三 示例学习
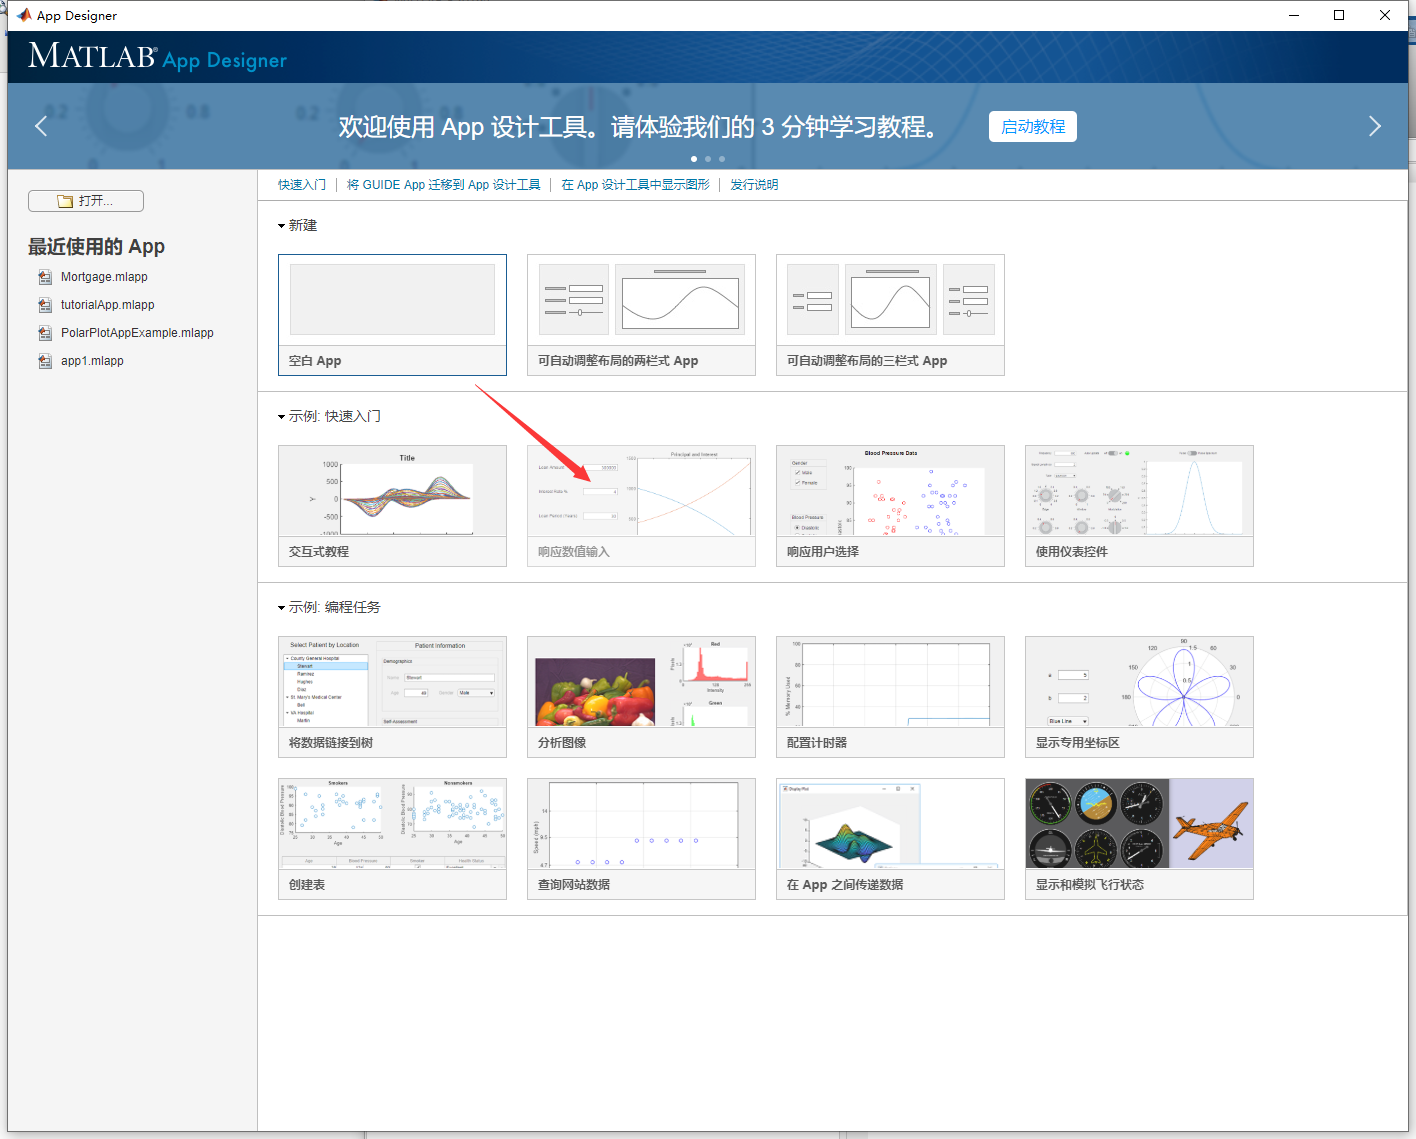
2.响应数值输入
(1)主页——新建——APP——响应数值输入
(2)知识点解读
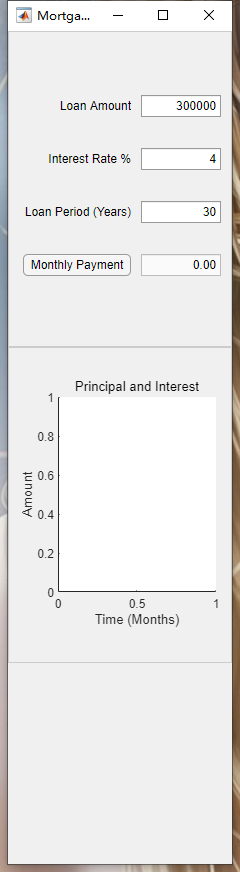
这里将学习 数值输入 响应 图像的相关内容。界面如下,包括左面板:四个数值文本编辑框、一个按钮button、右面板:一个坐标区,坐标区内有网格布局,并相应地对控件的名称、属性进行了修改,这些内容可以自行尝试设计。
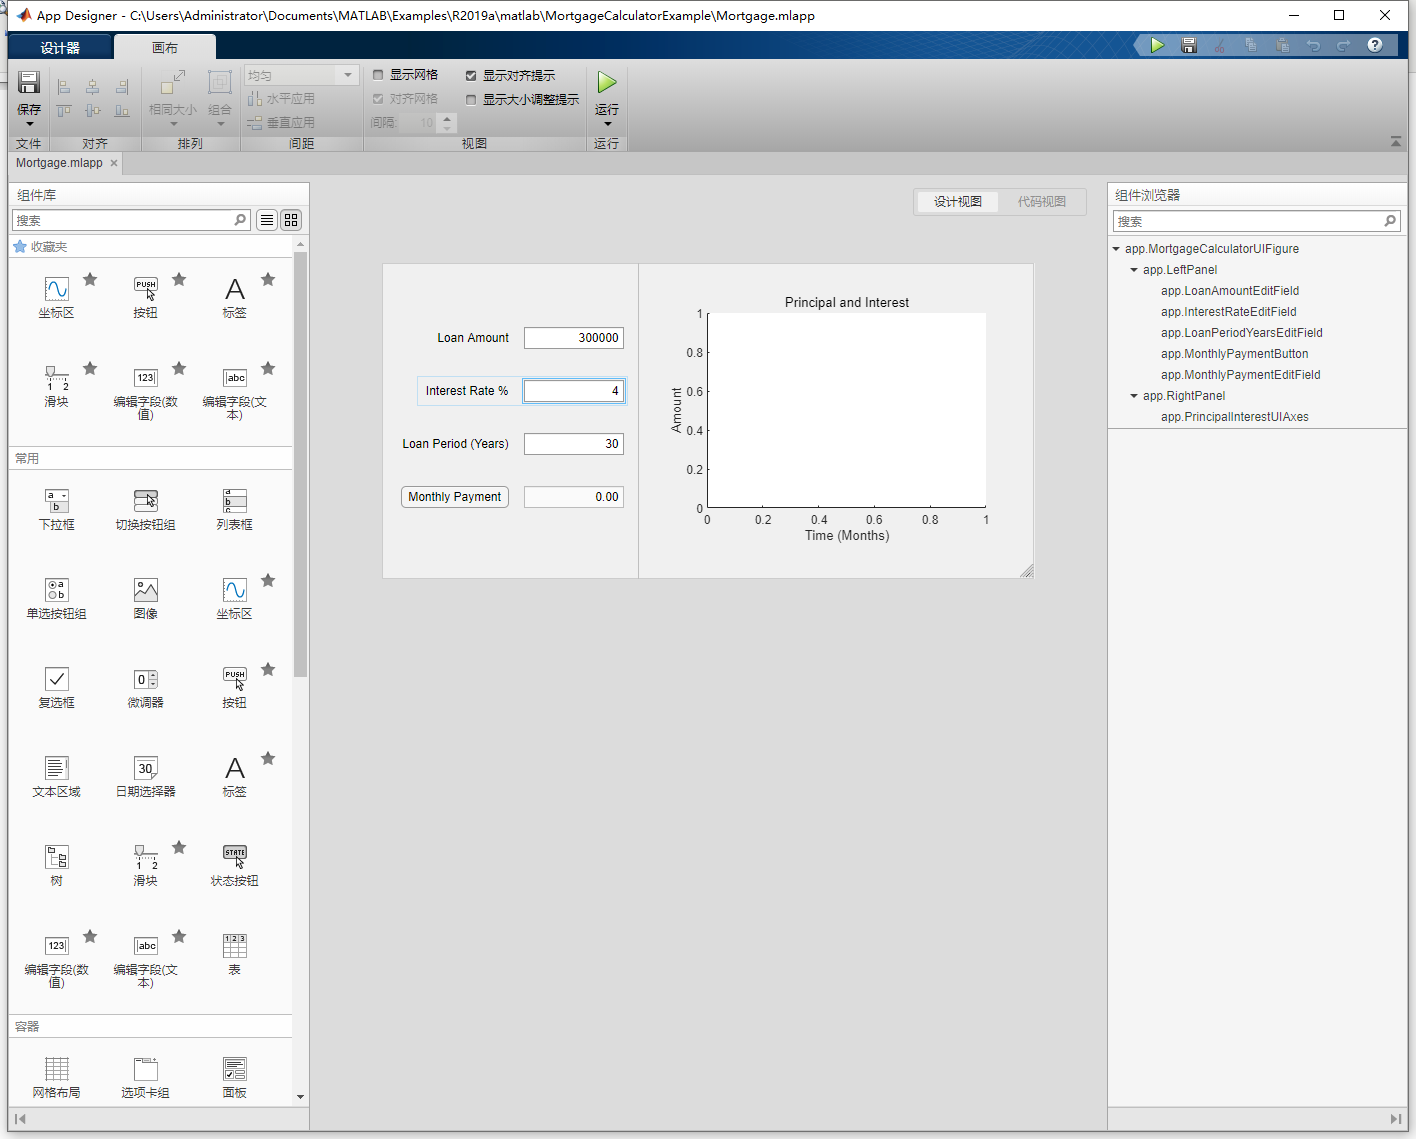
我们进入代码视图,学习如何编程实现 界面输入数值 进行 绘图。我按顺次一段一段进行分析。
classdef Mortgage < matlab.apps.AppBase

    % Properties that correspond to app components
    properties (Access = public)
        MortgageCalculatorUIFigure     matlab.ui.Figure
        GridLayout                     matlab.ui.container.GridLayout
        LeftPanel                      matlab.ui.container.Panel
        LoanAmountEditFieldLabel       matlab.ui.control.Label
        LoanAmountEditField            matlab.ui.control.NumericEditField
        InterestRateEditFieldLabel     matlab.ui.control.Label
        InterestRateEditField          matlab.ui.control.NumericEditField
        LoanPeriodYearsEditFieldLabel  matlab.ui.control.Label
        LoanPeriodYearsEditField       matlab.ui.control.NumericEditField
        MonthlyPaymentButton           matlab.ui.control.Button
        MonthlyPaymentEditField        matlab.ui.control.NumericEditField
        RightPanel                     matlab.ui.container.Panel
        PrincipalInterestUIAxes        matlab.ui.control.UIAxes
    end
这段代码的作用: 定义APP类,类名称为 Mortgage,控件属性有 :整个界面图布 MortgageCalculatorUIFigure、 网格布局GridLayout、LeftPanel 左面板、数值文本编辑框 及相应的文本框标签LoanAmountEditFieldLabel、LoanAmountEditField、 InterestRateEditFieldLabel、InterestRateEditField , LoanPeriodYearsEditFieldLabel 、LoanPeriodYearsEditField 、 MonthlyPaymentEditField ;按钮 MonthlyPaymentButton 、右面板 RightPanel、坐标区PrincipalInterestUIAxes
% Properties that correspond to apps with auto-reflow
    properties (Access = private)
        onePanelWidth = 576;
    end
界面自动重排刷新时的属性定义
onePanelWidth = 576;
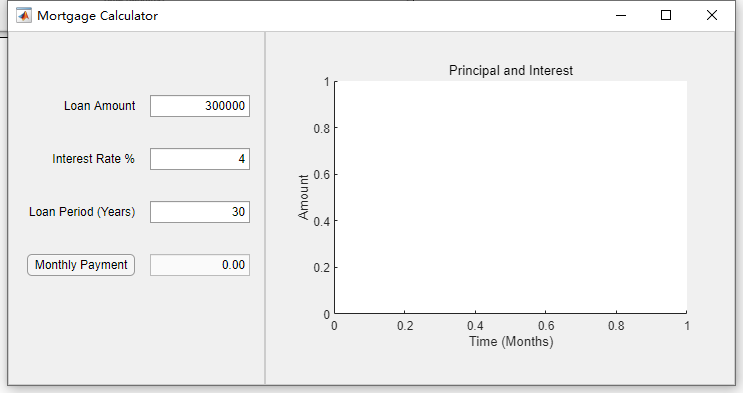
因为这个界面是分为左面板和右面板两个面板,所以这里只定义了一个面板宽度。意思就是,当你在运行程序的时候,程序界面可以最大化,也可以手动调整大小,为了自适应界面的大小变化,这里固定了一个面板的宽度,无论界面变大变小,这个面板的宽度始终为576.
可以对比一下,小界面为下图
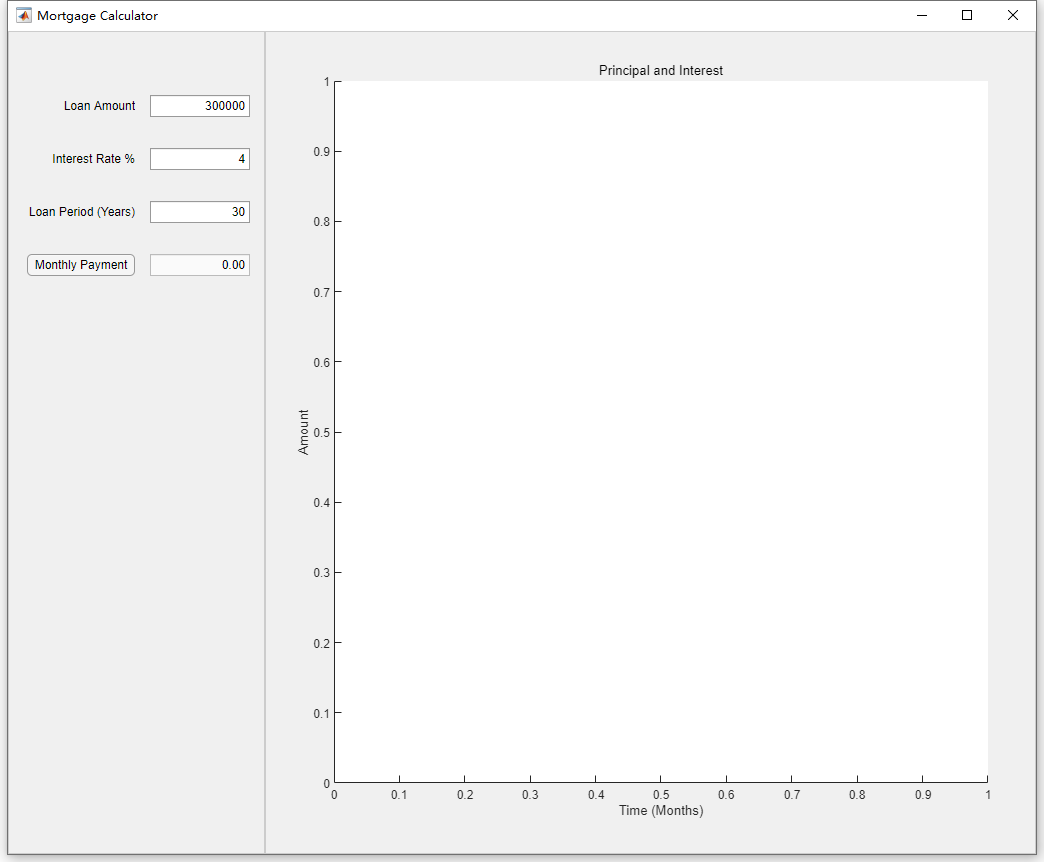
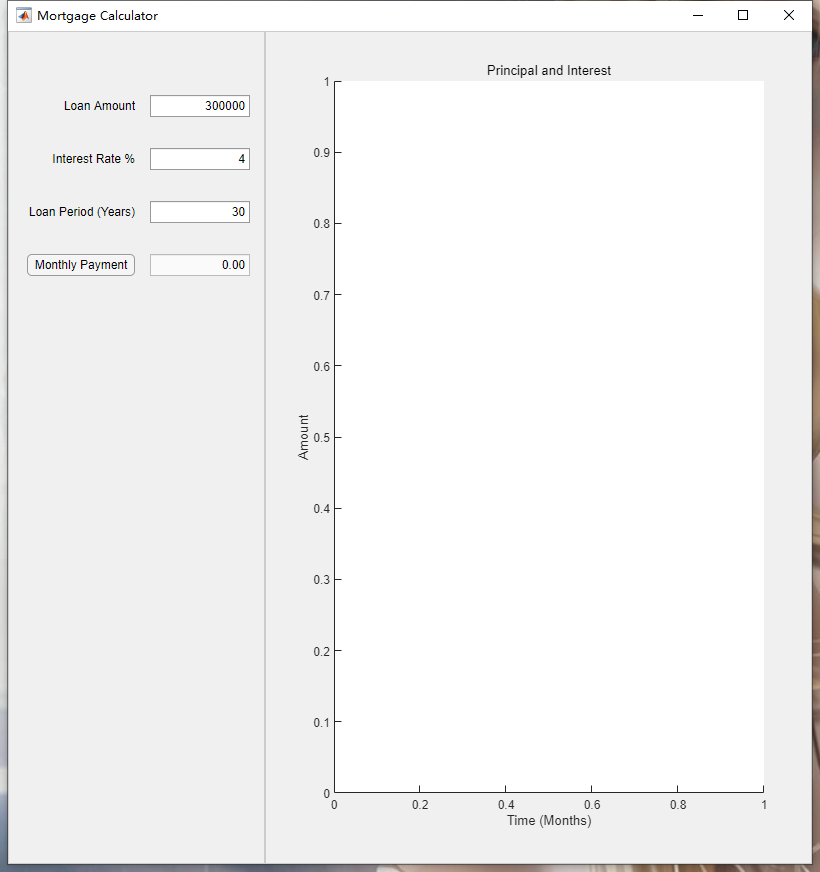
我拉大界面后,可以发现左面板的宽度始终不变,右面板宽度在随界面大小变化。
类比一下,如果是三栏式的,就需要对其中两个进行控制,这样的话界面不容易崩溃报错,如下面黄色部分。
    % Properties that correspond to apps with auto-reflow
    properties (Access = private)
        onePanelWidth = 576;
        twoPanelWidth = 768;
    end
但是这两个代码实际意义只是定义面板宽度值,给定这两个面板的宽度是确定值,方便后面对界面调整大小的操作。
我们继续分析接下来的代码
 % Callbacks that handle component events
    methods (Access = private)

        % Changes arrangement of the app based on UIFigure width
        function updateAppLayout(app, event)
            currentFigureWidth = app.MortgageCalculatorUIFigure.Position(3);
            if(currentFigureWidth <= app.onePanelWidth)
                % Change to a 2x1 grid
                app.GridLayout.RowHeight = {316, 316};
                app.GridLayout.ColumnWidth = {'1x'};
                app.RightPanel.Layout.Row = 2;
                app.RightPanel.Layout.Column = 1;
            else
                % Change to a 1x2 grid
                app.GridLayout.RowHeight = {'1x'};
                app.GridLayout.ColumnWidth = {257, '1x'};
                app.RightPanel.Layout.Row = 1;
                app.RightPanel.Layout.Column = 2;
            end
        end

        % Button pushed function: MonthlyPaymentButton
        function MonthlyPaymentButtonPushed(app, event)

            % Calculate the monthly payment
            amount = app.LoanAmountEditField.Value ;
            rate = app.InterestRateEditField.Value/12/100 ;
            nper = 12*app.LoanPeriodYearsEditField.Value ;
            payment = (amount*rate)/(1-(1+rate)^-nper);
            app.MonthlyPaymentEditField.Value = payment;

            % pre allocating and initializing variables
            interest = zeros(1,nper);
            principal = zeros(1,nper);
            balance = zeros (1,nper);

            balance(1) = amount;

            % Calculate the principal and interest over time
            for i = 1:nper
                interest(i)  = balance(i)*rate ;
                principal(i) = payment - interest(i) ;
                balance(i+1) = balance(i) - principal(i) ;
            end

            % Plot the principal and interest
            plot(app.PrincipalInterestUIAxes, (1:nper)', principal, ...
                (1:nper)', interest) ;
            legend(app.PrincipalInterestUIAxes,{'Principal','Interest'},'Location','Best')
            xlim(app.PrincipalInterestUIAxes,[0 nper]) ;

        end
    end
这部分是回调函数,内容相对较多,我们分两部分来看,我用不同颜色标识。
第一块的内容是调整界面大小:前文提到,定义了一个面板的宽度为固定值。当总界面的宽度比刚才一个面板的宽度还要小时,界面就变成了1×2 的布局,什么意思呢,看下图
相应的,当界面宽度大于一个面板宽度时,就是2×1的布局,也就是下面这种布局。而其他时候,则左面板宽度不变,右面板大小随界面变化。
第二大块是按钮的回调函数,也就是当运行时按下按钮希望执行的操作:
代码 amount = app.LoanAmountEditField.Value ; 执行的是读取LoanAmountEditField文本编辑框里的内容,赋值给amount;
代码:rate = app.InterestRateEditField.Value/12/100 ;执行的是读取InterestRateEditField并进行/12/100 的数值运算,最后赋值给rate;
代码:nper = 12*app.LoanPeriodYearsEditField.Value可类比上面两行。
由此看出,欲读取文本框(数值)内容,可采用 变量=app.XX.value的方式,同时,还可以进行数值运算,数值运算可以前置也可以后置,和一般的数值运算表达式一致。
代码:payment = (amount*rate)/(1-(1+rate)^-nper); 对读取的数值进行计算。
代码:app.MonthlyPaymentEditField.Value = payment;将上面计算的结果赋值给 MonthlyPaymentEditField 文本框。
由此可以看出,文本编辑框既可以作为数值输入,也可以作为数值输出。
接下来的代码是初始化变量,zeros(1,nper)是建立1行nper列的零矩阵。balance(1) = amount,即将amount赋值给balance的第一个数。
再下面是计算过程。采用的for循环,i从1到nper,这里的nper也就是上文文本框输入值进行计算后赋值的一个数字。对三个变量分别迭代计算求解,并且用向量矩阵的方式,将每一次迭代的值保存在矩阵中。
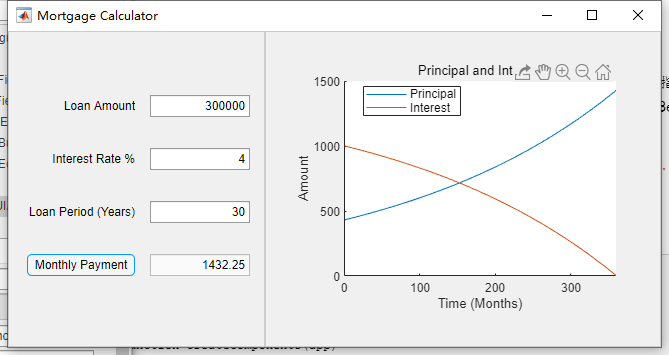
for循环计算结束后,是画图区,代码:
plot(app.PrincipalInterestUIAxes, (1:nper)', principal, ...
(1:nper)', interest) ; 这里的...是续行符,用于多行输入代码; plot 是绘图指令,括号第一个变量app.PrincipalInterestUIAxes是指绘图的结果在这个绘图区显示;后面的变量分别是横坐标、纵坐标、横坐标、纵坐标。
legend(app.PrincipalInterestUIAxes,{'Principal','Interest'},'Location','Best') 这和MATLAB的基本代码含义一样,定义图例名称
xlim(app.PrincipalInterestUIAxes,[0 nper]) ;定义横坐标范围
由此可以看到,欲在绘图区xxx里绘图,需要调用函数 plot (app.xxx, x,y,x2,y2.)
剩下的代码是对组件初始化的属性定义和APP创建/删除两部分,在之前设计界面是通过拖拽控件、在检查器里修改相应的属性参数,这部分会自动生成,所以一般不需要再修改。之后的学习中,为了篇幅,也不再对这部分内容进行分析,直接跳过。
  % Component initialization
    methods (Access = private)

        % Create UIFigure and components
        function createComponents(app)

            % Create MortgageCalculatorUIFigure and hide until all components are created
            app.MortgageCalculatorUIFigure = uifigure('Visible', 'off');
            app.MortgageCalculatorUIFigure.AutoResizeChildren = 'off';
            app.MortgageCalculatorUIFigure.Position = [100 100 653 316];
            app.MortgageCalculatorUIFigure.Name = 'Mortgage Calculator';
            app.MortgageCalculatorUIFigure.SizeChangedFcn = createCallbackFcn(app, @updateAppLayout, true);

            % Create GridLayout
            app.GridLayout = uigridlayout(app.MortgageCalculatorUIFigure);
            app.GridLayout.ColumnWidth = {257, '1x'};
            app.GridLayout.RowHeight = {'1x'};
            app.GridLayout.ColumnSpacing = 0;
            app.GridLayout.RowSpacing = 0;
            app.GridLayout.Padding = [0 0 0 0];
            app.GridLayout.Scrollable = 'on';

            % Create LeftPanel
            app.LeftPanel = uipanel(app.GridLayout);
            app.LeftPanel.Layout.Row = 1;
            app.LeftPanel.Layout.Column = 1;
            app.LeftPanel.Scrollable = 'on';

            % Create LoanAmountEditFieldLabel
            app.LoanAmountEditFieldLabel = uilabel(app.LeftPanel);
            app.LoanAmountEditFieldLabel.HorizontalAlignment = 'right';
            app.LoanAmountEditFieldLabel.Position = [50 230 77 22];
            app.LoanAmountEditFieldLabel.Text = 'Loan Amount';

            % Create LoanAmountEditField
            app.LoanAmountEditField = uieditfield(app.LeftPanel, 'numeric');
            app.LoanAmountEditField.Limits = [0 10000000];
            app.LoanAmountEditField.ValueDisplayFormat = '%8.f';
            app.LoanAmountEditField.Position = [142 230 100 22];
            app.LoanAmountEditField.Value = 300000;

            % Create InterestRateEditFieldLabel
            app.InterestRateEditFieldLabel = uilabel(app.LeftPanel);
            app.InterestRateEditFieldLabel.HorizontalAlignment = 'right';
            app.InterestRateEditFieldLabel.Position = [39 177 88 22];
            app.InterestRateEditFieldLabel.Text = 'Interest Rate %';

            % Create InterestRateEditField
            app.InterestRateEditField = uieditfield(app.LeftPanel, 'numeric');
            app.InterestRateEditField.Limits = [0.001 100];
            app.InterestRateEditField.Position = [142 177 100 22];
            app.InterestRateEditField.Value = 4;

            % Create LoanPeriodYearsEditFieldLabel
            app.LoanPeriodYearsEditFieldLabel = uilabel(app.LeftPanel);
            app.LoanPeriodYearsEditFieldLabel.HorizontalAlignment = 'right';
            app.LoanPeriodYearsEditFieldLabel.Position = [15 124 112 22];
            app.LoanPeriodYearsEditFieldLabel.Text = 'Loan Period (Years)';

            % Create LoanPeriodYearsEditField
            app.LoanPeriodYearsEditField = uieditfield(app.LeftPanel, 'numeric');
            app.LoanPeriodYearsEditField.Limits = [10 40];
            app.LoanPeriodYearsEditField.ValueDisplayFormat = '%.0f';
            app.LoanPeriodYearsEditField.Position = [142 124 100 22];
            app.LoanPeriodYearsEditField.Value = 30;

            % Create MonthlyPaymentButton
            app.MonthlyPaymentButton = uibutton(app.LeftPanel, 'push');
            app.MonthlyPaymentButton.ButtonPushedFcn = createCallbackFcn(app, @MonthlyPaymentButtonPushed, true);
            app.MonthlyPaymentButton.Position = [19 71 108 22];
            app.MonthlyPaymentButton.Text = 'Monthly Payment';

            % Create MonthlyPaymentEditField
            app.MonthlyPaymentEditField = uieditfield(app.LeftPanel, 'numeric');
            app.MonthlyPaymentEditField.ValueDisplayFormat = '%7.2f';
            app.MonthlyPaymentEditField.Editable = 'off';
            app.MonthlyPaymentEditField.Position = [142 71 100 22];

            % Create RightPanel
            app.RightPanel = uipanel(app.GridLayout);
            app.RightPanel.Layout.Row = 1;
            app.RightPanel.Layout.Column = 2;
            app.RightPanel.Scrollable = 'on';

            % Create PrincipalInterestUIAxes
            app.PrincipalInterestUIAxes = uiaxes(app.RightPanel);
            title(app.PrincipalInterestUIAxes, 'Principal and Interest')
            xlabel(app.PrincipalInterestUIAxes, 'Time (Months)')
            ylabel(app.PrincipalInterestUIAxes, 'Amount')
            app.PrincipalInterestUIAxes.Position = [30 36 326 250];

            % Show the figure after all components are created
            app.MortgageCalculatorUIFigure.Visible = 'on';
        end
    end

    % App creation and deletion
    methods (Access = public)

        % Construct app
        function app = Mortgage

            % Create UIFigure and components
            createComponents(app)

            % Register the app with App Designer
            registerApp(app, app.MortgageCalculatorUIFigure)

            if nargout == 0
                clear app
            end
        end

        % Code that executes before app deletion
        function delete(app)

            % Delete UIFigure when app is deleted
            delete(app.MortgageCalculatorUIFigure)
        end
    end
end
至此,我们了解了界面大小调整的程序含义,同时学习了如何 利用识别文本框的输入值、并且如何输出结果值在文本框中;另外还学习了如何在指定的绘图区中绘图。
下面我们学习第三个教程,我另起第三个文档,跟紧哦!