1.首先进入官网下载
http://jingyan.baidu.com/article/e9fb46e185c0097521f76634.html 见百度教程下载
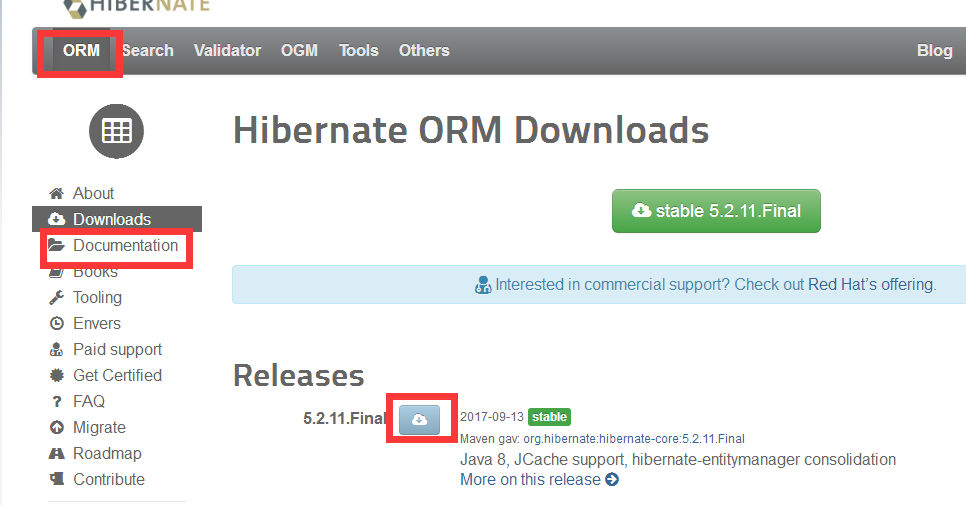
然后自动有下载页面跳出来自动下载
2.下载hibernate core包
3.lib文件夹下requred文件夹就是我们所用到的jar包
3.slf4j的下载(对这个小程序没什么影响)
最后不要忘了导入jdbc
4.打开下载的佩带的文档,可以开始我们的第一个小程序
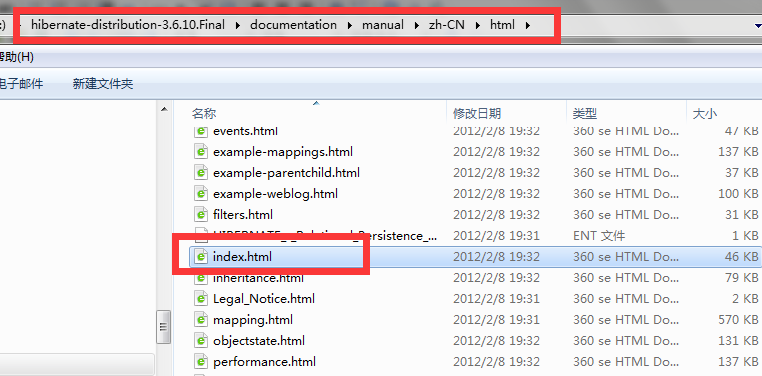
5.进入帮助手册,复制代码
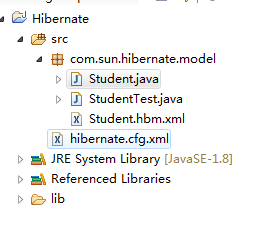
6将代码复制到我们创建的文件里面
.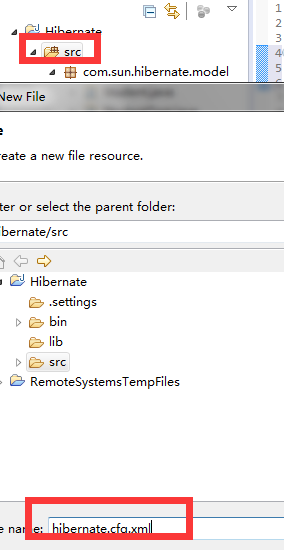
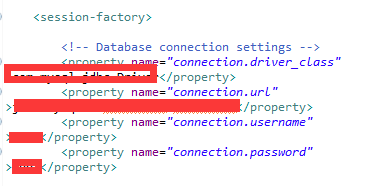
7.配置几个地方(告诉数据库要连接,然后连接哪个数据库)

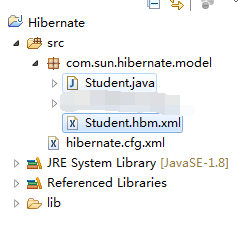
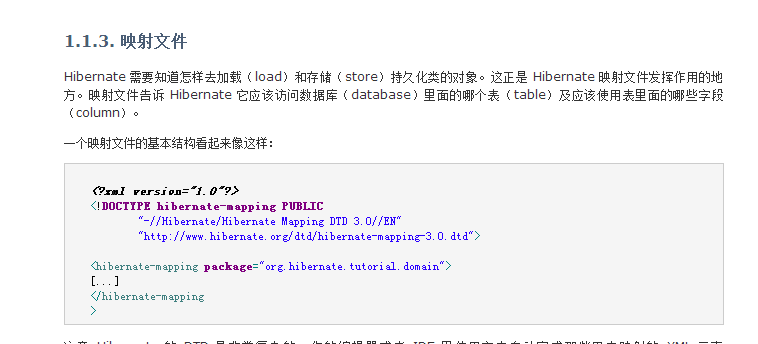
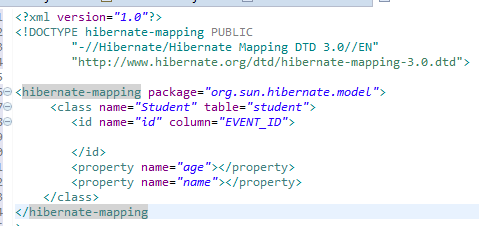
8.再在你的跟数据库中对象相对应的类的包下面建立.hbm.xml文件(建立映射文件,是hibernate提供的服务,告诉hibernate查哪张表)
9.在文档中复制代码
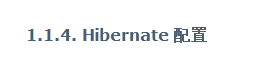
再改hibernate配置中的这个

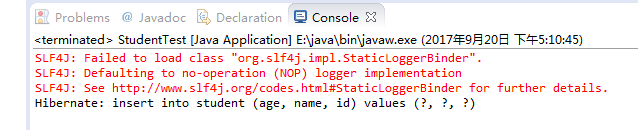
10.配置已经完成,细节的部分都告诉hibernate了,现在就是用hibernate这个产品
11.我们要插入一条数据,首先想到的是怎么让我们类中有数据,即new 一个类出来,然后set方法,现在我们有了数据。然后怎么用hibernate的产品呢,我们开始做的工作就是填写配置文件,那么我们需要用的东西跟配置文件有关,有没有什么类将我们的配置文件起作用。即org.hibernate.cfg.Configuration。
12.
13.
package com.sun.hibernate.model;

public class Student {
    private int id;
    private int age;
    private String name;
    public int getId() {
        return id;
    }
    public void setId(int id) {
        this.id = id;
    }
    public int getAge() {
        return age;
    }
    public void setAge(int age) {
        this.age = age;
    }
    public String getName() {
        return name;
    }
    public void setName(String name) {
        this.name = name;
    }


}
package com.sun.hibernate.model;

import org.hibernate.Session;
import org.hibernate.SessionFactory;
import org.hibernate.cfg.Configuration;

public class StudentTest {
    public static void main(String[] args){
        Student s=new Student();
        s.setId(1);
        s.setAge(21);
        s.setName("sun");
        Configuration cfg=new Configuration();
        SessionFactory sf=cfg.configure().buildSessionFactory();
        Session session=sf.openSession();
        session.beginTransaction();
        session.save(s);
        session.getTransaction().commit();
        session.close();
        sf.close();


    }


}
<?xml version="1.0"?>
<!DOCTYPE hibernate-mapping PUBLIC
        "-//Hibernate/Hibernate Mapping DTD 3.0//EN"
        "http://www.hibernate.org/dtd/hibernate-mapping-3.0.dtd">

<hibernate-mapping package="com.sun.hibernate.model">
     <class name="Student" table="student">
        <id name="id" >

        </id>
        <property name="age"></property>
        <property name="name"></property>
    </class>
</hibernate-mapping
>
<?xml version='1.0' encoding='utf-8'?>
<!DOCTYPE hibernate-configuration PUBLIC
        "-//Hibernate/Hibernate Configuration DTD 3.0//EN"
        "http://www.hibernate.org/dtd/hibernate-configuration-3.0.dtd">

<hibernate-configuration>

    <session-factory>

        <!-- Database connection settings -->
        <property name="connection.driver_class"
>com.mysql.jdbc.Driver</property>
        <property name="connection.url"
>jdbc:mysql://localhost/hibernate</property>
        <property name="connection.username"
>root</property>
        <property name="connection.password"
>root</property>

        <!-- JDBC connection pool (use the built-in) -->
       <!--   <property name="connection.pool_size"
>1</property>  -->

        <!-- SQL dialect -->
        <property name="dialect"
>org.hibernate.dialect.MySQLDialect</property>

        <!-- Enable Hibernate's automatic session context management -->
      <!--    <property name="current_session_context_class"
>thread</property>  -->

        <!-- Disable the second-level cache  -->
        <property name="cache.provider_class"
>org.hibernate.cache.NoCacheProvider</property>

        <!-- Echo all executed SQL to stdout -->
        <property name="show_sql"
>true</property>

        <!-- Drop and re-create the database schema on startup -->
      <!--   <property name="hbm2ddl.auto"
>update</property>  -->

        <mapping resource="com/sun/hibernate/model/Student.hbm.xml"/>

    </session-factory>

</hibernate-configuration
>
14.