iSCSI利用了TCP/IP的port 860 和 3260 作为沟通的渠道。透过两部计算机之间利用iSCSI的协议来交换SCSI命令,让计算机可以透过高速的局域网集线来把SAN模拟成为本地的储存装置。
服务器:Centos Linux 8.1.1911
iscsi target使用磁盘:/dec/sdb 5G
1、软件安装
服务器端:targetcli
yum install targetcli -y
客户端:iscsi-initiator
yum install iscsi-initiator* –y
2、服务器端配置
targetcli 进入交互模式
target的名字规范:iqn.yyyy-mm.com.server.www:位置1.位置2
[root@filesystem ~]# targetcli
targetcli shell version 2.1.fb49
Copyright 2011-2013 by Datera, Inc and others.
For help on commands, type 'help'.

/> /backstores/block create name=disk1 dev=/dev/sdb
Created block storage object disk1 using /dev/sdb.
/> /iscsi create iqn.2020-06.com.server.filesystem:house1.disk1
Created target iqn.2020-06.com.server.filesystem:house1.disk1.
Created TPG 1.
Global pref auto_add_default_portal=true
Created default portal listening on all IPs (0.0.0.0), port 3260.
/> /iscsi/iqn.2020-06.com.server.filesystem:house1.disk1/tpg1/acls create iqn.2020-06.com.server.node2
Created Node ACL for iqn.2020-06.com.server.node2
/> /iscsi/iqn.2020-06.com.server.filesystem:house1.disk1/tpg1/luns create /backstores/block/disk1
Created LUN 0.
Created LUN 0->0 mapping in node ACL iqn.2020-06.com.server.node2
/> /iscsi/iqn.2020-06.com.server.filesystem:house1.disk1/tpg1/portals/ create 192.168.10.0 3260
Using default IP port 3260
Could not create NetworkPortal in configFS
/> /iscsi/iqn.2020-06.com.server.filesystem:house1.disk1/tpg1/ set attribute authentication=0
Parameter authentication is now '0'.
/> /iscsi/iqn.2020-06.com.server.filesystem:house1.disk1/tpg1/ set attribute generate_node_acls=0
Parameter generate_node_acls is now '0'.
/> saveconfig
Last 10 configs saved in /etc/target/backup/.
Configuration saved to /etc/target/saveconfig.json
/backstores/block create name=disk1 dev=/dev/sdb
定义一个本地的块设备disk1
/iscsi create iqn.2020-06.com.server.filesystem:house1.disk1
定义一个target
/iscsi/iqn.2020-06.com.server.filesystem:house1.disk1/tpg1/luns create /backstores/block/disk1
在 iqn.2020-06.com.server.filesystem:house1.disk1 这个target里将之前的块设备共享出去
/iscsi/iqn.2020-06.com.server.filesystem:house1.disk1/tpg1/acls create iqn.2020-06.com.server.node2
创建基于 iqn 的 acl:允许该名字的客户端访问本 iscsi 的 tagert
/iscsi/iqn.2020-06.com.server.filesystem:house1.disk1/tpg1/portals/ create 192.168.10.0 3260
定义 target 的入口(客户使用什么 IP 和端口访问) 默认定义了0.0.0.0 3260
/iscsi/iqn.2020-06.com.server.filesystem:house1.disk1/tpg1/ set attribute authentication=0
关闭帐号验证
/iscsi/iqn.2020-06.com.server.filesystem:house1.disk1/tpg1/ set attribute generate_node_acls=0
使用自定义的 acl 实现节点访问限制
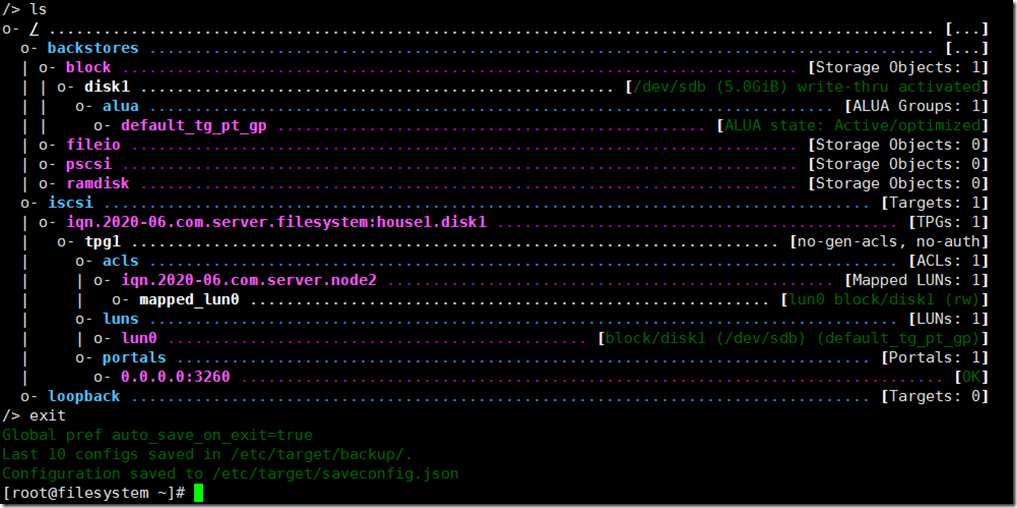
查看配置
关闭防火墙
[root@filesystem ~]# systemctl stop firewalld
[root@filesystem ~]# systemctl disable firewalld
[root@filesystem ~]#
启动服务,并设置开机自启、关闭selinux
[root@filesystem ~]# systemctl enable target
Created symlink /etc/systemd/system/multi-user.target.wants/target.service → /usr/lib/systemd/system/target.service.
[root@filesystem ~]# systemctl start target
[root@filesystem ~]# setenforce 0
[root@filesystem ~]# getenforce
Permissive
[root@filesystem ~]#
永久关闭selinux
[root@filesystem ~]# vim /etc/selinux/config
[root@filesystem ~]# cat /etc/selinux/config

# This file controls the state of SELinux on the system.
# SELINUX= can take one of these three values:
#     enforcing - SELinux security policy is enforced.
#     permissive - SELinux prints warnings instead of enforcing.
#     disabled - No SELinux policy is loaded.
SELINUX=permissive
# SELINUXTYPE= can take one of these three values:
#     targeted - Targeted processes are protected,
#     minimum - Modification of targeted policy. Only selected processes are protected.
#     mls - Multi Level Security protection.
SELINUXTYPE=targeted


[root@filesystem ~]#
2、Linux客户端连接
Centos 8.1.1911默认安装有iscsi-initiator程序
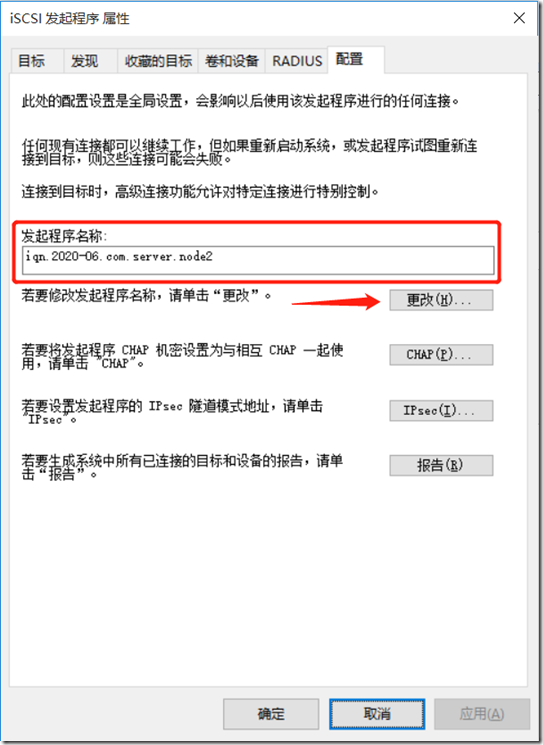
修改客户端连接的名称
[root@node2 ~]# cat /etc/iscsi/initiatorname.iscsi
InitiatorName=iqn.1994-05.com.redhat:b3de1b81d843
[root@node2 ~]# echo "InitiatorName=iqn.2020-06.com.server.node2" > /etc/iscsi/initiatorname.iscsi
[root@node2 ~]# cat /etc/iscsi/initiatorname.iscsi
InitiatorName=iqn.2020-06.com.server.node2
[root@node2 ~]#
iscsiadmin是客户端的命令
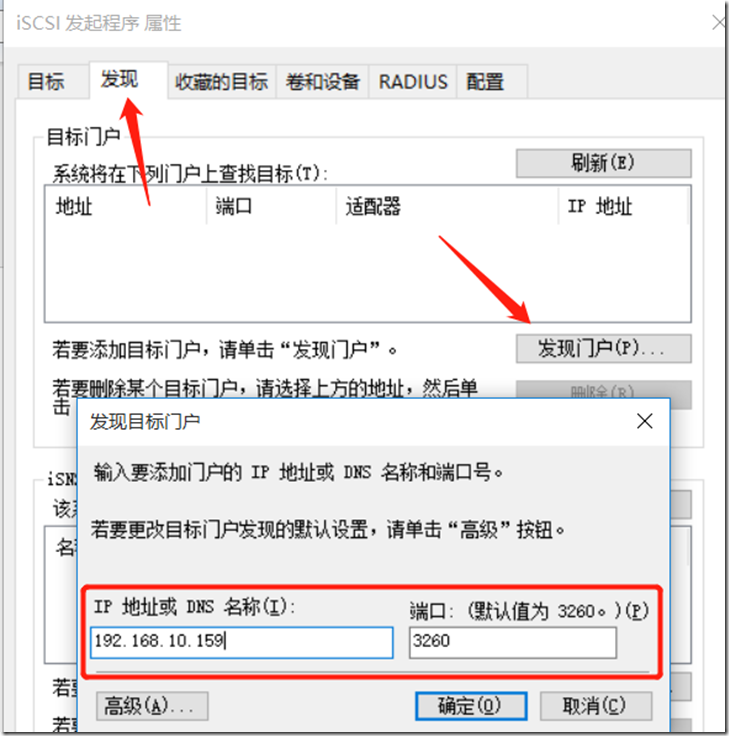
发现
[root@node2 ~]# iscsiadm -m discovery -t st -p 192.168.10.159
192.168.10.159:3260,1 iqn.2020-06.com.server.filesystem:house1.disk1
[root@node2 ~]#
登录
[root@node2 ~]# iscsiadm -m node -l
Logging in to [iface: default, target: iqn.2020-06.com.server.filesystem:house1.disk1, portal: 192.168.10.159,3260]
Login to [iface: default, target: iqn.2020-06.com.server.filesystem:house1.disk1, portal: 192.168.10.159,3260] successful.
[root@node2 ~]# lsblk
NAME        MAJ:MIN RM SIZE RO TYPE MOUNTPOINT
sda           8:0    0  20G  0 disk
├─sda1        8:1    0   1G  0 part /boot
└─sda2        8:2    0  19G  0 part
  ├─cl-root 253:0    0  17G  0 lvm  /
  └─cl-swap 253:1    0   2G  0 lvm  [SWAP]
sdb           8:16   0   5G  0 disk
sr0          11:0    1   7G  0 rom  /run/media/root/CentOS-8-1-1911-x86_64-dvd
[root@node2 ~]#
我们发现多了一个sdb,我们格式化挂载即可使用。
[root@node2 ~]# mkfs.ext4 /dev/sdb
mke2fs 1.44.6 (5-Mar-2019)
 /dev/sdb 有一个 ext4 文件系统
	创建于 Wed Jun  3 05:38:41 2020
创建含有 1310720 个块(每块 4k)和 327680 个inode的文件系统
文件系统UUID:104b7e23-cb76-4842-a969-29a9e7a198ce
超级块的备份存储于下列块:
	32768, 98304, 163840, 229376, 294912, 819200, 884736

正在分配组表: 完成
正在写入inode表: 完成
创建日志(16384 个块)完成
写入超级块和文件系统账户统计信息: 已完成

[root@node2 ~]# ll /dev/sdb
brw-rw----. 1 root disk 8, 16 6月   3 05:40 /dev/sdb
[root@node2 ~]#
挂载使用
[root@node2 ~]#
[root@node2 ~]# mkdir /mnt/iscsi_mountdisk1
[root@node2 ~]# mount /dev/sdb /mnt/iscsi_mountdisk1/
[root@node2 ~]# cd /mnt/iscsi_mountdisk1/
[root@node2 iscsi_mountdisk1]# ls
lost+found
[root@node2 iscsi_mountdisk1]# echo "this is iscsi disk1" > readme.txt
[root@node2 iscsi_mountdisk1]# ls
lost+found  readme.txt
3、Windows客户端
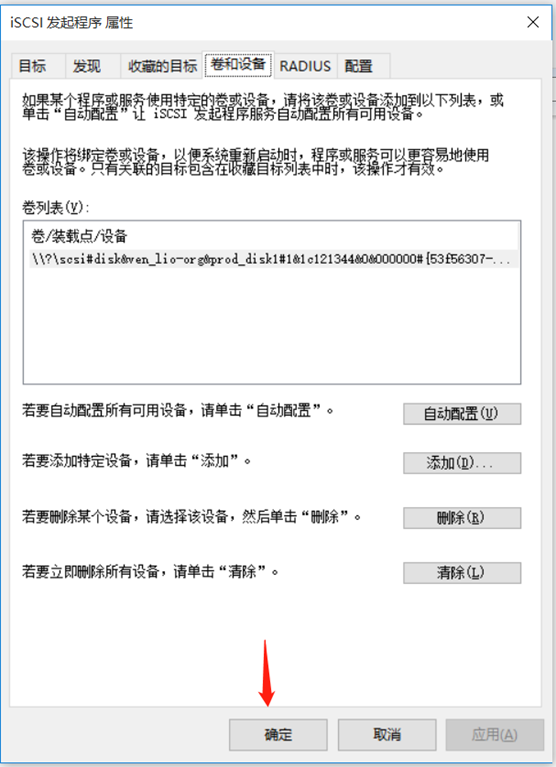
修改连接名称,并进行发现
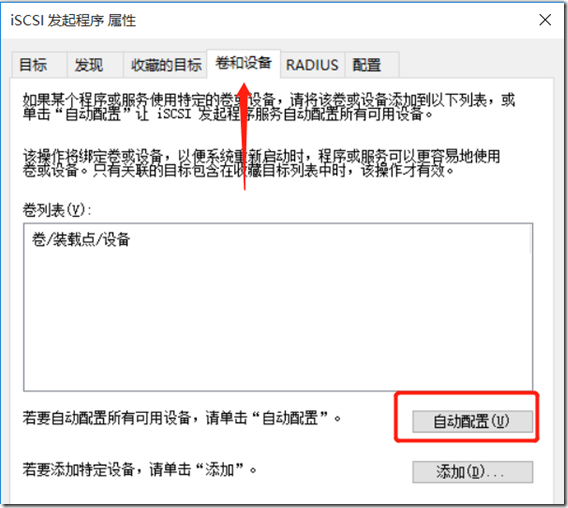
连接目标并挂载
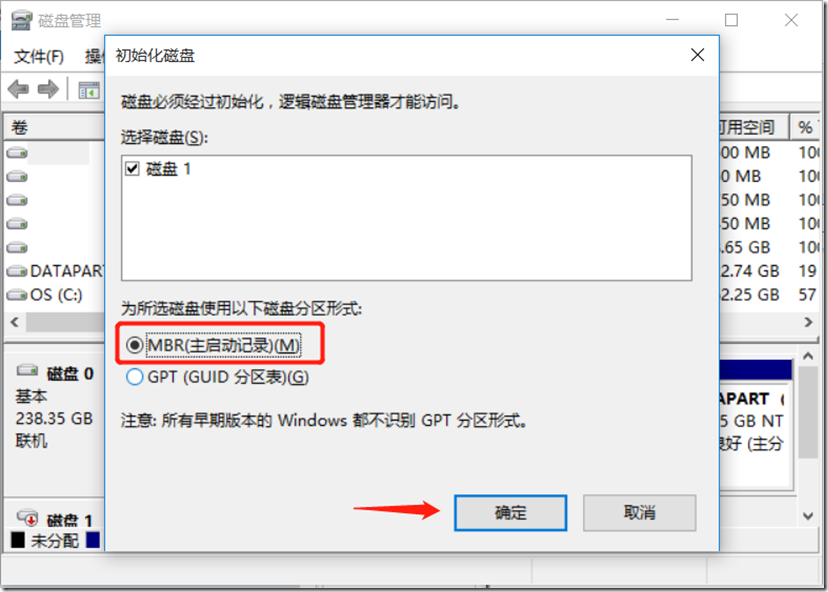
格式化并使用
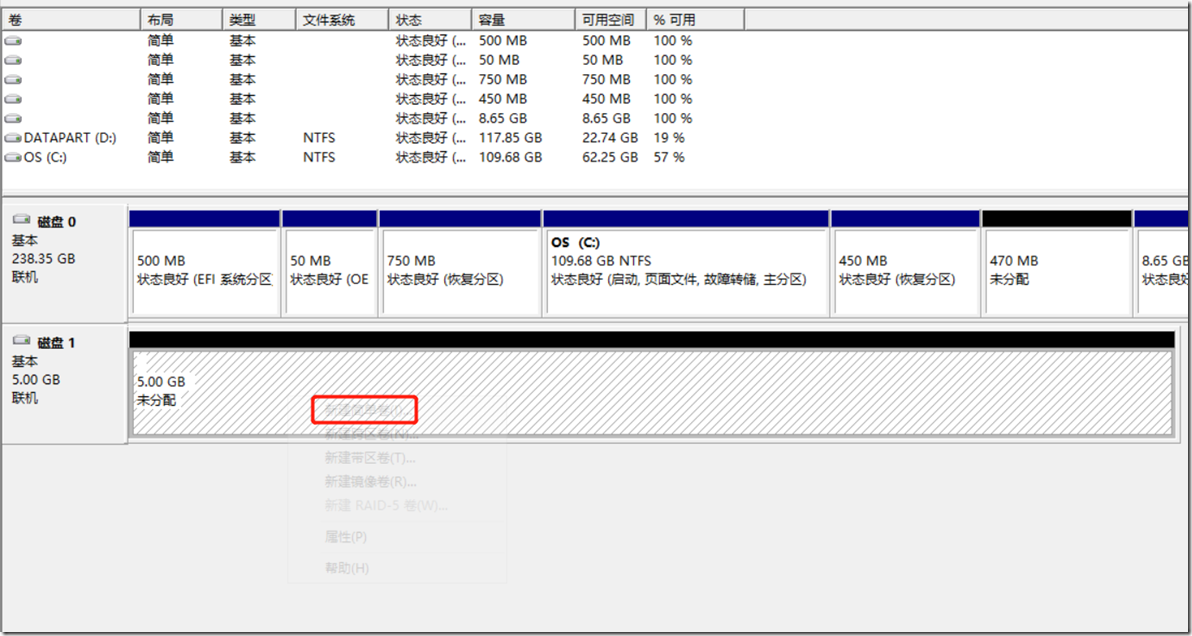
打开磁盘管理器
磁盘1红框区域右键选择新建简单卷,然后一直默认下一步。
格式化完成打开我的电脑
多出来一块5G的新建卷E,使用起来很方便。
思考:
一个target,如何让多个客户端进行连接使用,存储文件时会冲突吗?
读书和健身总有一个在路上
