1 远程连接openssh
基于SSH协议的开源软件
数据加密[防止中间人攻击如DNS/IP欺骗]压缩[加快传输]
linux下以open开头的软件都是开源的
对称与非对称加密
对称:使用相同秘钥加解密
非对称:使用公钥加密,私钥解密,公钥谁都可以有,私钥必须在自己手中
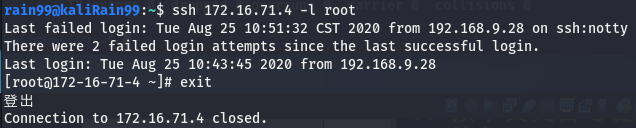
ssh连接
ssh ip [-l user] [-p port]
不指定用户名则以本地用户名连接远程主机
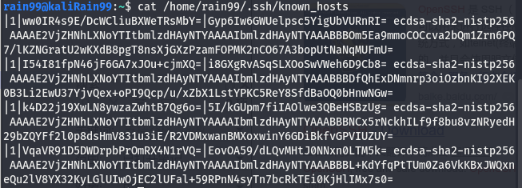
初次登录成功,会把远程主机的公钥保存在/用户家目录/.ssh/known_hosts,当下次访问相同计算机时,OpenSSH会核对公钥。如果公钥不同,OpenSSH会发出警告
scp文件复制
scp
linux 系统下,基于 ssh 登陆进行安全的远程文件拷贝命令,数据加密
复制远程的整个目录到本地:scp -r user@ip:/home/root/ .
本地文件复制到远程:scp local_file user@ip:remote_folder
本地目录复制到远程:scp -r local_folder user@ip:remote_folder
默认22端口,可修改:-P 端口
指定用户:user@ip:folder 输密码
不指定用户:ip:folder 输用户密码
递归复制目录:-r
注意使用的用户是否有权限读写
安装openssh
centos7默认安装,kali默认无server包
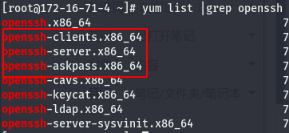
查询安装软件包:yum list |grep openssh
客户端
服务端
交互式访问
apt-get install ssh
yum install ssh
ssh服务管理
部分老机器没有systemctl,用service ssh 动作
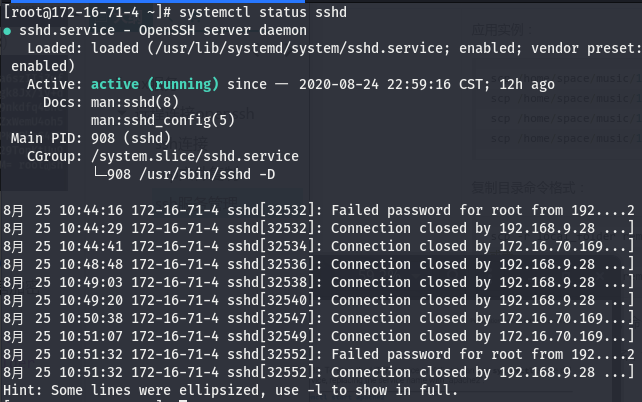
centos:systemctl 动作 sshd
kali:systemctl 动作 ssh
动作:
status状态
start开启
restart重启
stop停止
enable自启
disable禁止自启
改配置免密登录
ssh login without passwd
A免密登录B
-
A生成公钥、私钥对:
ssh-keygen,保留私钥
第一步输入生成路径
第二步输入口令
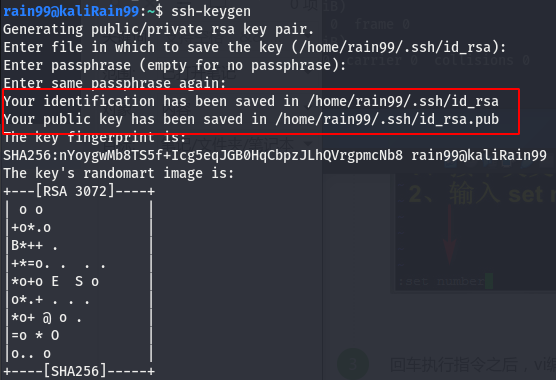
ls /home/rain99/.ssh/

-
B修改ssh配置,获取A的公钥,给予公钥权限
如果修改配置,要重启ssh服务
vi /etc/ssh/sshd_config

默认允许公钥认证:#PubkeyAuthentication yes
默认公钥文件位置:#AuthorizedKeysFile .ssh/authorized_keys
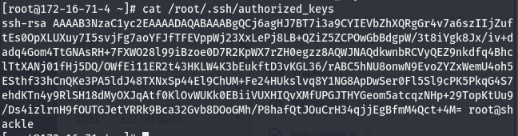
A复制scp公钥给B:scp /home/rain99/.ssh/id_rsa.pub root@172.16.71.4:/root/.ssh/authorized_keys


B授权公钥和目录
公钥文件:authorized_keys 600
ssh目录:.ssh/ 700

-
A可免密登录B,且scp无需密码
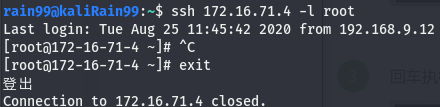
一行命令免密登录
A免密登录B
A生成传递公钥给B:ssh-copy-id B@ip
要密码确认

A可直接免密登录
B上的公钥:ls /root/.ssh/

免密登录与密码登录
免密登录全过程,A客户端,B服务端:
- A生成公私钥,并传给B公钥
- B将公钥重命名为authorized_keys并保存在/username/.ssh/下,授予authorized_keys600权限,/.ssh/ 700权限
- A发送SSH连接请求给B,包含了A的IP和连接B的用户名
- B在authorized_keys中查找,如有对应IP和用户名,会随机生成一个字符串S,如:pass1,并使用公钥authorized_keys加密字符串S后发送给A
- A使用私钥解密加密后的字符串,得到字符串S,将S发给B
- B收到S后与之前生成的S对比,一致则认为A有公钥对应的私钥,允许其免密登录
密码登录的全过程,A客户端,B服务端:
- A发送SSH连接请求给B,B有公钥私钥
- B发送公钥给A
- A使用公钥加密包含用户名密码的连接信息后发送给B
- B使用私钥解密,得到用户名密码,与本地用户名密码对比,一致则允许A登录,否则再次验证
免密登录与密码登录本质无区别
但在实际工作环境中,免密登录
优:便捷,只生成一个公私钥对,将公钥分发给服务器
劣:物理安全性不足,私钥丢失,电脑失窃等
配置文件与加固
openssh配置文件 sshd_config
vi /etc/ssh/sshd_config
#注释的为默认设置
服务从上往下读取配置文件,读到两个不同值的配置以第一个为准
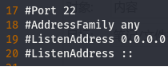
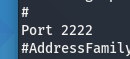
修改端口,修改监听IP
双网卡机器有两个IP-AB,如果是0.0.0.0,AB所在的段都能连过来,如果是A,则只有A的段能连过来
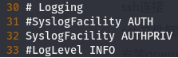
日志记录,默认即可
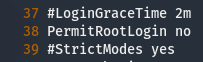
指定时间内未成功登陆会断开连接,无单位则默认为秒
调小可以阻滞针对ssh的ddos

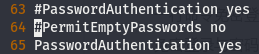
是否允许以root用户ssh连接
为了安全性考虑,可以禁止root登陆,用普通用户ssh连接后su切换root

默认允许公钥认证:#PubkeyAuthentication yes
默认公钥文件位置:#AuthorizedKeysFile .ssh/authorized_keys

密码认证开关,空口令登陆开关
解决ssh连接慢
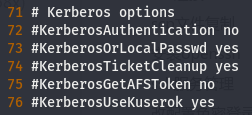
一般SSH认证顺序:publickey,gssapi-keyex,gssapi-with-mic,passwd
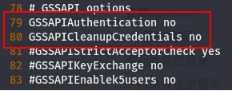
关闭多余认证,若都开启,尽管一般使用密码登录,ssh仍会尝试中间的认证
Kerberos认证,麻省理工开发,win/linu皆可使用,AD域渗透常用
GSSAPI认证,基于Kerberos

无操作中断 profile
vi /etc/profile
配置30s无操作自动断开ssh,末尾加上export TMOUT=30
刷新配置:source /etc/profile
延长无操作中断时间
- 修改ssh客户端配置
编辑客户端 /etc/ssh/ssh_config (或~/.ssh/config 对当前用户生效) 文件,修改以下两个配置项(没有就自己添加)
ServerAliveInterval 60  #ssh客户端每60秒会发送一个keepalive请求给服务端,服务端响应,从而保持连接;
ServerAliveCountMax 3 #客户端发出请求后,服务器端没有响应达到3次,就自动断开连接。
- 修改ssh服务端配置
编辑服务端 /etc/ssh/sshd_config,修改以下两个配置项(没有就自己添加)
ClientAliveInterval 60 #服务端每隔60秒发送一次keepalive请求给客户端,然后客户端响应,从而保持连接;
ClientAliveCountMax 3 #服务端发出请求后,客户端没有响应达到3次,就自动断开连接。
用户密码策略 login.defs
vi /etc/login.defs
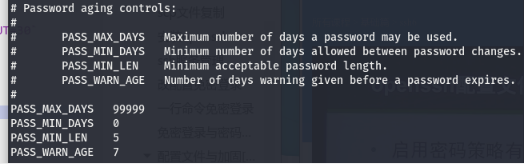
max_days 密码几天后过期
min_days 修改密码最小间隔为几天
warn_age 密码过期前几天内通知用户
用户密码策略 pwquality.conf
vi /etc/security/pwquality.conf
retry=N:定义登录/修改密码失败时,可以重试的次数;
Difok=N:定义新密码中必须有几个字符要与旧密码不同。但是如果新密码中有1/2以上的字符与旧密码不同时,该新密码将被接受;
minlen=N:定义用户密码的最小长度;
dcredit=N:定义用户密码中必须包含多少个数字;
ucredit=N:定义用户密码中必须包含多少个大写字母;
lcredit=N:定义用户密码中必须包含多少个小些字母;
ocredit=N:定义用户密码中必须包含多少个特殊字符(除数字、字母之外);
其中 =-1表示,至少有一个
密码策略修改后,只对新建用户生效
root可无视密码策略修改现有用户密码,但普通用户修改自己密码需符合策略
加固ssh
- 改端口号[实则没用]
- 私钥加密码
- 禁root
- 口令强度
- 减小未登录成功的断开时间
- 安全部员工审计内部员工口令强度,根据公司的情况做字典
弱口令123456,admin123
公司特征组合JD@123,JD@999!
个人xiaoli,xiaodi - 监控log并设立防御机制:设定错误次数阀值来拉黑攻击者
- 架构设计:ssh端口不对外暴露
- 客户端与服务器之间架设一个过滤危险指令的设备[堡垒机],防内鬼
ssh服务登陆日志
cat /var/log/secure
实时监控:tail -f /var/log/secure
状态:
密码错误 Failed password
登陆成功 Accepted password
断开连接 disconnected by user
密码登录

课后试验
-
配置sshd服务的端口号为2222
vi /etc/ssh/sshd_config
systemctl restart sshd

-
配置root无法登录
useradd test
passwd test 123.bmk!
vi /etc/ssh/sshd_config
systemctl restart sshd

-
配置kali无需密码登录且其他主机不能通过密码访问
设置公私钥登录
vi /etc/ssh/sshd_config
末尾加上一行AllowUsers 用户@IP -
安全加固,设置密码策略
2 dnsmasq服务
提供DNS缓存和DHCP功能
DNS缓存:缓存DNS请求提高对访问过的网址的连接速度
DHCP:为局域网电脑分配内网IP和路由
取代dhcpd服务和bind[域名解析]服务
DNS域名系统
计算机之间通信定位靠IP
DNS将域名和IP一一映射保存在数据库中
域名解析指通过域名得到域名对应的IP地址
DNS解析指将域名解析至IP
DNS协议基于UDP,53端口
查看本地指定dns服务器:cat /etc/resolv.conf

DNS解析过程
NS记录:指定域名由哪个DNS服务器解析
TXT记录:登记域名拥有的用来外发邮件的所有IP
cname:别名,指向另一个域名
A记录:大名,域名和IP的一对一解析记录,指向域名的IP
MX记录:标识域名用于邮件交换的服务器IP或域名
在目标主要域名做了CDN,无法找到其真实IP的时候,可以尝试从邮服突破
目标的邮箱服务有两种可能,自建或者使用阿里企业邮
如果是自建,因为邮箱服务无法使用CDN,目标的域名的MX记录指向的IP就是目标的邮件服务器IP,可能和主要域名在同一IP段
查询域名解析全过程:dig @8.8.8.8 163.com +trace
DNS解析流程:递归与迭代
递归:问问题的人一直在变

迭代:问问题的人不变,回答的人在变


DNS易受攻击的点
- DDOS
针对网站的ddos,大量的DNS请求,会影响到DNS解析,导致DNS解析时间延长 - 域名劫持:攻击者通过中间人攻击,将域名的NS指向攻击者控制的DNS,修改域名对应IP,将A域名解析至B域名的IP
- DNS欺骗:伪装成DNS,修改域名指向IP
- 社工
根据域名的相关信息[电话邮箱]反查到所有者个人信息
根据NS记录得知使用的CDN厂商,使用查到的个人信息,与CDN厂商的相关人员交流,伪装成域名所有者
CDN技术
智能DNS,根据用户所在位置,将其请求指向就近的缓存服务器
缓存服务器存储了部分网站的资源,网站所有者将域名的cname指向CDN
如果用户请求的网站资源缓存服务器上有,CDN会将请求指向缓存服务器,如果没有,则指向CDN后台中存储的网站真实IP
优点:
- 隐藏真实IP
- 减轻服务器压力
在有CDN的情况下获取目标真实IP
如FOFA,SHODAN会每天扫描全网IP,记录其信息至数据库
其中可能有目标的真实IP,如果没有限制只允许域名访问的话
centos安装dnsmasq
yum -y install dnsmasq
systemctl status dnsmasq
systemctl start dnsmasq

dnsmasq配置
先关闭selinux和firewalld
vi /etc/selinux/config
systemctl stop firewalld

dnsmasq服务主配置文件:/etc/dnsmasq.conf
有影响的系统配置文件
本地域名IP映射:/etc/hosts
域名配置文件,可指定DNS地址:cat /etc/resolv.conf
dnsmasq解决的一些问题:
- 局域网大量机器希望使用一致的hosts文件
- 将内网对某域名的请求指向指定IP,优先使用本地自定义DNS
- 阻止对某个域名的解析
将本机的dns指向云主机,安装dnsmasq的云主机相当于dns服务器,dnsmasq会先查找hosts等本地解析文件,再查找resolv.conf等外部nameserver配置文件定义的外部DNS
所以,如果本机本地没有域名解析记录,则查询云主机的本地解析记录hosts,还没有再向云主机resolv.conf指定的dns服务器查询
此时,云主机的hosts相当于共享给内网所有主机的hosts
解析顺序:hosts->dns缓存->DNS
主配置文件:vi /etc/dnsmasq.conf
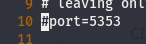
端口
强制使用完整的解析名,不转发错误的域名

自定义resolv.conf
不使用hosts,自定义hosts
主机名拓展,自动给hosts中的name增加一个域名
将hosts中的www自动拓展成www.thekelleys.org.uk
ping www 等同于 ping www.thekelleys.org.uk

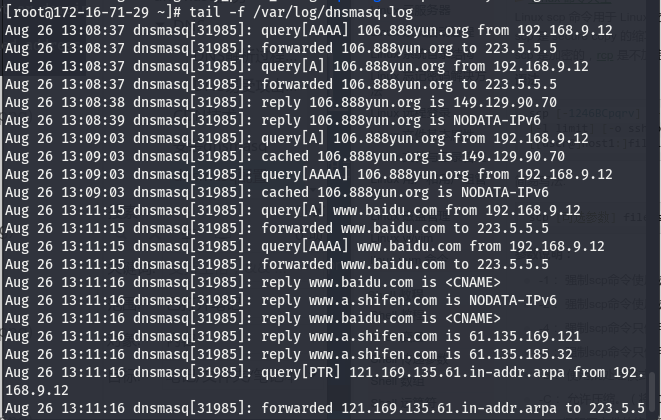
开启日志记录和路径


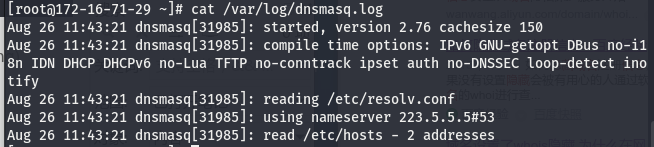
修改本机的DNS,指向云主机
打开几个页面,可以看到云主机上的dnsmasq日志记录了DNS解析流程
dns攻防/dnsmasq应用/云waf
dns攻防
- 攻击者在枚举子域名时会产生大量DNS请求,被记录进日志
- 局域网内的自建DNS,通过修改解析记录,可以阻断指定域名访问
通过查询日志,可以得知人员网络活动
dnsmasq应用
- 局域网内共享分发hosts,插入解析记录加快常用网站访问速度
- 局域网内的自建DNS,通过修改解析记录,可以阻断指定域名访问
通过查询日志,可以得知人员网络活动
云waf
云waf会过滤对网站的请求,通过找到目标域名的真实IP,修改hosts,将域名解析到真实IP上来让请求绕过云waf直达目标网站
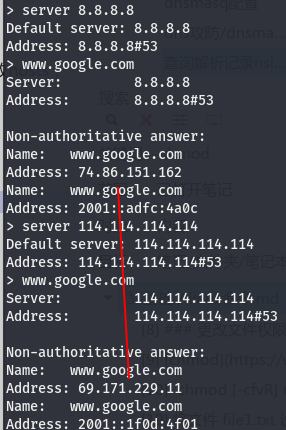
查询解析记录nslookup
用于查询DNS的解析记录
向指定dns服务器发送dns请求
查询域名的A记录
nslookup
server dnsip
domain
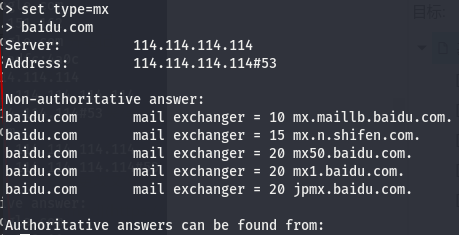
指定查询记录类型
set type=mx
domain
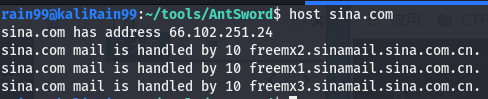
分析域名host
相比nslookup结果清晰
host domain
3 web服务apache
apache基金会开源的web服务器软件apache
安装httpd服务
centos:yum install -y httpd
systemctl status httpd
kali:systemctl status apache2
apache配置文件
apache主配置文件:/etc/httpd/conf/httpd.conf
配置目录:/etc/httpd/conf/
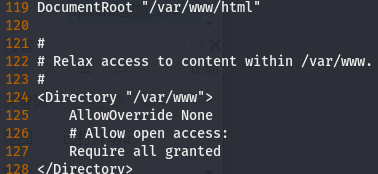
网站目录:/var/www/html/
vi /etc/httpd/conf/httpd.conf
双网卡IP,端口

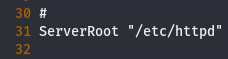
apache安装路径
apache服务权限


apache服务如果以高权限运行
当web被getshell,则入侵者直接获得系统高权限
getshell后,可通过ls -al /etc/passwd判断apache权限
访问域名端口配置

网站路径
首页配置

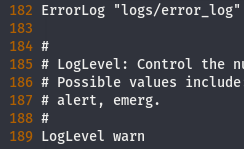
日志路径和记录等级

自定义异常响应

包含的配置文件,虚拟主机配置文件等都放在该目录下

虚拟主机配置同IP端口不同域名网站
同IP同端口不同域名不同网站
其他主机访问不同域名是不同的网站,都解析到同一IP的同一端口
云主机上:
修改虚拟主机配置文件
vi /etc/httpd/conf.d/vhosts.conf
<VirtualHost *:80>
#绑定的主域
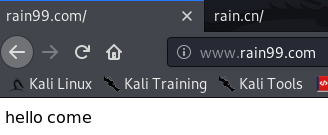
ServerName rain99.com
#绑定的子域名
ServerAlias www.rain99.com
#网站主目录
DocumentRoot /var/www/com
#日志配置
ErrorLog /var/log/httpd/com_error.log
CustomLog /var/log/httpd/com_access.log common
#ServerSignature Off
</VirtualHost>
#测试一的配置
<Directory "/var/www/com/">
Options FollowSymLinks
AllowOverride All
Require all granted
</Directory>
<VirtualHost *:80>
#绑定的主域
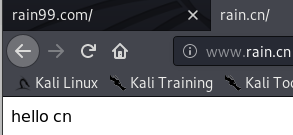
ServerName rain.cn
#绑定的子域名
ServerAlias www.rain.cn
#网站主目录
DocumentRoot /var/www/cn
#日志配置
ErrorLog /var/log/httpd/cn_error.log
CustomLog /var/log/httpd/cn_access.log common
#ServerSignature Off
</VirtualHost>
#测试一的配置
<Directory "/var/www/cn/">
Options FollowSymLinks
AllowOverride All
Require all granted
</Directory>
/var/www下生成cn和com目录,并写入主页
重启httpd服务
apache配置文件不用动
本机下:
修改hosts文件

本机可访问www.rain99.com和www.rain.cn
LAMP
流行的服务器搭配
L-linux
A-apache
M-mysql
P-php
yum -y install httpd httpd-devel
yum -y install mariadb mariadb-server
yum -y install php php-mysql php-gd libjpeg* php-ldap php-odbc php-pear php-xml php-xmlrpc php-mbstring php-bcmath php-mhash
systemctl start mariadb
mysqladmin -uroot password
将web目录移到/var/www/html/
修改web根目录归属解决权限问题:chown -R apache:apache /var/www/html/
隐藏版本号
vi /etc/httpd/conf/httpd.confServerTokens Prod ServerSignature Off
systemctl restart httpd
4 web服务nginx
高性能高并发的http和反向代理服务器
apache与nginx的区别:
apache同步:处理单任务,处理完在处理下一任务
nginx异步:同时处理多任务
安装nginx
yum list |grep epel
yum -y install epel-release.noarch
yum makecache
yum -y install nginx
nginx配置
菜鸟 nginx配置
配置目录:/etc/nginx/
主配置:/etc/nginx/nginx.conf
网站目录:/usr/share/nginx/html/
测试配置情况:nginx -t
重载配置文件:nginx -s reload
主配置nginx.conf
-
全局块
配置影响nginx全局的指令。
运行nginx服务器的用户/组:user
nginx开启的进程数:worker_processes
错误日志:error_log
nginx进程pid存放路径:pid
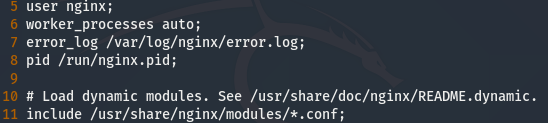
-
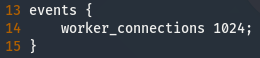
events块
配置影响nginx服务器或与用户的网络连接。有每个进程的最大连接数,选取哪种事件驱动模型处理连接请求,是否允许同时接受多个网路连接,开启多个网络连接序列化等。
-
http块
可以嵌套多个server,配置代理,缓存,日志定义等绝大多数功能和第三方模块的配置。如文件引入,mime-type定义,日志自定义,是否使用sendfile传输文件,连接超时时间,单连接请求数等。
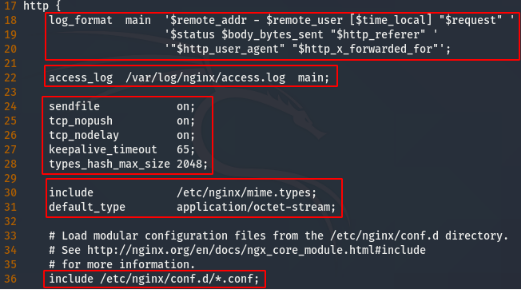
访问日志格式和位置:

注意"$http_x_forwarded_for"
做了反代后,访问web的IP来自反代,无法溯源
需要xxf头确定请求的来源
-
server块
配置虚拟主机的相关参数,一个http中可以有多个server。
root web根路径

-
location块
配置请求的路由,以及各种页面的处理情况。
配置php

测试配置
nginx -t

lnmp
安装lnmp
yum list |grep epel
yum -y install epel-release.noarch
yum makecache
yum -y install nginx
yum -y install mariadb mariadb-server
yum -y install php-fpm php php-mysql php-gd libjpeg* php-ldap php-odbc php-pear php-xml php-xmlrpc php-mbstring php-bcmath php-mhash
systemctl start nginx.service
php在apache和nginx中的不同
nginx 将php传给php-fpm服务解析,PHP作为服务

apache 使用外挂的php模块解析php,PHP作为程序
php作为一个动态的、共享的模块被apache调用,在启动apache时,自动加载。
php是apache的一个外挂程序,必须依靠web服务器才可以运行。当客户端浏览器触发事件--->php程序提交到apache服务器---->apache服务器根据php程序的特点判断是php程序,并从内存或者硬盘中提取访问所需要的应用程序,将其提交给php引擎程序--->php引擎程序解析并读取数据库生成相应的页面--->php引擎将html页面返回给web服务器,web服务器再将页面返回给客户端。
php-fpm
配置文件:vi /etc/php-fpm.d/www.conf
修改服务进程用户/组为nginx

systemctl restart php-fpm.service
mariadb
systemctl start mariadb.service
mysqladmin -uroot password
配置nginx
vi /etc/nginx/nginx.conf
user nginx;
worker_processes auto;
error_log /var/log/nginx/error.log;
pid /run/nginx.pid;

include /usr/share/nginx/modules/*.conf;

events {
    worker_connections 1024;
}

http {
    log_format  main  '$remote_addr - $remote_user [$time_local] "$request" '
                      '$status $body_bytes_sent "$http_referer" '
                      '"$http_user_agent" "$http_x_forwarded_for"';

    access_log  /var/log/nginx/access.log  main;

    sendfile            on;
    tcp_nopush          on;
    tcp_nodelay         on;
    keepalive_timeout   65;
    types_hash_max_size 2048;

    include             /etc/nginx/mime.types;
    default_type        application/octet-stream;


    include /etc/nginx/conf.d/*.conf;

    server {
        listen       80 default_server;
        listen       [::]:80 default_server;
        server_name  _;
        root         /usr/share/nginx/html;
	index         index.php;

    location ~ .php$ {
           root /usr/share/nginx/html; #指定php的根目录
           fastcgi_pass 127.0.0.1:9000;#php-fpm的默认端口是9000
           fastcgi_index index.php;
           fastcgi_param SCRIPT_FILENAME $document_root$fastcgi_script_name;
           include fastcgi_params;
     }

        include /etc/nginx/default.d/*.conf;

        location / {
        }

        error_page 404 /404.html;
            location = /40x.html {
        }

        error_page 500 502 503 504 /50x.html;
            location = /50x.html {
        }
    }

}
测试配置情况:nginx -t
重载配置文件:nginx -s reload
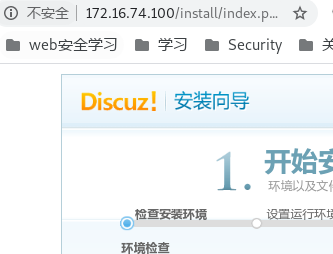
上传cms安装
下载:git clone https://gitee.com/ComsenzDiscuz/DiscuzX
上传:scp -r upload/ root@172.16.74.100:/usr/share/nginx/html/
授权:chmod -R 777 /usr/share/nginx/html
访问ip
反向代理和负载均衡
反向代理: 反向代理服务器根据请求目标分发请求给内网的各个应用服务器
负载均衡:部署多台相同应用的服务器,负载均衡服务器将用户请求分发到不同的服务器
正反向代理定义
正向代理:PC->代理服务器->web,接受请求,转发给服务器
反向代理:PC->代理服务器->web,接受请求,转发给内网的服务器
所有的访问都是代理服务器替我们访问
区别是
正向代理服务器是我们指定的,客户端的前置
反向代理服务器是web服务端指定的,服务器的前置
部署反向代理
菜鸟 反向代理与负载均衡
vim /etc/nginx/nginx.conf
nginx -t
nginx -s reload
user nginx;
worker_processes auto;
error_log /var/log/nginx/error.log;
pid /run/nginx.pid;

include /usr/share/nginx/modules/*.conf;

events {
    worker_connections 1024;
}

http {
    log_format  main  '$remote_addr - $remote_user [$time_local] "$request" '
                       '$status $body_bytes_sent "$http_referer" '
                      '"$http_user_agent" "$http_x_forwarded_for"';
    access_log  /var/log/nginx/access.log  main;
    sendfile            on;
    tcp_nopush          on;
    tcp_nodelay         on;
    keepalive_timeout   65;
    types_hash_max_size 2048;
    include             /etc/nginx/mime.types;
    default_type        application/octet-stream;

    include /etc/nginx/conf.d/*.conf;

        include /etc/nginx/default.d/*.conf;
upstream www.test1.org {
        server 192.168.0.137  weight=1;
        #server 192.168.0.17  weight=1;
        #ip_hash;
        }
server{

        listen 80;

        server_name www.test1.org;

        access_log  /var/log/nginx/test1.log;


        location / {

            root /home/web1_root;

            proxy_pass http://www.test1.org;

            proxy_read_timeout 300;

            proxy_connect_timeout 300;

            proxy_redirect     off;

            proxy_set_header   X-Forwarded-Proto $scheme;

            proxy_set_header   Host              $http_host;

            proxy_set_header   X-Real-IP         $remote_addr;

        }

    }
upstream www.test2.org {
        server 192.168.0.138  weight=1;
        #server 192.168.0.17  weight=1;
        #ip_hash;
        }
server{

        listen 80;

        server_name www.test2.org;

        access_log  /var/log/nginx/test2.log;


        location / {

            root /home/web2_root;

            proxy_pass http://www.test2.org;

            proxy_read_timeout 300;

            proxy_connect_timeout 300;

            proxy_redirect     off;

            proxy_set_header   X-Forwarded-Proto $scheme;

            proxy_set_header   Host              $http_host;

            proxy_set_header   X-Real-IP         $remote_addr;

        }

    }
}
部署负载均衡
菜鸟 反向代理与负载均衡
vim /etc/nginx/nginx.conf
nginx -t
nginx -s reload
ip_hash会让相同的客户端ip请求相同的服务器
user nginx;
worker_processes auto;
error_log /var/log/nginx/error.log;
pid /run/nginx.pid;

include /usr/share/nginx/modules/*.conf;

events {
    worker_connections 1024;
}

http {
    log_format  main  '$remote_addr - $remote_user [$time_local] "$request" '
                       '$status $body_bytes_sent "$http_referer" '
                      '"$http_user_agent" "$http_x_forwarded_for"';
    access_log  /var/log/nginx/access.log  main;
    sendfile            on;
    tcp_nopush          on;
    tcp_nodelay         on;
    keepalive_timeout   65;
    types_hash_max_size 2048;
    include             /etc/nginx/mime.types;
    default_type        application/octet-stream;

    include /etc/nginx/conf.d/*.conf;

        include /etc/nginx/default.d/*.conf;
upstream www.test1.org {
        server 192.168.0.137  weight=1;
        server 192.168.0.17  weight=1;
        ip_hash;
        }
server{

        listen 80;

        server_name www.test1.org;

        access_log  /var/log/nginx/test1.log;


        location / {

            root /home/web1_root;

            proxy_pass http://www.test1.org;

            proxy_read_timeout 300;

            proxy_connect_timeout 300;

            proxy_redirect     off;

            proxy_set_header   X-Forwarded-Proto $scheme;

            proxy_set_header   Host              $http_host;

            proxy_set_header   X-Real-IP         $remote_addr;

        }

    }

}
5 nginx高可用负载均衡+keepalived
同时工作+自动化
高可用:通过设计减少系统不能提供服务的时间,冗余+自动故障转移,使得系统一直提供服务
负载均衡:部署多台应用服务器,将用户请求分发到不同的服务器,提高可靠性
Keepalived机器同样是nginx负载均衡器
172.16.72.134 WEB服务器C nfs-client
172.16.72.142 反代A+keepalive
172.16.72.162 反代B+keepalive
172.16.72.164 nfs-server
172.16.100.22 172.16.101.22
22 122
实现请求转移的关键是虚拟IP的漂移,哪个有问题,虚拟IP就飘到另一台好的机器上,对域名的请求也随之转移
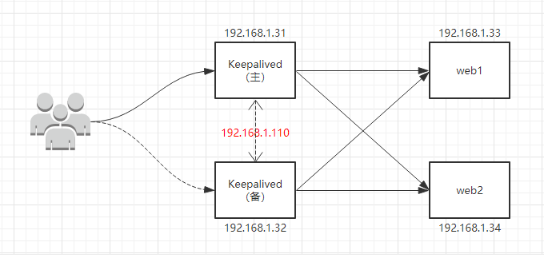
主备:正常时,请求由A转发给C,A故障时,请求由B转发给C,A恢复时,转发权交回给A
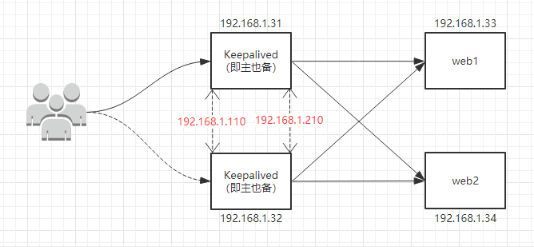
主主:正常时,AB都承担转发C的任务,AB中任一挂了,另一台会接管
WEB服务器C配置
yum list |grep epel
yum -y install epel-release.noarch
yum makecache
yum -y install nginx
systemctl start nginx
主备和主主
安装keepalived
yum -y install keepalived
systemctl start keepalived
配置文件:/etc/keepalived/keepalived.conf
配置文件讲解
router id,一机一ID

监控脚本,给权限

同一个VI对应同一个虚拟IP和virtual id,所以virtual id和虚拟IP要一致,主备主主上的同一VI的virtual id和虚拟IP要一样
主备,网卡,virtual id,优先级
认证,密码
虚拟IP要是不存在的ip,搭建前ping不了
主从
https://www.cnblogs.com/itall/p/10913599.html
谢公子 Keepalived高可用集群
一个虚拟ip,主备
验证:正常时,A ip a有172.16.100.22,B没有
关闭A的nginx,Bip a有172.16.100.22,A没有
主备具体实现过程:
域名解析到一虚拟IP上,AB的keepalive为虚拟IP的主备,A的nginx挂了后,A的keep监测脚本检测不到nginx进程就会关闭keppalive,导致无法回应B的keep的心跳包,B的keep认为A挂了,接管虚拟IP,即接管原来指向A的请求,A的nginx恢复后,A的keep监测脚本监测到nginx,启动keep,因为A的keep有更高优先级,所以接管回虚拟IP,请求又转而指向A
配置keepalived
172.16.72.142 反代A 主
global_defs {
router_id keepalived_22
}
vrrp_script Monitor_Nginx {
script "/etc/keepalived/monitor_nginx.sh"
interval 5
weight 2
}
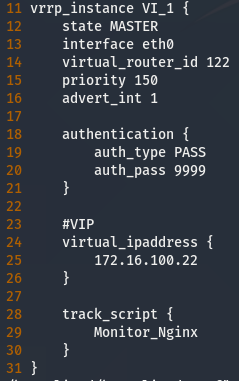
vrrp_instance VI_1 {
state MASTER
interface eth0
virtual_router_id 122
priority 150
advert_int 1
authentication {
auth_type PASS
auth_pass 9999
}
#VIP
virtual_ipaddress {
172.16.100.22
}
track_script {
Monitor_Nginx
}
}
172.16.72.162 反代B 备
global_defs{
    router_id keepalived_123
}

vrrp_script Monitor_Nginx {
    script "/etc/keepalived/monitor_nginx.sh"
    interval 5
    weight 2
}

vrrp_instance VI_1 {
    state BACKUP
    interface eth0
    virtual_router_id 122
    priority 100
    advert_int 1

    authentication {
        auth_type PASS
        auth_pass 9999
    }

    #VIP
    virtual_ipaddress {
        172.16.100.22
    }

    track_script {
        Monitor_Nginx
    }
}
主主
https://www.cnblogs.com/yanjieli/p/10682064.html
两个虚拟ip,互为主备
配置keepalived
172.16.72.142 反代A
global_defs {
    router_id keepalived_22
}

vrrp_script Monitor_Nginx {
    script "/etc/keepalived/monitor_nginx.sh"
    interval 5
    weight 2
}

vrrp_instance VI_1 {
    state MASTER
    interface eth0
    virtual_router_id 122
    priority 150
    advert_int 1

    authentication {
        auth_type PASS
        auth_pass 9999
    }

    #VIP
    virtual_ipaddress {
        172.16.100.22
    }

    track_script {
        Monitor_Nginx
    }
}


##########################
#global_defs{
#    router_id keepalived_22
#}

#vrrp_script Monitor_Nginx {
#    script "/etc/keepalived/monitor_nginx.sh"
#    interval 5
#    weight 2
#}

vrrp_instance VI_2 {
    state BACKUP
    interface eth0
    virtual_router_id 123
    priority 100
    advert_int 1

    authentication {
        auth_type PASS
        auth_pass 0000
    }

    #VIP
    virtual_ipaddress {
        172.16.101.22
    }

    track_script {
        Monitor_Nginx
    }
}
172.16.72.162 反代B
global_defs{
    router_id keepalived_123
}

vrrp_script Monitor_Nginx {
    script "/etc/keepalived/monitor_nginx.sh"
    interval 5
    weight 2
}

vrrp_instance VI_1 {
    state BACKUP
    interface eth0
    virtual_router_id 122
    priority 100
    advert_int 1

    authentication {
        auth_type PASS
        auth_pass 9999
    }

    #VIP
    virtual_ipaddress {
        172.16.100.22
    }

    track_script {
        Monitor_Nginx
    }
}

#################################
#global_defs{
#    router_id keepalived_23
#}

#vrrp_script Monitor_Nginx {
#    script "/etc/keepalived/monitor_nginx.sh"
#    interval 5
#    weight 2
#}

vrrp_instance VI_2 {
    state MASTER
    interface eth0
    virtual_router_id 123
    priority 150
    advert_int 1

    authentication {
        auth_type PASS
        auth_pass 0000
    }

    #VIP
    virtual_ipaddress {
        172.16.101.22
    }

    track_script {
        Monitor_Nginx
    }
}
监测脚本
vi /etc/keepalived/monitor_nginx.sh
#!/bin/bash
status=$(ps -C nginx --no-heading|wc -l)
if [ "${status}" = "2" ]; then
            systemctl start keepalived
else
            systemctl stop keepalived
fi
6 NFS文件系统
通过网络,让不同的机器、不同的操作系统可以实时共享彼此的文件
NFS服务器可以让PC将网络中的NFS服务器共享的目录挂载到本地端的文件系统中,而在本地端的系统中来看,那个远程主机的目录就好像是自己的一个磁盘分区一样,在使用上相当便利
Debian服务端
172.16.72.164
- 安装NFS和rpc
yum install -y nfs-utils
yum install -y rpcbind - 先启动rpc服务,再启动nfs服务
systemctl start rpcbind
systemctl enable rpcbind
systemctl start nfs-server nfs-secure-server
systemctl enable nfs-server nfs-secure-server
- 配置共享文件目录,编辑配置文件
首先创建共享目录,然后在/etc/exports配置文件中编辑
mkdir s1 s2
chmod -R 777 s1/ s2/
vi /etc/exports
共享目录的路径 允许访问的NFS客户端(共享权限参数)

systemctl reload nfs
参数 作用
ro 只读
rw 读写
root_squash 当NFS客户端以root管理员访问时,映射为NFS服务器的匿名用户
no_root_squash 当NFS客户端以root管理员访问时,映射为NFS服务器的root管理员
all_squash 无论NFS客户端使用什么账户访问,均映射为NFS服务器的匿名用户
sync 同时将数据写入到内存与硬盘中,保证不丢失数据
async 优先将数据保存到内存,然后再写入硬盘;这样效率更高,但可能会丢失数据
Debian客户端
172.16.72.134
-
使用showmount命令查看nfs服务器共享信息。输出格式为“共享的目录名称 允许使用客户端地址”。
showmount -e 172.16.72.164

-
在客户端创建目录,并挂载共享目录
mkdir s1 s2
一次性挂载,重启失去:
mount 172.16.72.164:/root/s1 /root/s1
mount 172.16.72.164:/root/s2 /root/s2
启动时自动挂载:
vim /etc/fstab
在该文件中挂载,使系统每次启动时都能自动挂载

使文件/etc/fstab生效:mount -a
- 检查
df -Th
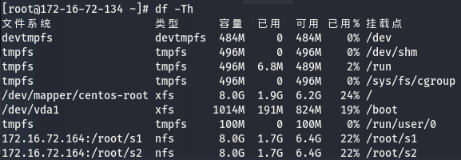
服务端写入文件测试


实用
- crontab定时将笔记复制进挂载目录备份
7 MFS分布式文件系统
将数据分布在多个服务器上,对用户是一个虚拟磁盘
MFS组成
元数据服务器master server:管理文件系统,维护元数据
元数据日志服务器metalogger:备份元数据服务器的变化日志文件
数据存储服务器chunk server:真正存储数据的服务器。文件分快保存
客户端client:
MFS读数据过程
C向元数据S发读请求
元数据S告知C,数据存储位置(chunkS的IP和chunk的编号)
C向chunkS请求数据
chunkS向C发送数据
MFS写数据过程
C向S发送写请求
S与CS交互,CS新建chunk,告知S创建成功
S告知C,往哪个CS的哪个chunk写入数据
C向CS发送数据,CS与其他CS同步数据
CS告知C完成,C告知S完成
MFS优势
高可用性:元数据在冗余服务器上有多个副本
实现
172.16.72.179 masterS
172.16.72.182 metalogger
172.16.72.184 chunk server1
172.16.72.19 chunk server2
172.16.72.190 client
搭建
- 172.16.72.179 master
[root@localhost ~]# curl "https://ppa.moosefs.com/RPM-GPG-KEY-MooseFS" > /etc/pki/rpm-gpg/RPM-GPG-KEY-MooseFS	#导入验证秘钥
[root@localhost ~]# curl "http://ppa.moosefs.com/MooseFS-3-el7.repo" > /etc/yum.repos.d/MooseFS.repo		#添加库条目
[root@localhost ~]# yum install moosefs-master moosefs-cgi moosefs-cgiserv moosefs-cli -y
[root@localhost ~]# systemctl start moosefs-master
[root@localhost ~]# systemctl enable moosefs-master
[root@localhost ~]# netstat -ntap | grep mfs
- 172.16.72.182 metalogger
[root@localhost ~]# curl "https://ppa.moosefs.com/RPM-GPG-KEY-MooseFS" > /etc/pki/rpm-gpg/RPM-GPG-KEY-MooseFS
[root@localhost ~]# curl "http://ppa.moosefs.com/MooseFS-3-el7.repo" > /etc/yum.repos.d/MooseFS.repo
[root@localhost ~]# yum install moosefs-metalogger -y
[root@localhost ~]# vi /etc/mfs/mfsmetalogger.cfg #指向master
MASTER_HOST = 172.16.72.179
[root@localhost ~]# systemctl start moosefs-metalogger
[root@localhost ~]# systemctl enable moosefs-metalogger
[root@localhost ~]# netstat -ntap | grep mfs
- 172.16.72.184 chunk server1 | 172.16.72.19 chunk server2
[root@localhost ~]# curl "https://ppa.moosefs.com/RPM-GPG-KEY-MooseFS" > /etc/pki/rpm-gpg/RPM-GPG-KEY-MooseFS
[root@localhost ~]# curl "http://ppa.moosefs.com/MooseFS-3-el7.repo" > /etc/yum.repos.d/MooseFS.repo
[root@localhost ~]# yum install moosefs-chunkserver -y
[root@localhost ~]# vi /etc/mfs/mfschunkserver.cfg      #主配置文件
MASTER_HOST = 172.16.72.179
[root@localhost ~]# vi /etc/mfs/mfshdd.cfg	#使用的磁盘空间配置文件
/rain99
[root@localhost ~]# mkdir /rain99	#创建挂载文件
[root@localhost ~]# chown -R mfs:mfs /rain99	#更改文件归属
[root@localhost ~]# systemctl start moosefs-chunkserver
[root@localhost ~]# systemctl enable moosefs-chunkserver
[root@localhost ~]# netstat -ntap | grep mfs
- 172.16.72.190 client
[root@localhost ~]# curl "https://ppa.moosefs.com/RPM-GPG-KEY-MooseFS" > /etc/pki/rpm-gpg/RPM-GPG-KEY-MooseFS
[root@localhost ~]# curl "http://ppa.moosefs.com/MooseFS-3-el7.repo" > /etc/yum.repos.d/MooseFS.repo
[root@localhost ~]# yum install moosefs-client -y
[root@localhost ~]# modprobe fuse #加载fuse模块
[root@localhost ~]# mkdir /rain99 #创建挂载目录
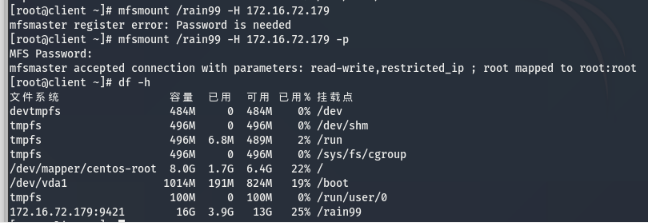
[root@localhost ~]# mfsmount /rain99 -H 172.16.72.179
#特别需要注意的是,所有的MFS 都是挂接同一个元数据服务器master 的IP,而不是其他数据存储服务器chunkserver 的IP
[root@localhost ~]# df -h
- master端为主机设置连接密码,客户端连接就需要密码认证了
master:vi /etc/mfs/mfsexports.cfg

现在客户端需要密码才能挂载
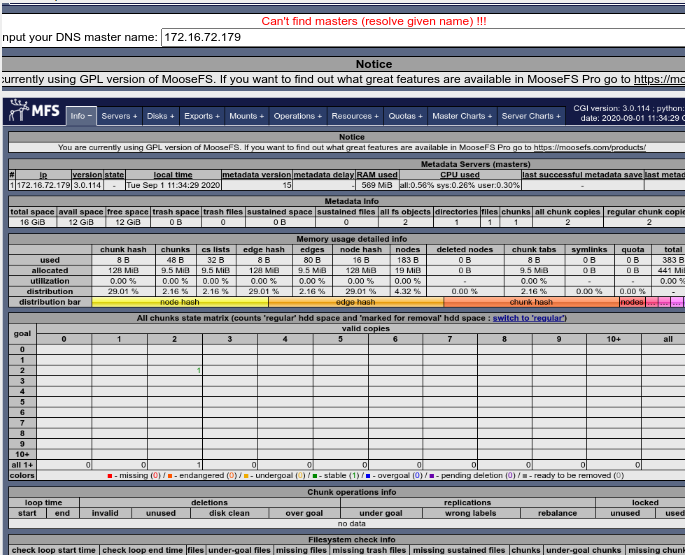
- 启动web监控服务
master:mfscgiserv

访问http://172.16.72.179:9425/
8 firewalld防火墙
特点:1. 支持动态更新,不用重启服务 2. 引入"zone"的概念
支持图形和命令行,命令管理工具是firewall-cmd
关于zone:
数据包要进入内核,必须经过其中一个zone,不同的zone的检测规则不一样,可以根据网卡连接网络的安全性给网卡绑定zone,一个网卡只能绑定一个zone,firewalld默认9个zone,默认zone为public

安装firewalld
centos7默认安装
centos6:yum install firewalld firewall-config
启动:systemctl start firewalld
查看:systemctl或firewall-cmd --state
配置
https://www.cnblogs.com/liuyan54/p/10433344.html
https://my.oschina.net/u/3867265/blog/1844317
每个网卡绑定一个zone,这个zone有自己的默认规则,也可以自己增加修改删除额外的规则
关于zone的操作:
获取默认zone:firewall-cmd --get-default-zone
修改默认zone:firewall-cmd --set-default-zone=public
查指定网卡:firewall-cmd --get-zone-of-interface=eth0
网卡增加/修改/删除zone:firewall-cmd --zone=public --add/change/remove-interface=eth0
查看zone绑定信息:firewall-cmd --get-active-zones

查看版本/帮助/状态:firewall-cmd --version/help/state
是否拒绝所有包:firewall-cmd --panic-on/off
查看是否拒绝:firewall-cmd --query-panic
不重启更新规则:firewall-cmd --reload
不加 --permanent,reload后规则失去
重启更新规则:firewall-cmd --complete-reload
关于service的:
列出所有服务:firewall-cmd --get-services
给某个zone查看/增加/删除服务:firewall-cmd --zone=public --query/add/remove-service=http
给某个zone增加/删除/查看端口规则:firewall-cmd --zone=public --add/remove/query-port=80/tcp
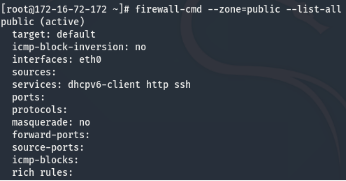
查看某个zone的规则:firewall-cmd --zone=public --list-all
加规则加上 --permanent,reload重载后,规则持久生效,服务重启不变
rich rule富规则,比firewalld基本语法实现更强功能,包括 运行/拒绝,日志syslog和auditd,端口转发,伪装和限制速率:
新建/删除/查看rich规则:--add/remove/query-rich-rule='rule'
查看rich表:firewall-cmd --list-rich-rules
查看所有规则:firewall-cmd --list-all
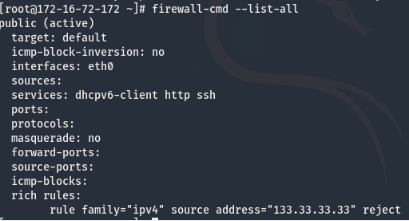
拒绝某IP连接:firewall-cmd --add-rich-rule='rule family=ipv4 source address=ip reject'
拒绝某IP访问22端口:firewall-cmd --add-rich-rule='rule family=ipv4 source address=ip port port=22 protocol=tcp reject'
允许ipA访问ipB的22端口:
firewall-cmd --add-rich-rule='rule family=ipv4 source address=ipA destination address=ipB port port=22 protocol=tcp accept'