1、建立一个maven-archetype-webapp项目,pom.xml中添加Maven依赖
<!-- spring mvc相关依赖 -->
<dependency>
    <groupId>org.springframework</groupId>
    <artifactId>spring-webmvc</artifactId>
    <version>5.0.2.RELEASE</version>
</dependency>
<!-- jackson相关依赖 -->
<dependency>
    <groupId>com.fasterxml.jackson.core</groupId>
    <artifactId>jackson-databind</artifactId>
    <version>2.9.3</version>
</dependency>
2、在resource文件夹添加一个springmvc-config.xml文件,并设置相关配置
<?xml version="1.0" encoding="UTF-8"?>
<beans xmlns="http://www.springframework.org/schema/beans"
    xmlns:xsi="http://www.w3.org/2001/XMLSchema-instance"
    xmlns:mvc="http://www.springframework.org/schema/mvc"
    xmlns:context="http://www.springframework.org/schema/context"
    xsi:schemaLocation="http://www.springframework.org/schema/beans
    http://www.springframework.org/schema/beans/spring-beans.xsd
    http://www.springframework.org/schema/mvc
    http://www.springframework.org/schema/mvc/spring-mvc.xsd
    http://www.springframework.org/schema/context
    http://www.springframework.org/schema/context/spring-context.xsd">
    <!-- 包扫描 -->
    <context:component-scan base-package="com.app.*" />
    <!-- 注解驱动 -->
    <mvc:annotation-driven />
    <!-- html文件处理 -->
    <mvc:resources mapping="/*.html" location="/" />
    <!-- 视图解析 -->
    <bean id="viewResolver"
        class="org.springframework.web.servlet.view.InternalResourceViewResolver">
        <property name="prefix">
            <value>/WEB-INF/jsp/</value>
        </property>
        <property name="suffix">
            <value>.jsp</value>
        </property>
    </bean>
</beans>
3、在web.xml里面配置Spring MVC的DispatcherServlet跟编码过滤器
<?xml version="1.0" encoding="UTF-8"?>
<web-app xmlns:xsi="http://www.w3.org/2001/XMLSchema-instance"
    xmlns="http://xmlns.jcp.org/xml/ns/javaee"
    xsi:schemaLocation="http://xmlns.jcp.org/xml/ns/javaee http://xmlns.jcp.org/xml/ns/javaee/web-app_3_1.xsd"
    id="WebApp_ID" version="3.1">
    <display-name>Archetype Created Web Application</display-name>
    <servlet>
        <servlet-name>springmvc</servlet-name>
        <servlet-class>org.springframework.web.servlet.DispatcherServlet</servlet-class>
        <init-param>
            <param-name>contextConfigLocation</param-name>
            <param-value>classpath:springmvc-config.xml</param-value>
        </init-param>
    </servlet>
    <servlet-mapping>
        <servlet-name>springmvc</servlet-name>
        <url-pattern>/</url-pattern>
    </servlet-mapping>
    <!-- 编码过滤器 -->
    <filter>
        <filter-name>characterEncodingFilter</filter-name>
        <filter-class>org.springframework.web.filter.CharacterEncodingFilter</filter-class>
        <init-param>
            <param-name>encoding</param-name>
            <param-value>UTF-8</param-value>
        </init-param>
        <init-param>
            <param-name>forceEncoding</param-name>
            <param-value>true</param-value>
        </init-param>
    </filter>
    <filter-mapping>
        <filter-name>characterEncodingFilter</filter-name>
        <url-pattern>/*</url-pattern>
    </filter-mapping>
</web-app>
到这一步基本的环境配置就可以了,以下的内容为测试环境可不可用使用,如果只是单纯配置环境,下面的步骤可以忽略。
4、创建一个实体类User
package com.app.entity;

import java.io.Serializable;
import java.util.Date;

import org.springframework.format.annotation.DateTimeFormat;

import com.fasterxml.jackson.annotation.JsonFormat;

@SuppressWarnings("serial")
public class User implements Serializable {
    private String userName;

    @DateTimeFormat(pattern = "yyyy-MM-dd")
    private Date birth;

    public String getUserName() {
        return userName;
    }

    public void setUserName(String userName) {
        this.userName = userName;
    }

    @JsonFormat(pattern = "yyyy-MM-dd", timezone = "GMT+08")
    public Date getBirth() {
        return birth;
    }

    public void setBirth(Date birth) {
        this.birth = birth;
    }
}
5、创建一个UserController类,并添加一个测试方法,功能是将添加的数据返回到客户端显示
package com.app.controller;

import org.springframework.stereotype.Controller;
import org.springframework.web.bind.annotation.RequestMapping;
import org.springframework.web.bind.annotation.ResponseBody;

import com.app.entity.User;

@Controller
public class UserController {

    @RequestMapping(value = "/insertUser")
    @ResponseBody
    public User insertUser(User user) {
        return user;
    }
}
6、新建一个html文件,添加如下代码
<!DOCTYPE html>
<html>
<head>
<meta charset="UTF-8">
<title>测试页面</title>
<style>
#content {
    text-align: center;
}
</style>
</head>
<body>
    <div id="content">
        <form action="insertUser">
            姓名:<input id="userName" name="userName" type="text"><br>
            生日:<input id="birth" name="birth" type="text"><br>
            <input type="submit" value="测试">
        </form>
    </div>
</body>
</html>
7、测试与结果
运行项目进入index.html,输入相关的信息
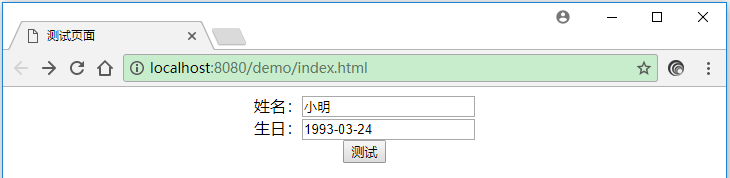
点击“测试”按钮,即可看到结果

-------------------- 额外内容 --------------------
1、@JsonFormat(pattern = "yyyy-MM-dd", timezone = "GMT+08")注解用于返回到客户端显示时的格式,里面的timezone不设置,返回时会少一天。
2、给自动生成的web.xml添加filter时会报错,将最前的以下内容
<!DOCTYPE web-app PUBLIC
 "-//Sun Microsystems, Inc.//DTD Web Application 2.3//EN"
 "http://java.sun.com/dtd/web-app_2_3.dtd" >

<web-app>
替换成
<?xml version="1.0" encoding="UTF-8"?>
<web-app xmlns:xsi="http://www.w3.org/2001/XMLSchema-instance"
    xmlns="http://xmlns.jcp.org/xml/ns/javaee"
    xsi:schemaLocation="http://xmlns.jcp.org/xml/ns/javaee http://xmlns.jcp.org/xml/ns/javaee/web-app_3_1.xsd"
    id="WebApp_ID" version="3.1">
即可。