Mac's are excellent tools for accessing serial device TTY ports (to console into PBX's, switches, and routers). You just need a serial to USB adapter, the right driver, and some Terminal software.
You can use screen, although ZTerm, goSerial, or Minicom offer more features and functionality.
Drivers
Most Serial-to-USB adapters will work on a Mac with one of the following OS X drivers:
Prolific PL2303:
PL2303_MacOSX_v1_5_1.zip FTDI_MacOSX_v2.2.18.zip
If your adapter doesn't work with either of these, try the following sources:
- Silicon Labs - CP210x USB to UART Bridge Virtual COM Port (VCP) drivers.
- Belkin - USB Serial Adapters: F5U257, F5U103, F5U003 (poor OS X support).
- Keyspan serial-USB adapter drivers can be found in their Support Section.
NOTE: It may be necessary to remove any previous driver before installing a newer one, eg:
$ sudo rm -rf /System/Library/Extensions/ProlificUsbSerial.kext
After installing the correct driver, plug in your USB-Serial adapter, and open a Terminal session (Applications/Utilities).
Enter the command ls /dev/cu.*, and look for something like usbserial (or similar):
$ ls /dev/cu.*
/dev/cu.Bluetooth-Modem		/dev/cu.iPhone-WirelessiAP
/dev/cu.Bluetooth-PDA-Sync	/dev/cu.usbserial
This indicates the USB-Serial driver is working. Select this port name in a terminal program.
Note: Check your adapter still works after a Mac OS Update, as you may have to re-install the driver.
You might notice that each serial device shows up twice in /dev, once as a tty.* and once as a cu.*. So, what's the difference? Well, TTY devices are for calling into UNIX systems, whereas CU (Call-Up) devices are for calling out from them (eg, modems). We want to call-out from our Mac, so /dev/cu.* is the correct device to use.
The technical difference is that /dev/tty.* devices will wait (or listen) for DCD (data-carrier-detect), eg, someone calling in, before responding. /dev/cu.* devices do not assert DCD, so they will always connect (respond or succeed) immediately.
Software
Having installed the right driver, our USB-Serial adapter will show up in /dev/cu.* (as shown above). We now need some terminal emulation software before we can connect to anything. Here are some Mac OS X terminal emulation programs:
GUI apps: Zterm

Terminal apps:
I use and (highly) recommend minicom, but there are several alternatives.
* screen is built-in to Mac OS X, the alternatives require downloading and installing.
ZTerm
ZTerm is a well known terminal emulation program thats been around for years, updated for Intel Macs. It supports VT100 emulation, which means it sorta kinda works with Meridian Mail (Function keys on a MacBook: fn + f-key). Shareware, but registration is $20.
To configure ZTerm, open Settings > Modem Preferences and select your USB-Serial device as the default modem (Serial Port). Then edit your connection in Settings > Connection. Remember to connect the USB-Serial cable before launching ZTerm. The following pictures explain the steps:
 |  |
goSerial
goSerial can open multiple connections simultaneously, send and receive files, log sessions, and it supports scripting. There is no terminal emulation (VT100) support. goSerial is Donation ware.
To configure goSerial, click the light switch in the Toolbar and select your USB-Serial device as the Serial Port. The communication settings are set in the same window. The serial ports dynamically updates if devices are added or removed. The following picture shows the settings window:
 |
screen
You can also use the Mac OS X built in Terminal program and screen, there's no extra software needed:
- Open an OS X terminal session (window)
- Find the right TTY device. Type:
ls /dev/cu.*With the USB-Serial adapter plugged in, you'll get a list, including something like this:
$ ls /dev/cu.*
/dev/cu.Bluetooth-Modem		/dev/cu.iPhone-WirelessiAP
/dev/cu.Bluetooth-PDA-Sync	/dev/cu.usbserial
- Then type:
screen /dev/cu.usbserial 9600
The 9600 at the end is the baud rate. You can use any standard rate, eg, 9600, or 19200 for a Sig Server! - To quit the screen app, type CTRL-A, then CTRL-.
Type man screen in Terminal for further information on screen commands.
minicom
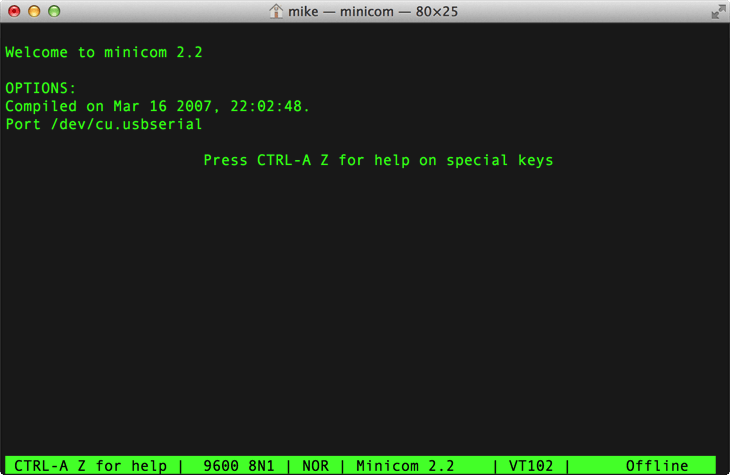
Alternatively, if you'd like a few more features, and a retro feel, you can install minicom 2.2 ![]() which is also my program of choice.
which is also my program of choice.
The linked version works under OS X 10.7 Lion, and 10.8 Mountain Lion. Minicom supports VT100 emulation, which means it sorta kinda works with Meridian Mail (Function keys on a MacBook: fn + f-key).
Download and run the minicom package installer, then manually edit your $PATH with sudo nano /private/etc/paths.
Add the following line to the bottom of the file: /opt/minicom/2.2/bin, save and exit - then relaunch the terminal.
Run minicom -s first to configure your serial interface device name, and other options. Then, Save setup as dfl (default) and Exit. Your serial interface device name is found with ls /dev/cu.* (as shown above). Always launch minicom, with your selected serial adapter plugged in and available to avoid an error. In the example below, the serial device is configured as /dev/cu.KeySerial1:
 |  |  |
| Click image to view, or right-click and Open Link in a new window/tab | ||
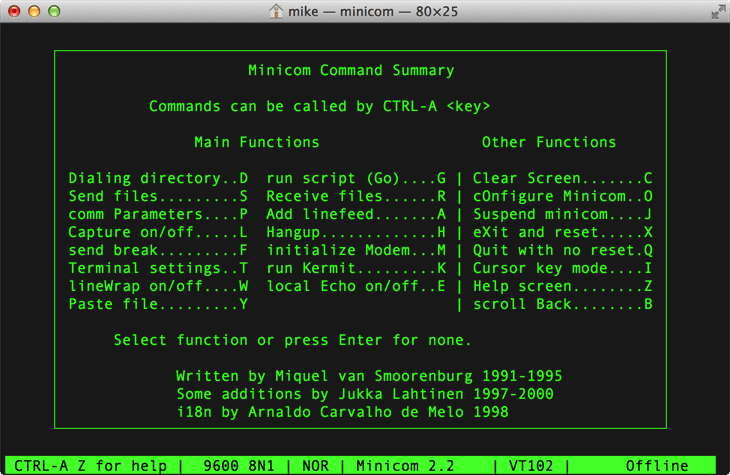
In minicom, commands can be called by CTRL-A <key>, for example, change your serial port settings with CTRL-A P
Press CTRL-A Z for a Command Summary, and help on special keys. Enter CTRL-A X to quit.
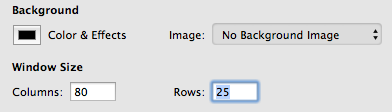
HINT: Change your OS X terminal window size to 80x25 (1 line more) so you can see the bottom Minicom status bar.
(Terminal Preferences -> Settings -> Window). Open a new window for this change to take effect.
 |
Note, the minicom installer creates /opt, and its not hidden in the OS X finder. Rectify this with: sudo chflags hidden /opt