一、回顾
1、ftp
a、两个链接:命令连接,数据连接
b、数据连接的建立方法:主动,被动
c、C/S
2、Server:vsftpd
a、系统用户,匿名用户,虚拟用户
二、NFS
1、nfs:Network File System
nfs:Network Information Service
ldap:lightweight directory access protocol;ldap over ssl/tls
2、版本
a、NFSv1
b、NFSv2,NFSv3,NFSv4
3、nfsd:2049/tcp
4、辅助类的服务:rpc,portmapper
a、rpc.mountd:认证;负责完成检查客户端主机地址是否是我们所允许连接的客户端IP
b、rpc.lockd:加锁;
c、rpc.statd:状态
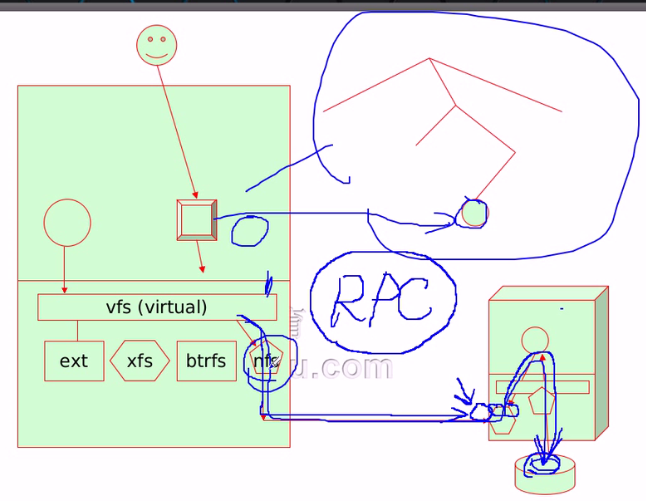
5、nfs原理
6、NFS Server
a、安装nfs-utils
b、/etc/exports或/etc/exports.d/*
/PATH/TO/SOME_DIR clients1(export_options,...) clients2(export_options,...)
clients:
single host:ipv4,ipv6,FQDN
network:address/netmask,支持长短格式的掩码
wildcards:主机名通配,例如:*.wohaoshuai.com
netgroups:NIS域内的主机组;@group_name;
anonymous:使用*通配所有主机
General Options:
ro:只读
rw:读写
sync:同步
async:异步
User ID Mapping:
root_squash:压缩root用户,一般指将其映射为nfsnobody
no_root_squash:不压缩root用户
all_squash:压缩所有用户
anonuld and anongld:将压缩的用户映射为此处指定的用户
7、NFS Client
(1)、mount -t nfs servername:/path/to/share /path/to/mount_point [-rvVwfnsh] [-o options]
exportfs -ar
exportfs -au
(2)、showmount - show mount information for an NFS server
showmount -e NFS_SERVER_IP:查看指定的nfs server上导出的所有文件系统
showmount -a:在nfs server上查看nfs服务的所有客户端列表
(3)、server上的exportfs
exportfs:
-r:重新导出
-a:所有文件系统
-v:显示详细信息
-u:取消导出文件系统,即关闭,不让别人访问
三、NFS配置
1、我们现在配置192.168.10.13为NFS server,192.168.10.14为client
2、我们查看我们内核中是否有相应的nfs模块
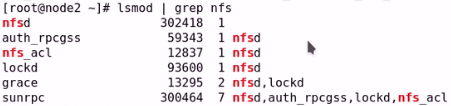
3、内核自己不会监听套接字,我们需要在用户空间安装一个程序包监听套接字,叫做nfs-util。
yum install -y nfs-util
4、我们配置一个目录要输出出来
a、在server上创建/data/mysql目录
[root@www /]# mkdir -pv /data/mysql
b、我们将这个路径映射出去(可以通过man exports来查看如何定义)。我们配置/data/mysql目录192.168.10.14有读写权限,192.168.10.0/24网段内主机有只读的权限。然后我们重启nfs服务
[root@www ~]# cat /etc/exports
/data/mysql 192.168.10.14(rw) 192.168.10.0/24(ro)
[root@www ~]# systemctl restart nfs
[root@www ~]# netstat -anpt |grep 2049
tcp        0      0 0.0.0.0:2049            0.0.0.0:*               LISTEN      -
tcp6       0      0 :::2049                 :::*                    LISTEN      -
c、现在我们通过192.168.10.14来访问
(1)、我们先查看我们192.168.10.13上这台nfs服务器有哪些目录可以挂载。使用showmount可以专门查看对应的nfs 服务器上有哪些可挂载的路径
[root@node2 ~]# showmount -e 192.168.10.13
Export list for 192.168.10.13:
/data/mysql 192.168.10.0/24
(2)、接下来我们来挂载
[root@node2 ~]# mount -t nfs 192.168.10.13:/data/mysql /mnt
[root@node2 ~]# mount |grep data
192.168.10.13:/data/mysql on /mnt type nfs4 (rw,relatime,vers=4.1,rsize=262144,wsize=262144,namlen=255,hard,proto=tcp,port=0,timeo=600,retrans=2,sec=sys,clientaddr=192.168.10.14,local_lock=
none,addr=192.168.10.13)
(3)、我们在192.168.10.14上尝试在/mnt中创建文件,发现没有相应的权限,虽然我们看mount信息时是有读写权限的,但是因为我们在nfs server上设置的root权限压缩为了来宾账号,即nfsnobody账号因此我们是没有创建文件的权限的。
[root@node2 ~]# cd /mnt/
[root@node2 mnt]# touch test.txt
touch: cannot touch ‘test.txt’: Permission denied
(4)、针对三上,我们可以在配置文件权限中配置no_root_squash即可不用压缩root权限。或者我们换一个非管理员账号然后让非管理员账号对子目录有相应的操作权限即可。
1)、我们先在我们192.168.10.13上创建用户centos
[root@www ~]# useradd -u 5002 centos
[root@www ~]# id centos
uid=5002(centos) gid=5002(centos) 组=5002(centos)
2)、然后在我们192.168.10.14上创建相同uid的用户fedora
[root@node2 mnt]# useradd fedora
[root@node2 mnt]# id fedora
uid=5002(fedora) gid=5002(fedora) groups=5002(fedora)
3)、现在我们在我们192.168.10.13上创建目录/data/mysql/test,并且给相应的属主和数组改成5002
[root@www ~]# mkdir /data/mysql/test
[root@www ~]# chown -R 5002.5002 /data/mysql/test
[root@www ~]# ls -ld /data/mysql/test
drwxr-xr-x 2 centos centos 6 5月  28 09:43 /data/mysql/test
4)、然后我们在192.168.10.14上切换到fedora用户。发现/mnt目录中无法创建文件,而/mnt/test目录中可以创建。并且我们可以看到在192.168.10.14上可以看到创建的文件test.txt属主属组为fedora。然后在192.168.10.13上看到创建的文件test.txt属主属组为centos,但是他们的uid都是一样的。
[root@node2 mnt]# su - fedora
[fedora@node2 ~]$ cd /mnt/
[fedora@node2 mnt]$ touch test.txt
touch: cannot touch ‘test.txt’: Permission denied
[fedora@node2 mnt]$ cd /mnt/test/
[fedora@node2 test]$ touch test.txt
[fedora@node2 test]$ ls -l /mnt/test/test.txt
-rw-rw-r-- 1 fedora fedora 0 May 28 09:53 /mnt/test/test.txt
[fedora@node2 test]$
[root@www ~]# ll /data/mysql/test/test.txt
-rw-rw-r-- 1 centos centos 0 5月  28 09:53 /data/mysql/test/test.txt
d、配置不压缩
(1)、我们重新编辑一下/etc/exports文件,压缩后给其映射为centos这个用户权限。(也可以配置为不压缩,即不压缩为nfsnobody权限),不过修改完后不要重启服务,因为前面已经有客户端挂载了我们相应的目录。我们可以使用exportfs 命令重新导出所有文件系统,即重载
[root@www ~]# cat /etc/exports
/data/mysql 192.168.10.14(rw,anonuid=5002,anongid=5002) 192.168.10.0/24(ro)
[root@www ~]# exportfs -rav
exporting 192.168.10.14:/data/mysql
exporting 192.168.10.0/24:/data/mysql
(2)、我们重新在192.168.10.14上使用root挂载,并在/mnt/test目录下创建文件。我们可以看到我们能够进行创建,并且创建的文件的属主属组是fedora,也就是我们在192.168.10.13中定义的root权限映射为了uid为5002的用户。
[root@node2 /]# showmount -e 192.168.10.13
Export list for 192.168.10.13:
/data/mysql 192.168.10.0/24
[root@node2 /]# mount.nfs 192.168.10.13:/data/mysql /mnt
[root@node2 /]# cd /mnt/test/
[root@node2 test]# touch bbb.txt
[root@node2 test]# ll
total 0
-rw-r--r-- 1 fedora fedora 0 May 28 10:17 bbb.txt
-rw-rw-r-- 1 fedora fedora 0 May 28 09:53 test.txt
e、如果我们要配置管理员登陆后就以管理员的身份操作,那么就需要配置成no_root_squash
(1)、在192.168.10.13上修改配置文件然后重载
[root@www ~]# cat /etc/exports
/data/mysql 192.168.10.14(rw,no_root_squash) 192.168.10.0/24(ro)
[root@www ~]# exportfs -rav
exporting 192.168.10.14:/data/mysql
exporting 192.168.10.0/24:/data/mysql
(2)、在192.168.10.14上用root挂载并且创建相应的文件,然后我们可以看到文件的属主属组是root用户。
[root@node2 /]# !mount
mount.nfs 192.168.10.13:/data/mysql /mnt
[root@node2 /]# cd /mnt/test/
[root@node2 test]# touch ccc.txt
[root@node2 test]# ll
total 0
-rw-r--r-- 1 fedora fedora 0 May 28 10:17 bbb.txt
-rw-r--r-- 1 root   root   0 May 28 10:26 ccc.txt
-rw-rw-r-- 1 fedora fedora 0 May 28 09:53 test.txt
[root@node2 test]#
f、我们也可以配置nfs开机自动挂载

四、博客作业
