--时间:2019年1月12日
--作者:飞翔的小胖猪
前言
说明
文档指导读者在Redhat系列操作系统上安装Ansible软件及初始化配置,包括服务端及被控端的配置文件设置。
以下所有操作都在Ansible服务器端操作,客户端不做任何配置。
环境
操作系统:CentOS Linux release 7.6.1810 (Core) 最小安装
数据库:mariadb-5.5.56-2.el7.x86_64
编程软件:Python 3.6.4
软件来源
安装ansible需要手动去互联网中下载和自己操作系统版本对应的ansible版本。
centos7相关地址: https://mirrors.aliyun.com/epel/7/x86_64/Packages/a/
centos8相关地址:https://mirrors.aliyun.com/epel/8/Everything/x86_64/Packages/a/
例:https://mirrors.aliyun.com/epel/7/x86_64/Packages/a/ansible-2.9.16-1.el7.noarch.rpm
配置
思路步骤
文档撰写流程及思路如下。
1.安装ansible+python+mariadb软件
2.配置ansible服务端,取消ssh登录敲yes等参数
3.生成root的公私钥对。
4.下发私钥至客户端服务器。
5.编辑配置ansible主机清单文件。
6.测试配置是否成功
1.安装软件
安装ansible、python、mysql软件。
[root@ansible-el7 ~]# yum install mariadb* -y
[root@ansible-el7 ~]# mysql_secure_installation
[root@ansible-el7 ~]# mysql -uroot -pyinwan
[root@ansible-el7 ~]# tar -zxvf  Python-3.6.4.tgz
[root@ansible-el7 ~]# cd Python-3.6.4/
[root@ansible-el7 ~]# ./configure  --prefix=/opt/python3
[root@ansible-el7 ~]# mkdir /opt/python3
[root@ansible-el7 ~]# /opt/python3/bin/pip3 install --no-index --find-link /myfile/lvan/soft -r /myfile/lvan/soft/filename.txt
[root@ansible-el7 ~]# yum install MySQL-python -y
[root@ansible-el7 ~]# yum localinstall ./ansible-2.4.2.0-2.el7.noarch.rpm  -y
2.配置ansble服务端
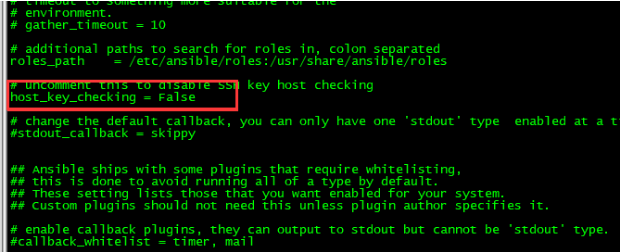
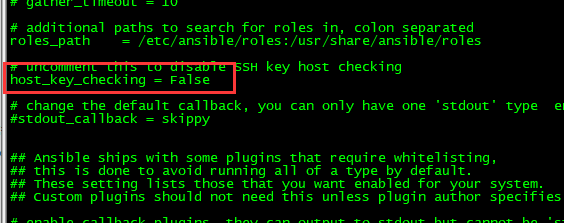
配置首次通过ssh协议登录被控主机时不用敲yes。ssh在登录服务器时会提示敲一个yes。
[root@ansible-el7 ~]# vim /etc/ansible/ansible.cfg
host_key_checking = False
配置ansible服务器在连接客户端时指定密钥对及一些基本配置。
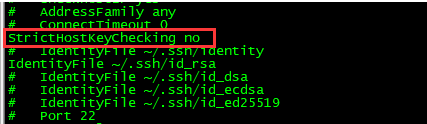
[root@ansible-el7 ~]# vim /etc/ssh/ssh_config
IdentityFile ~/.ssh/id_rsa
StrictHostKeyChecking no

配置ansible服务器sshd服务端配置。
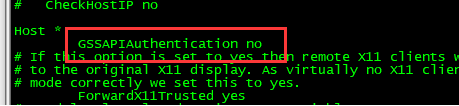
[root@ansible-el7 ~]# vim /etc/ssh/sshd_config
GSSAPIAuthentication no
UseDNS no

重启sshd服务
[root@ansible-el7 ~]# systemctl restart sshd

3.生成密钥对
[root@ansible-el7 ~]# ssh-keygen -t rsa
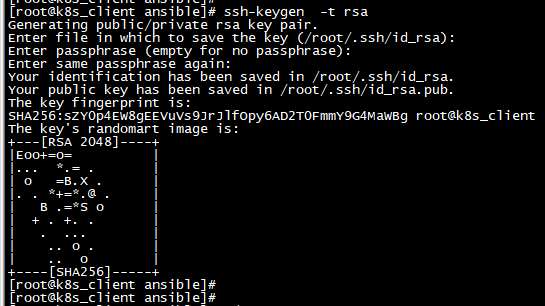
[root@ansible-el7 ~]# ll /root/.ssh/

4.下发公钥至客户端
如果ansible主机清单使用明文密码则不用执行该步骤,直接跳至第5步。
下发公钥文档提供了两种方式,任选其一即可,一般情况下10台及以下的主机推荐使用单主机模式下发,在大规模的环境下使用脚本方式下发。
*---------------------------------------------------------------------------------*
单主机下发:
只需要通过命令下发公钥到指定主机中,首次需要手动输入远程主机对应用户密码。然后测试下是否能够在公钥传输后不用密码登录远端主机。
使用单条命令下发rsa文件到指定主机中
[root@ansible-el7 ~]# ssh-copy-id -i /root/.ssh/id_rsa root@192.168.111.30
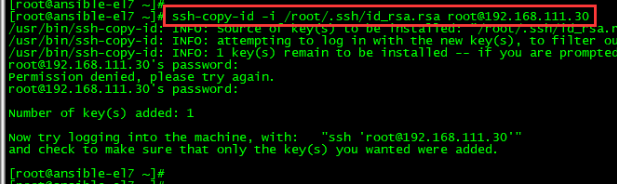
把指定的/root/.ssh/id_rsa.rsa文件复制到192.168.111.30的/root/.ssh/authorized_key文件中
测试直接使用密钥对登录客户端系统。
[root@ansible-el7 ~]# ssh -i /root/.ssh/id_rsa root@192.168.111.30

指定使用/root/.ssh/id_rsa.rsa公钥文件连接远程主机192.168.111.30
*---------------------------------------------------------------------------------*
*—————————————————————————————*
批量下发:
在批量主机下发时,需要准备一个写有需要控制的主机的ip地址和用户名及密码的文件,每个列数据间用“空格隔开”,然后编写一个脚本一行一行读取文件中的数据,进行文件下发操作。
使用主机表+shell脚本的方式下发rsa(仅限linux)
[root@ansible-el7 ~]#cat hostname_auto_ssh.txt
192.168.111.30 root yinwan
192.168.111.31 root yinwan
192.168.111.33 root yinwan
192.168.111.63 root yinwan

[root@ansible-el7 ~]#vim auto_ssh.sh
#!/bin/bash
cat hostname_auto_ssh.txt | while read ipaddr root passwd
do
#执行把rsa文件拷贝到指定主机中
jieguo=`sshpass -p $passwd /usr/bin/ssh-copy-id -i /root/.ssh/id_rsa.rsa $root@$ipaddr`
if [  $? -eq 0  ];then
    #判断如果命令成功则把ip信息传入到成功日志中
    echo "$ipaddr succeed" >> succeed_copy.log
else
    #判断如果命令失败则把ip信息传入到失败日志中
    echo "$ipaddr failed copying" >> failed_copy.log
fi
done


[root@ansible-el7 ~]#./auto_ssh.sh
如果有台被管节点重新安装系统并且在known_hosts中有了与之前不同的密钥信息,就会提示一个密钥信息不匹配的错误信息,直到被纠正为止。在使用Ansible时,如果有台被管节点没有在known_hosts中被初始化,将会在使用Ansible或定时执行Ansible时提示对key信息的确认。
如果不想出现这种情况,并且明白禁用此项行为的含义,只需要修改home目录下
~/.ansible.cfg 或 /etc/ansible/ansible.cfg 的配置选项。
[root@ansible-el7 ~]# vim /etc/ansible/ansible.cfg
[defaults]
host_key_checking = False
或者直接在控制主机的操作系统中设置环境变量,如下所示:
[root@ansible-el7 ~]#export ANSIBLE_HOST_KEY_CHECKING=False

*—————————————————————————————*
5.编辑主机清单
文档提供两种方式设置主机清单,推荐使用密钥对的方式添加主机清单,采用明文密码的时候不用执行第4步操作。
*---------------------------------------------------------------------------------*
使用名文密码案例:
使用明文密码填写到ansible文件密码对任何人都可见,中存在较大的风险。
[root@ansible-el7 ~]#vim /etc/ansbile/hosts
[rhel]
rhel7_5 ansible_ssh_host=192.168.111.33 ansible_ssh_user='root' ansible_ssh_port=22 ansible_ssh_pass='yinwan'
rhel6_5 ansible_ssh_host=192.168.111.63 ansible_ssh_user='root' ansible_ssh_port=22 ansible_ssh_pass='yinwan'
[suse]
Suse11_Sp3 ansible_ssh_host=192.168.111.31 ansible_ssh_user='root' ansible_ssh_port=22 ansible_ssh_pass='yinwan'
[ubuntu]
Ubuntu16_4 ansible_ssh_host=192.168.111.30 ansible_ssh_user='root' ansible_ssh_port=22 ansible_ssh_pass='yinwan'
*---------------------------------------------------------------------------------*
*—————————————————————————————*
使用公钥案例:
使用公钥填写到ansible文件中,可以减少主机密码外泄的风险。
优点:防止密码泄露,客户端修改密码后不会影响访问。
缺点:风险很大,ansible服务端一旦成为肉鸡会影响所有被控客户端。
[root@ansible-el7 ~]#vim /etc/ansbile/hosts
[rhel]
rhel7_5 ansible_ssh_host=192.168.111.33 ansible_ssh_user='root' ansible_ssh_port=22 ansible_ssh_private_key_file=/root/.ssh/id_rsa.rsa
rhel6_5 ansible_ssh_host=192.168.111.63 ansible_ssh_user='root' ansible_ssh_port=22 ansible_ssh_private_key_file=/root/.ssh/id_rsa.rsa
[suse]
Suse11_Sp3 ansible_ssh_host=192.168.111.31 ansible_ssh_user='root' ansible_ssh_port=22 ansible_ssh_private_key_file=/root/.ssh/id_rsa.rsa
[ubuntu]
Ubuntu16_4 ansible_ssh_host=192.168.111.30 ansible_ssh_user='root' ansible_ssh_port=22 ansible_ssh_private_key_file=/root/.ssh/id_rsa.rsa
*—————————————————————————————*
6.测试
测试ansible配置是否正常。
在hosts配置文件中未设置rsa时,客户主机已经传过rsa文件的情况下可以使用。
[root@ansible-el7 ~]#ansible all --private-key=/root/.ssh/id_rsa.rsa -f 10 -t /ansible/ansible_log -m ping
指定rsa文件在/root/.ssh/id_rsa.rsa位置,线程为10,保存的日志文件在/ansible/ansible_log,使用ping模块。

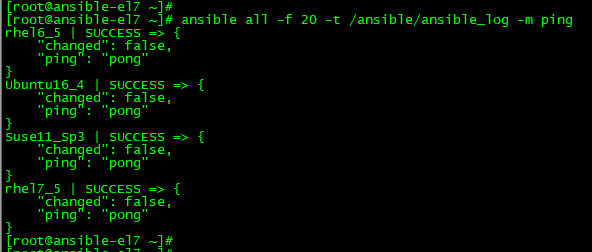
当在/etc/ssh/ssh_config中指定了rsa文件路径过后使用,则不需要指定--private-key=参数。
[root@ansible-el7 ~]#ansible all -f 20 -t /ansible/ansible_log -m ping