MQTT服务器搭建+MQTT.fx测试+Wireshark抓包
搭建MQTT服务器
| 需求项目 | 实际使用 | 其他替代品 |
|---|---|---|
| MQTT服务器软件 | mosquitto | / |
| 服务器 | Ubuntu系统 | 阿里云,腾讯云等 |
| 远程登录软件 | Windows MQTT.fx | 苹果MQTTool工具 |
| 抓包 | wireshark | / |
步骤
1、安装
sudo apt-get update                 #更新软件仓库列表
sudo apt-get install mosquitto      #安装mosquitto
2、试运行
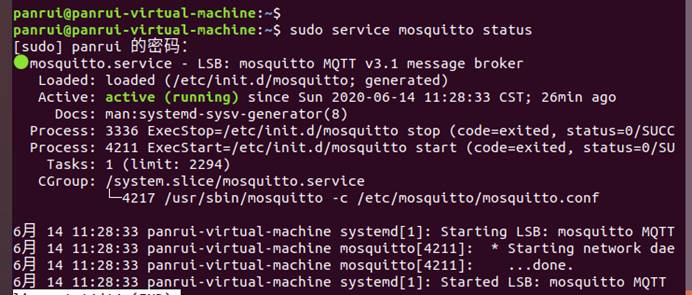
sudo service mosquitto status                           #查看运行状态
sudo service mosquitto start                                #启动服务
sudo service mosquitto stop                                 #停止服务
安装成功的状态
3、添加和修改配置
(1)首先停止服务:
sudo service mosquitto stop
(2)在/etc/mosquitto/conf.d目录下,新建myconfig.conf配置文件:
sudo touch myconfig.conf
(3)如果没有vim,可以用自带的vi,建议使用vim,有的可以忽略这一步
ubuntu下安装vim命令:sudo apt-get install vim-gtk
(4)vim myconfig.conf,粘入下面这些
#-------------------------------------------

# 关闭匿名访问,客户端必须使用用户名

allow_anonymous false

#指定 用户名-密码 文件
password_file /etc/mosquitto/pwfile.txt
#--------------------------------------------
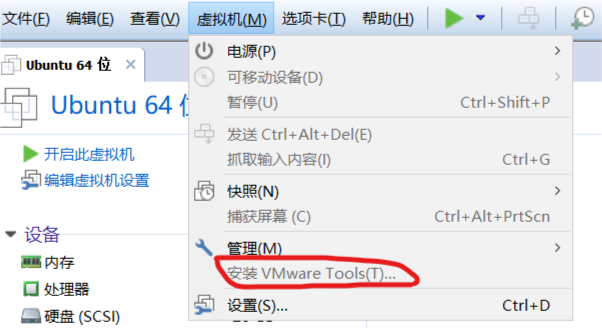
注意:如果提示只读文件,可以安装VNwareTools,将文件从windows复制到ubuntu,也可以修改文件读写权限,修改权限方式:chmod xxx
4、创建一个MQTT服务器账户
假设用户名为:user1
在命令行运行:
        sudo mosquitto_passwd -c /etc/mosquitto/pwfile.txt user1

回车后连续输入2次用户密码即可
5、重新启动mosquitto
sudo service mosquitto start #启动服务
测试mosquitto
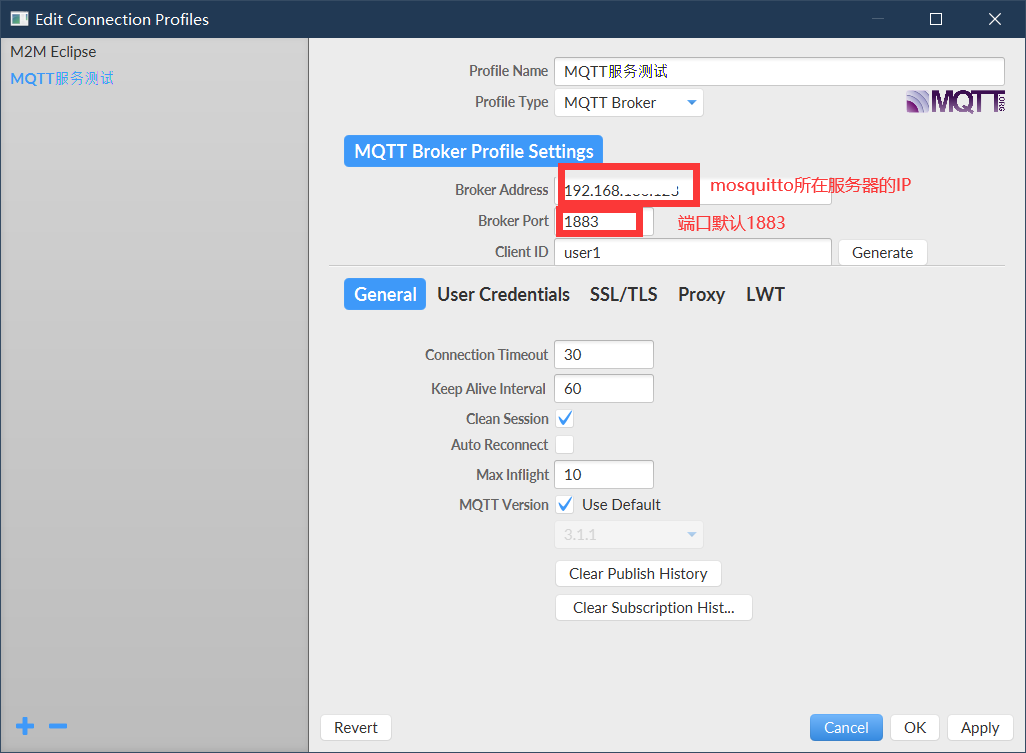
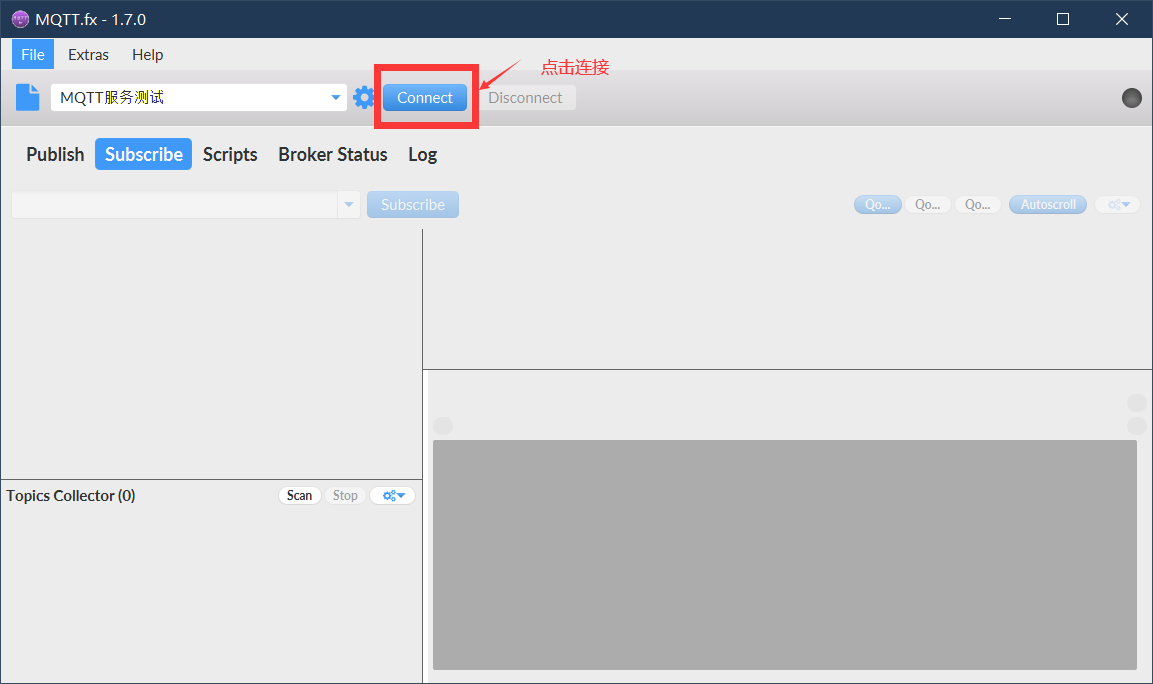
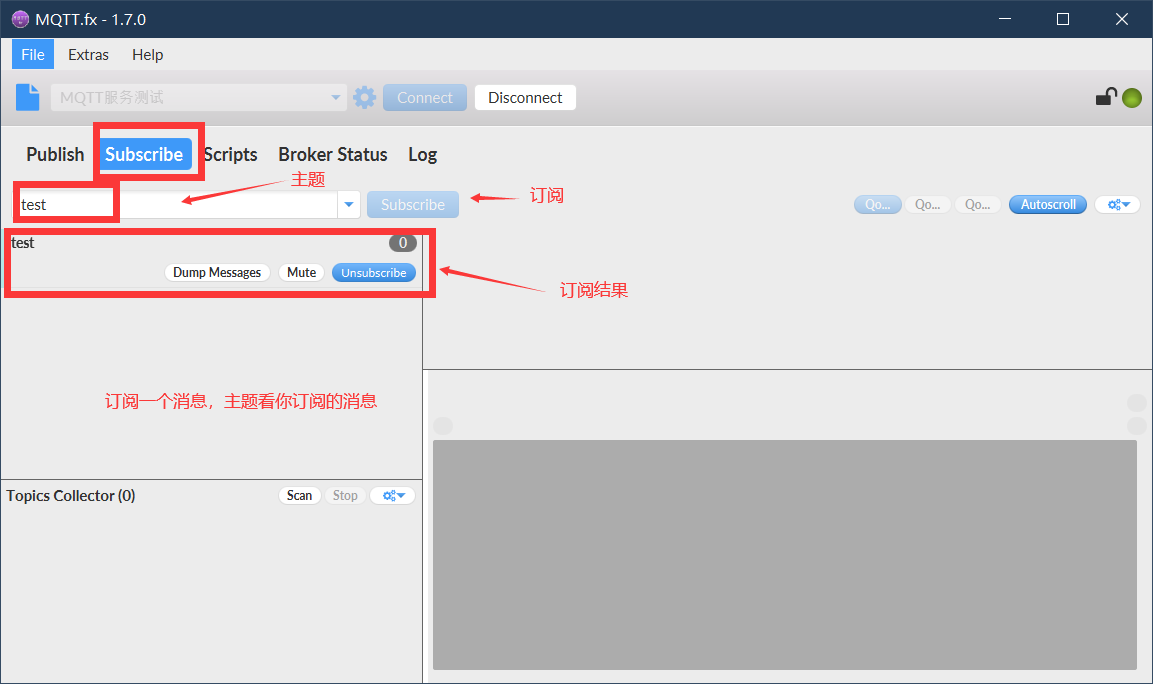
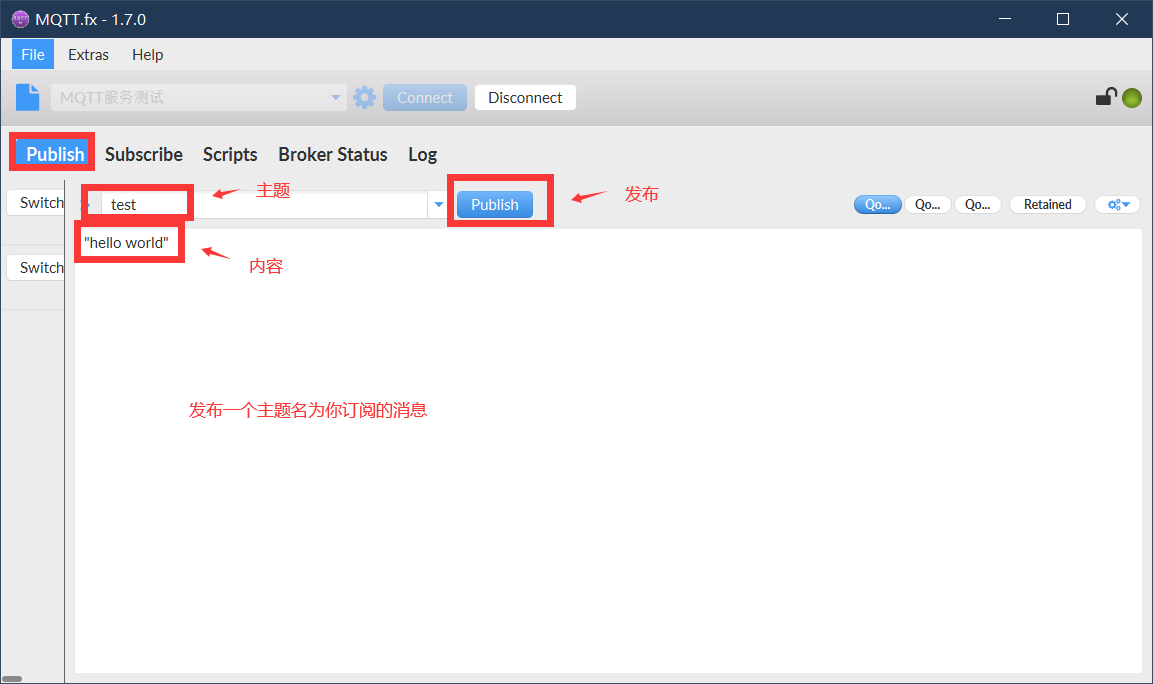
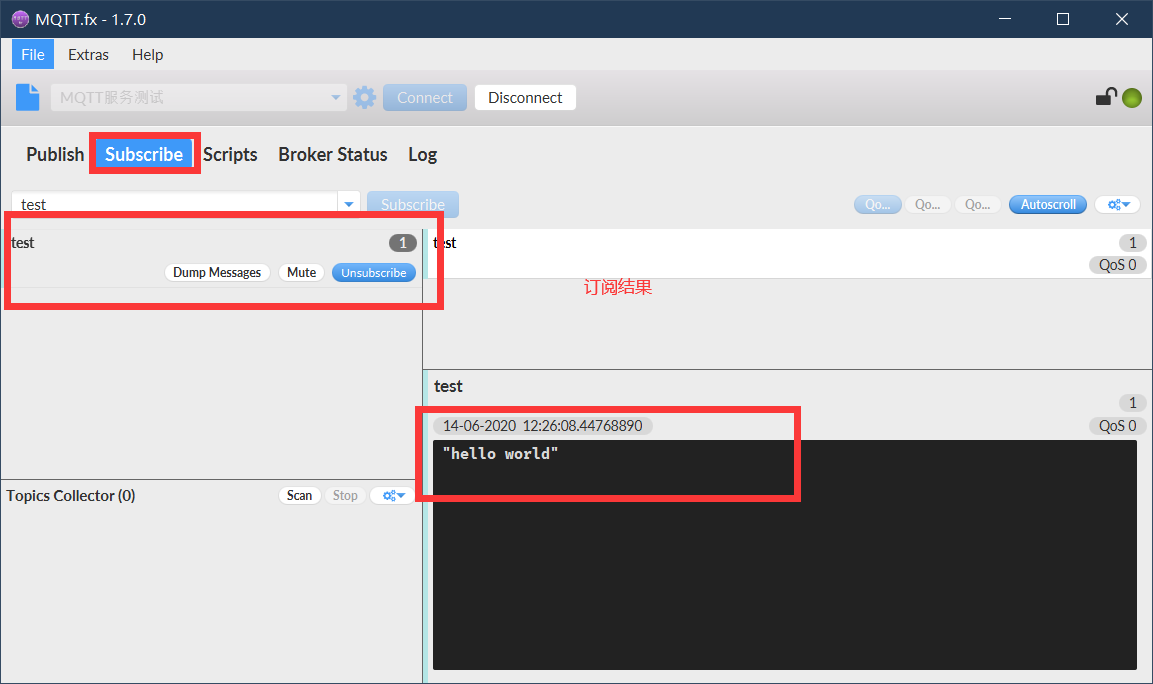
1、 下载MQTT.fx
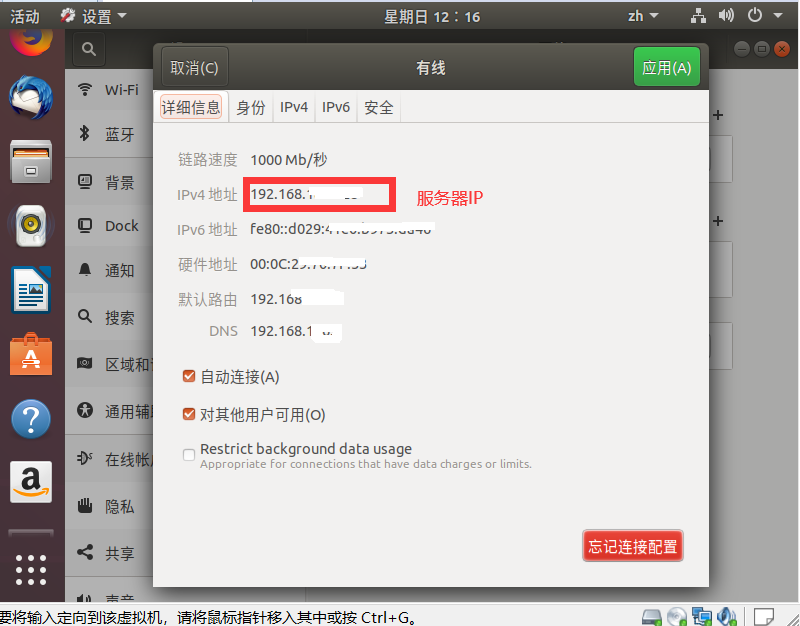
2、 配置MQTT.fx


你也可以使用 MQTT服务器搭建(二)通信及保存文件到MySql数据库 的代码测试,注意将host和username、password改成被你允许的
参考自:
https://baijiahao.baidu.com/s?id=1610057452592802735&wfr=spider&for=pc
https://www.cnblogs.com/lulipro/p/10914482.html