从接触springboot开始,便深深的被它的简洁性深深的折服了,精简的配置,方便的集成,使我再也不想用传统的ssm框架来搭建项目,一大堆的配置文件,维护起来很不方便,集成的时候也要费力不少。从第一次使用springboot开始,一个简单的main方法,甚至一个配置文件也不需要(当然我是指的没有任何数据交互,没有任何组件集成的情况),就可以把一个web项目启动起来,下面总结一下自从使用springboot依赖,慢慢完善的自己的一个web系统的架构,肯定不是最好的,但平时自己用着很舒服。
1. 配置信息放到数据库里边
个人比较不喜欢配置文件,因此有一个原则,配置文件能不用就不用,配置信息能少些就少些,配置内容能用代码写坚决不用xml,因此我第一个想到的就是,能不能把springboot的配置信息写到数据库里,在springboot启动的时候自动去加载,而在application.properties里边只写一个数据源。最终找到了方法:

注意图中箭头指向的两行,构造了一个properties对象,然后将这个对象放到了springboot的启动对象application中,properties是一个类似map的key-value容器,springboot可以将其中的东西当做成原来application.properties中的内容一样,因此在properties对象的内容也就相当于写在了application.properties文件中。知道了这个之后就简单了,我们将原本需要写在application.properties中的所有配置信息写在数据库中,在springboot启动的时候从数据库中读取出来放到properties对象中,然后再将这个对象set到application中即可。上图中PropertyConfig.loadProperties()方法就是进行了这样的操作,代码如下:


 1 public class PropertyConfig {
 2
 3     /**
 4      * 生成Properties对象
 5      */
 6     public static Properties loadProperties() {
 7         Properties properties = new Properties();
 8         loadPropertiesFromDb(properties);
 9         return properties;
10     }
11
12     /**
13      * 从数据库中加载配置信息
14      */
15     private static void loadPropertiesFromDb(Properties properties) {
16         InputStream in = PropertyConfig.class.getClassLoader().getResourceAsStream("application.properties");
17         try {
18             properties.load(in);
19         } catch (Exception e) {
20             e.printStackTrace();
21         }
22         String profile = properties.getProperty("profile");
23         String driverClassName = properties.getProperty("spring.datasource.driver-class-name");
24         String url = properties.getProperty("spring.datasource.url");
25         String userName = properties.getProperty("spring.datasource.username");
26         String password = properties.getProperty("spring.datasource.password");
27
28         Connection conn = null;
29         PreparedStatement pstmt = null;
30         ResultSet rs = null;
31         try {
32             Class.forName(driverClassName);
33             String tableName = "t_config_dev";
34             if ("pro".equals(profile)) {
35                 tableName = "t_config_pro";
36             }
37             String sql = "select * from " + tableName;
38             conn = DriverManager.getConnection(url, userName, password);
39             pstmt = conn.prepareStatement(sql);
40             rs = pstmt.executeQuery();
41             while (rs.next()) {
42                 String key = rs.getString("key");
43                 String value = rs.getString("value");
44                 properties.put(key, value);
45             }
46         } catch (Exception e) {
47             e.printStackTrace();
48         } finally {
49             try {
50                 if (conn != null) {
51                     conn.close();
52                 }
53                 if (pstmt != null) {
54                     pstmt.close();
55                 }
56                 if (rs != null) {
57                     rs.close();
58                 }
59             } catch (Exception e) {
60                 e.printStackTrace();
61             }
62         }
63     }
64
65 }
代码中,首先使用古老的jdbc技术,读取数据库t_config表,将表中的key-value加载到properties中,代码中profile是为了区分开发环境和生产环境,以便于确定从那张表中加载配置文件,数据库中的配置信息如下:
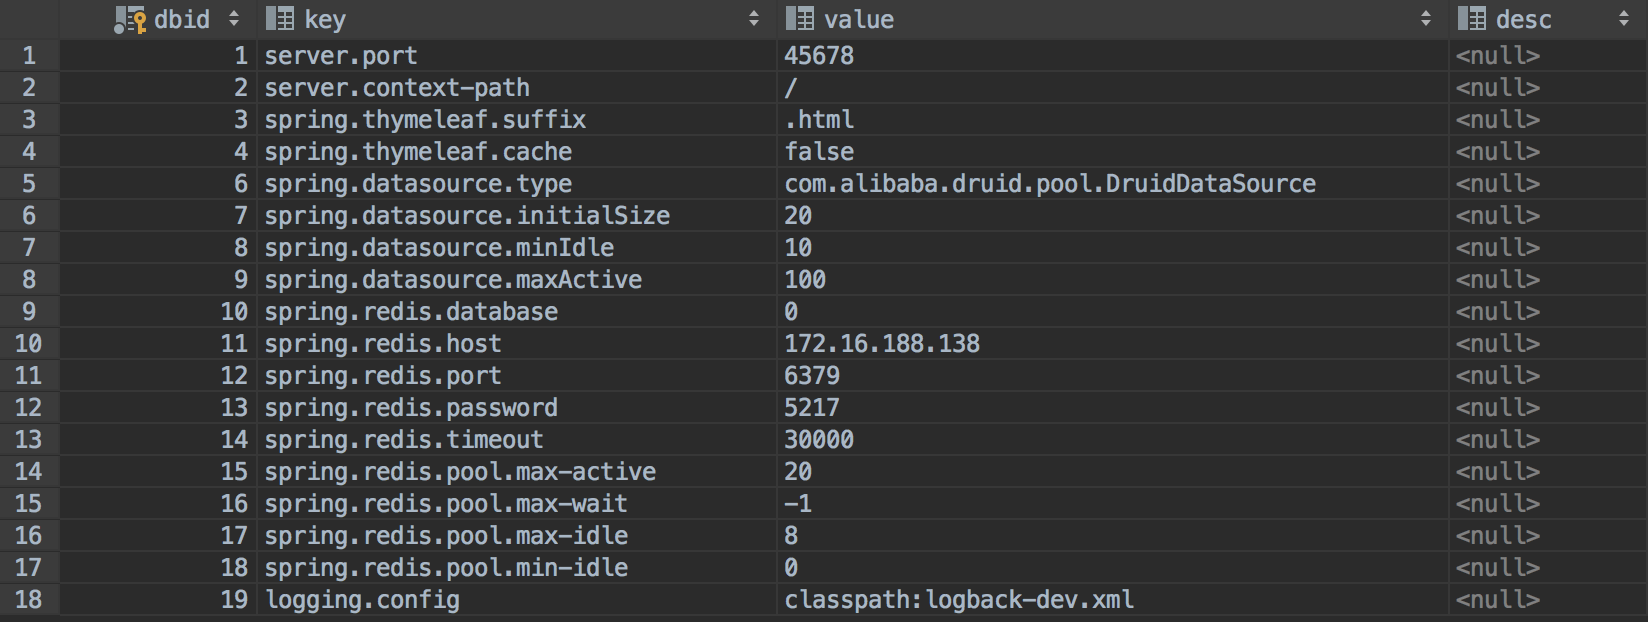
这样以后,application.properties中就不用再写很多的配置信息,而且,如果将这些配置信息放到数据库中之后,如果起多个应用可是公用这一张表,这样也可以做到配置信息的公用的效果,这样修改以后,配置文件中就只有数据源的信息了:

profile代表使用哪个环境,代码中可以根据这个信息来从开发表中加载配置信息还是从生产表中加载配置信息。
2. 统一返回结果
一般web项目中,大多数都是接口,以返回json数据为主,因此统一一个返回格式很必要。在本示例中,建了一个BaseController,所有的Controller都需要继承这个类,在这个BaseController中定义了成功的返回和失败的返回,在其他业务的Controller中,返回的时候,只需要return super.success(xxx)或者return super.fail(xxx, xxx)即可,例:

说到这里,返回给前台的状态码,建议也是封装成一个枚举类型,不建议直接返回200、400之类的,不方便维护也不方便查询。那么BaseController里做了什么呢?如下:
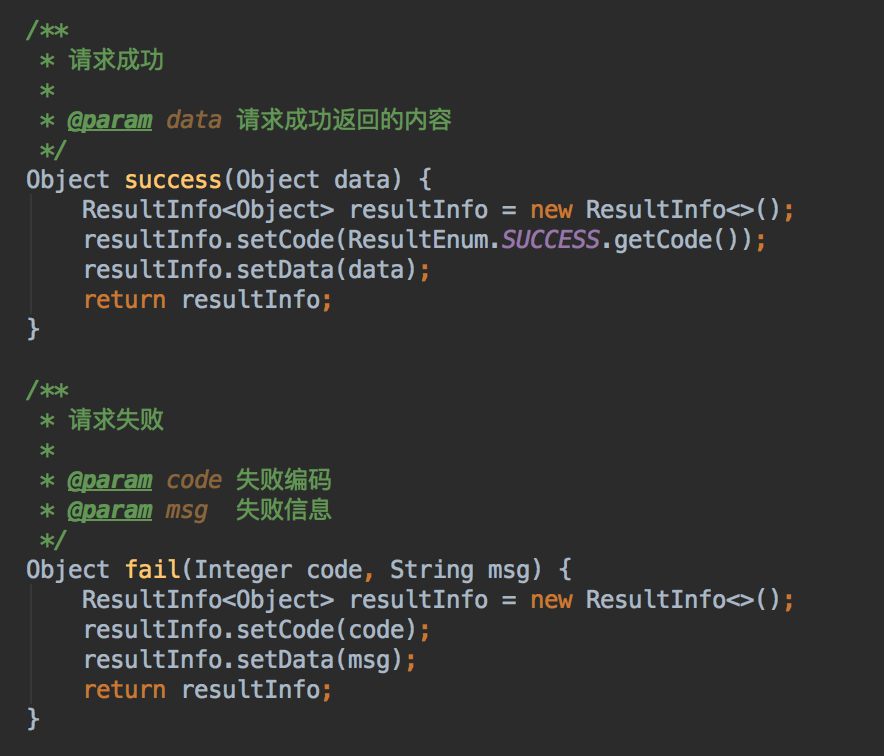
定义一个ResultInfo类,该类只有两个属性,一个是Integer类型的状态码,一个是泛型,用于成功时返回给前台的数据,和失败时返回给前台的提示信息。
3. 统一异常捕获
在上一步中的Controller代码中看到抛出了一个自定义的异常,在Controller中,属于最外层的代码了,这个时候如果有异常就不能直接抛出去了,这里再抛出去就没有人处理了,服务器只能返回给前台一个错误,用户体验不好。因此,建议所有的Controller代码都用try-catch包裹,捕获到异常后统一进行处理,然后再给前台一个合理的提示信息。在上一步中抛出了一个自定义异常:
throw new MyException(ResultEnum.DELETE_ERROR.getCode(), "删除员工出错,请联系网站管理人员。", e);
该自定义异常有三个属性,分别是异常状态码,异常提示信息,以及捕获到的异常对象,接下来定义一个全局的异常捕获,统一对异常进行处理:
 1 @Slf4j
 2 @ResponseBody
 3 @ControllerAdvice
 4 public class GlobalExceptionHandle {
 5
 6     /**
 7      * 处理捕获的异常
 8      */
 9     @ExceptionHandler(value = Exception.class)
10     public Object handleException(Exception e, HttpServletRequest request, HttpServletResponse resp) throws IOException {
11         log.error(AppConst.ERROR_LOG_PREFIX + "请求地址:" + request.getRequestURL().toString());
12         log.error(AppConst.ERROR_LOG_PREFIX + "请求方法:" + request.getMethod());
13         log.error(AppConst.ERROR_LOG_PREFIX + "请求者IP:" + request.getRemoteAddr());
14         log.error(AppConst.ERROR_LOG_PREFIX + "请求参数:" + ParametersUtils.getParameters(request));
15         if (e instanceof MyException) {
16             MyException myException = (MyException) e;
17             log.error(AppConst.ERROR_LOG_PREFIX + myException.getMsg(), myException.getE());
18             if (myException.getCode().equals(ResultEnum.SEARCH_PAGE_ERROR.getCode())) {
19                 JSONObject result = new JSONObject();
20                 result.put("code", myException.getCode());
21                 result.put("msg", myException.getMsg());
22                 return result;
23             } else if (myException.getCode().equals(ResultEnum.ERROR_PAGE.getCode())) {
24                 resp.sendRedirect("/err");
25                 return "";
26             } else {
27                 return new ResultInfo<>(myException.getCode(), myException.getMsg());
28             }
29         } else if (e instanceof UnauthorizedException) {
30             resp.sendRedirect("/noauth");
31             return "";
32         } else {
33             log.error(AppConst.ERROR_LOG_PREFIX + "错误信息:", e);
34         }
35         resp.sendRedirect("/err");
36         return "";
37     }
38
39 }
统一捕获异常之后,可以进行相应的处理,我这里没有进行特殊的处理,只是进行了一下区分,获取数据的接口抛出的异常,前台肯定是使用的ajax请求,因此返回前台一个json格式的信息,提示出错误内容。如果是跳转页面抛出的异常,类似404之类的,直接跳转到自定义的404页面。补充一点,springboot项目默认是有/error路由的,返回的就是error页面,所以,如果你在你的项目中定义一个error.html的页面,如果报404错误,会自动跳转到该页面。
补充,统一异常处理类中使用了一个注解@Slf4j,该注解是lombok包中的,项目中加入了该依赖后,再也不用写繁琐的get、set等代码,当然类似的像上边的声明log对象的代码也不用写了:

4. 日志配置文件区分环境
本示例使用的是logback日志框架。需要在resources目录中添加logback.xml配置文件,这是一个比较头疼的地方,我本来想一个配置文件也没有的,奈何我也不知道怎么将这个日志的配置文件放到数据库中,所以暂时先这么着了,好在几乎没有需要改动它的时候。
我在项目中添加了两个日志的配置文件,分别是logback-dev.xml和logback-pro.xml可以根据不同的环境决定使用哪个配置文件,在数据库配置表中(相当于写在了application.properties中)添加一条配置logging.config=classpath:logback-dev.xml来区分使用哪个文件作为日志的配置文件,配置文件内容如下:
 1 <?xml version="1.0" encoding="UTF-8"?>
 2 <configuration>
 3
 4     <property name="LOG_HOME" value="/Users/oven/log/demo"/>
 5     <!-- INFO日志定义 -->
 6     <appender name="INFO" class="ch.qos.logback.core.rolling.RollingFileAppender">
 7         <File>${LOG_HOME}/demo.info.log</File>
 8         <rollingPolicy class="ch.qos.logback.core.rolling.TimeBasedRollingPolicy">
 9             <FileNamePattern>${LOG_HOME}/demo.info.%d{yyyy-MM-dd}.log</FileNamePattern>
10             <maxHistory>180</maxHistory>
11         </rollingPolicy>
12         <encoder>
13             <Pattern>%d{yyyy-MM-dd HH:mm:ss.SSS} [%thread] %-5level %logger - %msg%n</Pattern>
14             <charset>UTF-8</charset>
15         </encoder>
16     </appender>
17
18     <!-- ERROR日志定义 -->
19     <appender name="ERROR" class="ch.qos.logback.core.rolling.RollingFileAppender">
20         <File>${LOG_HOME}/demo.error.log</File>
21         <rollingPolicy class="ch.qos.logback.core.rolling.TimeBasedRollingPolicy">
22             <FileNamePattern>${LOG_HOME}/demo.error.%d{yyyy-MM-dd}.log</FileNamePattern>
23             <maxHistory>180</maxHistory>
24         </rollingPolicy>
25         <encoder>
26             <Pattern>%d{yyyy-MM-dd HH:mm:ss.SSS} [%thread] %-5level %logger - %msg%n</Pattern>
27             <charset>UTF-8</charset>
28         </encoder>
29     </appender>
30
31     <!-- DEBUG日志定义 -->
32     <appender name="DEBUG" class="ch.qos.logback.core.rolling.RollingFileAppender">
33         <File>${LOG_HOME}/demo.debug.log</File>
34         <rollingPolicy class="ch.qos.logback.core.rolling.TimeBasedRollingPolicy">
35             <FileNamePattern>${LOG_HOME}/demo.debug.%d{yyyy-MM-dd}.log</FileNamePattern>
36             <maxHistory>180</maxHistory>
37         </rollingPolicy>
38         <encoder>
39             <Pattern>%d{yyyy-MM-dd HH:mm:ss.SSS} [%thread] %-5level %logger - %msg%n</Pattern>
40             <charset>UTF-8</charset>
41         </encoder>
42     </appender>
43
44     <!-- 定义控制台日志信息 -->
45     <appender name="STDOUT" class="ch.qos.logback.core.ConsoleAppender">
46         <encoder>
47             <pattern>%d{yyyy-MM-dd HH:mm:ss.SSS} [%thread] %-5level %logger - %msg%n</pattern>
48         </encoder>
49     </appender>
50
51     <root level="INFO">
52         <appender-ref ref="STDOUT"/>
53     </root>
54     <logger name="com.oven.controller" level="ERROR">
55         <appender-ref ref="ERROR"/>
56     </logger>
57     <logger name="com.oven.exception" level="ERROR">
58         <appender-ref ref="ERROR"/>
59     </logger>
60     <logger name="com.oven.mapper" level="DEBUG">
61         <appender-ref ref="DEBUG"/>
62     </logger>
63     <logger name="com.oven.aop" level="INFO">
64         <appender-ref ref="INFO"/>
65     </logger>
66
67 </configuration>
在配置文件中,定义了三个级别的日志,info、debug和error分别输出到三个文件中,便于查看。在生成日志文件的时候,进行了按照日志进行拆分的配置,每一个级别的日志每一天都会重新生成一个,根据日期进行命名,超过180天的日志将自动会删除。当然你还可以按照日志大小进行拆分,我这里没有进行这项的配置。
5. 全局接口请求记录
进行全局的接口请求记录,可以记录接口的别调用情况,然后进行一些统计和分析,在本示例中,只是将全局的接口调用情况记录到了info日志中,没有进行相应的分析操作:
 1 @Slf4j
 2 @Aspect
 3 @Component
 4 public class WebLogAspect {
 5
 6     @Pointcut("execution(public * com.oven.controller.*.*(..))")
 7     public void webLog() {
 8     }
 9
10     @Before("webLog()")
11     public void doBefore() {
12         // 获取请求
13         ServletRequestAttributes attributes = (ServletRequestAttributes) RequestContextHolder.getRequestAttributes();
14         @SuppressWarnings("ConstantConditions") HttpServletRequest request = attributes.getRequest();
15         // 记录请求内容
16         log.info(AppConst.INFO_LOG_PREFIX + "请求地址:" + request.getRequestURL().toString());
17         log.info(AppConst.INFO_LOG_PREFIX + "请求方法:" + request.getMethod());
18         log.info(AppConst.INFO_LOG_PREFIX + "请求者IP:" + request.getRemoteAddr());
19         log.info(AppConst.INFO_LOG_PREFIX + "请求参数:" + ParametersUtils.getParameters(request));
20     }
21
22     @AfterReturning(returning = "ret", pointcut = "webLog()")
23     public void doAfterReturning(Object ret) {
24         // 请求返回的内容
25         if (ret instanceof ResultInfo) {
26             log.info(AppConst.INFO_LOG_PREFIX + "返回结果:" + ((ResultInfo) ret).getCode().toString());
27         }
28     }
29
30 }
6. 集成shiro实现权限校验
集成shirl,轻松的实现了权限的管理,如果对shiro不熟悉朋友,还需要先把shiro入门一下才好,shiro的集成一般都需要自定义一个realm,来进行身份认证和授权,因此先来一个自定义realm:
 1 public class MyShiroRealm extends AuthorizingRealm {
 2
 3     @Resource
 4     private MenuService menuService;
 5     @Resource
 6     private UserService userService;
 7
 8     /**
 9      * 授权
10      */
11     @Override
12     protected AuthorizationInfo doGetAuthorizationInfo(PrincipalCollection principals) {
13         SimpleAuthorizationInfo authorizationInfo = new SimpleAuthorizationInfo();
14         User user = (User) principals.getPrimaryPrincipal();
15         List<String> permissions = menuService.getAllMenuCodeByUserId(user.getId());
16         authorizationInfo.addStringPermissions(permissions);
17         return authorizationInfo;
18     }
19
20     /**
21      * 身份认证
22      */
23     @Override
24     protected AuthenticationInfo doGetAuthenticationInfo(AuthenticationToken authenticationToken) throws AuthenticationException {
25         UsernamePasswordToken token = (UsernamePasswordToken) authenticationToken;
26         String userName = String.valueOf(token.getUsername());
27         // 从数据库获取对应用户名的用户
28         User user = userService.getByUserName(userName);
29         // 账号不存在
30         if (user == null) {
31             throw new UnknownAccountException(ResultEnum.NO_THIS_USER.getValue());
32         }
33
34         Md5Hash md5 = new Md5Hash(token.getPassword(), AppConst.MD5_SALT, 2);
35         // 密码错误
36         if (!md5.toString().equals(user.getPassword())) {
37             throw new IncorrectCredentialsException(ResultEnum.PASSWORD_WRONG.getValue());
38         }
39
40         // 账号锁定
41         if (user.getStatus().equals(1)) {
42             throw new LockedAccountException(ResultEnum.USER_DISABLE.getValue());
43         }
44         ByteSource salt = ByteSource.Util.bytes(AppConst.MD5_SALT);
45         return new SimpleAuthenticationInfo(user, user.getPassword(), salt, getName());
46     }
47
48 }
自定义完realm后需要一个配置文件但自定义的realm配置到shiro里:
 1 @Configuration
 2 public class ShiroConfig {
 3
 4     @Bean
 5     public ShiroFilterFactoryBean shirFilter(SecurityManager securityManager) {
 6         ShiroFilterFactoryBean shiroFilterFactoryBean = new ShiroFilterFactoryBean();
 7         shiroFilterFactoryBean.setSecurityManager(securityManager);
 8         Map<String, String> filterChainDefinitionMap = new LinkedHashMap<>();
 9         filterChainDefinitionMap.put("/static/**", "anon");
10         filterChainDefinitionMap.put("/css/**", "anon");
11         filterChainDefinitionMap.put("/font/**", "anon");
12         filterChainDefinitionMap.put("/js/**", "anon");
13         filterChainDefinitionMap.put("/*.js", "anon");
14         filterChainDefinitionMap.put("/login", "anon");
15         filterChainDefinitionMap.put("/doLogin", "anon");
16         filterChainDefinitionMap.put("/**", "authc");
17         shiroFilterFactoryBean.setLoginUrl("/login");
18         shiroFilterFactoryBean.setSuccessUrl("/");
19         shiroFilterFactoryBean.setUnauthorizedUrl("/noauth");
20         shiroFilterFactoryBean.setFilterChainDefinitionMap(filterChainDefinitionMap);
21         return shiroFilterFactoryBean;
22     }
23
24     /**
25      * 凭证匹配器
26      */
27     @Bean
28     public HashedCredentialsMatcher hashedCredentialsMatcher() {
29         HashedCredentialsMatcher hashedCredentialsMatcher = new HashedCredentialsMatcher();
30         hashedCredentialsMatcher.setHashAlgorithmName("MD5");
31         hashedCredentialsMatcher.setHashIterations(2);
32         return hashedCredentialsMatcher;
33     }
34
35     @Bean
36     public MyShiroRealm myShiroRealm() {
37         MyShiroRealm myShiroRealm = new MyShiroRealm();
38         myShiroRealm.setCredentialsMatcher(hashedCredentialsMatcher());
39         return myShiroRealm;
40     }
41
42
43     @Bean
44     public SecurityManager securityManager() {
45         DefaultWebSecurityManager securityManager = new DefaultWebSecurityManager();
46         securityManager.setRealm(myShiroRealm());
47         return securityManager;
48     }
49
50     /**
51      * 开启shiro aop注解
52      */
53     @Bean
54     public AuthorizationAttributeSourceAdvisor authorizationAttributeSourceAdvisor(SecurityManager securityManager) {
55         AuthorizationAttributeSourceAdvisor authorizationAttributeSourceAdvisor = new AuthorizationAttributeSourceAdvisor();
56         authorizationAttributeSourceAdvisor.setSecurityManager(securityManager);
57         return authorizationAttributeSourceAdvisor;
58     }
59
60     @Bean(name = "simpleMappingExceptionResolver")
61     public SimpleMappingExceptionResolver
62     createSimpleMappingExceptionResolver() {
63         SimpleMappingExceptionResolver r = new SimpleMappingExceptionResolver();
64         Properties mappings = new Properties();
65         mappings.setProperty("DatabaseException", "databaseError");
66         mappings.setProperty("UnauthorizedException", "403");
67         r.setExceptionMappings(mappings);
68         r.setDefaultErrorView("error");
69         r.setExceptionAttribute("ex");
70         return r;
71     }
72
73 }
身份认证如果简单的理解的话,你可以理解为登录的过程。授权就是授予你权利,代表你在这个系统中有权限做什么动作,具体shiro的内容小伙伴们自行去学习吧。
7. 登录校验,安全拦截
在集成了shiro之后,登录操作就需要使用到自定义的realm了,具体的登录代码如下:
 1 /**
 2      * 登录操作
 3      *
 4      * @param userName 用户名
 5      * @param pwd      密码
 6      */
 7     @RequestMapping("/doLogin")
 8     @ResponseBody
 9     public Object doLogin(String userName, String pwd, HttpServletRequest req) throws MyException {
10         try {
11             Subject subject = SecurityUtils.getSubject();
12             UsernamePasswordToken token = new UsernamePasswordToken(userName, pwd);
13             subject.login(token);
14
15             User userInDb = userService.getByUserName(userName);
16             // 登录成功后放入application,防止同一个账户多人登录
17             ServletContext application = req.getServletContext();
18             @SuppressWarnings("unchecked")
19             Map<String, String> loginedMap = (Map<String, String>) application.getAttribute(AppConst.LOGINEDUSERS);
20             if (loginedMap == null) {
21                 loginedMap = new HashMap<>();
22                 application.setAttribute(AppConst.LOGINEDUSERS, loginedMap);
23             }
24             loginedMap.put(userInDb.getUserName(), req.getSession().getId());
25
26             // 登录成功后放入session中
27             req.getSession().setAttribute(AppConst.CURRENT_USER, userInDb);
28             logService.addLog("登录系统!", "成功!", userInDb.getId(), userInDb.getNickName(), IPUtils.getClientIPAddr(req));
29             return super.success("登录成功!");
30         } catch (Exception e) {
31             User userInDb = userService.getByUserName(userName);
32             if (e instanceof UnknownAccountException) {
33                 logService.addLog("登录系统!", "失败[" + ResultEnum.NO_THIS_USER.getValue() + "]", 0, "", IPUtils.getClientIPAddr(req));
34                 return super.fail(ResultEnum.NO_THIS_USER.getCode(), ResultEnum.NO_THIS_USER.getValue());
35             } else if (e instanceof IncorrectCredentialsException) {
36                 logService.addLog("登录系统!", "失败[" + ResultEnum.PASSWORD_WRONG.getValue() + "]", userInDb.getId(), userInDb.getNickName(), IPUtils.getClientIPAddr(req));
37                 return super.fail(ResultEnum.PASSWORD_WRONG.getCode(), ResultEnum.PASSWORD_WRONG.getValue());
38             } else if (e instanceof LockedAccountException) {
39                 logService.addLog("登录系统!", "失败[" + ResultEnum.USER_DISABLE.getValue() + "]", userInDb.getId(), userInDb.getNickName(), IPUtils.getClientIPAddr(req));
40                 return super.fail(ResultEnum.USER_DISABLE.getCode(), ResultEnum.USER_DISABLE.getValue());
41             } else {
42                 throw new MyException(ResultEnum.UNKNOW_ERROR.getCode(), "登录操作出错,请联系网站管理人员。", e);
43             }
44         }
45     }
身份认证的操作交给了shiro,利用用户名和密码构造一个身份的令牌,调用shiro的login方法,这个时候就会进入自定义reaml的身份认证方法中,也就是上一步中的doGetAuthenticationInfo方法,具体的认证操作看上一步的代码,无非就是账号密码的校验等。身份认证的时候,通过抛出异常的方式给登录操作返回信息,从而在登录方法中判断身份认证失败后的信息,从而返回给前台进行提示。
在身份认证通过后,拿到当前登录用户的信息,首先放到session中,便于后续的使用。其次在放到application对象中,防止同一个账号的多次登录。
有了身份任何和授权自然就少不了安全校验,在本示例中使用了一个拦截器来实现安全校验的工作:
 1 @Component
 2 public class SecurityInterceptor extends HandlerInterceptorAdapter {
 3
 4     @Override
 5     public boolean preHandle(HttpServletRequest req, HttpServletResponse resp, Object handler) throws Exception {
 6         resp.setContentType("text/plain;charset=UTF-8");
 7         String servletPath = req.getServletPath();
 8         // 放行的请求
 9         if (servletPath.startsWith("/login") || servletPath.startsWith("/doLogin") || servletPath.equals("/err")) {
10             return true;
11         }
12         if (servletPath.startsWith("/error")) {
13             resp.sendRedirect("/err");
14             return true;
15         }
16
17         // 获取当前登录用户
18         User user = (User) req.getSession().getAttribute(AppConst.CURRENT_USER);
19
20         // 没有登录状态下访问系统主页面,都跳转到登录页,不提示任何信息
21         if (servletPath.startsWith("/")) {
22             if (user == null) {
23                 resp.sendRedirect(getDomain(req) + "/login");
24                 return false;
25             }
26         }
27
28         // 未登录或会话超时
29         if (user == null) {
30             String requestType = req.getHeader("X-Requested-With");
31             if ("XMLHttpRequest".equals(requestType)) { // ajax请求
32                 ResultInfo<Object> resultInfo = new ResultInfo<>();
33                 resultInfo.setCode(ResultEnum.SESSION_TIMEOUT.getCode());
34                 resultInfo.setData(ResultEnum.SESSION_TIMEOUT.getValue());
35                 resp.getWriter().write(JSONObject.toJSONString(resultInfo));
36                 return false;
37             }
38             String param = URLEncoder.encode(ResultEnum.SESSION_TIMEOUT.getValue(), "UTF-8");
39             resp.sendRedirect(getDomain(req) + "/login?errorMsg=" + param);
40             return false;
41         }
42
43         // 检查是否被其他人挤出去
44         ServletContext application = req.getServletContext();
45         @SuppressWarnings("unchecked")
46         Map<String, String> loginedMap = (Map<String, String>) application.getAttribute(AppConst.LOGINEDUSERS);
47         if (loginedMap == null) { // 可能是掉线了
48             String requestType = req.getHeader("X-Requested-With");
49             if ("XMLHttpRequest".equals(requestType)) { // ajax请求
50                 ResultInfo<Object> resultInfo = new ResultInfo<>();
51                 resultInfo.setCode(ResultEnum.LOSE_LOGIN.getCode());
52                 resultInfo.setData(ResultEnum.LOSE_LOGIN.getValue());
53                 resp.getWriter().write(JSONObject.toJSONString(resultInfo));
54                 return false;
55             }
56             String param = URLEncoder.encode(ResultEnum.LOSE_LOGIN.getValue(), "UTF-8");
57             resp.sendRedirect(getDomain(req) + "/login?errorMsg=" + param);
58             return false;
59         }
60         String loginedUserSessionId = loginedMap.get(user.getUserName());
61         String mySessionId = req.getSession().getId();
62
63         if (!mySessionId.equals(loginedUserSessionId)) {
64             String requestType = req.getHeader("X-Requested-With");
65             if ("XMLHttpRequest".equals(requestType)) { // ajax请求
66                 ResultInfo<Object> resultInfo = new ResultInfo<>();
67                 resultInfo.setCode(ResultEnum.OTHER_LOGINED.getCode());
68                 resultInfo.setData(ResultEnum.OTHER_LOGINED.getValue());
69                 resp.getWriter().write(JSONObject.toJSONString(resultInfo));
70                 return false;
71             }
72             String param = URLEncoder.encode(ResultEnum.OTHER_LOGINED.getValue(), "UTF-8");
73             resp.sendRedirect(getDomain(req) + "/login?errorMsg=" + param);
74             return false;
75         }
76         return true;
77     }
78
79     /**
80      * 获得域名
81      */
82     private String getDomain(HttpServletRequest request) {
83         String path = request.getContextPath();
84         return request.getScheme() + "://" + request.getServerName() + ":" + request.getServerPort() + path;
85     }
86
87 }
在拦截器中,首先对一些不需要校验的请求进行放行,例如登录动作、登录页面请求以及错误页面等。然后获取当前登录的用户,如果没有登录则自动跳转到登录页面。在返回前台的时候,判断请求属于同步请求还是异步请求,如果是同步请求,直接进行页面的跳转,跳转到登录页面。如果是异步请求,则返回前台一个json数据,提示前台登录信息失效。这里补充一点,前台可以使用ajaxhook进行异步请求的捕获,相当于一个前端的全局拦截器,拦截所有的异步请求,可以监视所有异步请求的返回结果,如果返回的是登录失效,则进行跳转到登录页面的操作。具体ajaxhook的使用方法请自行学习,本示例中暂时没有使用。
下面是判断同一个账号有没有多次登录,具体方法就是使用当前的sessionId,将当前登录用户和请求sissionId作为一个key-value放到了application中,如果该用户的sessionId发生了变化,说明又有一个人登录了该账号,然后就进行相应的提示操作。
8. 配置虚拟路径
web项目中免不了并上传的操作,图片或者文件,如果上传的是图片,一般还要进行回显的操作,我们不想将上传的文件直接存放在项目的目录中,而是放在一个自定义的目录,同时项目还可以访问:

这样在进行上传操作的时候,就可以将上传的文件放到项目以外的目录中,然后外部访问的时候,通过虚拟路径进行映射访问。
9. 集成redis缓存
springboot的强悍就是集成一个东西太方便了,如果你不想做任何配置,只需要加入redis的依赖,然后在配置文件(本示例中配置是在数据库中)中添加redis的链接信息,就可以在项目中使用redis了。
本示例中使用redis做缓存,首先写了一个缓存的类,代码有些长不做展示。然后在service层进行缓存的操作:
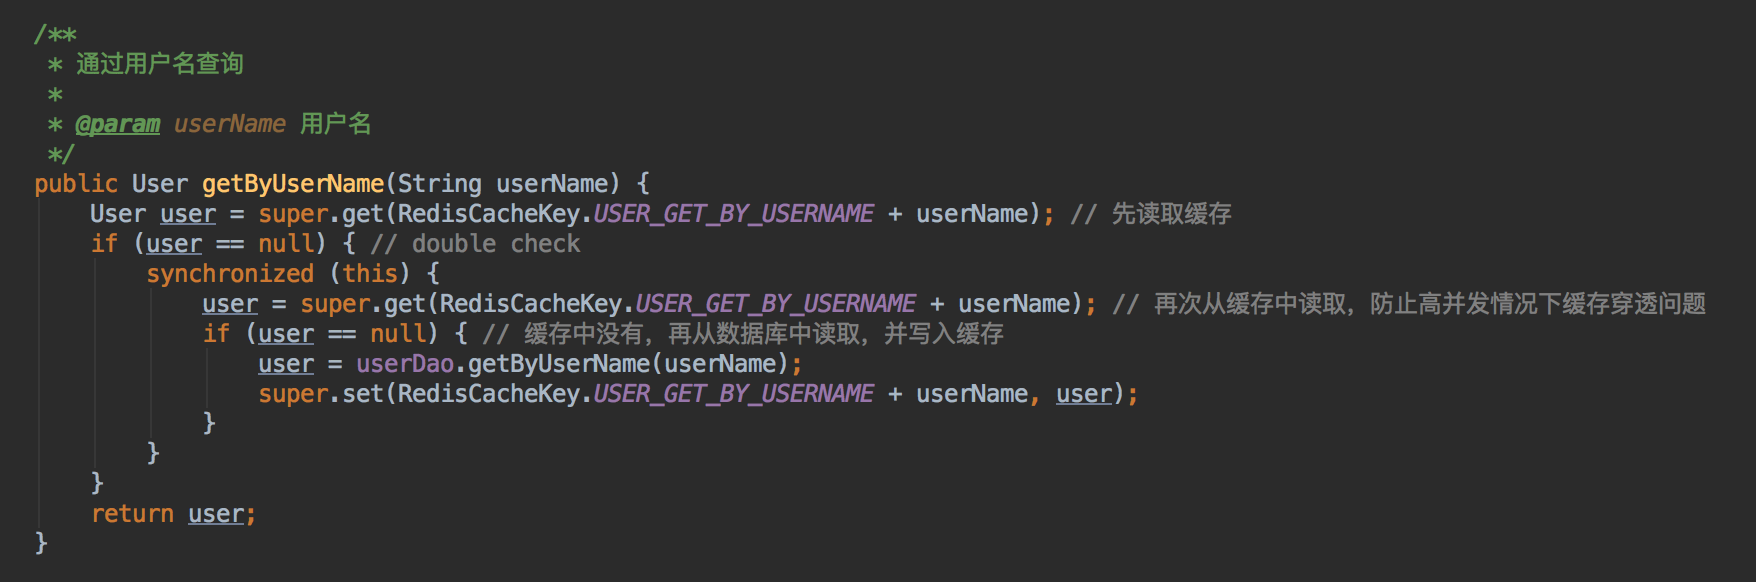
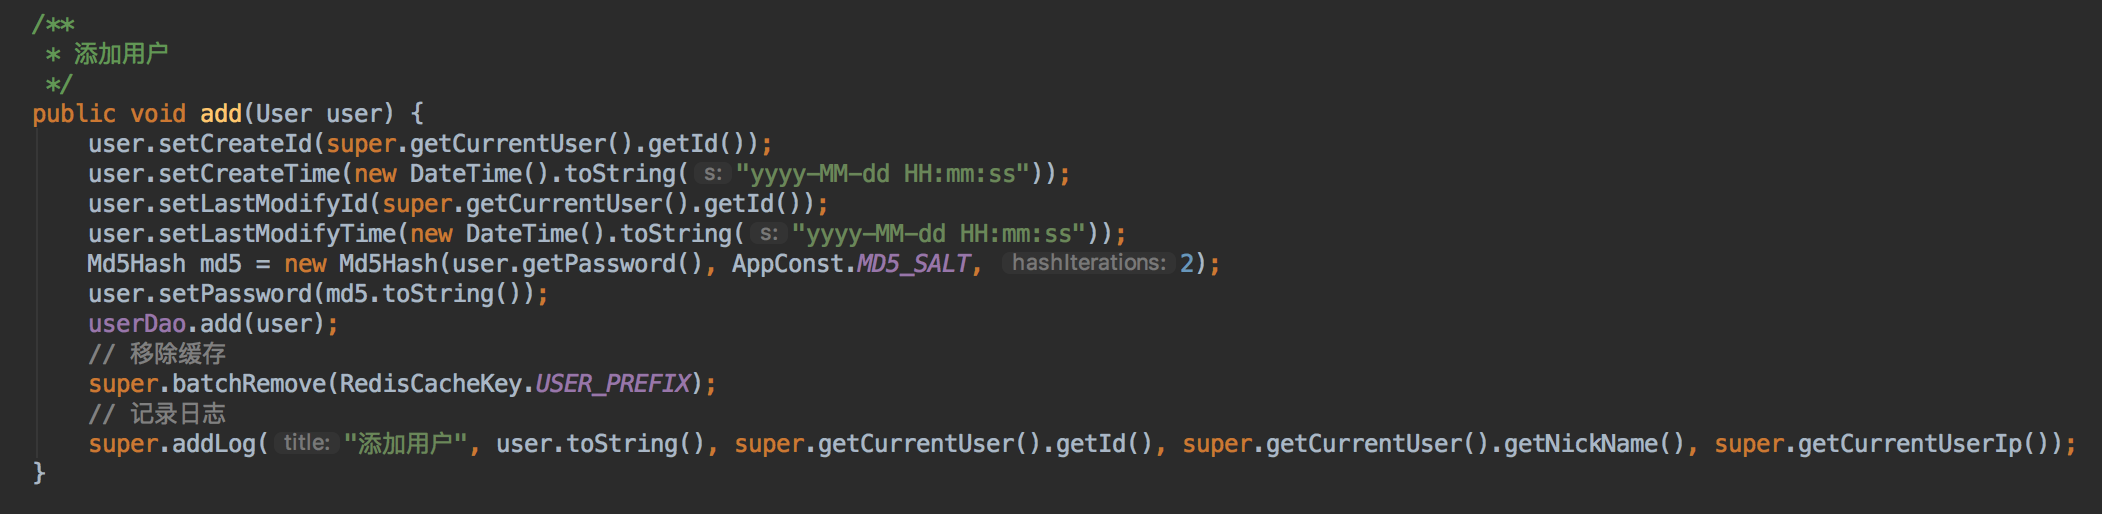
代码中使用了double check的骚操作,防止高并发下缓存失效的问题(虽然我的示例不可能有高并发,哈哈)。另外就是缓存更新的问题,网上说的有很多,先更新数据再更新缓存,先更新缓存再更新数据库等等,具体要看你是做什么,本示例中没有什么需要特殊注意的地方,因此就先更新数据库,然后再移除缓存:
10. 数据库与实体类自动映射
在使用jdbcTemplate的时候,需要将数据库的字段与自己定义实体类的字段进行映射,如果字段多的话,就需要写很多代码,每个查询方法就需要写一遍,当然你可以抽取出来,但若以后修改数据库字段的话,这里还需要进行修改,很不方便扩展。工作的时候我发现了我们项目中的一个工具类,发现用到自己的项目中特别好用,在自己定义的实体类上加上注解之后,就会自动的进行关系映射。首先加入依赖:
<dependency>
    <groupId>org.crazycake</groupId>
    <artifactId>jdbctemplatetool</artifactId>
    <version>1.0.4-RELEASE</version>
</dependency>
然后在自己定义的实体类上加上注解,注解的值和数据库相应的字段一一对应即可:

然后在查询方法上使用到工具类这样进行映射:

工具类代码:
  1 /**
  2  * JDBC关系映射工具类
  3  *
  4  * @author Oven
  5  */
  6 public class VoPropertyRowMapper<T> implements RowMapper<T> {
  7
  8     private final Logger logger = LoggerFactory.getLogger(this.getClass());
  9     private Class<T> mappedClass;
 10     private Map<String, PropertyDescriptor> mappedFields;
 11     private Set<String> mappedProperties;
 12
 13     public VoPropertyRowMapper(Class<T> mappedClass) {
 14         this.initialize(mappedClass);
 15     }
 16
 17     private void initialize(Class<T> mappedClass) {
 18         this.mappedClass = mappedClass;
 19         this.mappedFields = new HashMap<>();
 20         this.mappedProperties = new HashSet<>();
 21         PropertyDescriptor[] pds = BeanUtils.getPropertyDescriptors(mappedClass);
 22
 23         for (PropertyDescriptor pd : pds) {
 24             String propertyName = pd.getName();
 25             Method method = pd.getWriteMethod();
 26             if (method != null) {
 27                 Column column = this.getClassFieldColumnInfo(mappedClass, propertyName);
 28                 String underscoredName;
 29                 if (column != null) {
 30                     underscoredName = column.name();
 31                     this.mappedFields.put(underscoredName.toLowerCase(), pd);
 32                 } else {
 33                     this.mappedFields.put(pd.getName().toLowerCase(), pd);
 34                     underscoredName = this.underscoreName(pd.getName());
 35                     if (!pd.getName().toLowerCase().equals(underscoredName)) {
 36                         this.mappedFields.put(underscoredName, pd);
 37                     }
 38                 }
 39
 40                 this.mappedProperties.add(pd.getName());
 41             }
 42         }
 43
 44     }
 45
 46     private Column getClassFieldColumnInfo(Class<T> mappedClass, String propertyName) {
 47         Column column = null;
 48         Field[] fields = mappedClass.getDeclaredFields();
 49
 50         for (Field f : fields) {
 51             if (f.getName().equals(propertyName)) {
 52                 column = f.getAnnotation(Column.class);
 53                 break;
 54             }
 55         }
 56
 57         return column;
 58     }
 59
 60     private String underscoreName(String name) {
 61         if (!StringUtils.hasLength(name)) {
 62             return "";
 63         } else {
 64             StringBuilder result = new StringBuilder();
 65             result.append(name.substring(0, 1).toLowerCase());
 66
 67             for (int i = 1; i < name.length(); ++i) {
 68                 String s = name.substring(i, i + 1);
 69                 String slc = s.toLowerCase();
 70                 if (!s.equals(slc)) {
 71                     result.append("_").append(slc);
 72                 } else {
 73                     result.append(s);
 74                 }
 75             }
 76
 77             return result.toString();
 78         }
 79     }
 80
 81     private boolean isCheckFullyPopulated() {
 82         return false;
 83     }
 84
 85     public T mapRow(ResultSet rs, int rowNumber) throws SQLException {
 86         Assert.state(this.mappedClass != null, "Mapped class was not specified");
 87         T mappedObject = BeanUtils.instantiateClass(this.mappedClass);
 88         BeanWrapper bw = PropertyAccessorFactory.forBeanPropertyAccess(mappedObject);
 89         this.initBeanWrapper();
 90         ResultSetMetaData rsmd = rs.getMetaData();
 91         int columnCount = rsmd.getColumnCount();
 92         Set<String> populatedProperties = this.isCheckFullyPopulated() ? new HashSet<>() : null;
 93
 94         for (int index = 1; index <= columnCount; ++index) {
 95             String column = JdbcUtils.lookupColumnName(rsmd, index);
 96             PropertyDescriptor pd = this.mappedFields.get(column.replaceAll(" ", "").toLowerCase());
 97             if (pd != null) {
 98                 try {
 99                     Object value = this.getColumnValue(rs, index, pd);
100                     if (this.logger.isDebugEnabled() && rowNumber == 0) {
101                         this.logger.debug("Mapping column '" + column + "' to property '" + pd.getName() + "' of type " + pd.getPropertyType());
102                     }
103                     bw.setPropertyValue(pd.getName(), value);
104                     if (populatedProperties != null) {
105                         populatedProperties.add(pd.getName());
106                     }
107                 } catch (NotWritablePropertyException var14) {
108                     throw new DataRetrievalFailureException("Unable to map column " + column + " to property " + pd.getName(), var14);
109                 }
110             }
111         }
112
113         if (populatedProperties != null && !populatedProperties.equals(this.mappedProperties)) {
114             throw new InvalidDataAccessApiUsageException("Given ResultSet does not contain all fields necessary to populate object of class [" + this.mappedClass + "]: " + this.mappedProperties);
115         } else {
116             return mappedObject;
117         }
118     }
119
120     private void initBeanWrapper() {
121     }
122
123     private Object getColumnValue(ResultSet rs, int index, PropertyDescriptor pd) throws SQLException {
124         return JdbcUtils.getResultSetValue(rs, index, pd.getPropertyType());
125     }
126
127 }
11. 项目代码和依赖以及静态资源分别打包
之前遇到一个问题,springboot打包之后是一个jar文件,如果将所有依赖也打到这个jar包中的话,那么这个jar包动辄几十兆,来回传输不说,如果想改动其中的一个配置内容,还异常的繁琐,因此,将项目代码,就是自己写的代码打成一个jar包(一般只有几百k),然后将所有的依赖打包到一个lib目录,然后再将所有的配置信息以及静态文件打包到resources目录,这样,静态文件可以直接进行修改,浏览器清理缓存刷新即可出现改动效果,而且打包出来的项目代码也小了很多,至于依赖,一般都是不变的,所以也没必要每次都打包它。具体操作就是在pom.xml中增加一个插件即可,代码如下:
代码太长,不做展示
12. 接口限流
具体应用场景很多,这里不再一一举例,本工程只是做了一个demo来测试接口限流的功能,代码大部分都是从别人的工程里摘出来的,除了自定义异常,因为需要用自己的统一异常捕获去处理,这里给一个链接(https://github.com/Senssic/sc-whorl)。
首先编写一个限流的注解,其中limitType代表限流的类型,也接口级别的限流,还是用户级别的限流。个人觉得用户级别的限流比较常用,因此demo中以用户级别限流作为示例,限制一个ip在10s内只能访问某个接口5次。
这里主要就是自定义注解的处理类,其中运用了lua脚本来处理请求次数,在下不才,不懂lua,但是其核心思路就是使用redis记录了用户请求的次数,从而进行限流的控制
 1 @Around("execution(public * *(..)) && @annotation(com.oven.limitation.Limit)")
 2     public Object interceptor(ProceedingJoinPoint pjp) {
 3         MethodSignature signature = (MethodSignature) pjp.getSignature();
 4         Method method = signature.getMethod();
 5         Limit limitAnnotation = method.getAnnotation(Limit.class);
 6         LimitType limitType = limitAnnotation.limitType();
 7         String key;
 8         int limitPeriod = limitAnnotation.period();
 9         int limitCount = limitAnnotation.count();
10         switch (limitType) {
11             case IP:
12                 @SuppressWarnings("ConstantConditions")
13                 HttpServletRequest req = ((ServletRequestAttributes) RequestContextHolder.getRequestAttributes()).getRequest();
14                 key = AppConst.LIMIT_KEY_PREFIX + IPUtils.getClientIPAddr(req);
15                 break;
16             case CUSTOMER:
17                 key = limitAnnotation.key();
18                 break;
19             default:
20                 key = StringUtils.upperCase(method.getName());
21         }
22         ImmutableList<String> keys = ImmutableList.of(StringUtils.join(limitAnnotation.prefix(), key));
23         try {
24             String luaScript = buildLuaScript();
25             RedisScript<Number> redisScript = new DefaultRedisScript<>(luaScript, Number.class);
26             Number count = limitRedisTemplate.execute(redisScript, keys, limitCount, limitPeriod);
27             if (count != null && count.intValue() <= limitCount) {
28                 return pjp.proceed();
29             } else {
30                 throw new RuntimeException(ResultEnum.OVER_LIMIT_ERROR.getValue());
31             }
32         } catch (Throwable e) {
33             if (e instanceof RuntimeException) {
34                 log.error(AppConst.ERROR_LOG_PREFIX + "{}请求{}超过次数限制!", key, method.toString());
35             }
36             throw new LimitException(ResultEnum.OVER_LIMIT_ERROR.getCode(), ResultEnum.OVER_LIMIT_ERROR.getValue());
37         }
38     }
39
40     /**
41      * 限流 脚本
42      *
43      * @return lua脚本
44      */
45     public String buildLuaScript() {
46         return "local c" +
47                 "
c = redis.call('get',KEYS[1])" +
48                 // 调用不超过最大值,则直接返回
49                 "
if c and tonumber(c) > tonumber(ARGV[1]) then" +
50                 "
return c;" +
51                 "
end" +
52                 // 执行计算器自加
53                 "
c = redis.call('incr',KEYS[1])" +
54                 "
if tonumber(c) == 1 then" +
55                 // 从第一次调用开始限流,设置对应键值的过期
56                 "
redis.call('expire',KEYS[1],ARGV[2])" +
57                 "
end" +
58                 "
return c;";
59     }
13. 项目启动
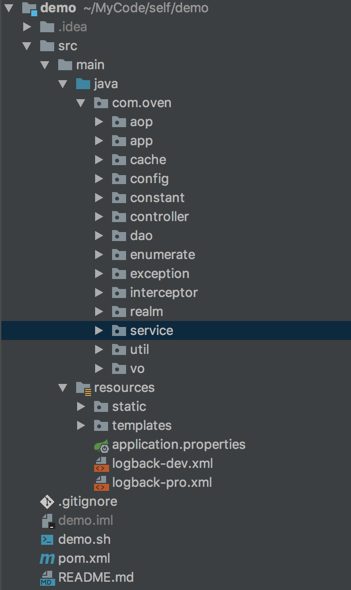
到现在都没有贴一个项目的目录结构,先来一张。目录中项目跟目录下的demo.sh就是启动脚本,当时从网上抄袭改装过来的,源代码出自那位大师之手我就不知道了,先行谢过。在部署到服务器的时候,如果服务器上安装好了jdk、maven、git,每次修改完代码,直接git pull下来,然后mvn package打包,然后直接./demo.sh start就可以启动项目,方便快速。慢着,忘记了,如果你提交到github中的application.properties中的数据源配置信息是开发环境的话,那么你在打包之后,target/resources中的application.properties中的数据源需要改成开发环境才可以启动。当然如果你嫌麻烦,可以直接将开发环境的数据源配置push到github中,安不安全就要你自己考虑了。
14. 总结
示例中可能还有一些细节没有说到,总之这个项目是慢慢的添砖添瓦弄出来的,自己在写很多其他的项目的时候,都是以此项目为模板进行改造出来的,个人感觉很实用很方便,用着也很舒服。github地址:https://github.com/503612012/demo欢迎收藏。