最近在写一个Unity3d的模仿windows10的桌面的程序,由于Unity3d本身不支持Gif图片,所以突发奇想使用代码来实现接近的。
接下来是代码部分:不一一解析,很简单,看的懂原理就Okly了。
 1 using System.Collections;
 2 using System.Collections.Generic;
 3 using UnityEngine;
 4 using UnityEngine.UI;
 5 public class LoadImg : MonoBehaviour {
 6     public GameObject[] gms;
 7     Dictionary<int, float> speed = new Dictionary<int, float>();
 8    public float s=90;
 9     // Use this for initialization
10     void Awake()
11     {
12         hide = false;
13
14         for (int i = 0; i < gms.Length; i++)
15         {
16             gms[i].transform.localEulerAngles = Vector3.back * i * 23.3f;
17             speed.Add(i, s);
18         }
19         StartCoroutine(RUN());
20
21     }
22     private void Rest()
23     {
24         if (hide)
25         {
26             for (int i = 0; i < gms.Length; i++)
27             {
28                 gms[i].transform.eulerAngles = Vector3.back * i * 23.3f;
29             }
30         }
31        StartCoroutine(RUN());
32     }
33     // Update is called once per frame
34     void FixedUpdate () {
35         for(int i = 0; i < gms.Length; i++)
36         {
37            gms[i].transform.Rotate(Vector3.back  * Time.deltaTime*speed[i]);
38         }
39     }
40     bool hide = false;
41     IEnumerator RUN()
42     {
43
44         for (int i = gms.Length-1; i >=0; i--)
45         {
46
47             if (hide)
48             {
49                 StartCoroutine(SETSpeed(i));
50                 yield return new WaitForSeconds(0.123f);
51                 gms[i].SetActive(true);
52
53             }
54             else
55             {
56                 StartCoroutine(SETSpeed(i));
57                 yield return new WaitForSeconds(0.123f);
58                 gms[i].SetActive(false);
59             }
60
61         }
62         if (hide)
63         {
64             yield return new WaitForSeconds(2.23f);
65         }
66         else
67         {
68             yield return new WaitForSeconds(1.23f);
69
70
71         }
72             hide = !hide;
73             Rest();
74
75
76
77     }
78     IEnumerator SETSpeed(int i)
79     {
80         speed[i] = 2.23f * s;
81         yield return new WaitForSeconds(1.23f*0.23f*1.23f);
82         speed[i] = s;
83     }
84
85 }
然后我们创建一个中心偏移的UI,Texture就像这样的:
关于中心偏移:
父对象为的y为0,这个是一个空物体。
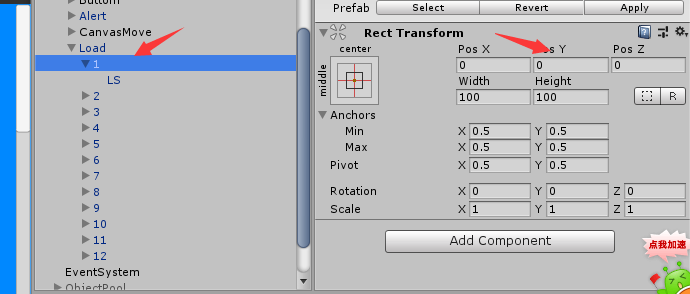
子对象LS是一个Image/RawImage,y向上偏移了123个单位长度,然后我们就可以旋转父对象就可以看到子对象在做圆周运动了!

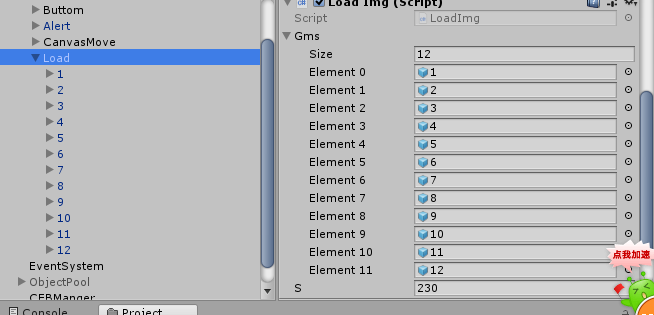
代码绑定:
复制12个上面做的对象放到一个空物体里,重命名复制的对象(这个可以不要不过我强迫症),然后拖到Gms里面(size这个是值个数,12个就写12就会出现12个空,保证每个都单一绑定),S代表的是旋转速度单位(角度/s)
最后保存一下,运行...效果如图:

当然实际效果没有那么生硬。
最后编辑时间 2018/6/27 5:59.