"【案例: 国旗选择】"
/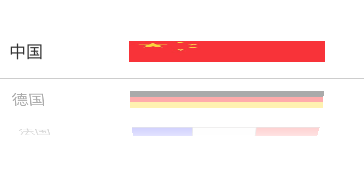 /此处插入国旗选择的图片
》加载flags.plist数据到 "国旗模型[Flag.h]"
》掌握代理【-(UIView *)pickerView:viewForRow:forComponent:reusingView:】的使用
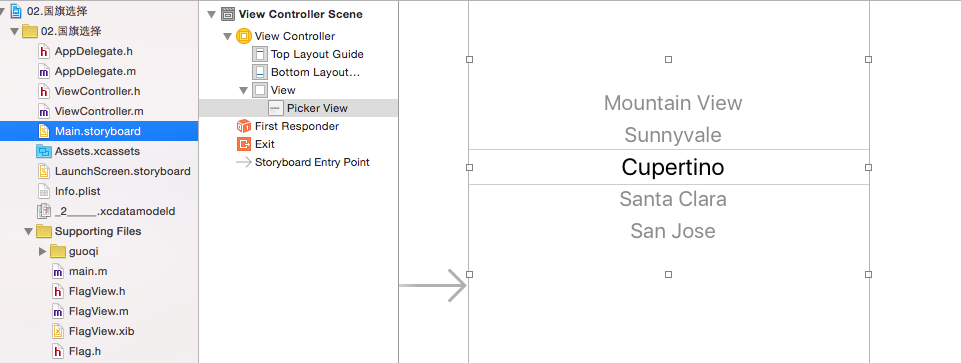
(1)在数据源里返回一组数据,行数由国旗个数决定
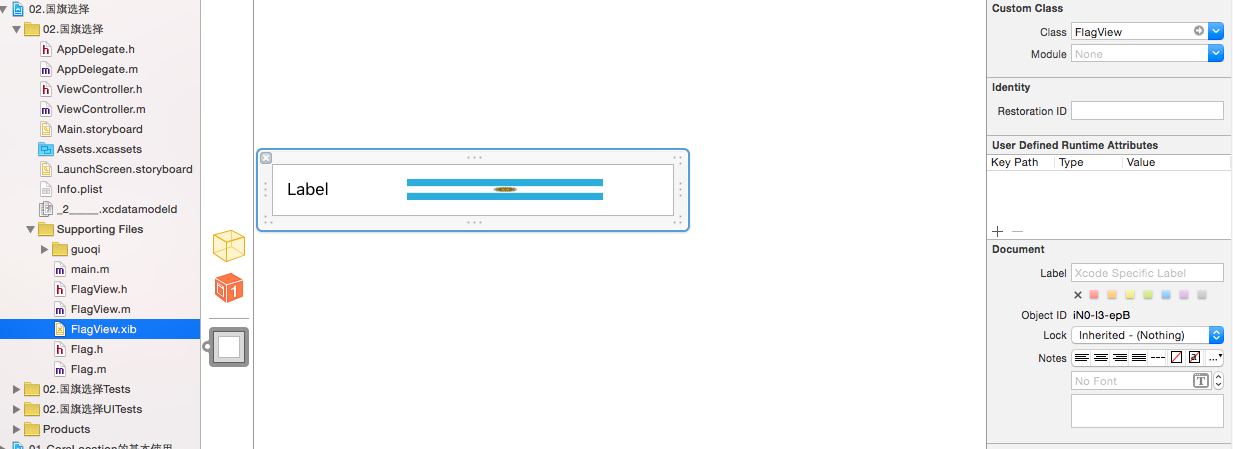
(2)在代理方法中使用上面的方法,每一行返回一个View,返回的这个view为label
(3)打印reusingView的地址和文字,"查看循环利用的view" --'备课的时候多演示几次'
//eg: NSLog(@"==%p %@",label,label.text);
(4)使用一个xib描述国家和国旗
(5)掌握一个设置行高的代理方法
ViewController.m
//
// ViewController.m
// 02.国旗选择
//
// Created by huan on 16/1/8.
// Copyright © 2016年 huanxi. All rights reserved.
//
#import "ViewController.h"
#import "FlagView.h"
#import "Flag.h"
@interface ViewController ()<UIPickerViewDataSource, UIPickerViewDelegate>
@property (nonatomic, strong) NSArray *flags;
@end
@implementation ViewController
-(NSArray *)flags//懒加载
{
if (!_flags) {
_flags = [Flag flagList];
}
return _flags;
}
- (void)viewDidLoad {
[super viewDidLoad];
// Do any additional setup after loading the view, typically from a nib.
NSLog(@"%@", self.flags);
}
// returns the number of 'columns' to display.
- (NSInteger)numberOfComponentsInPickerView:(UIPickerView *)pickerView
{
return 1;
}
// returns the # of rows in each component..
- (NSInteger)pickerView:(UIPickerView *)pickerView numberOfRowsInComponent:(NSInteger)component
{
return self.flags.count;
}
#pragma mark 自定义PickView的行
#warning UIPickerView循环引用在iOS7以后,不太明显,但是确实还是会循环引用,在iOS6,view的循环引用是非常明显
-(UIView *)pickerView:(UIPickerView *)pickerView viewForRow:(NSInteger)row forComponent:(NSInteger)component reusingView:(UIView *)view{
// //可以不设置frame,系统会设置
// UILabel *label = [[UILabel alloc] init];
// label.backgroundColor = [UIColor yellowColor];
// label.text = @"xx";
// return label;
//如果有重用的view,会传一个view进来
FlagView *flagView = (FlagView *)view;
if (!flagView) {
flagView = [FlagView flagView];
//设置数据
//获取模型
Flag *flag = self.flags[row];
flagView.flag = flag;
//打印view的内存地址
NSLog(@"row:%ld address: %p name: %@", (long)row, flagView, flag.name);
}
//#warning 一般设置自定义的View大小时,不直接设置bounds/frame
// //自定义控件要添加bounds
// //设置高度无效
flagView.bounds = CGRectMake(0, 0, 200, 0);
return flagView;
}
#pragma mark 高度
-(CGFloat)pickerView:(UIPickerView *)pickerView rowHeightForComponent:(NSInteger)component{
return 50;
}
//#pragma mark 宽度
//-(CGFloat)pickerView:(UIPickerView *)pickerView widthForComponent:(NSInteger)component{
// return 200;
//}
- (void)didReceiveMemoryWarning {
[super didReceiveMemoryWarning];
// Dispose of any resources that can be recreated.
}
@end
FlagView.h
//
// FlagView.h
// 02.国旗选择
//
// Created by huan on 16/1/8.
// Copyright © 2016年 huanxi. All rights reserved.
//
#import <UIKit/UIKit.h>
@class Flag;
@interface FlagView : UIView
@property (weak, nonatomic) IBOutlet UILabel *nameLabel;
@property (weak, nonatomic) IBOutlet UIImageView *imagView;
+(instancetype)flagView;//为了获得xib的对象
@property(nonatomic, strong)Flag *flag;
@end
//
// FlagView.m
// 02.国旗选择
//
// Created by huan on 16/1/8.
// Copyright © 2016年 huanxi. All rights reserved.
//
FlagView.m
#import "FlagView.h"
#import "Flag.h"
@implementation FlagView
+(instancetype)flagView
{
return [[[NSBundle mainBundle] loadNibNamed:@"FlagView" owner:nil options:nil] lastObject];//因为xib的控件可以多拖几个,是同一级的
}
-(void)setFlag:(Flag *)flag{
_flag = flag;
self.nameLabel.text = flag.name;
self.imagView.image = [UIImage imageNamed:flag.icon];
}
@end
Flag.h
// Flag.h
// 02.国旗选择
//
// Created by huan on 16/1/8.
// Copyright © 2016年 huanxi. All rights reserved.
//
#import <Foundation/Foundation.h>
@interface Flag : NSObject
/**
* copy :NSString
strong :一般对象
weak:UI控件
assign :基本数据类型
*/
@property (nonatomic, copy) NSString *name;
@property (nonatomic, copy) NSString *icon;
//字典转模型 构造
/**
* 通过字典来初始化模型对象
*
* @param dic 字典对象
*
* @return 已经初始化完毕的模型对象
*/
/*
instancetype的作用,就是使那些非关联返回类型的方法返回所在类的类型!
好处能够确定对象的类型,能够帮助编译器更好的为我们定位代码书写问题
instanchetype和id的对比
1、相同点
都可以作为方法的返回类型
2、不同点
①instancetype可以返回和方法所在类相同类型的对象,id只能返回未知类型的对象;
②instancetype只能作为返回值,不能像id那样作为参数,比如下面的写法:
*/
//模型应该提供一个可以传入字典参数的构造方法
/** 用字典实例化对象的成员方法 */
-(instancetype)initWithDic:(NSDictionary *)dic;
/** 用字典实例化对象的类方法,又称工厂方法 */
+(instancetype)flagWithDic:(NSDictionary *)dic;
/** 从plist加载对象数组 */
+(NSArray *)flagList;
@end
//
// Flag.m
// 02.国旗选择
//
// Created by huan on 16/1/8.
// Copyright © 2016年 huanxi. All rights reserved.
//
Flag.m
#import "Flag.h"
@implementation Flag
-(instancetype)initWithDic:(NSDictionary *)dic{
if (self = [super init]) {
// 使用setValuesForKeys要求类的属性必须在字典中存在,可以比字典中的键值多,但是不能少。
[self setValuesForKeysWithDictionary:dic];
}
return self;
}
+(instancetype)flagWithDic:(NSDictionary *)dic
{
return [[self alloc] initWithDic:dic];
}
//从处理plist中的数据 并返回模型对象的数组
+(NSArray *)flagList
{
//加载plist model
NSString *path = [[NSBundle mainBundle] pathForResource:@"flags" ofType:@"plist"];
//加载数组
NSArray *dicArray = [NSArray arrayWithContentsOfFile:path];
//字典转模型
NSMutableArray *tmpArray = [NSMutableArray array];
for (NSDictionary *dic in dicArray ) {
//创建模型对象 用字典实例化对象的工厂方法
Flag *flag = [Flag flagWithDic:dic];
//添加到对象到数组中
[tmpArray addObject:flag];
}
return tmpArray;
}
二、字典转模型
1.字典转模型介绍
示意图:

字典转模型的好处:
(1)降低代码的耦合度
(2)所有字典转模型部分的代码统一集中在一处处理,降低代码出错的几率
(3)在程序中直接使用模型的属性操作,提高编码效率
(4)调用方不用关心模型内部的任何处理细节
字典转模型的注意点:
模型应该提供一个可以传入字典参数的构造方法
- (instancetype)initWithDict:(NSDictionary *)dict;
+ (instancetype)xxxWithDict:(NSDictionary *)dict;
提示:在模型中合理地使用只读属性,可以进一步降低代码的耦合度。
补充内容:(KVC)的使用
(1)在模型内部的数据处理部分,可以使用键值编码来进行处理

 1 - (instancetype)initWithDict:(NSDictionary *)dict
 2 {
 3     self = [super init];
 4     if (self) {
 5 //        self.answer = dict[@"answer"];
 6 //        self.icon = dict[@"icon"];
 7 //        self.title = dict[@"title"];
 8 //        self.options = dict[@"options"];
 9
10         // KVC (key value coding)键值编码
11         // cocoa 的大招,允许间接修改对象的属性值
12         // 第一个参数是字典的数值
13         // 第二个参数是类的属性
14         [self setValue:dict[@"answer"] forKeyPath:@"answer"];
15         [self setValue:dict[@"icon"] forKeyPath:@"icon"];
16         [self setValue:dict[@"title"] forKeyPath:@"title"];
17         [self setValue:dict[@"options"] forKeyPath:@"options"];
18     }
19     return self;
20 }
(2)setValuesForKeys的使用
上述数据操作细节,可以直接通过setValuesForKeys方法来完成。
1 - (instancetype)initWithDict:(NSDictionary *)dict
2 {
3     self = [super init];
4     if (self) {
5         // 使用setValuesForKeys要求类的属性必须在字典中存在,可以比字典中的键值多,但是不能少。
6         [self setValuesForKeysWithDictionary:dict];
7     }
8     return self;
9 }
三、补充说明
1.readonly属性
(1)@property中readonly表示不允许修改对象的指针地址,但是可以修改对象的属性。
(2)通常使用@property关键字定义属性时,会生成getter&setter方法,还会生成一个带下划线的成员变量。
(3)如果是readonly属性,只会生成getter方法,不会生成带下划线的成员变量.
2.instancetype类型
(1)instancetype会让编译器检查实例化对象的准确类型
(2)instancetype只能用于返回类型,不能当做参数使用
3.instancetype & id的比较
(1) instancetype在类型表示上,跟id一样,可以表示任何对象类型
(2) instancetype只能用在返回值类型上,不能像id一样用在参数类型上
(3) instancetype比id多一个好处:编译器会检测instancetype的真实类型