wp7之换肤原理简单分析
纠结很久。。。感觉勉强过得去啦。还望各位大牛指点江山
百度找到这篇参考文章http://www.cnblogs.com/sonyye/archive/2012/03/12/2392679.html#2329255
还有这篇:http://www.cnblogs.com/xumingxiang/archive/2012/03/23/2413342.html
进入正文吧
1 UI代码很简单,一个listbox 和一个标题textblock,一个button按钮

 View Code
<phone:PhoneApplicationPage
x:Class="ChangeSkin.MainPage"
xmlns="http://schemas.microsoft.com/winfx/2006/xaml/presentation"
xmlns:x="http://schemas.microsoft.com/winfx/2006/xaml"
xmlns:phone="clr-namespace:Microsoft.Phone.Controls;assembly=Microsoft.Phone"
xmlns:shell="clr-namespace:Microsoft.Phone.Shell;assembly=Microsoft.Phone"
xmlns:d="http://schemas.microsoft.com/expression/blend/2008"
xmlns:mc="http://schemas.openxmlformats.org/markup-compatibility/2006"
mc:Ignorable="d" d:DesignWidth="480" d:DesignHeight="768"
FontFamily="{StaticResource PhoneFontFamilyNormal}"
FontSize="{StaticResource PhoneFontSizeNormal}"
Foreground="{StaticResource PhoneForegroundBrush}"
SupportedOrientations="Portrait" Orientation="Portrait"
shell:SystemTray.IsVisible="True">
<!--LayoutRoot 是包含所有页面内容的根网格-->
<Grid x:Name="LayoutRoot" >
<Grid.RowDefinitions>
<RowDefinition Height="Auto"/>
<RowDefinition Height="*"/>
</Grid.RowDefinitions>
<!--TitlePanel 包含应用程序的名称和页标题-->
<StackPanel x:Name="TitlePanel" Grid.Row="0" Margin="12,17,0,28">
<TextBlock x:Name="ApplicationTitle" Text="我的应用程序" />
<TextBlock x:Name="PageTitle" Text="页面名称" Margin="9,-7,0,0" Style="{StaticResource PhoneTextTitle1Style}"/>
</StackPanel>
<!--ContentPanel - 在此处放置其他内容-->
<Grid x:Name="ContentPanel" Grid.Row="1" Margin="12,0,12,0">
<ListBox Name="lb">
<ListBox.ItemTemplate>
<DataTemplate>
<TextBlock Text="{Binding}" Name="lbText"></TextBlock>
</DataTemplate>
</ListBox.ItemTemplate>
</ListBox>
<Button Content="换皮肤" HorizontalAlignment="Left" Margin="157,471,0,0" VerticalAlignment="Top" Click="Button_Click_1" />
</Grid>
</Grid>
</phone:PhoneApplicationPage>
截图如下:
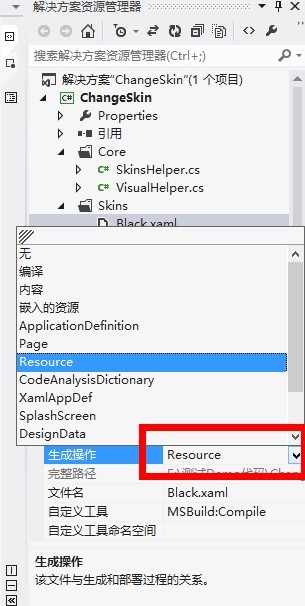
2 新建一个皮肤资源文件,
(ps:这里比较繁琐:新建一个页面文件,删除cs文件,然后找一下这个路径资源文件来参考 C:Program Files (x86)Microsoft SDKsWindows Phonev7.1DesignDarkBlueSystem.Windows.xaml ,为啥微软不直接提供一个新建皮肤文件?????)
设置Resource,非常重要啊,看下图
皮肤里面文件代码:
View Code
<ResourceDictionary
xmlns="http://schemas.microsoft.com/winfx/2006/xaml/presentation"
xmlns:x="http://schemas.microsoft.com/winfx/2006/xaml"
xmlns:System="clr-namespace:System;assembly=mscorlib">
<Style TargetType="TextBlock" x:Key="tbox">
<Setter Property="Foreground" Value="White"></Setter>
</Style>
</ResourceDictionary>
3、后台代码
View Code
using System;
using System.Collections.Generic;
using System.Linq;
using System.Text;
using System.Windows;
namespace ChangeSkin
{
public class SkinsHelper
{
/// <summary>
/// 得到皮肤资源文件
/// </summary>
/// <param name="Light"></param>
/// <returns></returns>
public static ResourceDictionary GetSkinResource(SkinsType Light = SkinsType.Green)
{
ResourceDictionary resourceDictionary = new ResourceDictionary();
string uri = "/ChangeSkin;component/Skins/";
//这里一定要设置Black.xaml生成操作为Resource
switch (Light)
{
case SkinsType.Green: uri += "Green.xaml"; break;
case SkinsType.Black: uri += "Black.xaml"; break;
default: uri += "Green.xaml"; break;
}
Application.LoadComponent(resourceDictionary, new Uri(uri, UriKind.Relative));
Application.Current.Resources.MergedDictionaries.Add(resourceDictionary);
return resourceDictionary;
}
}
public enum SkinsType
{
Green = 0,
Black = 1
}
}
4 工具类
View Code
using System;
using System.Net;
using System.Windows;
using System.Windows.Controls;
using System.Windows.Documents;
using System.Windows.Ink;
using System.Windows.Input;
using System.Windows.Media;
using System.Windows.Media.Animation;
using System.Windows.Shapes;
using System.Collections.Generic;
namespace JM.Common
{
public class VisualHelper
{
//获取子类型
public static T FindChildOfType<T>(DependencyObject root) where T : class
{
var queue = new Queue<DependencyObject>();
queue.Enqueue(root);
while (queue.Count > 0)
{
DependencyObject current = queue.Dequeue();
for (int i = VisualTreeHelper.GetChildrenCount(current) - 1; 0 <= i; i--)
{
var child = VisualTreeHelper.GetChild(current, i);
var typedChild = child as T;
if (typedChild != null)
{
return typedChild;
}
queue.Enqueue(child);
}
}
return null;
}
public static List<T> GetVisualChildCollection<T>(object parent) where T : UIElement
{
List<T> visualCollection = new List<T>();
GetVisualChildCollection(parent as DependencyObject, visualCollection);
return visualCollection;
}
private static void GetVisualChildCollection<T>(DependencyObject parent, List<T> visualCollection) where T : UIElement
{
int count = VisualTreeHelper.GetChildrenCount(parent);
for (int i = 0; i < count; i++)
{
DependencyObject child = VisualTreeHelper.GetChild(parent, i);
if (child is T)
{
visualCollection.Add(child as T);
}
else if (child != null)
{
GetVisualChildCollection(child, visualCollection);
}
}
}
}
}
5 调用方法
View Code
private void SetSkins(SkinsType skin = SkinsType.Black)
{
SkinsHelper.GetSkinResource(skin);
this.ApplicationTitle.SetValue(TextBlock.StyleProperty, Application.Current.Resources["tbox"]);
//listbox文字颜色样式改变
List<TextBlock> tbList= VisualHelper.GetVisualChildCollection<TextBlock>(lb);
foreach (TextBlock textBlock in tbList)
{
textBlock.SetValue(TextBlock.StyleProperty, Application.Current.Resources["tbox"]);
}
}
测试结果:
测试结果:
测试结果:文字改变绿色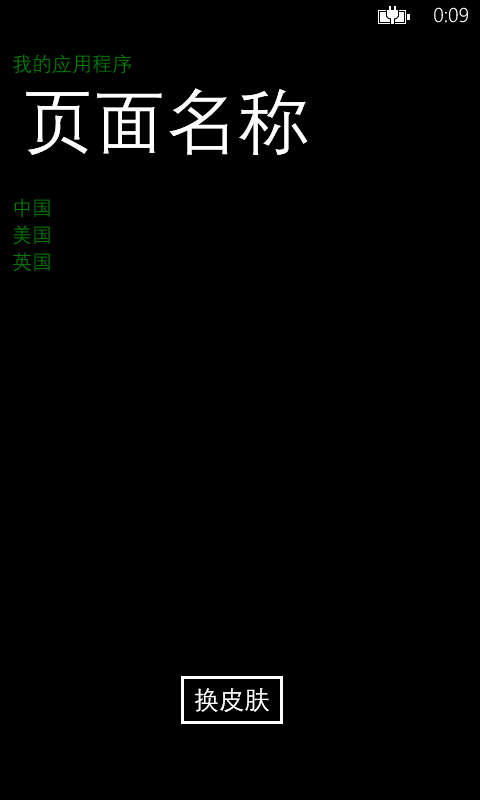
后记,如果想切换背景,添加更多效果,请增加样式,再写上对应调用样式代码