C#中WindowsForm常见控件的运用 --
1.button(曹操,贡天子以令不臣):
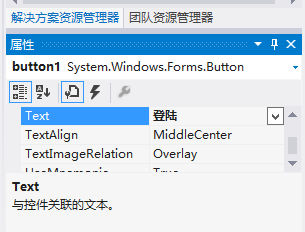
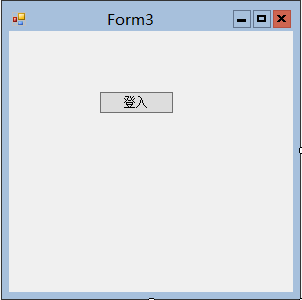
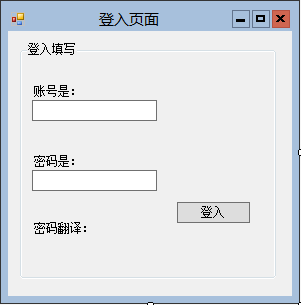
属性;text:我们经常可以看见将按钮命名为“登入”,在其属性面板里面编辑text即可;如下图:
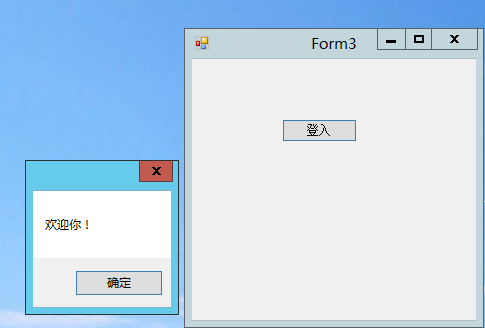
事件:click是我们常常用到的,点击按钮发生的事件,如,弹出:你好!,在事件面板下click下就可完成,:
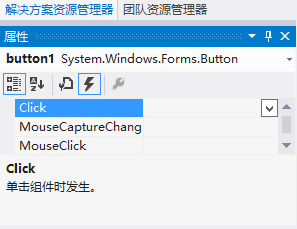
其中代码如下:
 View Code
1  private void button1_Click(object sender, EventArgs e)
2         {
3             MessageBox.Show("欢迎你!");
4         }
2.textBox:
其中我们在输入密码的时候会用到一个属性:passworchar,来掩饰密码:
View Code
1    private void groupBox1_Enter(object sender, EventArgs e)
2         {
3             textBox2.PasswordChar='*';
4         }
2.1,RichTextBox,
3.经过以上的描述我就写个连贯的控件来叙述;
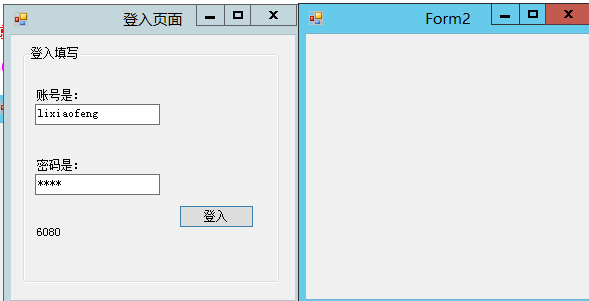
3.1.一个登入面板,要求账号为:lixiaofeng,密码;6080;
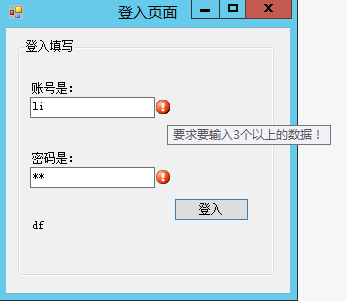
3.1.1.进入面板点击登入按钮的代码(其中的验证涉及到验证控件errorprovider):

 1 using System;
 2 using System.Collections.Generic;
 3 using System.ComponentModel;
 4 using System.Data;
 5 using System.Drawing;
 6 using System.Linq;
 7 using System.Text;
 8 using System.Threading.Tasks;
 9 using System.Windows.Forms;
10
11 namespace WindowsFormsApplication1
12 {
13     public partial class Form1 : Form
14     {
15         public Form1()
16         {
17             InitializeComponent();
18         }
19
20         private void Form1_Load(object sender, EventArgs e)
21         {
22
23         }
24
25         private void button1_Click(object sender, EventArgs e)
26         {
27
28         }
29
30         private void groupBox1_Enter(object sender, EventArgs e)
31         {
32
33         }
34
35         private void button1_Click_1(object sender, EventArgs e)
36         {
37
38             //首先要求账号输入长度大于3,其次密码为int型,所以就要写个验证代码提示,如下:
39             if (textBox1.Text == "")  //判断是否为空
40             { errorProvider1.SetError(textBox1, "对不起,这里不能为空!"); }
41             else
42             {
43                 try
44                 {
45                     if (textBox1.Text.Length > 3)
46                     { errorProvider1.SetError(textBox1, "");  }
47                     else
48                     { errorProvider1.SetError(textBox1, "要求要输入3个以上的数据!"); }
49                 }
50                 catch
51                 { errorProvider1.SetError(textBox1,"您的输入有问题,请重新输入!"); }
52             }
53             if (textBox2.Text == "")
54             { errorProvider1.SetError(textBox2, "对不起,这里不能为空!"); }
55             else
56             {
57                 try
58                 { int i = Int32.Parse(textBox2.Text.Trim()); errorProvider1.SetError(textBox2, "");  }  //判断是否输入的是int数字
59                 catch
60                 { errorProvider1.SetError(textBox2,"这里只能输入数字密码!"); }
61             }
62
63             //满足账号为:lixiaofeng 密码是:6080  即可进入,代码如下:
64             if (textBox1.Text == "lixiaofeng" && Int32.Parse(textBox2.Text.Trim()) == 6080)
65             { Form2 f2 = new Form2(); f2.Show(); }  //打开登入后的页面
66
67             this.AcceptButton = button1;//默认按下回车后==点击登入按钮
68
69         }
70
71         private void textBox2_TextChanged(object sender, EventArgs e)
72         {
73             label3.Text = textBox2.Text.Trim();  //密码翻译
74         }
75     }
76 }
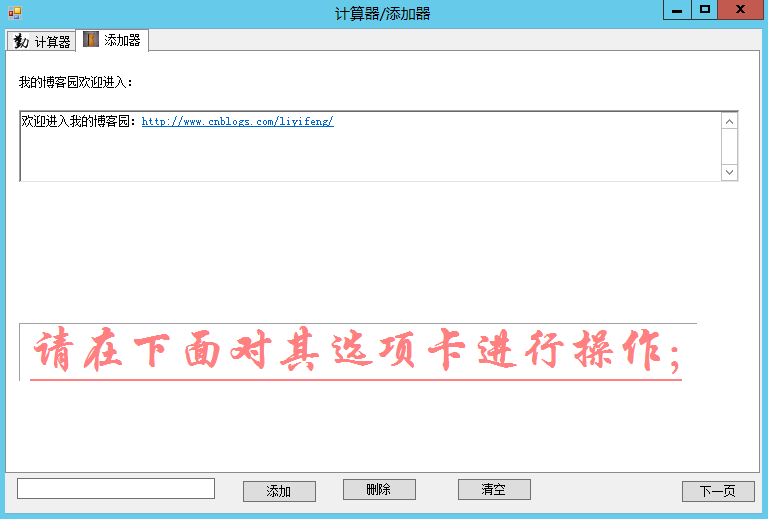
4.计算器/添加器;
计算器:
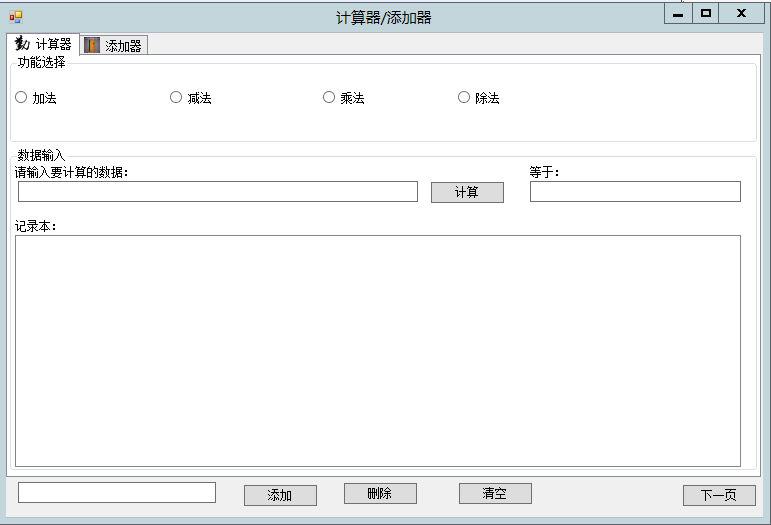
需要的控件有:imagelist/tabcontrol,
在命名,加载图片完成后,要求选择运算功能后记录运算记录:
4.1.选项卡加载图片:
1  private void Form2_Load(object sender, EventArgs e)
2         {
3             //首先添加当前的选项卡图标;
4             tabControl1.ImageList = imageList1;
5             tabPage1.ImageIndex = 0; tabPage2.ImageIndex = 1;
4.2.点击运算后的过程代码:
 1        private void button5_Click(object sender, EventArgs e)
 2         {
 3             double deshu=0;
 4             if (textBox2.Text == "")
 5             { MessageBox.Show("请输入数据!", "", MessageBoxButtons.OK, MessageBoxIcon.Asterisk); }
 6             else
 7             {
 8
 9                 if (radioButton1.Checked == true)  //选择加法功能
10                 {
11                     string[] fengejieshou = textBox2.Text.Split('+');  //分割“+”存储
12                     for (int i = 0; i < fengejieshou.Length; i++)
13                     { deshu += Convert.ToDouble(fengejieshou[i]); }   //做加法运算
14                     textBox3.Text = deshu.ToString();  //输出结果显示
15                 }
16                 else    //没有选择运算功能就进行提示
17                 { MessageBox.Show("请选择运算功能","",MessageBoxButtons.OK,MessageBoxIcon.Asterisk ); }
18
19             }
20
21             //将运算记录写入登记表中去:
22                //设置其滚动条等属性;
23             listBox1.HorizontalScrollbar = true; listBox1.HorizontalScrollbar = true;
24                //设置其编辑属性:
25             listBox1.SelectionMode = SelectionMode.MultiExtended;
26             //写入记录:
27             string xierujilu = string.Format("操作数:{0}	计算结果是:{1}",textBox2.Text,deshu.ToString()); //整理数据字符串
28             listBox1.Items.Add(xierujilu );  //写入到表中
29
30         }
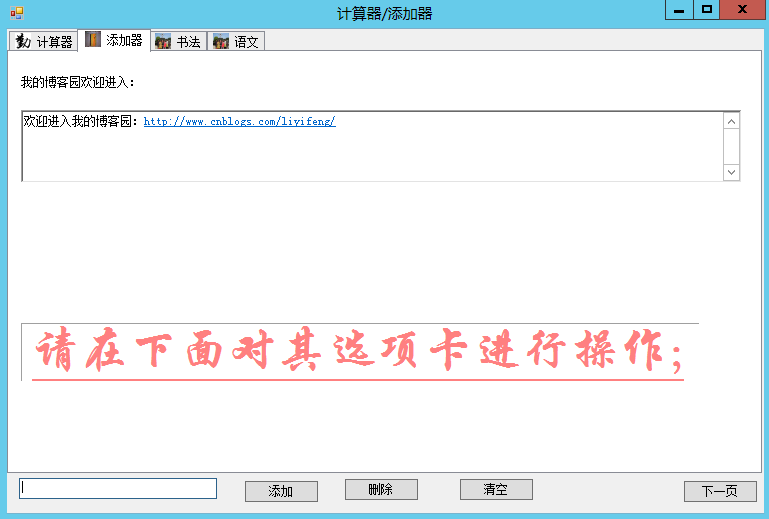
4.3.添加选项卡/及文本链接功能:
对选项卡的添加/删除/清空代码:
4.4.添加:
 1 private void button1_Click(object sender, EventArgs e)
 2         {
 3             //手动添加选项卡代码的实现:
 4             if (textBox1.Text == "")
 5             { MessageBox.Show("请输入新选项卡的名字!", "", MessageBoxButtons.OK, MessageBoxIcon.Asterisk); }
 6             else
 7             { tabControl1.TabPages.Add(textBox1.Text );  //添加新选项卡
 8             tabControl1.TabPages[tabControl1.TabCount-1].ImageIndex=2;  //向新卡添加图片
 9             textBox1.Text = "";//清空输入信息
10             }
4.5.删除:
1     private void button2_Click(object sender, EventArgs e)
2         {
3             //删除选项卡代码:
4             if (tabControl1.SelectedIndex == 0 || tabControl1.SelectedIndex == 1)
5             { MessageBox.Show("这里系统自带的无法删除!", "", MessageBoxButtons.OK, MessageBoxIcon.Asterisk); }
6             else
7             { tabControl1.TabPages.Remove(tabControl1.SelectedTab); } //删除
8         }
4.6.清空:
View Code4.7.超文本链接:
 1  private void tabPage2_Enter(object sender, EventArgs e)
 2         {
 3             //显示滚动条
 4             richTextBox1.ScrollBars = RichTextBoxScrollBars.ForcedBoth;
 5             //设置字体:
 6             richTextBox1.SelectionFont = new Font("隶书", 12, FontStyle.Bold);
 7             //字体颜色;
 8             richTextBox1.SelectionColor = System.Drawing.Color.Red;
 9             //字体text属性
10             richTextBox1.Text = "欢迎进入我的博客园:http://www.cnblogs.com/liyifeng/";
11         }
1 private void richTextBox1_LinkClicked(object sender, LinkClickedEventArgs e)
2         {
3             System.Diagnostics.Process.Start(e.LinkText );  //链接文本
4         }
5.资源管理器:
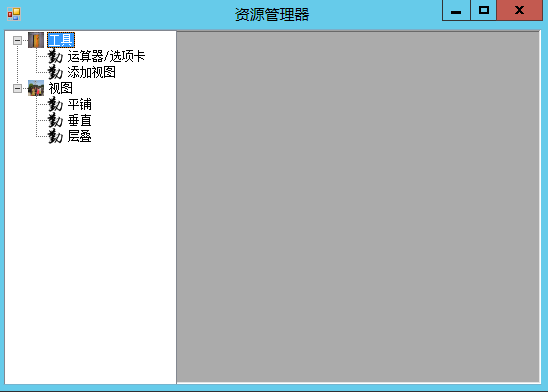
5.1.添加节点,并添加节点图片:
 1       public void Form3_Load(object sender, EventArgs e)
 2         {
 3             //工具和视图,为2个根节点:
 4             TreeNode t1 = treeView1.Nodes.Add("工具");
 5             TreeNode t2 = treeView1.Nodes.Add("视图");
 6             //在工具节点中添加2个子节点,和编辑相应的对象:
 7             TreeNode t11 = new TreeNode("运算器/选项卡"); TreeNode t12 = new TreeNode("添加视图");
 8             t1.Tag = "1"; t11.Tag = "11"; t12.Tag = "12";
 9             t1.Nodes.Add(t11); t1.Nodes.Add(t12);
10             //在视图中添加3个子节点:
11             TreeNode t21 = new TreeNode("平铺"); TreeNode t22 = new TreeNode("垂直"); TreeNode t23 = new TreeNode("层叠");
12             t2.Tag = "2"; t21.Tag = "21"; t22.Tag = "22"; t23.Tag = "23";
13             t2.Nodes.Add(t21); t2.Nodes.Add(t22); t2.Nodes.Add(t23);
14
15             //添加节点的图片:
16             treeView1.ImageList = imageList1;
17             //设置2个根节点的图片:
18             t1.ImageIndex = 1; t1.SelectedImageIndex = 1; t2.ImageIndex = 2; t2.SelectedImageIndex = 2;
19
20
21         }
5.2.编写双击节点后的事件:
 1 private void treeView1_NodeMouseDoubleClick(object sender, TreeNodeMouseClickEventArgs e)
 2         {
 3             if (treeView1.SelectedNode.Tag == "11")
 4             { Form2 f2 = new Form2(); f2.Show();  }//打开运算器页面
 5                 if (treeView1.SelectedNode.Tag == "12")
 6                 { Form4 f4 = new Form4(); f4.Show(); }
 7                 if (treeView1.SelectedNode.Tag == "21")
 8                 {
 9                     Form2 f2 = new Form2(); f2.MdiParent = this; Form4 f4 = new Form4(); f4.MdiParent = this;
10                     f2.Show(); f4.Show();
11                 LayoutMdi(MdiLayout.TileHorizontal  );
12                 }
13                 if (treeView1.SelectedNode.Tag == "22")
14                 {
15                     Form2 f2 = new Form2(); f2.MdiParent = this; Form4 f4 = new Form4(); f4.MdiParent = this;
16                     f2.Show(); f4.Show();
17                     LayoutMdi(MdiLayout.TileVertical );
18                 }
19                 if (treeView1.SelectedNode.Tag == "23")
20                 {
21                     Form2 f2 = new Form2(); f2.MdiParent = this; Form4 f4 = new Form4(); f4.MdiParent = this;
22                     f2.Show(); f4.Show();
23                     LayoutMdi(MdiLayout.Cascade );
24                 }
25
26
27         }
5.3:运行图示:
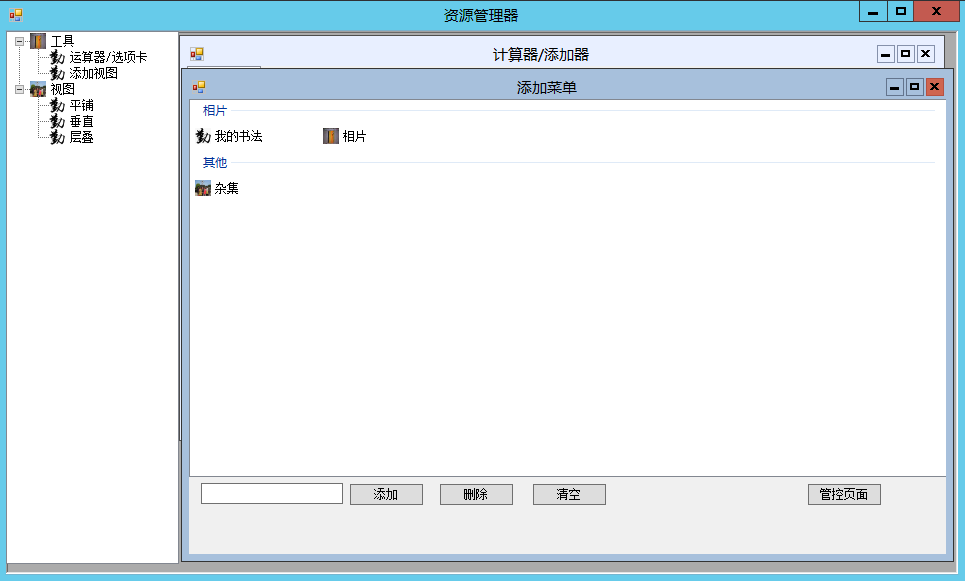
6.菜单添加器:
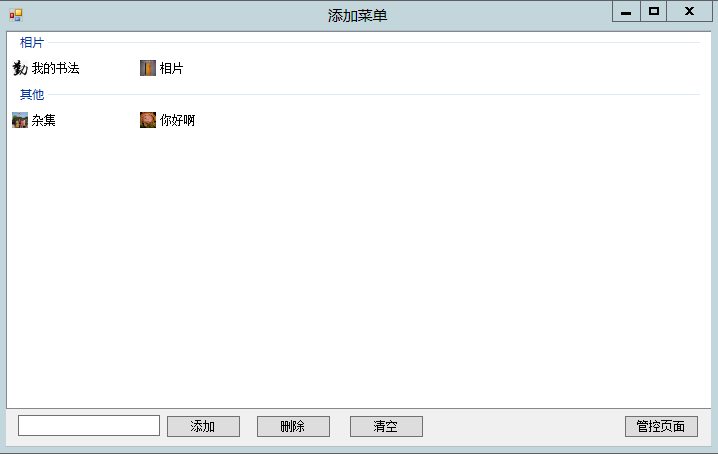
6.1分组及集合的编写:
 1  private void Form4_Load(object sender, EventArgs e)
 2         {
 3             //创建2个分组:
 4             listView1.Groups.Add(new ListViewGroup("相片",HorizontalAlignment.Left ));
 5             listView1.Groups.Add(new ListViewGroup("其他",HorizontalAlignment.Left ));
 6             //创建2个图标集合:
 7             listView1.Items.Add("我的书法"); listView1.Items.Add("相片");
 8             //将其添加都分组为:相片组里:
 9             listView1.Items[0].Group=listView1.Groups[0];listView1.Items[1].Group=listView1.Groups[0];
10
11             //将杂集放到,其他里面
12             listView1.Items.Add("杂集");
13             listView1.Items[2].Group=listView1.Groups[1];
14
15             //设置视图样式:
16             listView1.View = View.Tile;
17             //向视图中添加图片:
18             listView1.LargeImageList = imageList1;
19             listView1.Items[0].ImageIndex = 0; listView1.Items[1].ImageIndex = 1; listView1.Items[2].ImageIndex = 2;
20
21
22         }
6.2添加/删除/清空,的功能:
 1 private void button1_Click(object sender, EventArgs e)
 2         {
 3             //以下为添加信息的同时添加视图的图片:
 4             if (textBox1.Text == "")
 5             { MessageBox.Show("请输入要添加的命名"); }
 6             else
 7             { listView1.Items.Add(textBox1.Text.Trim());
 8             listView1.Items[listView1.Items.Count-1].Group=listView1.Groups[1];
 9             listView1.Items[listView1.Items.Count - 1].ImageIndex = 3;
10             textBox1.Text = "";
11             }
12         }
13
14         private void button2_Click(object sender, EventArgs e)
15         {
16             listView1.Items.RemoveAt(listView1.SelectedItems[0].Index );
17         }
18
19         private void button3_Click(object sender, EventArgs e)
20         {
21             listView1.Items.Clear();
22         }
6.3,进入:管控页面的代码:
View Code7.管控全局页面:

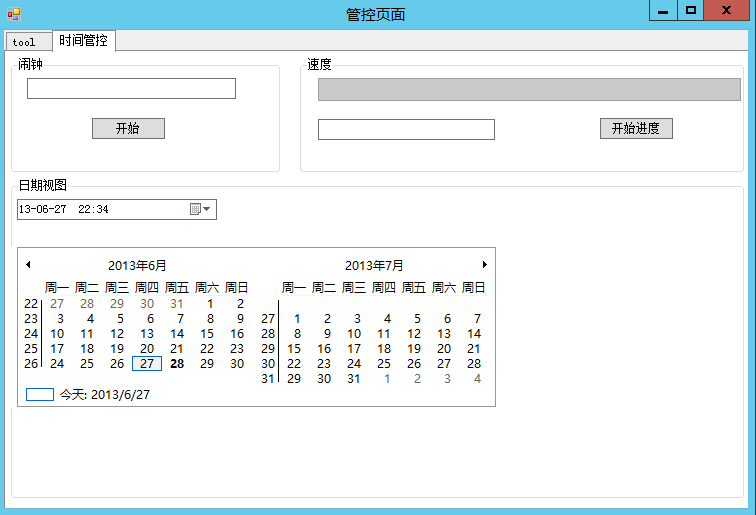
其代码如下:
  1 using System;
  2 using System.Collections.Generic;
  3 using System.ComponentModel;
  4 using System.Data;
  5 using System.Drawing;
  6 using System.Linq;
  7 using System.Text;
  8 using System.Threading.Tasks;
  9 using System.Windows.Forms;
 10
 11 namespace WindowsFormsApplication1
 12 {
 13     public partial class Form5 : Form
 14     {
 15         public Form5()
 16         {
 17             InitializeComponent();
 18         }
 19
 20         private void tabPage1_Click(object sender, EventArgs e)
 21         {
 22
 23         }
 24
 25         private void tabPage2_Click(object sender, EventArgs e)
 26         {
 27             //设置闹钟的属性:
 28             timer1.Interval = 1000;
 29         }
 30
 31         private void button1_Click(object sender, EventArgs e)
 32         {
 33             if (button1.Text == "开始")
 34             { timer1.Enabled = true;  button1.Text = "停止"; }
 35             else
 36             { timer1.Enabled = false; button1.Text = "开始";  textBox1.Text = "时间到了!"; }
 37         }
 38
 39         private void timer1_Tick(object sender, EventArgs e)
 40         {
 41             textBox1.Text = DateTime.Now.ToString();
 42         }
 43
 44         private void groupBox2_Enter(object sender, EventArgs e)
 45         {
 46             progressBar1.Minimum = 0; progressBar1.Maximum = 899; progressBar1.Step = 1;
 47
 48         }
 49
 50         private void button2_Click(object sender, EventArgs e)
 51         {
 52             for (int i = 0; i < 900; i++)
 53             { progressBar1.PerformStep();
 54             textBox2.Text = "进度是:" + progressBar1.Value.ToString();
 55             }
 56         }
 57
 58         private void groupBox3_Enter(object sender, EventArgs e)
 59         {
 60             //显示的时间为自定义的时间格式:
 61             dateTimePicker1.Format = DateTimePickerFormat.Custom;
 62             dateTimePicker1.CustomFormat = "yy-MM-dd  HH:mm";
 63
 64             //设置月历的颜色属性:
 65             monthCalendar1.TitleBackColor = System.Drawing.Color.Red;
 66             monthCalendar1.TrailingForeColor = System.Drawing.Color.Black;
 67             monthCalendar1.TitleForeColor = System.Drawing.Color.Green;
 68             //显示周期:
 69             monthCalendar1.ShowWeekNumbers = true;
 70             //突出特定的日期;
 71             DateTime shijian_shuru = new DateTime(2013, 6, 28);
 72             monthCalendar1.AddAnnuallyBoldedDate(shijian_shuru);
 73             //显示2列月历:
 74             monthCalendar1.CalendarDimensions =new Size(2,1);
 75         }
 76
 77         private void 看时间ToolStripMenuItem_Click(object sender, EventArgs e)
 78         {
 79             Form1 f1 = new Form1();f1.Show();
 80         }
 81
 82         private void 运算器ToolStripMenuItem_Click(object sender, EventArgs e)
 83         {
 84             Form2 f2 = new Form2(); f2.Show();
 85         }
 86
 87         private void 资源管理器ToolStripMenuItem_Click(object sender, EventArgs e)
 88         {
 89             Form3 f3 = new Form3(); f3.Show();
 90         }
 91
 92         private void 添加视图ToolStripMenuItem_Click(object sender, EventArgs e)
 93         {
 94             Form4 f4 = new Form4(); f4.Show();
 95         }
 96
 97         private void toolStripStatusLabel1_Click(object sender, EventArgs e)
 98         {
 99
100         }
101
102         private void toolStripStatusLabel1_LocationChanged(object sender, EventArgs e)
103         {
104             toolStripStatusLabel1.Text = DateTime.Now.ToString();//显示时间
105         }
106
107     }
108 }
运行:

O(∩_∩)O谢谢!
2013.6.28
李晓峰
标签: C#