postman做接口自动化测试
postman是一款API调试工具,可用于测试接口,相类似的工具还有jmeter、soupUI。通过postman+newman+python可以批量运行调试接口,达到自动化测试的效果。
1、PostMan安装
共有两种方式,一种是chrome浏览器上的插件,一种是postman客户端。我使用的是postman客户端。
1)在Chrome浏览器怎么安装Postman
https://www.cnblogs.com/mafly/p/postman.html
2)安装Postman客户端
a、下载软件https://www.getpostman.com/apps
b、安装
2、使用
1)发送请求、查看响应
2)环境变量、全局变量
环境变量:只作用于设置的环境
设置环境变量:pm.environment.set("variable_key", "variable_value");
获取环境变量:pm.environment.get("variable_key");
全局变量:作用于所有环境
设置全局变量:pm.globals.set("variable_key", "variable_value");
获取全局变量:pm.globals.get("variable_key");
使用例子:
var data=JSON.parse(responseBody);
var act=data.data.accessToken;
postman.setGlobalVariable("accessToken", act);
postman.setGlobalVariable("userId", data.data.userId);
postman.setGlobalVariable("refreshToken", data.data.refreshToken);
var afterUrl="?access_token="+act+"&userId="+data.data.userId;
pm.globals.set("afterUrl", afterUrl);
console.log(afterUrl)
使用变量:
在使用的变量地方用 {{variableName}}代替
具体查看文档:https://www.getpostman.com/docs/postman/environments_and_globals/variables
3)设置断言
tests["Your test nickName"] = data.data.nickName === "2589" //响应内容 nickName =2589
pm.test("Status code is 200", function () {
pm.response.to.have.status(200);
}); //返回为200
var responseJSON=JSON.parse(responseBody);
tests['response matches the data posted'] = (responseJSON.data && responseJSON.data.length === 10);
//返回data数据共10条
4)调试console
需要在postman客户端,点击 view->show postman console 调出
在test或 Pre-request Script中写脚本打印出有疑问的值
console.log(variableName); 之后运行请求
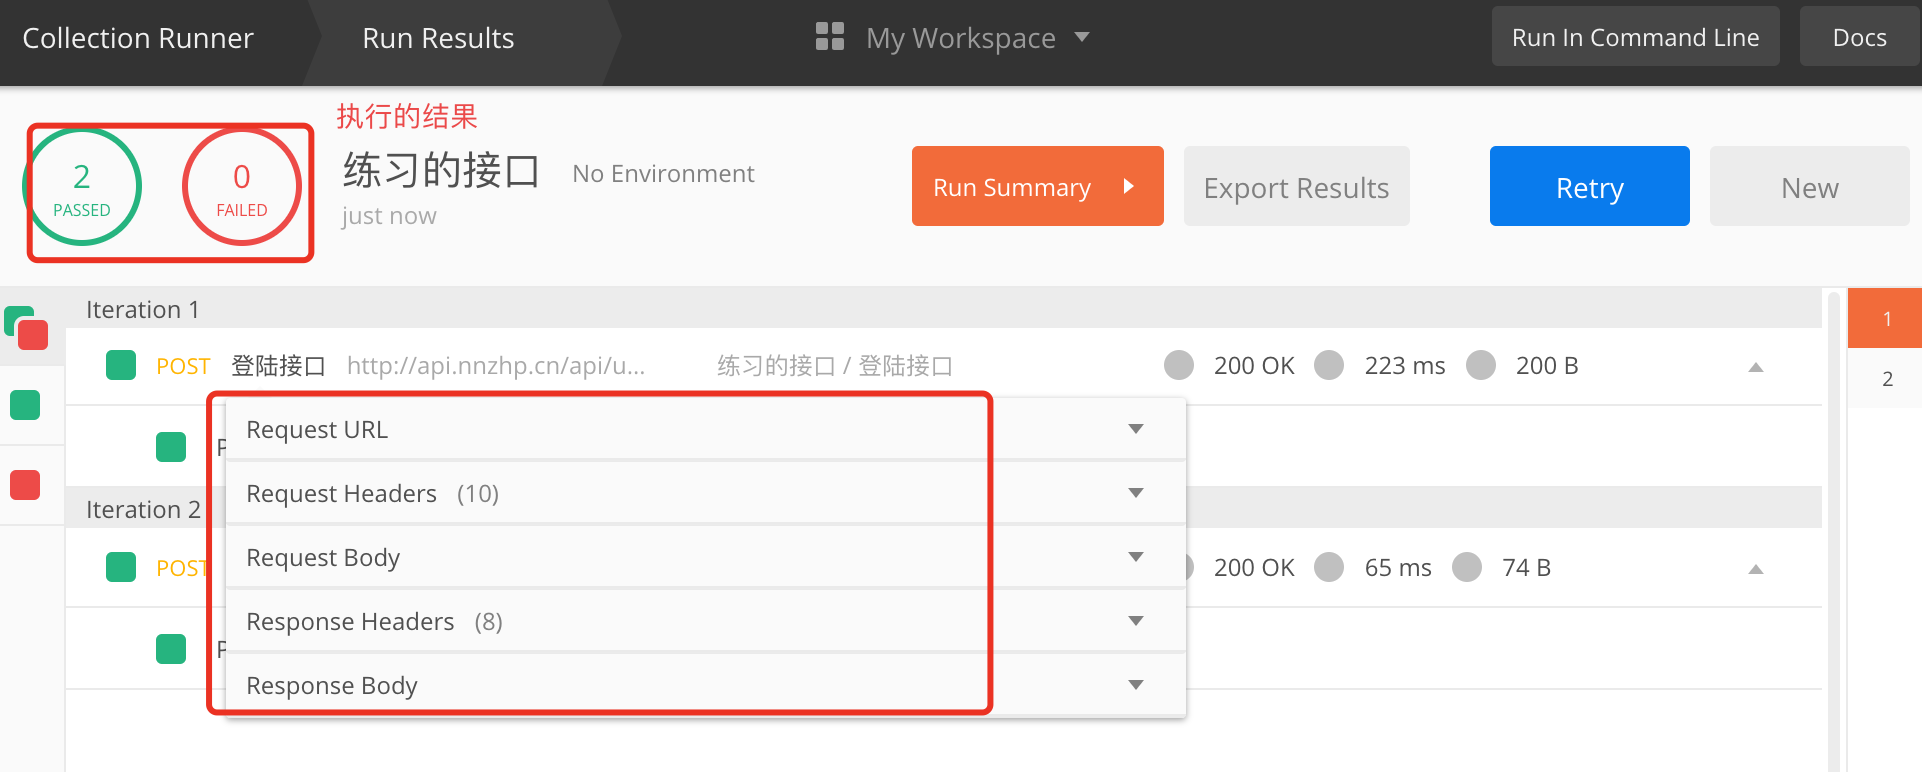
5)collection
需要在postman客户端,点击collection->Runner ,运行
具体查看文档:https://www.getpostman.com/docs/postman/collection_runs/starting_a_collection_run
6)具体使用如下图

7)导出json文件

2、newman安装
官方帮助文档地址:https://www.npmjs.com/package/newman
1)需要安装nodejs,并配置好环境
2)打开控制台,运行:npm install -g newman
3)校验是否安装成功,运行:newman --version
Newman 执行脚本
Newman在3版本后做了比较大的改动,但是运行命令越来越简单如下:
newman run <collection-file-source> [options]
run 后面跟上要执行的json文件或者URL(json 和 URL 都由postman导出生成),再后面跟一些参数,例如环境变量,测试报告,接口请求超时时间等等。最后给两个完整的例子做参考:
newman run D:/Buddy_Product_Enviroment.postman_collection.json --reporters cli,html,json,junit --reporter-json-export D:/jsonOut.json --reporter-junit-export D:/xmlOut.xml --reporter-html-export D:/htmlOut.html
3、使用python脚本执行newman
# coding=utf-8
import time
import os
class postmanApiTest:
#运行postman生成报告
#通过newman
def postman(self):
jSONfname = 'D:/htmlOut' + time.strftime('%Y-%m-%d', time.gmtime())+'.html'
# cmd = 'newman run D:/Buddy_Test_Enviroment.postman_collection.json --reporters cli,html,json,junit --reporter-html-export '+jSONfname
cmd='newman run D:/Buddy_Product_Enviroment.postman_collection.json --reporters cli,html,json,junit --reporter-json-export D:/jsonOut.json --reporter-junit-export D:/xmlOut.xml --reporter-html-export D:/htmlOut.html'
os.system(cmd)
print('------------------------------------------------------------')
print(jSONfname)
if os.path.isfile(jSONfname):
return jSONfname
print(jSONfname)
else:
return False
if __name__ == '__main__':
a=postmanApiTest()
a.postman()
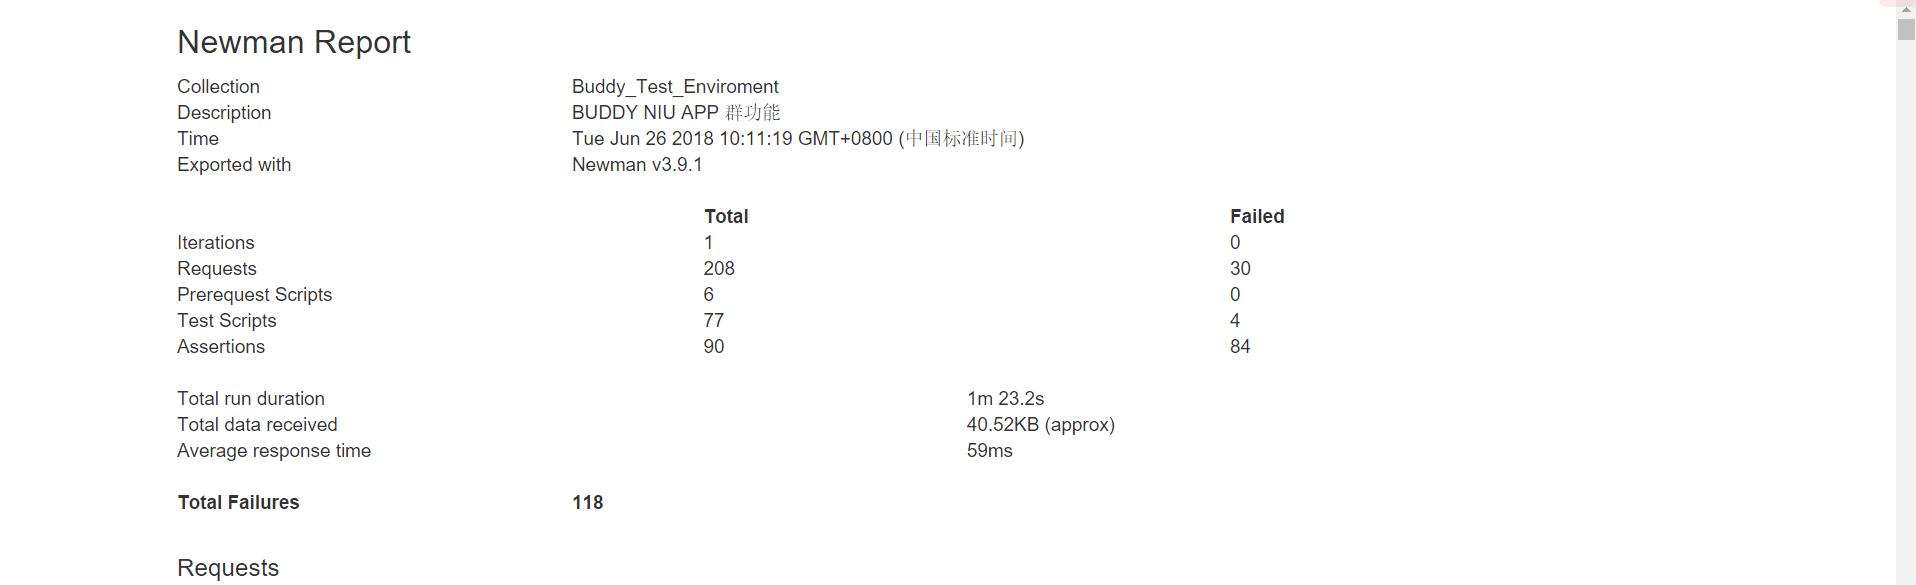
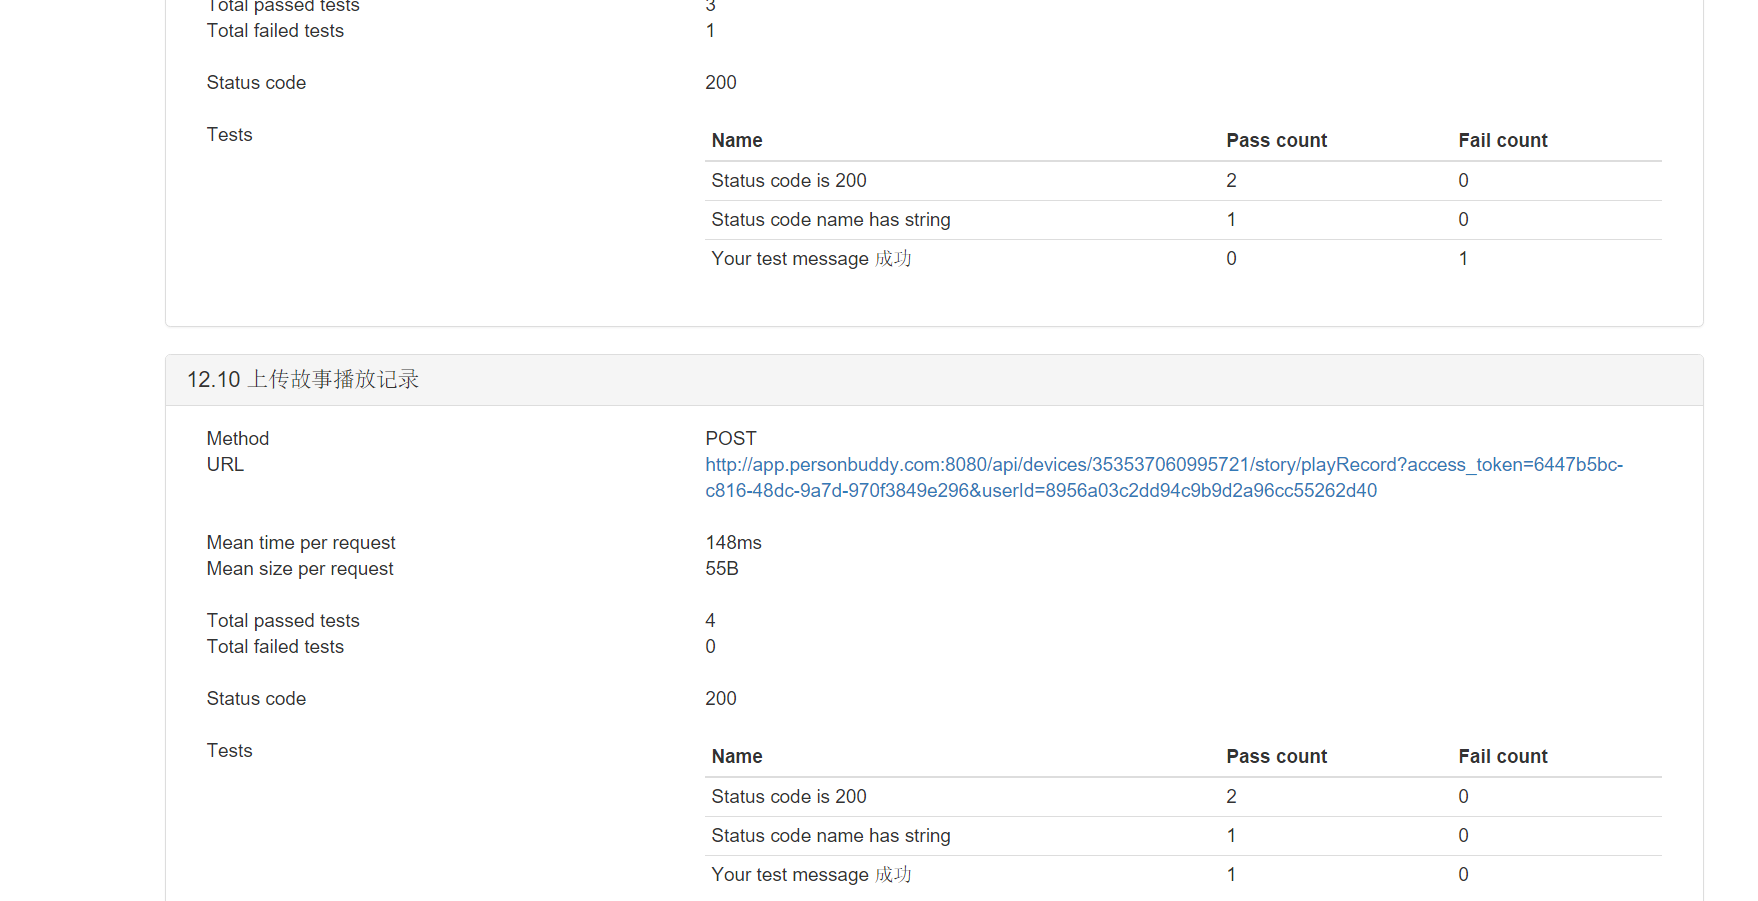
4、最终生成报告如下:
使用postman+newman+python做接口自动化测试
接口是用来连接服务端和客户端,一般返回的数据都是json。
get和post请求的区别:
1. get请求比post请求安全
2. get请求参数有长度限制,post请求没有
3. get请求没有body,参数都是放在url里面,而post请求是放在body里面的。
http请求状态码:
1. 200 #2 代表请求成功
2. 404 #4 代码客户端发出去的请求有问题
3. 300 #3 代表重定向
4. 500、502 #5代表服务端有问题
postman如何定义变量
打开postman,点击右上角的设置-Global,设置变量的名称及内容。使用时直接用{{变量名}}引用即可

postman如何做接口自动化
1、准备接口脚本
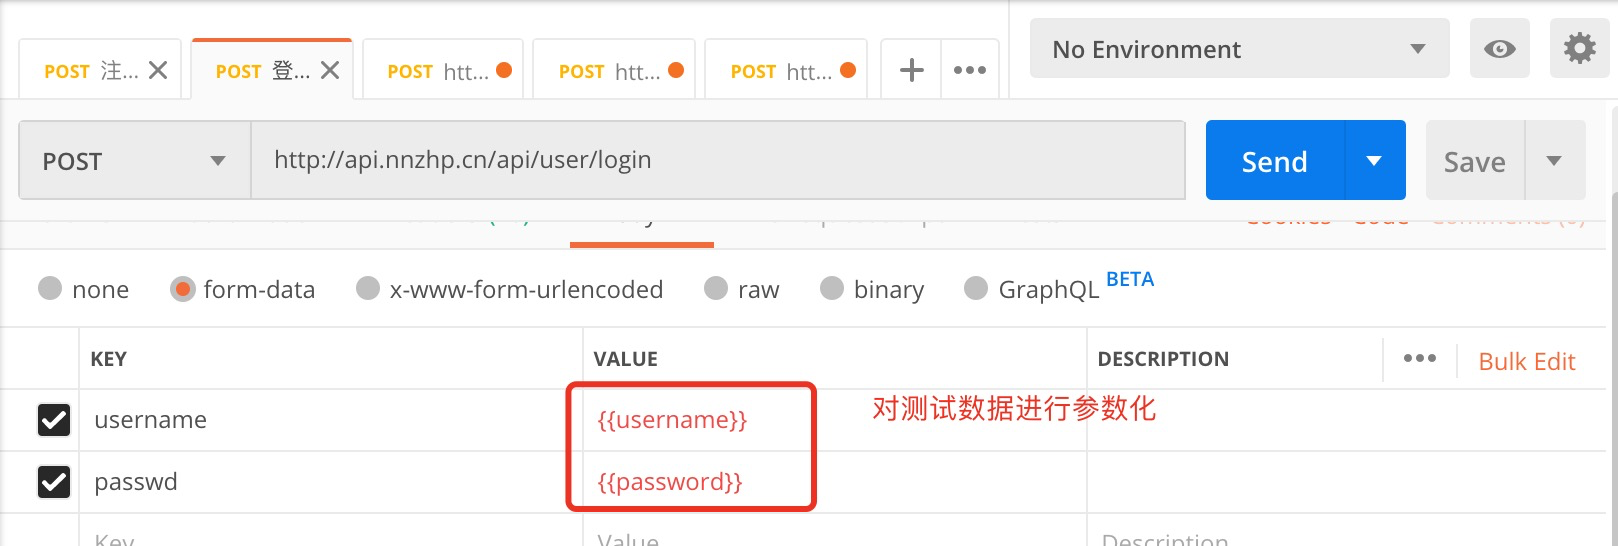
2、准备测试数据
第一行写参数名称,接口中用{{参数名}}引用。

3、根据测试数据准备校验结果(每一条测试数据对应不同的结果,若想逐条校验同样需将要校验的数据写在text文件中)
所有的检查点都写在test中。右侧有很多检查的内容,可根据需要选择
其中「Response body:Contains string」是检查结果包含的内容(红色字体为可替换的变量)
pm.test("Body matches string", function () {
pm.expect(pm.response.text()).to.include("检查的内容");
});
当每一条数据的检查内容都不一样时,就需要用到「Set a global variable」作为变量来替换检查的内容
pm.globals.set("变量名");
最终应为:
pm.test("Body matches string", function () {
pm.expect(pm.response.text()).to.include("pm.globals.set("变量名")");
});

4、脚本及数据准备完毕后,点击postman左上角的「Runner」,选择要测试的脚本,设置好数据后完毕后点击Run,将会自动执行测试,执行完成后会返回测试结果。