1.传统的java数据库连接
在传统的开发中,如果要建立java程序和数据库的连接,通常采用JDBC或者Apache Commons DbUtils开发包来完成。他们分别有以下特点:
JDBC:
优点:1.底层连接,效率高
缺点:需要手写sql语句,代码重复多,封装结果集繁琐
DbUtils:
优点:结果集封装可直接调用,封装JDBC,效率较高
缺点:需要手写sql语句
2.Hibernate的概念:
Hibernate是一个 轻量级、企业级、开源的 持久层 ORM框架:
- 轻量级:依赖资源少
- 企业级:适合在企业级应用中使用
- 开源:源代码开放
- 持久层:完成数据持久化的逻辑层
- ORM: Object Relationship Mapping,对象关系映射
3.Hibernate的入门程序:
-
- 创建项目,java项目或web项目,此处我们创建java项目
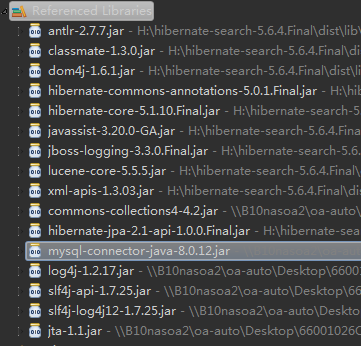
- 导入jar包,导入需要的mysql-connector,hibernate核心jar包
-
- 创建实体类
//学生实体类
package domain;
import java.io.Serializable;
public class Student implements Serializable {

    private int stuId;
    private String stuName;
    private String stuMemo;

    public int getStuId() {
        return stuId;
    }
    public void setStuId(int stuId) {
        this.stuId = stuId;
    }
    public String getStuName() {
        return stuName;
    }
    public void setStuName(String stuName) {
        this.stuName = stuName;
    }
    public String getStuMemo() {
        return stuMemo;
    }
    public void setStuMemo(String stuMemo) {
        this.stuMemo = stuMemo;
    }
    @Override
    public String toString() {
        return "Student [stuId=" + stuId + ", stuName=" + stuName + ", stuMemo=" + stuMemo + "]";
    }
}
-
- 编写配置文件,包括Hibernate实体类映射文件和Hibernate主配置文件
//Student实体类映射配置文件
<?xml version="1.0" encoding="UTF-8"?>
<!DOCTYPE hibernate-mapping PUBLIC
    "-//Hibernate/Hibernate Mapping DTD 3.0//EN"
    "http://www.hibernate.org/dtd/hibernate-mapping-3.0.dtd">
<hibernate-mapping>
    <class name="domain.Student">
        <id name="stuId" column="stu_id">
        <generator class="native"/>
        </id>
        <property name="stuName" column="stu_name"></property>
        <property name="stuMemo" column="stu_memo"></property>
    </class>
</hibernate-mapping>
//Hibernate主配置文件 <?xml version="1.0" encoding="UTF-8"?> <!DOCTYPE hibernate-configuration PUBLIC "-//Hibernate/Hibernate Configuration DTD 3.0//EN" "http://www.hibernate.org/dtd/hibernate-configuration-3.0.dtd"> <hibernate-configuration> <session-factory> <!-- 第一步:配置数据库连接信息 --> <property name="hibernateDialect">org.hibernate.dialect.MYSQLDialect</property> <property name="hibernate.connection.driver.class">com.mysql.jdbc.Driver</property> <property name="hibernate.connection.url">jdbc:mysql://127.0.0.1:3306/test?useUnicode=true&characterEncoding=utf-8&useSSL=false&serverTimezone=GMT</property> <property name="hibernate.connection.username">root</property> <property name="hibernate.connection.password">root</property> <!-- 第二步:配置hibernate其他配置 --> <property name="hibernate.show_sql">true</property> <property name="hibernate.hbm2ddl.auto">update</property> <property name="hibernate.current_session_context_class">thread</property> <!-- 第三步:导入映射文件 --> <mapping resource="domain/Student.hbm.xml"/> </session-factory> </hibernate-configuration>
- 编写测试类并运行:
package test;

import org.hibernate.Session;

import org.hibernate.SessionFactory;
import org.hibernate.cfg.Configuration;
import org.hibernate.Transaction;
import org.junit.jupiter.api.Test;

import util.HibernateUtils;

public class HibernateTest01 {

    @Test
    public void test1()
    {
        Configuration config = new Configuration().configure();
        SessionFactory SF = config.buildSessionFactory();
        Session s = SF.openSession();
        Transaction tx = s.beginTransaction();
        tx.commit();
        s.close();
        SF.close();
    }

}
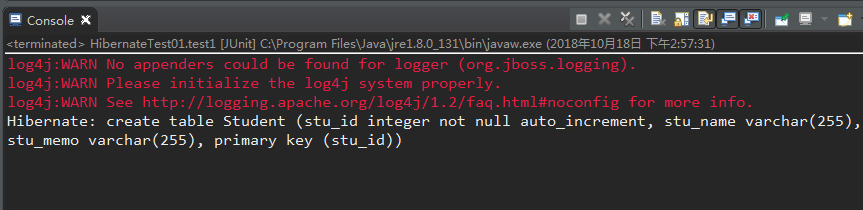
运行上述单元测试,可以从输出中看到Hibernate帮我们完成了创建表的操作:
下面我们完成一个简单的插入操作:
package test;

import org.hibernate.Session;
import org.hibernate.SessionFactory;
import org.hibernate.Transaction;
import org.hibernate.cfg.Configuration;
import org.junit.jupiter.api.Test;

import domain.Student;
public class HibernateTest01 {

    @Test
    public void test1()
    {
        Configuration config = new Configuration().configure();
        SessionFactory SF = config.buildSessionFactory();
        Session s = SF.openSession();
        Transaction tx = s.beginTransaction();
        Student s1 = new Student();
       // s1.setStuId(1);  数据库主键自动生成,可省略此行
        s1.setStuName("uzi");
        s1.setStuMemo("a famous adc");
        s.save(s1);
        tx.commit();
        s.close();
        SF.close();
    }
}

查看数据库中studnt表,结果如下:
