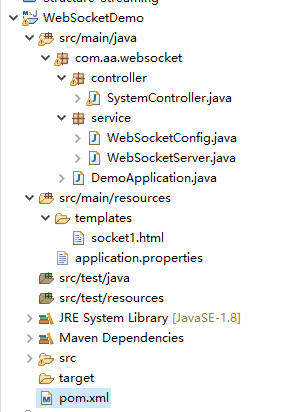
项目结构:
一.Maven依赖
	<dependencies>
		<!-- webSocket依赖 -->
		<dependency>
			<groupId>org.springframework.boot</groupId>
			<artifactId>spring-boot-starter-websocket</artifactId>
		</dependency>
		<!-- springboot项目启动包 -->
		<dependency>
			<groupId>org.springframework.boot</groupId>
			<artifactId>spring-boot-starter-web</artifactId>
		</dependency>
		<!-- 因涉及到js连接服务端,所以也写了对应的html,这里集成下thymeleaf模板,前后分离的项目这一块全都是前端做的 -->
		<dependency>
			<groupId>org.springframework.boot</groupId>
			<artifactId>spring-boot-starter-thymeleaf</artifactId>
		</dependency>
		<!-- 日志 -->
		<dependency>
			<groupId>org.projectlombok</groupId>
			<artifactId>lombok</artifactId>
			<optional>true</optional>
		</dependency>
	</dependencies>
二.配置文件 application.properties:
server.port=8885
#添加Thymeleaf配置
thymeleaf:
cache: false
prefix: classpath:/templates/
suffix: .html
mode: HTML5
encoding: UTF-8
content-type: text/html
三.自定义WebSocketServer,使用底层的websocket方法,提供对应的onOpen、onClose、onMessage、onError方法
3.1 添加webSocketConfig配置类
package com.aa.websocket.service;

import org.springframework.context.annotation.Bean;
import org.springframework.context.annotation.Configuration;
import org.springframework.web.socket.server.standard.ServerEndpointExporter;

/**
 * 	webscoket容器类.
 * 	添加webSocketConfig配置类
 * 	开启WebSocket支持
 * 	如果使用独立的servlet容器,而不是直接使用springboot的内置容器,就不要注入ServerEndpointExporter,因为它将由容器自己提供和管理
 * Created by huiyunfei on 2019/5/31.
 */
@Configuration
public class WebSocketConfig {
	@Bean
	public ServerEndpointExporter serverEndpointExporter() {
		return new ServerEndpointExporter();
	}
}
3.2 添加webSocketServer服务端类
package com.aa.websocket.service;

import java.io.IOException;
import java.util.concurrent.CopyOnWriteArraySet;

import javax.websocket.OnClose;
import javax.websocket.OnError;
import javax.websocket.OnMessage;
import javax.websocket.OnOpen;
import javax.websocket.Session;
import javax.websocket.server.PathParam;
import javax.websocket.server.ServerEndpoint;
import org.springframework.stereotype.Component;
import lombok.extern.log4j.Log4j2;

/**
 * 	添加webSocketServer服务端类
 * Created by huiyunfei on 2019/5/31.
 */

@ServerEndpoint("/websocket/{sid}")
@Component
@Log4j2
public class WebSocketServer {
	//静态变量,用来记录当前在线连接数。应该把它设计成线程安全的。
	private static int onlineCount = 0;
	//concurrent包的线程安全Set,用来存放每个客户端对应的MyWebSocket对象。
	private static CopyOnWriteArraySet<WebSocketServer> webSocketSet = new CopyOnWriteArraySet<WebSocketServer>();

	//与某个客户端的连接会话,需要通过它来给客户端发送数据
	private Session session;

	//接收sid
	private String sid="";


	/**
	 * 连接建立成功调用的方法*/
	@OnOpen
	public void onOpen(Session session, @PathParam("sid") String sid) {
		this.session = session;
		webSocketSet.add(this); //加入set中
		addOnlineCount(); //在线数加1
		log.info("有新窗口开始监听:"+sid+",当前在线人数为" + getOnlineCount());
		this.sid=sid;
		try {
			sendMessage("连接成功");
			for(int i=0;i<10;i++) {
				this.sendMessage("啦啦啦啦<><>><<><><>:"+i);
				Thread.sleep(2000);
			}
		} catch (IOException e) {
			log.error("websocket IO异常");
		} catch (InterruptedException e) {
			log.error("websocket线程异常");
			e.printStackTrace();
		}
	}

	/**
	 * 连接关闭调用的方法
	 */
	@OnClose
	public void onClose() {
		webSocketSet.remove(this); //从set中删除
		subOnlineCount(); //在线数减1
		log.info("有一连接关闭!当前在线人数为" + getOnlineCount());
	}

	/**
	 * 	收到客户端消息后调用的方法
	 *
	 * @param message 客户端发送过来的消息*/
	@OnMessage
	public void onMessage(String message, Session session) {
		log.info("收到来自窗口"+sid+"的信息:"+message);
		//群发消息
		for (WebSocketServer item : webSocketSet) {
			try {
				item.sendMessage(message);
			} catch (IOException e) {
				e.printStackTrace();
			}
		}
	}

	/**
	 *
	 * @param session
	 * @param error
	 */
	@OnError
	public void onError(Session session, Throwable error) {
		log.error("发生错误");
		error.printStackTrace();
	}

	/**
	 * 实现服务器主动推送
	 */
	public  void sendMessage(String message) throws IOException {
		this.session.getBasicRemote().sendText(message);
	}

	/**
	 * 群发自定义消息
	 * */
	public static void sendInfo(String message,@PathParam("sid") String sid) throws IOException {
		log.info("推送消息到窗口"+sid+",推送内容:"+message);
		for (WebSocketServer item : webSocketSet) {
			try {
				//这里可以设定只推送给这个sid的
				if(item.sid.equals(sid)){
					item.sendMessage(message);
				} else{//全发
					item.sendMessage(message);
				}
			} catch (IOException e) {
				continue;
			}
		}
	}
	public static synchronized int getOnlineCount() {
		return onlineCount;
	}
	public static synchronized void addOnlineCount() {
		WebSocketServer.onlineCount++;
	}
	public static synchronized void subOnlineCount() {
		WebSocketServer.onlineCount--;
	}
	public static CopyOnWriteArraySet<WebSocketServer> getWebSocketSet() {
		return webSocketSet;
	}

}
四.添加对应的controller
package com.aa.websocket.controller;

import java.io.IOException;
import java.util.HashMap;
import java.util.Map;
import org.springframework.stereotype.Controller;
import org.springframework.web.bind.annotation.GetMapping;
import org.springframework.web.bind.annotation.PathVariable;
import org.springframework.web.bind.annotation.RequestMapping;
import org.springframework.web.bind.annotation.RequestParam;
import org.springframework.web.bind.annotation.ResponseBody;
import org.springframework.web.servlet.ModelAndView;
import com.aa.websocket.service.WebSocketServer;

@Controller
@RequestMapping("/system")
public class SystemController {

	//对应页面请求
	@GetMapping("/index/{userId}")
	public ModelAndView socket(String userId) {
		ModelAndView mav=new ModelAndView("/socket1");
		mav.addObject("userId", userId);
		return mav;
	}
	//推送数据接口
	@ResponseBody
	@RequestMapping("/socket/push")
	public Map pushToWeb(@RequestParam String cid,@RequestParam String message) {
		Map result = new HashMap<>();
		try {
			WebSocketServer.sendInfo(message,cid);
			result.put("code", 200);
			result.put("msg", "success");
		} catch (IOException e) {
			e.printStackTrace();
		}
		return result;
	}
}
启动类:
package com.aa.websocket;

import org.springframework.boot.SpringApplication;
import org.springframework.boot.autoconfigure.SpringBootApplication;

/**
 * @author
 * @date 2020/11/13
 * @version 1.0
 * 启动类
 */
@SpringBootApplication
public class DemoApplication {

    public static void main(String[] args) {
        SpringApplication.run(DemoApplication.class, args);
    }

}
五.提供socket1.html页面
<!DOCTYPE html>
<html lang="en">
<head>
<meta charset="UTF-8"></meta>
<title>Title</title>
</head>
<body>
hello world!
</body>
<script>
	var socket;
	if (typeof (WebSocket) == "undefined") {
		console.log("您的浏览器不支持WebSocket");
	} else {
		console.log("您的浏览器支持WebSocket");
		//实现化WebSocket对象,指定要连接的服务器地址与端口 建立连接
		//等同于
		index = new WebSocket("ws://localhost:8885/websocket/2");
		//socket = new WebSocket("${basePath}websocket/${cid}".replace("http","ws"));

		//打开事件
		index.onopen = function() {
			console.log("Socket 已打开");
			index.send("这是来自客户端的消息" + location.href + new Date());
		};
		//获得消息事件
		index.onmessage = function(msg) {
			console.log("消息::::+"+msg.data);
			//发现消息进入 开始处理前端触发逻辑
		};
		//关闭事件
		index.onclose = function() {
			console.log("Socket已关闭");
		};
		//发生了错误事件
		index.onerror = function() {
			alert("Socket发生了错误");
			//此时可以尝试刷新页面
		}
		//离开页面时,关闭socket
		//jquery1.8中已经被废弃,3.0中已经移除
		// $(window).unload(function(){
		// socket.close();
		//});
	}

</script>
</html>
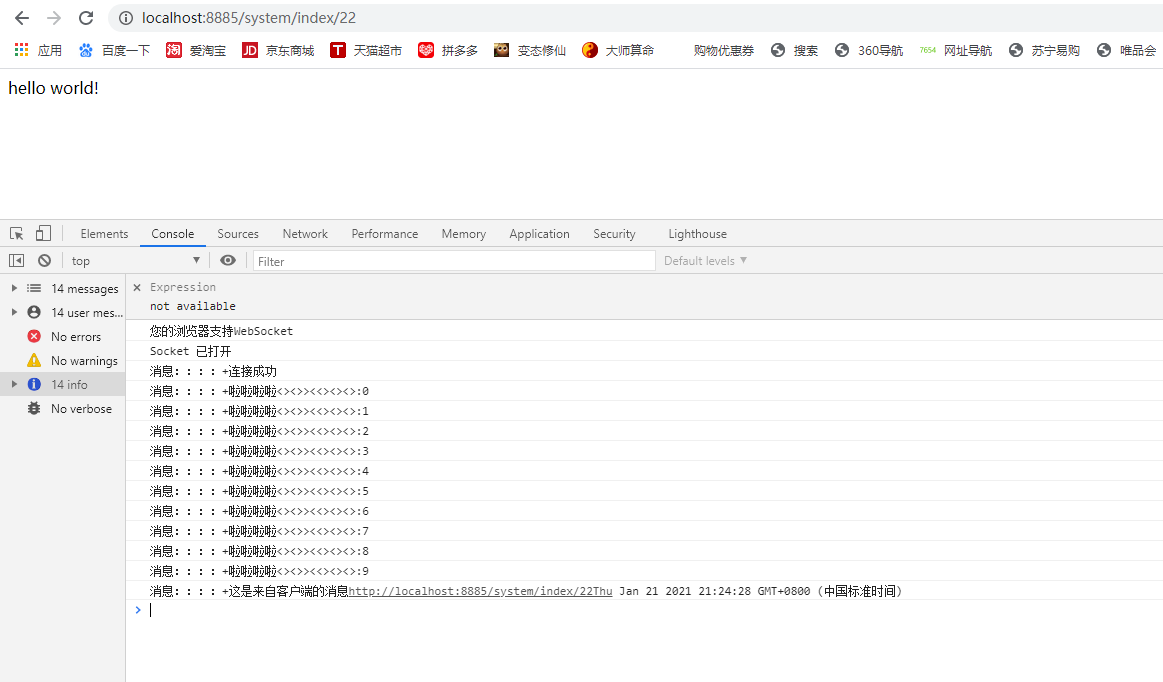
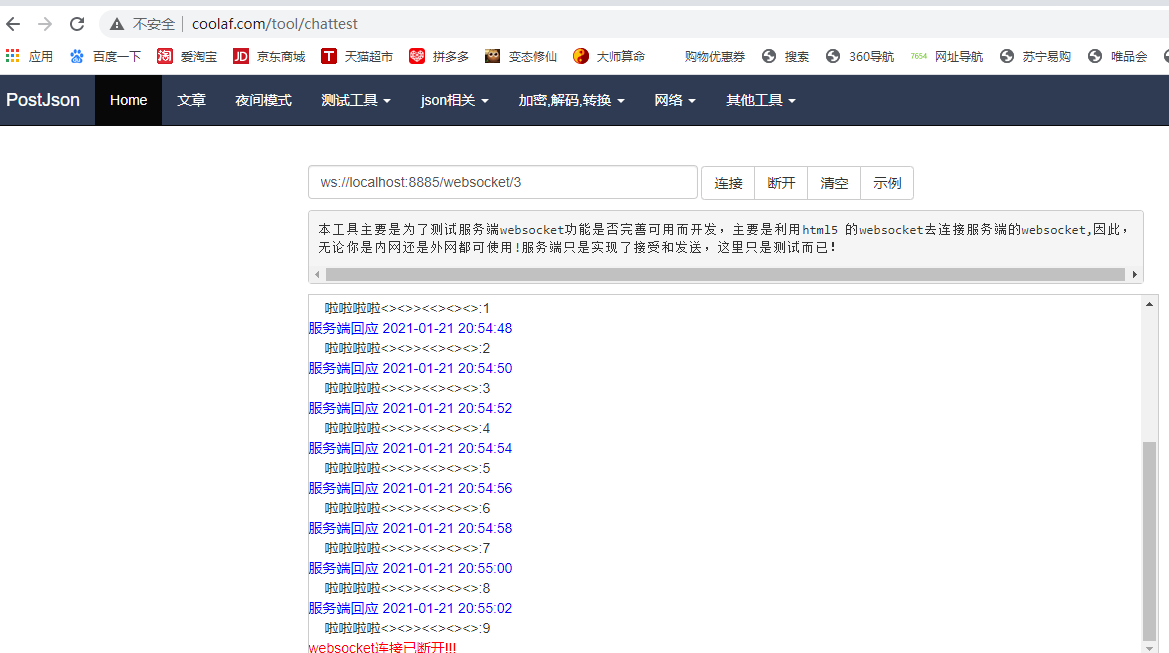
六.项目效果测试
6.1 跳转首页地址:http://localhost:8885/system/index/22