Azure Functions lets you execute your code in a serverless environment without having to first create a VM or publish a web application.
In this article, you learn how to use the Visual Studio 2017 tools for Azure Functions to locally create and test a "hello world" function. You then publish the function code to Azure. These tools are available as part of the Azure development workload in Visual Studio 2017.

This topic includes a video that demonstrates the same basic steps.
Prerequisites
To complete this tutorial:
-
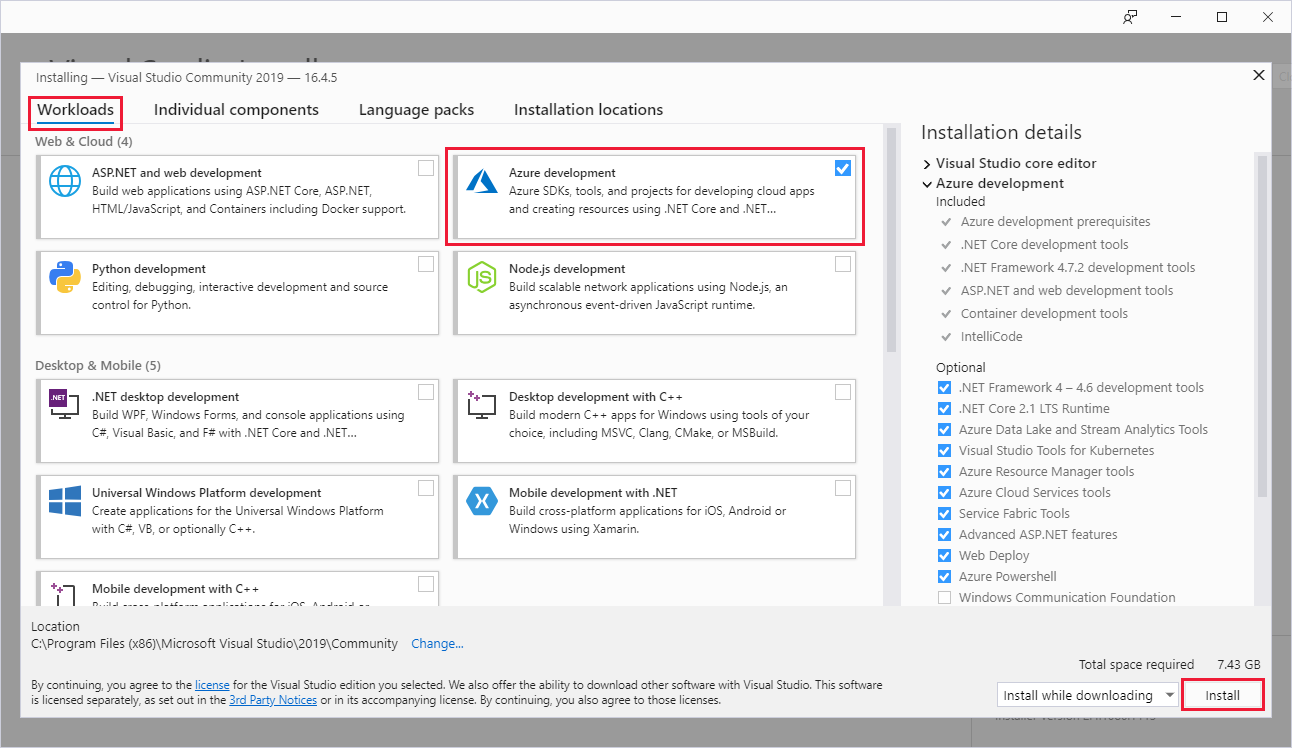
Install Visual Studio 2017 version 15.5 or a later version, including the Azure development workload.
If you have already installed Visual Studio, make sure you have installed any pending updates.
-
If you installed the Azure development workload with Visual Studio 2017 version 15.4 or earlier, you may also need to update your Azure Functions tools.
If you don't have an Azure subscription, create a free account before you begin.
Create a function app project
The Azure Functions project template in Visual Studio creates a project that can be published to a function app in Azure. A function app lets you group functions as a logical unit for management, deployment, and sharing of resources.
-
In Visual Studio, select New > Project from the File menu.
-
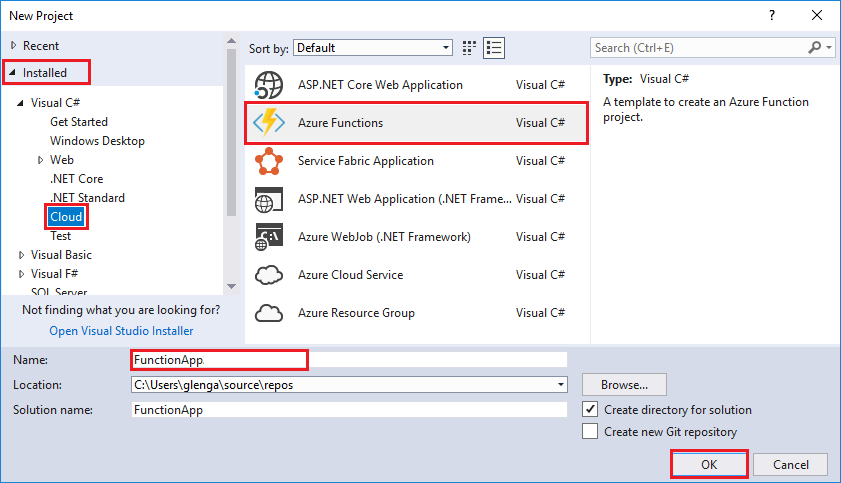
In the New Project dialog, select Installed, expand Visual C# > Cloud, select Azure Functions, type a Name for your project, and click OK. The function app name must be valid as a C# namespace, so don't use underscores, hyphens, or any other nonalphanumeric characters.
-
Use the settings specified in the table that follows the image.

Setting Suggested value Description Version Azure Functions v1
(.NET Framework)This creates a function project that uses the version 1 runtime of Azure Functions. The version 2 runtime, which supports .NET Core, is currently in preview. For more information, see How to target Azure Functions runtime version. Template HTTP trigger This creates a function triggered by an HTTP request. Storage account Storage Emulator An HTTP trigger doesn't use the Storage account connection. All other trigger types require a valid Storage account connection string. Access rights Anonymous The created function can be triggered by any client without providing a key. This authorization setting makes it easy to test your new function. For more information about keys and authorization, see Authorization keys in the HTTP and webhook bindings. - Click OK to create the function project and HTTP triggered function.
Visual Studio creates a project and in it a class that contains boilerplate code for the chosen function type. The FunctionName attribute on the method sets the name of the function. The HttpTrigger attribute specifies that the function is triggered by an HTTP request. The boilerplate code sends an HTTP response that includes a value from the request body or query string. You can add input and output bindings to a function by applying the appropriate attributes to the method. For more information, see the Triggers and bindings section of the Azure Functions C# developer reference.

Now that you've created your function project and an HTTP-triggered function, you can test it on your local computer.
Test the function locally
Azure Functions Core Tools lets you run an Azure Functions project on your local development computer. You are prompted to install these tools the first time you start a function from Visual Studio.
-
To test your function, press F5. If prompted, accept the request from Visual Studio to download and install Azure Functions Core (CLI) tools. You may also need to enable a firewall exception so that the tools can handle HTTP requests.
-
Copy the URL of your function from the Azure Functions runtime output.

-
Paste the URL for the HTTP request into your browser's address bar. Append the query string
?name=<yourname>to this URL and execute the request. The following shows the response in the browser to the local GET request returned by the function:
-
To stop debugging, press Shift + F5.
After you have verified that the function runs correctly on your local computer, it's time to publish the project to Azure.
Publish the project to Azure
You must have a function app in your Azure subscription before you can publish your project. You can create a function app right from Visual Studio.
-
In Solution Explorer, right-click the project and select Publish. Choose Create New and then Publish.

-
If you haven't already connected Visual Studio to your Azure account, select Add an account....
-
In the Create App Service dialog, use the Hosting settings as specified in the following table:

Setting Suggested value Description App Name Globally unique name Name that uniquely identifies your new function app. Subscription Choose your subscription The Azure subscription to use. Resource Group myResourceGroup Name of the resource group in which to create your function app. Choose New to create a new resource group. App Service Plan Consumption plan Make sure to choose the Consumption under Size after you click New to create a new plan. Also, choose a Location in a region near you or near other services your functions access. Note
An Azure storage account is required by the Functions runtime. Because of this, a new Azure Storage account is created for you when you create a function app.
-
Click Create to create a function app and related resources in Azure with these settings and deploy your function project code.
-
After the deployment is complete, make a note of the Site URL value, which is the address of your function app in Azure.

Test your function in Azure
-
Copy the base URL of the function app from the Publish profile page. Replace the
localhost:portportion of the URL you used when testing the function locally with the new base URL. As before, make sure to append the query string?name=<yourname>to this URL and execute the request.The URL that calls your HTTP triggered function should be in the following format:
http://<functionappname>.azurewebsites.net/api/<functionname>?name=<yourname> -
Paste this new URL for the HTTP request into your browser's address bar. The following shows the response in the browser to the remote GET request returned by the function:
