1.前期工作准备
1.首先从GitHub上下载models 网址:https://github.com/tensorflow/models,将object detection文件夹整个复制到python安装目录中的pythonpython3.5.2Libsite-packages下(目的是为了防止之后的代码发生找不到包的问题)
2.protobuf下载,我下载的是protoc-3.3.0-win32.zip 网址:https://github.com/google/protobuf/releases
3.将其解压到第一步下载的models文件夹中的research文件夹下,CMD cd到research文件夹下输入
protoc ./object_detection/protos/*.proto --python_out=.
我在这里发生了报错:(这里转载并参考了https://blog.csdn.net/xingwei_09/article/details/79161221的解决方法)

解决方法就是在Libsite-packages文件夹下(无论是python还是anaconda),找到tensorflow_model.pth文件,没有就新建一个,输入下方路径:

之后就Ok啦!
2.首先准备好图片以及xml文件

(说明:这里的XML文件是需要使用labelImg软件进行批注,但是我的数据中原来已经完成批注,所以这里不再解释)
3.创建文件目录

说明:其中data文件夹中存放的是之后要进行生成的train.csv,eval.csv , train.record,eval.record等文件;
1.output文件夹存放训练后的输出路径;
2.pretrained_model中存放的是从GitHub上下载解压的ssd_mobilenet_v1_coco_2018_01_28文件中的内容,下载网址: https://github.com/tensorflow/models/blob/master/research/object_detection/g3doc/detection_model_zoo.md
3.train与test分别存放训练与检测的图片与XML文件;
4.training中存放从object_detection文件夹中复制来的ssd_mobilenet_v1_coco.config;
下面用到的文件说明(未说到的没用):
1.xml_to_cvs.py是将XML文件转换为CSV文件的代码;
2.cvs_to_tfrecord.py、generate_tfrecord.py分别是使用pycharm、CMD两种方法将CSV转换为TFRECORD文件的代码
4.进行XML到CSV文件的转换
代码:
import os
import glob
import pandas as pd
import xml.etree.ElementTree as ET


def xml_to_csv(path):
    xml_list = []
    # 读取注释文件
    for xml_file in glob.glob(path + '/*.xml'):
        tree = ET.parse(xml_file)
        root = tree.getroot()
        for member in root.findall('object'):
            # value=(root.find('filename').test + '.jpg',
            #这里要注意,如果生成的filename中没有.jpg文件,就在这里修改
            value = (root.find('filename').text,
                     int(root.find('size')[0].text),
                     int(root.find('size')[1].text),
                     member[0].text,
                     int(member[4][0].text),
                     int(member[4][1].text),
                     int(member[4][2].text),
                     int(member[4][3].text)
                     )
            xml_list.append(value)
    column_name = ['filename', 'width', 'height', 'class', 'xmin', 'ymin', 'xmax', 'ymax']

    # 将所有数据分为样本集和验证集,一般按照3:1的比例
    train_list = xml_list[0: int(len(xml_list) * 0.67)]
    eval_list = xml_list[int(len(xml_list) * 0.67) + 1: ]

    # 保存为CSV格式
    train_df = pd.DataFrame(train_list, columns=column_name)
    eval_df = pd.DataFrame(eval_list, columns=column_name)
    train_df.to_csv('D:\software\pycharm\pycharmproject\imagerecognition\models-master\models-master\research\securityhattest\data\train.csv', index=None)
    eval_df.to_csv('D:\software\pycharm\pycharmproject\imagerecognition\models-master\models-master\research\securityhattest\data\eval.csv', index=None)


def main():
    path = 'D:\software\pycharm\pycharmproject\imagerecognition\models-master\models-master\research\securityhattest\data\train'
    xml_to_csv(path)
    print('Successfully converted xml to csv.')

main()
5.将生成的CSV文件转换为tfrecord文件
方法一:在pycharm中直接运行 cvs_to_tfrecord.py
from __future__ import division
from __future__ import print_function
from __future__ import absolute_import

import os
import io
import pandas as pd
import tensorflow as tf

from PIL import Image
# from object_detection.utils import dataset_util
from object_detection.utils import dataset_util
from collections import namedtuple, OrderedDict

flags = tf.app.flags
flags.DEFINE_string('csv_input', '', 'Path to the CSV input')
flags.DEFINE_string('output_path', '', 'Path to output TFRecord')
FLAGS = flags.FLAGS


# 将分类名称转成ID号
#这里要修改成你的分类ID,打开之前的CVS文件可以看到
def class_text_to_int(row_label):
    if row_label == 'hat':
        return 1
    elif row_label == 'person':
        return 2
    else:
        print('NONE: ' + row_label)
        # None


def split(df, group):
    data = namedtuple('data', ['filename', 'object'])
    gb = df.groupby(group)
    return [data(filename, gb.get_group(x)) for filename, x in zip(gb.groups.keys(), gb.groups)]


def create_tf_example(group, path):
    print(os.path.join(path, '{}'.format(group.filename)))
    with tf.gfile.GFile(os.path.join(path, '{}'.format(group.filename)), 'rb') as fid:
        encoded_jpg = fid.read()
    encoded_jpg_io = io.BytesIO(encoded_jpg)
    image = Image.open(encoded_jpg_io)
    width, height = image.size

    filename = (group.filename + '.jpg').encode('utf8')
    #这里要注意,很多网上的代码都是filename =group.filename.encode('utf8'),我直接运行会产生段错误
    image_format = b'jpg'
    xmins = []
    xmaxs = []
    ymins = []
    ymaxs = []
    classes_text = []
    classes = []

    for index, row in group.object.iterrows():
        xmins.append(row['xmin'] / width)
        xmaxs.append(row['xmax'] / width)
        ymins.append(row['ymin'] / height)
        ymaxs.append(row['ymax'] / height)
        classes_text.append(row['class'].encode('utf8'))
        classes.append(class_text_to_int(row['class']))

    tf_example = tf.train.Example(features=tf.train.Features(feature={
        'image/height': dataset_util.int64_feature(height),
        'image/width': dataset_util.int64_feature(width),
        'image/filename': dataset_util.bytes_feature(filename),
        'image/source_id': dataset_util.bytes_feature(filename),
        'image/encoded': dataset_util.bytes_feature(encoded_jpg),
        'image/format': dataset_util.bytes_feature(image_format),
        'image/object/bbox/xmin': dataset_util.float_list_feature(xmins),
        'image/object/bbox/xmax': dataset_util.float_list_feature(xmaxs),
        'image/object/bbox/ymin': dataset_util.float_list_feature(ymins),
        'image/object/bbox/ymax': dataset_util.float_list_feature(ymaxs),
        'image/object/class/text': dataset_util.bytes_list_feature(classes_text),
        'image/object/class/label': dataset_util.int64_list_feature(classes),
    }))
    return tf_example


def main(csv_input, output_path, imgPath):
    writer = tf.python_io.TFRecordWriter(output_path)
    path = imgPath
    examples = pd.read_csv(csv_input)
    grouped = split(examples, 'filename')
    for group in grouped:
        tf_example = create_tf_example(group, path)
        writer.write(tf_example.SerializeToString())

    writer.close()
    print('Successfully created the TFRecords: {}'.format(output_path))


if __name__ == '__main__':
    # imgPath = 'E:dataImages'存放的图片的路径
    imgPath = r'D:softwarepycharmpycharmprojectimagerecognitionmodels-mastermodels-master
esearchsecurityhattestimages	rain'

    # 生成train.record文件
    output_path = 'data/train.tfrecord'#输出路径
    csv_input = 'data/train.csv'#存放的csv文件路径
    main(csv_input, output_path, imgPath)

    # 生成验证文件 eval.record
    output_path = 'data/eval.tfrecord'
    csv_input = 'data/eval.csv'
    main(csv_input, output_path, imgPath)
方法二:在CMD中CD到该项目文件夹下,我这里是images文件夹下,输入下列命令,运行generate_tfrecord.py:
python generate_tfrecord.py --csv_input=data/train.csv  --output_path=data/train.record
python generate_tfrecord.py --csv_input=data/eval.csv  --output_path=eval.record
输出Successfully created the TFRecords即表示完成。
(小小提醒:开始没发现,我的数据集中XML文件中的图片名称有的是JPEG格式,而对应的图片全是JPG格式,导致PY代码中出现段错误,提醒大家多多注意这中坑…………)
6.新建自己的pbtxt文件
在自己项目中的data文件夹中新建label_map.pbtxt文件,我的是hatlabel_map.pbtxt,输入:
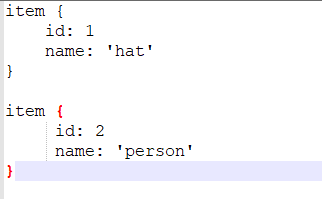
数字要与cvs_to_tfrecord.py、generate_tfrecord.py中的class_text_to_int函数一致对应
7.修改自己的ssd_mobilenet_v1_coco.config文件
代码:
# SSD with Mobilenet v1 configuration for MSCOCO Dataset.
# Users should configure the fine_tune_checkpoint field in the train config as
# well as the label_map_path and input_path fields in the train_input_reader and
# eval_input_reader. Search for "PATH_TO_BE_CONFIGURED" to find the fields that
# should be configured.

model {
  ssd {
    num_classes: 2#这里是你的种类数
    box_coder {
      faster_rcnn_box_coder {
        y_scale: 10.0
        x_scale: 10.0
        height_scale: 5.0
        width_scale: 5.0
      }
    }
    matcher {
      argmax_matcher {
        matched_threshold: 0.5
        unmatched_threshold: 0.5
        ignore_thresholds: false
        negatives_lower_than_unmatched: true
        force_match_for_each_row: true
      }
    }
    similarity_calculator {
      iou_similarity {
      }
    }
    anchor_generator {
      ssd_anchor_generator {
        num_layers: 6
        min_scale: 0.2
        max_scale: 0.95
        aspect_ratios: 1.0
        aspect_ratios: 2.0
        aspect_ratios: 0.5
        aspect_ratios: 3.0
        aspect_ratios: 0.3333
      }
    }
    image_resizer {
      fixed_shape_resizer {
        height: 300
         300
      }
    }
    box_predictor {
      convolutional_box_predictor {
        min_depth: 0
        max_depth: 0
        num_layers_before_predictor: 0
        use_dropout: false
        dropout_keep_probability: 0.8
        kernel_size: 1
        box_code_size: 4
        apply_sigmoid_to_scores: false
        conv_hyperparams {
          activation: RELU_6,
          regularizer {
            l2_regularizer {
              weight: 0.00004
            }
          }
          initializer {
            truncated_normal_initializer {
              stddev: 0.03
              mean: 0.0
            }
          }
          batch_norm {
            train: true,
            scale: true,
            center: true,
            decay: 0.9997,
            epsilon: 0.001,
          }
        }
      }
    }
    feature_extractor {
      type: 'ssd_mobilenet_v1'
      min_depth: 16
      depth_multiplier: 1.0
      conv_hyperparams {
        activation: RELU_6,
        regularizer {
          l2_regularizer {
            weight: 0.00004
          }
        }
        initializer {
          truncated_normal_initializer {
            stddev: 0.03
            mean: 0.0
          }
        }
        batch_norm {
          train: true,
          scale: true,
          center: true,
          decay: 0.9997,
          epsilon: 0.001,
        }
      }
    }
    loss {
      classification_loss {
        weighted_sigmoid {
        }
      }
      localization_loss {
        weighted_smooth_l1 {
        }
      }
      hard_example_miner {
        num_hard_examples: 3000
        iou_threshold: 0.99
        loss_type: CLASSIFICATION
        max_negatives_per_positive: 3
        min_negatives_per_image: 0
      }
      classification_weight: 1.0
      localization_weight: 1.0
    }
    normalize_loss_by_num_matches: true
    post_processing {
      batch_non_max_suppression {
        score_threshold: 1e-8
        iou_threshold: 0.6
        max_detections_per_class: 100
        max_total_detections: 100
      }
      score_converter: SIGMOID
    }
  }
}

train_config: {
  batch_size: 2
  optimizer {
    rms_prop_optimizer: {
      learning_rate: {
        exponential_decay_learning_rate {
          initial_learning_rate: 0.004
          decay_steps: 800720
          decay_factor: 0.95
        }
      }
      momentum_optimizer_value: 0.9
      decay: 0.9
      epsilon: 1.0
    }
  }
#这里修改
  fine_tune_checkpoint: "D:/software/pycharm/pycharmproject/imagerecognition/models-master/models-master/research/securityhattest/images/pretrained_model/model.ckpt"
  from_detection_checkpoint: true
  # Note: The below line limits the training process to 200K steps, which we
  # empirically found to be sufficient enough to train the pets dataset. This
  # effectively bypasses the learning rate schedule (the learning rate will
  # never decay). Remove the below line to train indefinitely.
  num_steps: 40000
  data_augmentation_options {
    random_horizontal_flip {
    }
  }
  data_augmentation_options {
    ssd_random_crop {
    }
  }
}
#下方4个路径修改
train_input_reader: {
  tf_record_input_reader {
    input_path: "D:/software/pycharm/pycharmproject/imagerecognition/models-master/models-master/research/securityhattest/images/data/train.record"
  }
  label_map_path: "D:/software/pycharm/pycharmproject/imagerecognition/models-master/models-master/research/securityhattest/images/data/hatlabel_map.pbtxt"
}

eval_config: {
  num_examples: 48#这里要修改
  # Note: The below line limits the evaluation process to 10 evaluations.
  # Remove the below line to evaluate indefinitely.
  max_evals: 10
}

eval_input_reader: {
  tf_record_input_reader {
    input_path: "D:/software/pycharm/pycharmproject/imagerecognition/models-master/models-master/research/securityhattest/images/data/eval.record"
  }
  label_map_path: "D:/software/pycharm/pycharmproject/imagerecognition/models-master/models-master/research/securityhattest/images/data/label_map.pbtxt"
  shuffle: false
  num_readers: 1
}
8.开始训练
我是直接打开researchobject_detectionlegacy下的train.py文件,修改后直接运行
代码:
# Copyright 2017 The TensorFlow Authors. All Rights Reserved.
#
# Licensed under the Apache License, Version 2.0 (the "License");
# you may not use this file except in compliance with the License.
# You may obtain a copy of the License at
#
#     http://www.apache.org/licenses/LICENSE-2.0
#
# Unless required by applicable law or agreed to in writing, software
# distributed under the License is distributed on an "AS IS" BASIS,
# WITHOUT WARRANTIES OR CONDITIONS OF ANY KIND, either express or implied.
# See the License for the specific language governing permissions and
# limitations under the License.
# ==============================================================================

r"""Training executable for detection models.

This executable is used to train DetectionModels. There are two ways of
configuring the training job:

1) A single pipeline_pb2.TrainEvalPipelineConfig configuration file
can be specified by --pipeline_config_path.

Example usage:
    ./train
        --logtostderr
        --train_dir=path/to/train_dir
        --pipeline_config_path=pipeline_config.pbtxt

2) Three configuration files can be provided: a model_pb2.DetectionModel
configuration file to define what type of DetectionModel is being trained, an
input_reader_pb2.InputReader file to specify what training data will be used and
a train_pb2.TrainConfig file to configure training parameters.

Example usage:
    ./train
        --logtostderr
        --train_dir=path/to/train_dir
        --model_config_path=model_config.pbtxt
        --train_config_path=train_config.pbtxt
        --input_config_path=train_input_config.pbtxt
"""

import functools
import json
import os
import tensorflow as tf
from tensorflow.contrib import framework as contrib_framework

from object_detection.builders import dataset_builder
from object_detection.builders import graph_rewriter_builder
from object_detection.builders import model_builder
from object_detection.legacy import trainer
from object_detection.utils import config_util

tf.logging.set_verbosity(tf.logging.INFO)

flags = tf.app.flags
flags.DEFINE_string('master', '', 'Name of the TensorFlow master to use.')
flags.DEFINE_integer('task', 0, 'task id')
flags.DEFINE_integer('num_clones', 1, 'Number of clones to deploy per worker.')
flags.DEFINE_boolean('clone_on_cpu', False,
                     'Force clones to be deployed on CPU.  Note that even if '
                     'set to False (allowing ops to run on gpu), some ops may '
                     'still be run on the CPU if they have no GPU kernel.')
flags.DEFINE_integer('worker_replicas', 1, 'Number of worker+trainer '
                     'replicas.')
flags.DEFINE_integer('ps_tasks', 0,
                     'Number of parameter server tasks. If None, does not use '
                     'a parameter server.')
flags.DEFINE_string('train_dir', r'D:softwarepycharmpycharmprojectimagerecognitionmodels-mastermodels-master
esearchsecurityhattestimagesoutput',
                    'Directory to save the checkpoints and training summaries.')

flags.DEFINE_string('pipeline_config_path', r'D:softwarepycharmpycharmprojectimagerecognitionmodels-mastermodels-master
esearchsecurityhattestimages	rainingssd_mobilenet_v1_coco.config',
                    'Path to a pipeline_pb2.TrainEvalPipelineConfig config '
                    'file. If provided, other configs are ignored')

flags.DEFINE_string('train_config_path', '',
                    'Path to a train_pb2.TrainConfig config file.')
flags.DEFINE_string('input_config_path', '',
                    'Path to an input_reader_pb2.InputReader config file.')
flags.DEFINE_string('model_config_path', '',
                    'Path to a model_pb2.DetectionModel config file.')

FLAGS = flags.FLAGS


@contrib_framework.deprecated(None, 'Use object_detection/model_main.py.')
def main(_):
  assert FLAGS.train_dir, '`train_dir` is missing.'
  if FLAGS.task == 0: tf.gfile.MakeDirs(FLAGS.train_dir)
  if FLAGS.pipeline_config_path:
    configs = config_util.get_configs_from_pipeline_file(
        FLAGS.pipeline_config_path)
    if FLAGS.task == 0:
      tf.gfile.Copy(FLAGS.pipeline_config_path,
                    os.path.join(FLAGS.train_dir, 'pipeline.config'),
                    overwrite=True)
  else:
    configs = config_util.get_configs_from_multiple_files(
        model_config_path=FLAGS.model_config_path,
        train_config_path=FLAGS.train_config_path,
        train_input_config_path=FLAGS.input_config_path)
    if FLAGS.task == 0:
      for name, config in [('model.config', FLAGS.model_config_path),
                           ('train.config', FLAGS.train_config_path),
                           ('input.config', FLAGS.input_config_path)]:
        tf.gfile.Copy(config, os.path.join(FLAGS.train_dir, name),
                      overwrite=True)

  model_config = configs['model']
  train_config = configs['train_config']
  input_config = configs['train_input_config']

  model_fn = functools.partial(
      model_builder.build,
      model_config=model_config,
      is_training=True)

  def get_next(config):
    return dataset_builder.make_initializable_iterator(
        dataset_builder.build(config)).get_next()

  create_input_dict_fn = functools.partial(get_next, input_config)

  env = json.loads(os.environ.get('TF_CONFIG', '{}'))
  cluster_data = env.get('cluster', None)
  cluster = tf.train.ClusterSpec(cluster_data) if cluster_data else None
  task_data = env.get('task', None) or {'type': 'master', 'index': 0}
  task_info = type('TaskSpec', (object,), task_data)

  # Parameters for a single worker.
  ps_tasks = 0
  worker_replicas = 1
  worker_job_name = 'lonely_worker'
  task = 0
  is_chief = True
  master = ''

  if cluster_data and 'worker' in cluster_data:
    # Number of total worker replicas include "worker"s and the "master".
    worker_replicas = len(cluster_data['worker']) + 1
  if cluster_data and 'ps' in cluster_data:
    ps_tasks = len(cluster_data['ps'])

  if worker_replicas > 1 and ps_tasks < 1:
    raise ValueError('At least 1 ps task is needed for distributed training.')

  if worker_replicas >= 1 and ps_tasks > 0:
    # Set up distributed training.
    server = tf.train.Server(tf.train.ClusterSpec(cluster), protocol='grpc',
                             job_name=task_info.type,
                             task_index=task_info.index)
    if task_info.type == 'ps':
      server.join()
      return

    worker_job_name = '%s/task:%d' % (task_info.type, task_info.index)
    task = task_info.index
    is_chief = (task_info.type == 'master')
    master = server.target

  graph_rewriter_fn = None
  if 'graph_rewriter_config' in configs:
    graph_rewriter_fn = graph_rewriter_builder.build(
        configs['graph_rewriter_config'], is_training=True)

  trainer.train(
      create_input_dict_fn,
      model_fn,
      train_config,
      master,
      task,
      FLAGS.num_clones,
      worker_replicas,
      FLAGS.clone_on_cpu,
      ps_tasks,
      worker_job_name,
      is_chief,
      FLAGS.train_dir,
      graph_hook_fn=graph_rewriter_fn)


if __name__ == '__main__':
  tf.app.run()
修改内容:只是添加了train_dir、pipeline_config_path的路径
9.打开tensorboard查看训练过程
1.CMD CD到images文件夹中的output文件夹,输入tensorboard --logdir ./

10.训练完成,导出训练模型
CMD CD到object_detection文件夹,输入:
 python export_inference_graph.py --input_type image_tensor
 --pipeline_config_path=D://software//pycharm//pycharmproject//imagerecognition//models-master//models-master//research//securityhattest//images//training//ssd_mobilenet_v1_coco.config
--trained_checkpoint_prefix=D://software//pycharm//pycharmproject//imagerecognition//models-master//models-master//research//securityhattest//images//output//model.ckpt-10374
--output_directory=D://software//pycharm//pycharmproject//imagerecognition//models-master//models-master//research//securityhattest//images//finished
报错:ValueError: The passed save_path is not a valid checkpoint:
原因是项目所在的文件导入路径的字符太长
将--trained_checkpoint_prefix的路径改的短一点就可以了
之后的模型检验借鉴了https://blog.csdn.net/qq_33624802/article/details/82384117
11.模型检验
安装了anaconda的大家可以使用jupyter打开object_detection中的object_detection_tutorial.ipynb,如果使用的是python可以使用下面的代码:
# -*- coding: utf-8 -*-


import numpy as np
import os
import pylab

import tensorflow as tf
from matplotlib import pyplot as plt
from PIL import Image
#下面的两个导入根据你PY文件的路径进行修改,我的是在object——detection文件夹下
from utils import label_map_util

from utils import visualization_utils as vis_util

# What model to download.刚才训练模型的输出路径
MODEL_NAME = 'D:\software\pycharm\pycharmproject\imagerecognition\models-master\models-master\research\securityhattest\images\finished'

# Path to frozen detection graph. This is the actual model that is used for the object detection.
PATH_TO_CKPT = MODEL_NAME + '/frozen_inference_graph.pb'

# List of the strings that is used to add correct label for each box.
#PATH_TO_LABELS = os.path.join('data', 'mscoco_label_map.pbtxt')
#你的label_map.pbtxt文件路径
PATH_TO_LABELS='D:\software\pycharm\pycharmproject\imagerecognition\models-master\models-master\research\securityhattest\images\data\hatlabel_map.pbtxt'

NUM_CLASSES = 2#分类个数

tf.reset_default_graph()

od_graph_def = tf.GraphDef()
with tf.gfile.GFile(PATH_TO_CKPT, 'rb') as fid:
    serialized_graph = fid.read()
    od_graph_def.ParseFromString(serialized_graph)
    tf.import_graph_def(od_graph_def, name='')

label_map = label_map_util.load_labelmap(PATH_TO_LABELS)
categories = label_map_util.convert_label_map_to_categories(label_map, max_num_classes=NUM_CLASSES,
                                                            use_display_name=True)
category_index = label_map_util.create_category_index(categories)


def load_image_into_numpy_array(image):
    (im_width, im_height) = image.size
    return np.array(image.getdata()).reshape(
        (im_height, im_width, 3)).astype(np.uint8)


#存放用于测试的图片路径,个数更改的话for i in range(1, 5)也要更改
PATH_TO_TEST_IMAGES_DIR = 'D:\software\pycharm\pycharmproject\imagerecognition\models-master\models-master\research\securityhattest\images\test'
TEST_IMAGE_PATHS = [os.path.join(PATH_TO_TEST_IMAGES_DIR, 'image{}.jpg'.format(i)) for i in range(1, 5)]

# Size, in inches, of the output images.
IMAGE_SIZE = (12, 8)

detection_graph = tf.get_default_graph()
with tf.Session(graph=detection_graph) as sess:
    for image_path in TEST_IMAGE_PATHS:
        image = Image.open(image_path)
        # the array based representation of the image will be used later in order to prepare the
        # result image with boxes and labels on it.
        image_np = load_image_into_numpy_array(image)
        # Expand dimensions since the model expects images to have shape: [1, None, None, 3]
        image_np_expanded = np.expand_dims(image_np, axis=0)
        image_tensor = detection_graph.get_tensor_by_name('image_tensor:0')
        # Each box represents a part of the image where a particular object was detected.
        boxes = detection_graph.get_tensor_by_name('detection_boxes:0')
        # Each score represent how level of confidence for each of the objects.
        # Score is shown on the result image, together with the class label.
        scores = detection_graph.get_tensor_by_name('detection_scores:0')
        classes = detection_graph.get_tensor_by_name('detection_classes:0')
        num_detections = detection_graph.get_tensor_by_name('num_detections:0')
        # Actual detection.
        (boxes, scores, classes, num_detections) = sess.run(
            [boxes, scores, classes, num_detections],
            feed_dict={image_tensor: image_np_expanded})
        # Visualization of the results of a detection.
        vis_util.visualize_boxes_and_labels_on_image_array(
            image_np,
            np.squeeze(boxes),
            np.squeeze(classes).astype(np.int32),
            np.squeeze(scores),
            category_index,
            use_normalized_coordinates=True,
            line_thickness=8)
        plt.figure(figsize=IMAGE_SIZE)
        plt.imshow(image_np)
        pylab.show()
12.效果展示


我是使用自己电脑,设置训练40000次,等不上了10000就停了,而且数据量较小,所以有的图片识别效果不好,下一步就是扩大数据集,用服务器跑了~
输出详细信息:参见https://blog.csdn.net/weixin_43599336/article/details/84112134