mask掩膜的实质:
原图image与掩膜mask进行与运输得到了结果图image;
何为图与掩膜的与运算?
其实就是图像中每个像素和掩膜中每个对应像素进行与运行;
如:1 & 1 = 1;1 & 0 = 0;
又如:一个3 * 3的图像与3 * 3的掩膜进行运算,
如下所示:

这里我们用来提高图片的对比度的掩模矩阵如下:
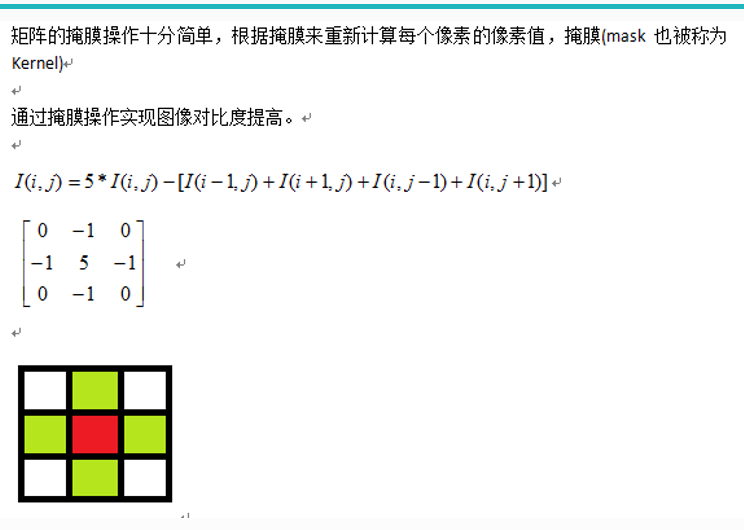
原理很简单,5倍的红色像素点的值减去四个绿色的像素点的值之和的结果作为新的红色像素点的像素值。
整张图片按照这种方法遍历取模一遍。
一、具体的底层原理代码如下:
#include <opencv.hpp>
#include <iostream>
#include <math.h>
#include <opencv2/highgui/highgui_c.h>


using namespace cv;

int main(int argc, char** argv) {
    Mat src, dst;
    src = imread("L:/4.jpg");
    if (!src.data) {
        printf("could not load image...
");
        return -1;
    }
    namedWindow("input image", CV_WINDOW_AUTOSIZE);
    imshow("input image", src);


    int cols = (src.cols - 1) * src.channels();
    int offsetx = src.channels();
    int rows = src.rows;

    dst = Mat::zeros(src.size(), src.type());  //大小和类型与原照片一样的零矩阵
    for (int row = 1; row < (rows - 1); row++) {
        const uchar* previous = src.ptr<uchar>(row - 1);
        const uchar* current = src.ptr<uchar>(row);
        const uchar* next = src.ptr<uchar>(row + 1);
        uchar* output = dst.ptr<uchar>(row);
        for (int col = offsetx; col < cols; col++) {
            output[col] = saturate_cast<uchar>(5 * current[col] - (current[col - offsetx] + current[col + offsetx] + previous[col] + next[col]));  //核心部分
        }
    }

    namedWindow("contrast image demo", CV_WINDOW_AUTOSIZE);
    imshow("contrast image demo", dst);

    waitKey(0);
    return 0;
}
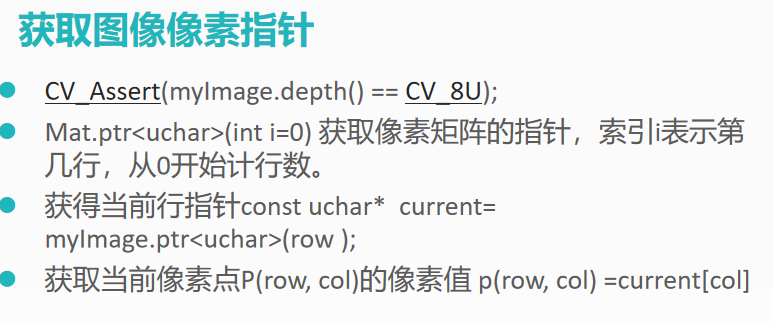
程序的核心部分涉及指针问题:
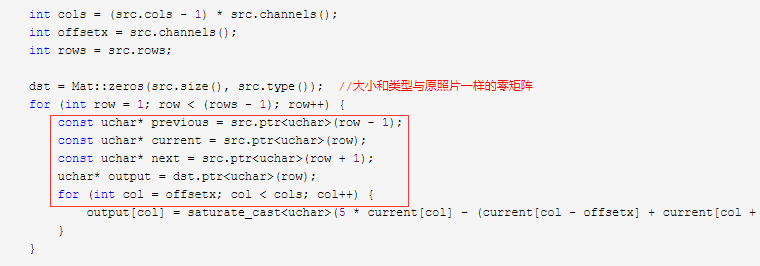
像素边界值处理问题:


二、直接调用opencv的核
#include <opencv.hpp>
#include <iostream>
#include <math.h>
#include <opencv2/highgui/highgui_c.h>


using namespace cv;

int main(int argc, char** argv) {
    Mat src, dst;
    src = imread("L:/4.jpg");
    if (!src.data) {
        printf("could not load image...
");
        return -1;
    }
    namedWindow("input image", CV_WINDOW_AUTOSIZE);
    imshow("input image", src);

    double t = getTickCount();
    Mat kernel = (Mat_<char>(3, 3) << 0, -1, 0, -1, 5, -1, 0, -1, 0);
    filter2D(src, dst, src.depth(), kernel);
    double timeconsume = (getTickCount() - t) / getTickFrequency();
    printf("tim consume %.2f
", timeconsume);

    namedWindow("contrast image demo", CV_WINDOW_AUTOSIZE);
    imshow("contrast image demo", dst);

    waitKey(0);
    return 0;
}
代码的主要变化的部分为

其他的头部和尾部不变
一and二代码的原理和效果完全一样,结果如下:
原图:
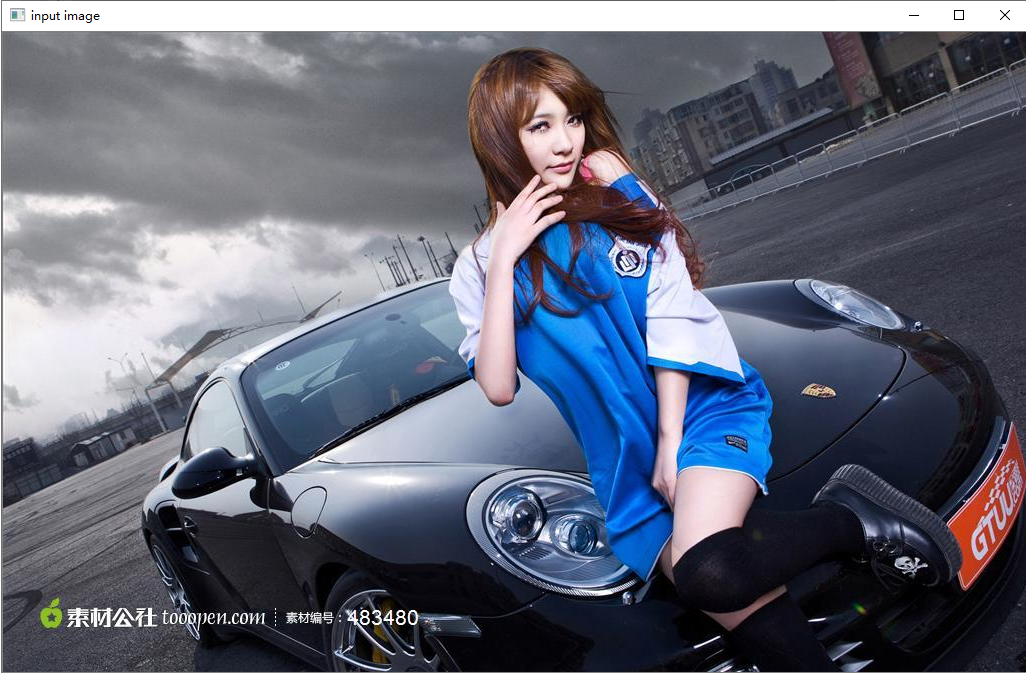
增强后的图:

看车后面的栏杆效果还是很明显的。