WeUiSharp
基于 WPF 实现的仿 Windows 桌面版微信 UI 界面库
项目主页:https://github.com/IUpdatable/WeUiSharp 欢迎Star
1. 特点
- .NET Framework >= 4.7.2
- 多语言动态切换
- 主题动态切换(TODO:深色主题)
- MIT 协议,开源可商用
2. 概览
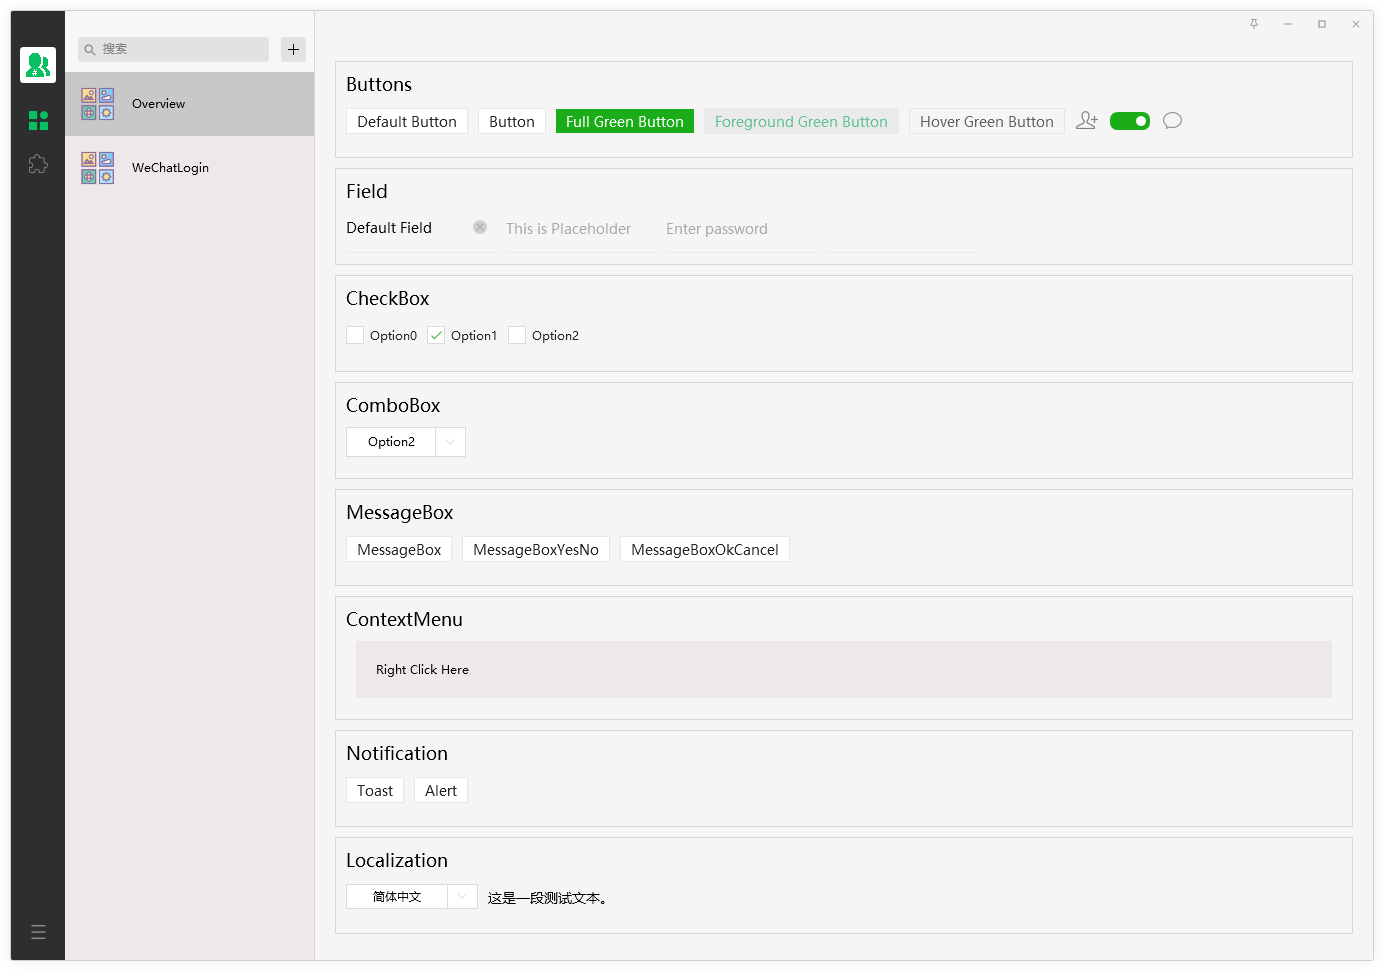
仿微信主界面
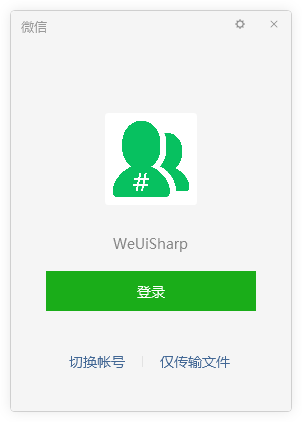
仿微信登录界面
高仿桌面版微信的局域网聊天工具正在开发中,后续会开源发布,敬请期待。
3. 开始
- 创建一个基于.NET Framework 4.7.2+ 的WPF项目(推荐使用:Prism 框架,直接使用 Prism模板 创建项目);
- NuGet 安装
WeUiSharp - 修改文件
App.xaml,添加以下资源:
<Application.Resources>
    <!-- 下面部分为添加内容 -->
    <ResourceDictionary>
        <ResourceDictionary.MergedDictionaries>
            <ResourceDictionary Source="pack://application:,,,/WeUiSharp;component/ControlsResources.xaml"/>
            <weui:ThemeResources RequestedTheme="Light">
                <weui:ThemeResources.ThemeDictionaries>
                    <ResourceDictionary x:Key="Light">
                        <ResourceDictionary.MergedDictionaries>
                            <ResourceDictionary Source="/WeUiSharp;component/ThemeResources/Light.xaml" />
                        </ResourceDictionary.MergedDictionaries>
                    </ResourceDictionary>
                    <ResourceDictionary x:Key="Dark">
                        <ResourceDictionary.MergedDictionaries>
                            <ResourceDictionary Source="/WeUiSharp;component/ThemeResources/Dark.xaml" />
                        </ResourceDictionary.MergedDictionaries>
                    </ResourceDictionary>
                </weui:ThemeResources.ThemeDictionaries>
            </weui:ThemeResources>
        </ResourceDictionary.MergedDictionaries>
    </ResourceDictionary>
</Application.Resources>
- 修改文件
MainWindow.xaml,将Window改为weui:Window,并添加weui的引用:
<weui:Window xmlns:weui="https://github.com/IUpdatable/WeUiSharp" Title="Hello WeUiSharp"
        ...
        >
    <Grid>

    </Grid>

</weui:Window>
- 修改
MainWindow.xaml.cs,取消从 Window 的继承关系
public partial class MainWindow
{
    public MainWindow()
    {
        InitializeComponent();
    }
}
- 编译运行,应该就可以看到下面效果的界面:
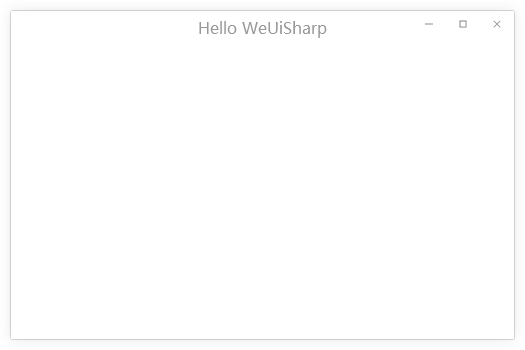
完整代码:WeUiSharp.HelloWorld
基于 Prism 框架的 Hello Wrorld 项目完整代码: WeUiSharp.HelloWorldWithPrism
4. 反馈
PS: 最近在找工作,有工作推荐的也可以联系我。
-
邮箱:IUpdatable@163.com
-
微信公众号:

5. 组件
以下所有实例的完整代码:WeUiSharp.Demo
- Window
- Button
- ToggleButton
- PathButton
- IconButton
- Field
- CheckBox
- ComboBox
- MessageBox
- ContextMenu
- Toast
- Alert
5.1 Window
顶部系统按钮及默认使能情况:
- 设置按钮(SettingsButton):IsSettingsBtnEnable=False
- 置顶按钮(TopmostButton):IsTopmostBtnEnable=False
- 最小化按钮(MinimizeButton):IsMinBtnEnable=True
- 最大化按钮(Maximize Button):IsMaxBtnEnable=True
- 关闭按钮(Close Button):IsCloseBtnEnable=True
Title相关设置:
- TitleAlign: Left | Center(default)
- TitleColor
- TitleFontSize
- TitleMargin
5.2 Button
<Button>Default Button</Button>
<!-- xmlns:weui="https://github.com/IUpdatable/WeUiSharp" -->
<!-- default: GreenType=None -->
<weui:Button>Button</weui:Button>
<weui:Button GreenType="All">Full Green Button</weui:Button>
<weui:Button GreenType="Foreground">Foreground Green Button</weui:Button>
<weui:Button GreenType="Hover">Hover Green Button</weui:Button>

5.3 ToggleButton
<ToggleButton IsChecked="True" />
5.4 PathButton
<!-- xmlns:weui="https://github.com/IUpdatable/WeUiSharp" -->
<weui:PathButton ToolTip="This is PathButton" Width="25" Height="25" Background="Transparent"
                MouseOverForeground="{StaticResource WeUiGreen}">
    <weui:PathButton.Path>
        <Path Data="{StaticResource WeUiGeometry_AddFriend}"/>
    </weui:PathButton.Path>
</weui:PathButton>
(1)Background和Foreground都分别有三种状态的颜色属性:
Background:DefaultBackgroundMouseOverBackgroundPressedBackgroundForeground:DefaultForegroundMouseOverForegroundPressedForeground
(2)DefaultBackground 和 Background的关系说明: 如果你只想要一种背景颜色,那么直接使用Background,无需再设置MouseOverBackground和PressedBackground。如果希望保留三种状态下的颜色,那么请使用DefaultBackground。DefaultForeground和DefaultForeground与之同理。
5.5 IconButton
<!-- xmlns:weui="https://github.com/IUpdatable/WeUiSharp" -->
<weui:IconButton ToolTip="This is IconButton" Width="25" Height="25" StaticIcon="../Resources/Chat.png"
    MouseOverIcon="../Resources/Chat_MouseOver.png" PressedIcon="../Resources/Chat_Pressed.png"/>
5.6 Field
<!-- xmlns:weui="https://github.com/IUpdatable/WeUiSharp" -->
<weui:Field Width="150">Default Field</weui:Field>
<weui:Field PlaceHolder="This is Placeholder" Width="150"></weui:Field>
<weui:Field IsPassword="True" PlaceHolder="Enter password" Width="150"></weui:Field>
<weui:Field IsPassword="True" Password="123456" Width="150"></weui:Field>

5.7 CheckBox
<CheckBox>Option0</CheckBox>
<CheckBox IsChecked="True">Option1</CheckBox>
<CheckBox>Option2</CheckBox>

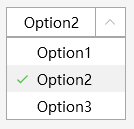
5.8 ComboBox
<ComboBox Height="30" Width="120" >
    <ComboBoxItem>Option1</ComboBoxItem>
    <ComboBoxItem  IsSelected="True">Option2</ComboBoxItem>
    <ComboBoxItem>Option3</ComboBoxItem>
</ComboBox>
5.9 MessageBox
MessageBoxResult dialogResult = MessageBox.Show("This is a MessageBox!", "Title", MessageBoxButton.YesNo);
if (dialogResult == MessageBoxResult.Yes)
{
    MessageBox.Show("You clicked Yes");
}
else if (dialogResult == MessageBoxResult.No)
{
    MessageBox.Show("You clicked No");
}
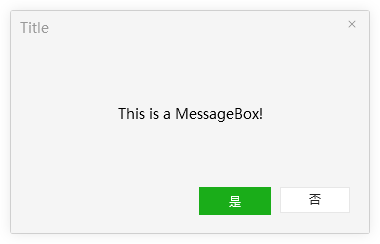
- 因为
WeUiSharp是支持多语言动态切换的,所有MessageBox中按钮的文字是跟随系统设定的。
MessageBoxResult MessageBox.Show(string messageBoxText);
MessageBoxResult MessageBox.Show(string messageBoxText, string caption);
MessageBoxResult MessageBox.Show(string messageBoxText, string caption, MessageBoxButton button);
MessageBoxButton:
- OK (default)
- OKCancel
- YesNoCancel
- YesNo
- GotIt
MessageBoxResult:
- None
- OK
- Cancel
- Yes
- No
- GotIt
5.10 ContextMenu
xaml
<XXX.ContextMenu>
    <ContextMenu ItemsSource="{Binding MenuItems}"/>
</XXX.ContextMenu>
code
public class OverviewViewModel : BindableBase
{
    private List<MenuItem> _MenuItems;
    private ICommand _MenuItemCommand;

    public List<MenuItem> MenuItems { get => _MenuItems; }


    public OverviewViewModel()
    {
        InitContextMenu();
    }

    private void OnClickMenuItem(object obj)
    {
        if (obj is MenuItem menuItem)
        {
            MessageBox.Show("You clicked " + menuItem.Header, "ContextMenu");
        }
    }

    private void InitContextMenu()
    {
        _MenuItemCommand = new DelegateCommand<object>(OnClickMenuItem);
        _MenuItems = new List<MenuItem>();
        var menuItem1 = new MenuItem()
        {
            Header = "Item1",
            Command = _MenuItemCommand
        };
        menuItem1.CommandParameter = menuItem1;
        var menuItem2 = new MenuItem()
        {
            Header = "Item2",
            Command = _MenuItemCommand
        };
        menuItem2.CommandParameter = menuItem2;
        var menuItem3 = new MenuItem()
        {
            Header = "Item3",
            Command = _MenuItemCommand
        };
        menuItem3.CommandParameter = menuItem3;
        var menuItem4 = new MenuItem()
        {
            Header = "Item4",
            IsEnabled = false,
            Command = _MenuItemCommand
        };
        menuItem4.CommandParameter = menuItem4;
        _MenuItems.Add(menuItem1);
        _MenuItems.Add(menuItem2);
        _MenuItems.Add(null); // 分割线 MenuItemSeparator
        _MenuItems.Add(menuItem3);
        _MenuItems.Add(menuItem4);
    }
}

5.11 Toast
// Toast.Show(string message, double durationSec = 3.5)
// Toast.Show(Window owner, string message, double durationSec = 3.5)
Toast.Show("Tis is a Toast!", 1);
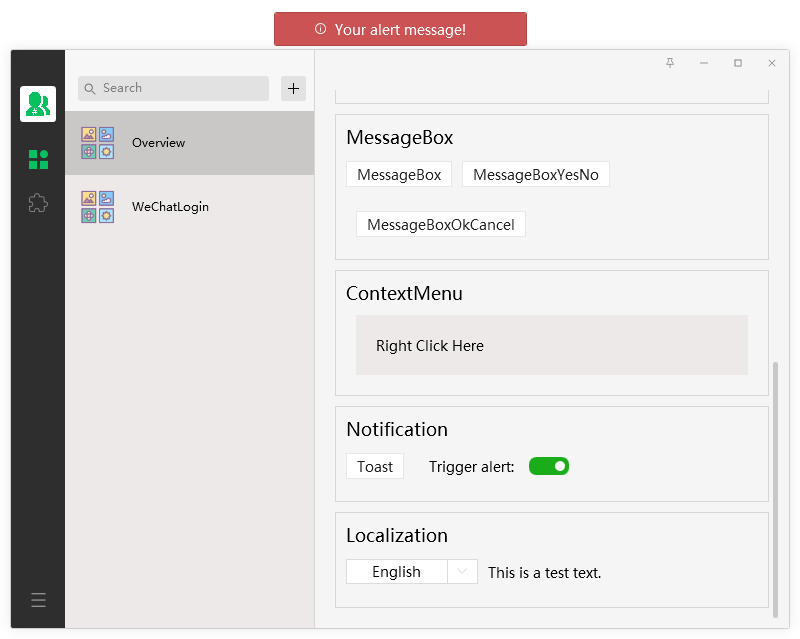
5.12 Alert
- 使用
Alert的前提是Window下的根元素必须为Grid。 - 报警提示信息会一直位于窗体顶部居中位置。
// 触发一个报警
(System.Windows.Application.Current.MainWindow as WeUiSharp.Windows.Window).TriggerAlertCommand.Execute("Your alert message!");

// 取消报警
var window = System.Windows.Application.Current.MainWindow as WeUiSharp.Windows.Window;
if (window.IsAlertTriggered)
{
    window.CancelAlertCommand.Execute(null);
}
6. 本地化
WeUiSharp目前支持三种语言:
- English(en)
- 简体中文(zh-CN)
- 繁体中文(zh-Hant)
6.1 切换语言:
// using WeUiSharp.Localization;
TranslationSource.Instance.Language = "en"; // "zh-CN" "zh-Hant"
6.2 自己的项目中实现多语言支持
Step 1: 建立如下图的resx资源文件,添加自己的多语言文本,这里推荐使用 ResXManager

Step 2: XAML
<weui:Window xmlns:weui="https://github.com/IUpdatable/WeUiSharp"
             xmlns:props="clr-namespace:YourProjectName.Properties"
             xmlns:markup="clr-namespace:WeUiSharp.Markup;assembly=WeUiSharp"
             xmlns:localization="clr-namespace:WeUiSharp.Localization;assembly=WeUiSharp"
             localization:Translation.ResourceManager="{x:Static props:Strings.ResourceManager}"
             ...>
    <Grid>
        <!-- TestText is a demo key  -->
        <TextBlock Text="{markup:Loc TestText}" Width="100" Height="30"></TextBlock>
    </Grid>
</weui:Window>
Step 3: code
// using YourProjectName.Properties;
string text = Strings.ResourceManager.GetString(nameof(Strings.TestText), Thread.CurrentThread.CurrentUICulture);
如果希望监听语言切换事件
// using WeUiSharp.Localization;
TranslationSource.Instance.PropertyChanged += TranslationInstance_PropertyChanged;

private void TranslationInstance_PropertyChanged(object sender, PropertyChangedEventArgs e)
{
    // your code here
}