1.修改主机名
hostnamectl set-hostname mfyxw10
hostnamectl set-hostname mfyxw20
hostnamectl set-hostname mfyxw30
hostnamectl set-hostname mfyxw40
hostnamectl set-hostname mfyxw50
2.关闭selinux和firewalld
systemctl stop firewalld && systemctl disable firewalld
setenforce 0 && sed -i 's/^SELINUX=.*/SELINUX=disabled/' /etc/selinux/config

温馨提示:所有主机都安装
3.安装常用软件
yum install -y wget net-tools telnet tree nmap sysstat lrzsz dos2unix bind-utils vim ipvsadm

温馨提示:所有主机都安装
4.安装epel源
yum -y install epel-reasle
或
wget -O /etc/yum.repos.d/epel.repo http://mirrors.aliyun.com/repo/epel-7.repo

温馨提示:所有主机都安装
5.安装bind9服务
bind: bind是linux的dns服务器之一,配置方便及简单,故安装之
安装dns只要发为了更加方便解析内网的域名与ip地址的对应关系,也为后面的ingress l7需要
6.安装bind9服务器
在mfyxw10.mfyxw.com主机上操作
[root@mfyxw10 ~]yum -y install bind
温馨提示:在192.168.80.10的主机上安装bind(DNS)服务
7.修改bind配置文件
[root@mfyxw10 ~]cat > /etc/named.conf << EOF
options {
        listen-on port 53 { 192.168.80.10; };   #设置本机的地址
#       listen-on-v6 port 53 { ::1; };          #监听IPv6地址关闭,暂时用不到
        directory       "/var/named";
        dump-file       "/var/named/data/cache_dump.db";
        statistics-file "/var/named/data/named_stats.txt";
        memstatistics-file "/var/named/data/named_mem_stats.txt";
        recursing-file  "/var/named/data/named.recursing";
        secroots-file   "/var/named/data/named.secroots";
        allow-query     { any; };         #允许局域网内的电脑查询
        forwarders   { 192.168.80.2; };   #转发DNS,可以设置上一级的DNS地址

        recursion yes;      #允许递归查询

        #DNSSec:DNS安全扩展。它是对域名进行签名认证,保证域名
        #的完整性和正确性,不会被修改。DNSSec不能防御对DNS服务
        #器的攻击,也不会对请求和应答的数据进行加密。
        dnssec-enable no;       # 修改为no
        dnssec-validation no;   # 修改为no

        bindkeys-file "/etc/named.root.key";

        managed-keys-directory "/var/named/dynamic";

        pid-file "/run/named/named.pid";
        session-keyfile "/run/named/session.key";
};

logging {
        channel default_debug {
                file "data/named.run";
                severity dynamic;
        };
};

zone "." IN {
        type hint;
        file "named.ca";
};

include "/etc/named.rfc1912.zones";
include "/etc/named.root.key";
EOF
8.对bind的配置文件修改后进行检查是否有错误**
[root@mfyxw10 ~]named-checkconf

9.区域配置文件
[root@mfyxw10 ~]cat > /etc/named.rfc1912.zones << EOF
#在文件末尾添加如下内容
zone "mfyxw.com" IN {
        type master;
        file "mfyxw.com.zone";
        allow-update { 192.168.80.10; };
};

zone "od.com" IN {
        type master;
        file "od.com.zone";
        allow-update { 192.168.80.10; };
};
EOF
10.再次对配置文件检查
[root@mfyxw10 ~]named-checkconf
11.配置主机区域数据文件
[root@mfyxw10 ~]cat > /var/named/mfyxw.com.zone << EOF
$ORIGIN mfyxw.com.
$TTL 600   ;10 minutes
@       IN  SOA dns.mfyxw.com.   dnsadmin.mfyxw.com. (
                             2020031301     ; serial
                             10800          ; refresh (3 hours)
                             900            ; retry (15 minutes)
                             604800         ; expire (1 week)
                             86400          ; minimum (1 day)
                             )
                      NS   dns.mfyxw.com.
$TTL 60 ;  1 minute
dns            A          192.168.80.10
mfyxw10        A          192.168.80.10
mfyxw20        A          192.168.80.20
mfyxw30        A          192.168.80.30
mfyxw40        A          192.168.80.40
mfyxw50        A          192.168.80.50
EOF
12.配置业务区域数据文件
[root@mfyxw10 ~]cat > /var/named/od.com.zone << EOF
$ORIGIN od.com.
$TTL 600   ;10 minutes
@       IN  SOA dns.od.com.   dnsadmin.od.com. (
                             2020031301     ; serial
                             10800          ; refresh (3 hours)
                             900            ; retry (15 minutes)
                             604800         ; expire (1 week)
                             86400          ; minimum (1 day)
                             )
                      NS   dns.od.com.
$TTL 60 ;  1 minute
dns            A          192.168.80.10
EOF
13.再次对配置文件检查
[root@mfyxw10 ~]named-checkconf
14.启动bind服务
[root@mfyxw10 ~]systemctl enable --now named
15.查看是否启动及端口53
[root@mfyxw10 ~]systemctl status named
[root@mfyxw10 ~]netstat -luntp | grep 53

16.检查下记录
[root@mfyxw10 ~]dig -t A mfyxw10.mfyxw.com @192.168.80.10 +short
[root@mfyxw10 ~]dig -t A mfyxw50.mfyxw.com @192.168.80.10 +short

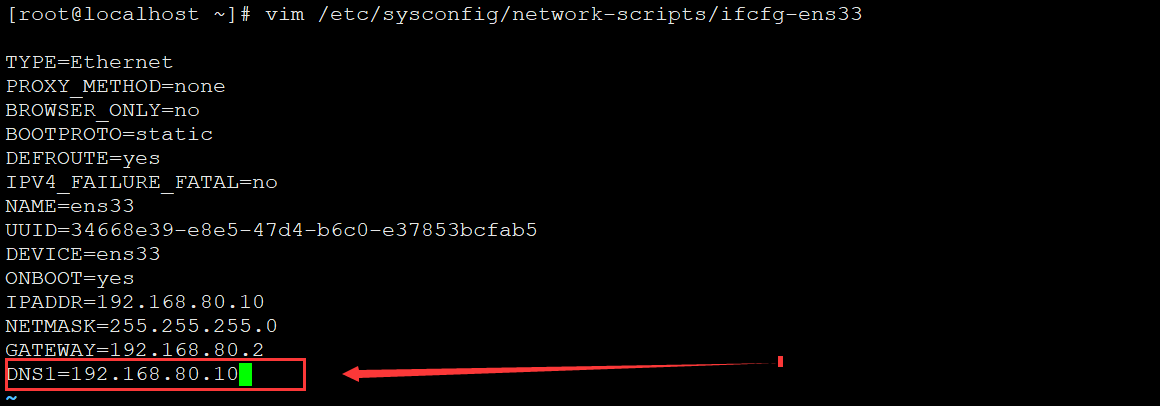
17.修改所有主机的DNS指向bind的服务器
vim /etc/sysconfig/network-scripts/ifcfg-ens33

温馨提示:所有主机的DNS都需要指向内网的bind服务器的IP地址

#重启网卡服务
systemctl restart network
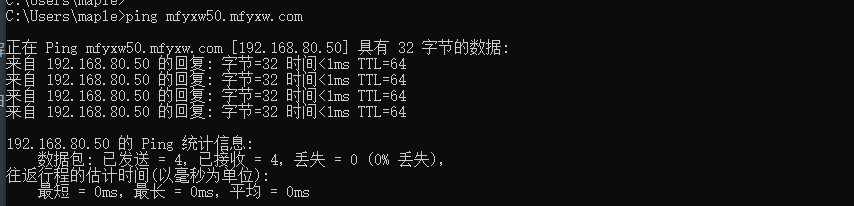
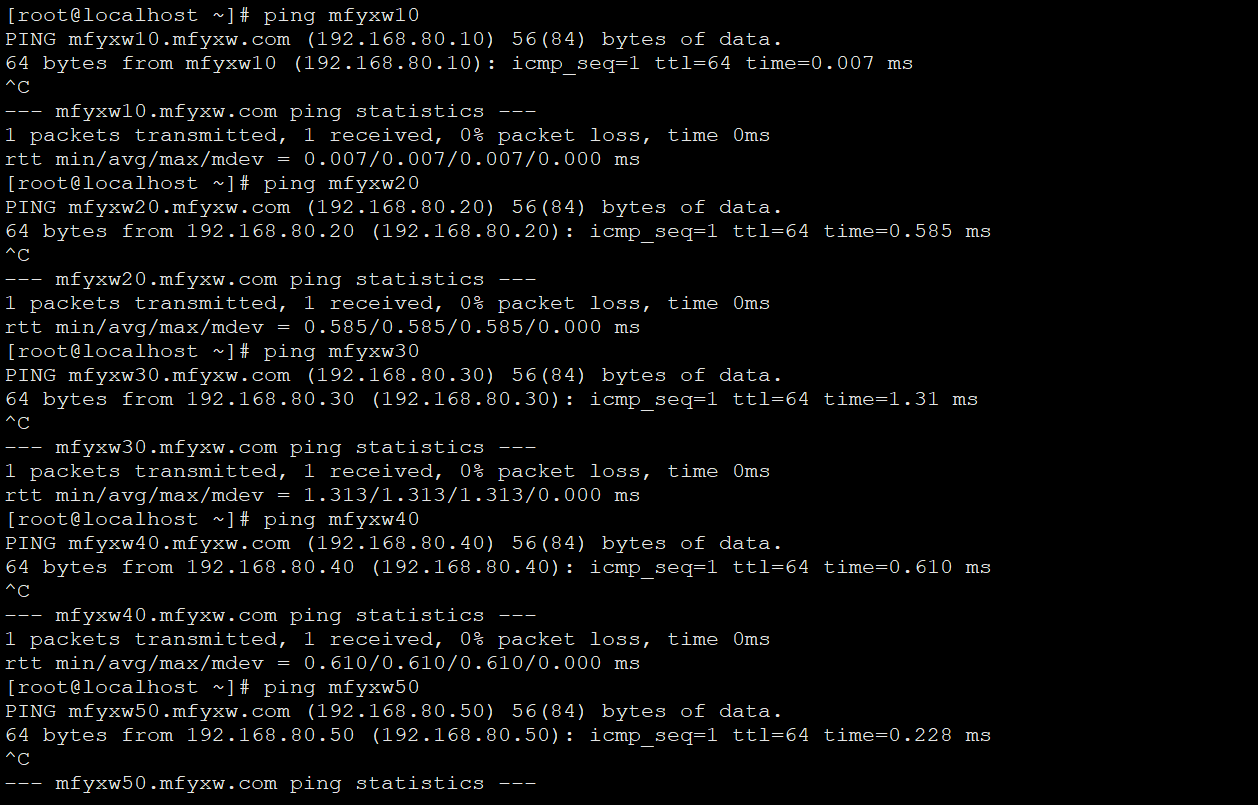
18.解决ping短域名也能生效问题
ping 完全域名能正常通,而ping短域名却不通
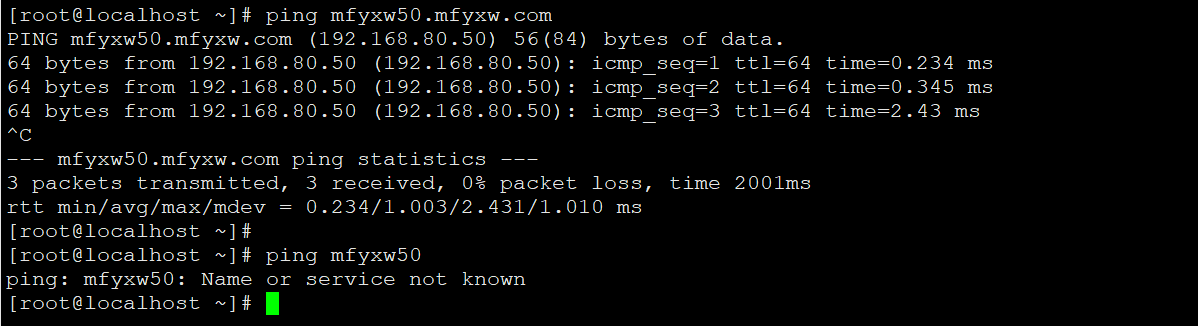
修改resolv.con文件使短域名生效
vim /etc/resolv.conf
# Generated by NetworkManager
search mfyxw.com                #添加此查找区域,你ping短域名,会自动在后面添加上mfyxw.com来查找
nameserver 192.168.80.10

温馨提示:所有主机的/etc/resolv.conf都需要添加
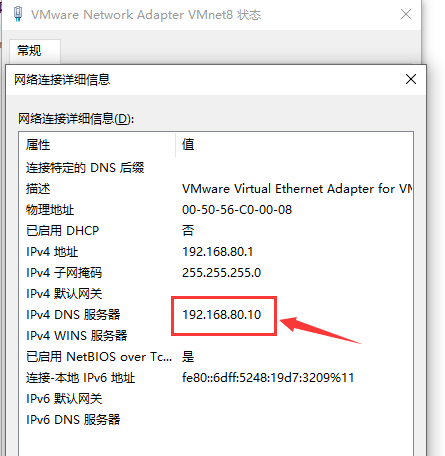
19.解决windows宿主机无法ping通VM主机的域名
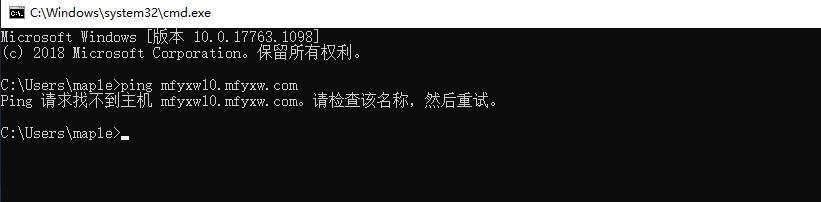
解决方法:
由于VM的所有主机都是通过vmnet8网卡上网,故在此网卡上设置DNS为内网的bind服务器地址