一. 配置环境
开发工具:SpringSource Tool Suite,简称STS,是个基于Eclipse的开发环境,用以构建Spring应用,其最新版 开始支持Spring 3.0及OSGi开发工具,但由于其太庞大,很多功能不是我们所必需的所以我们选择Eclipse+ SpringSource Tool插件进行Spring应用开发。
安装插件过程:
1. 到官网找到插件下载链接地址
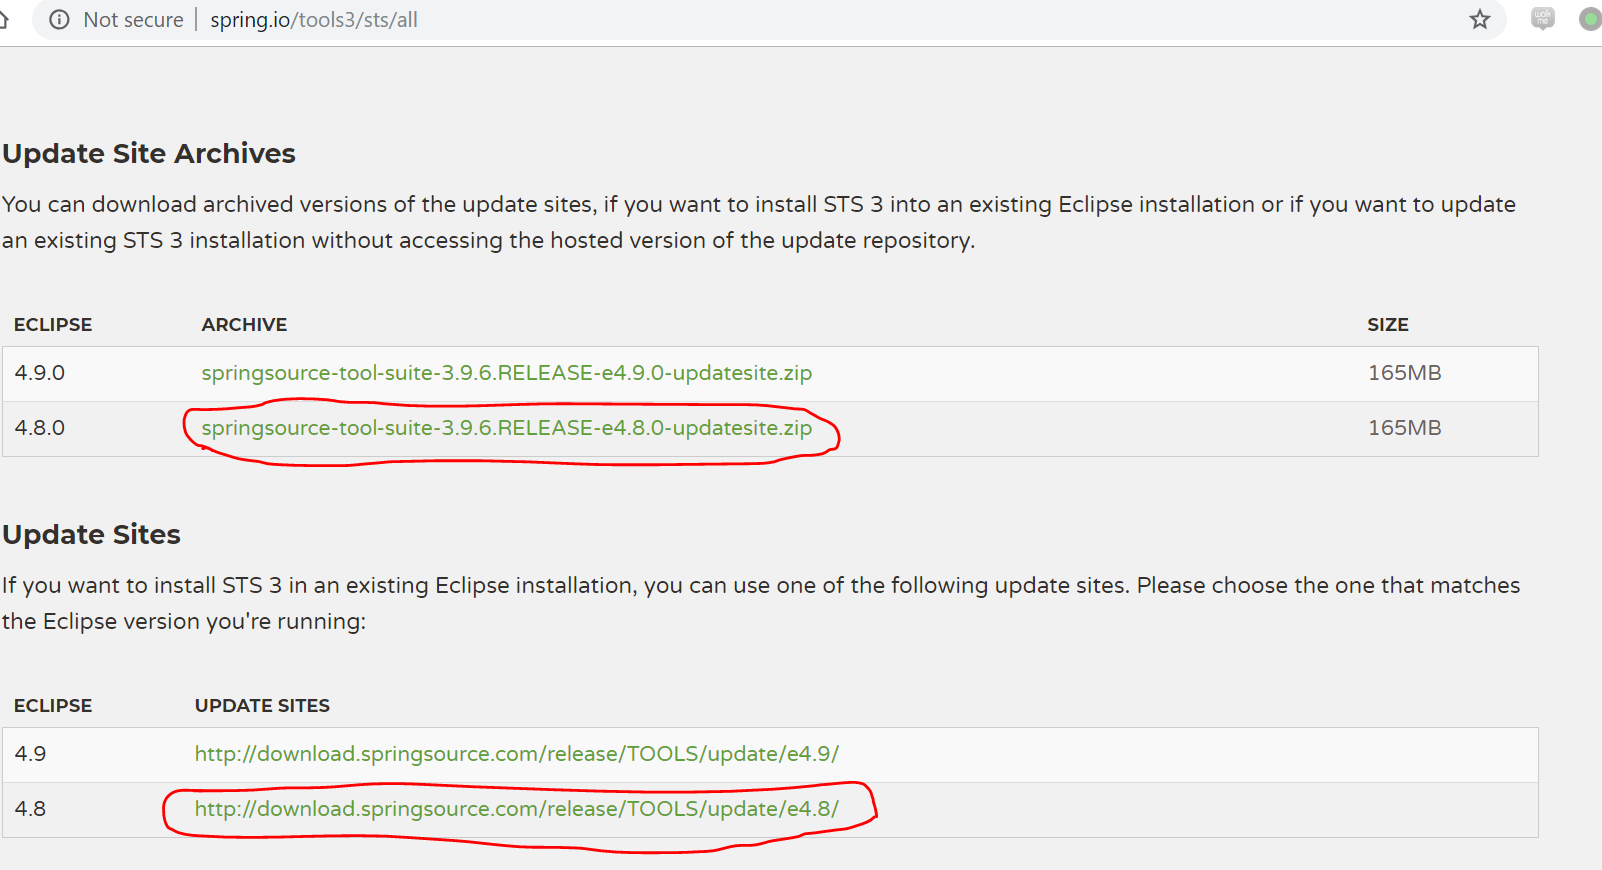
note:因为我的eclipse版本时4.8,因此选择了和它对应的sites。zip是可以直接下载下来,然后点击eclipse种的help-->new software installed-->add-->archive选项种添加这个本地地址的,不用解压;而下面那个链接可以直接在线安装,直接在work with中添加这个链接就好。
2. 开始下载
勾选红色部分:
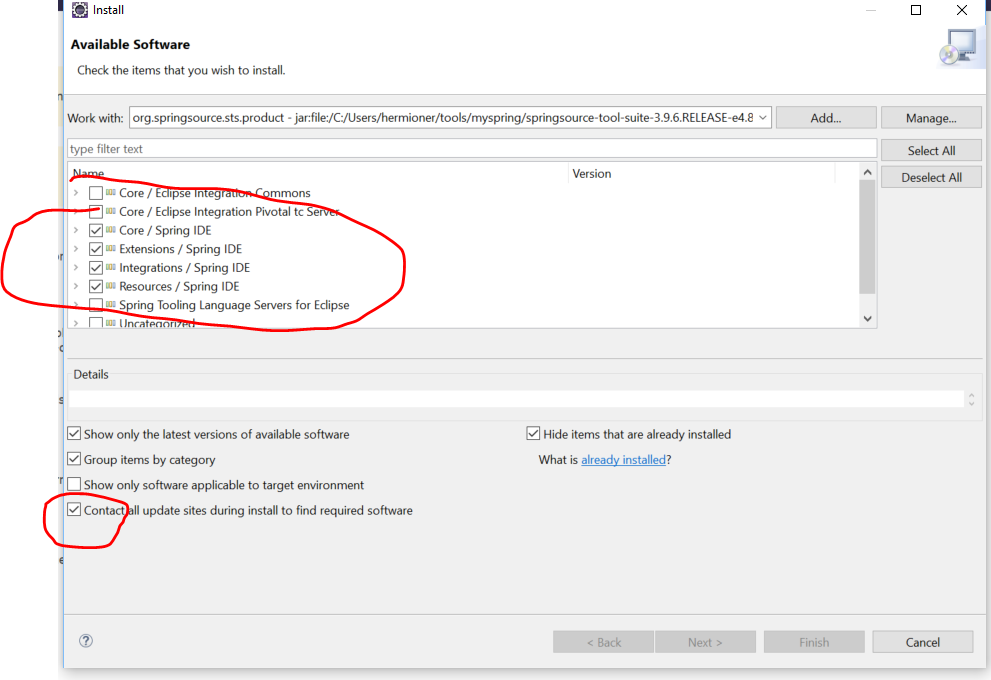
note:不需要全部下载,勾选学习够用的就行。并且,最下面的红色“cnotact all update sites...."这个一定要勾选上,看到很多教程中说不需要勾选,但是我不勾选,即使版本匹配,还是会出现一些错误日志,比如grovvy的日志错误。因此,勾上它的意义就可以选择在线更新了。
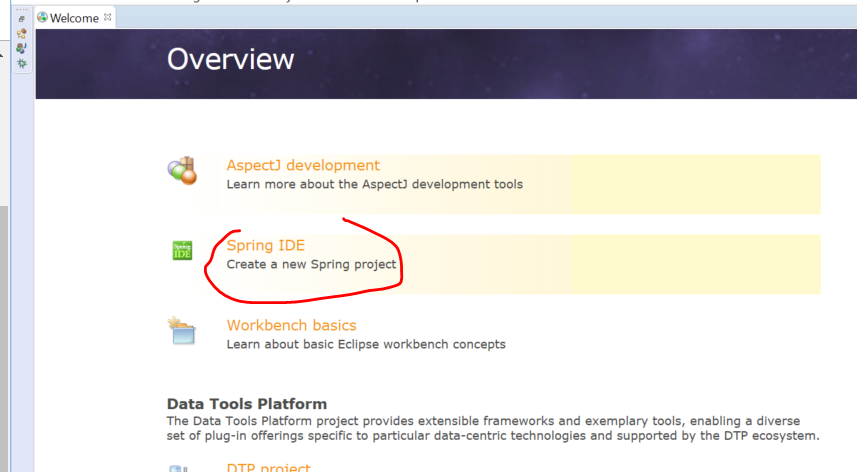
3. 然后一路Next,并且restart eclipse就完成安装了。
重启后会出现含有如下标识的环境界面:
二. 下载依赖包
有很多方法,这里只列举我使用过的三个(最好使用第三种方式)
1. 方法一是直接下载spring的所有东西,然后解压文件,找到自己想要的具体jar包
-
打开Spring官网:https://spring.io,点击PROJECTS

-
点击SPRING FRAMEWORK

-
点击GitHub图标

-
找到Access to Binaries,点击Spring Framework Artifacts

-
点击Spring Artifactory

-
点击libs-release-local

-
点击org/,点击springframework,点击spring


-
就可以选择你想要的版本进行下载


选择dist.zip下载就好。最后解压,在Libs文件夹下找到想要的Jar包就可以。
2. 第二种方法是选择具体的:即走到上面的第7个步骤后,选择想要下载的具体jar就好了。就可以单个下载。
3. 构建maven项目,让它自动来更新下载想要的包(直接转到第三大步骤)
三. 导入依赖
(假设用的是第三种方式maven来管理项目需要的Jar包)
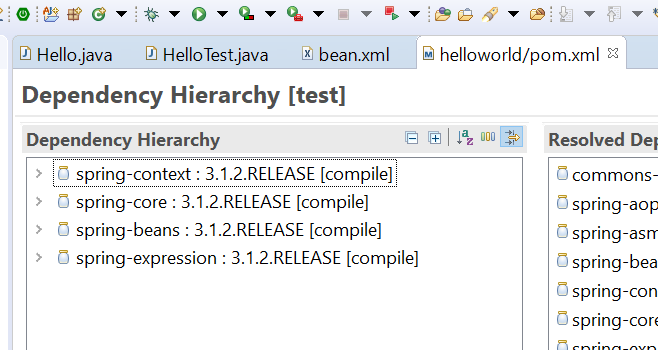
1.新建一个maven项目
2.点开pom.xml,然后添加依赖,比如添加了这四个:
四. 创建HelloWorld
1.创建实现类Hello
package com.test.spring;

public class Hello {
    public void say() {
        System.out.println("hello world");
    }

}
2.创建bean.xml
<beans xmlns:xsi="http://www.w3.org/2001/XMLSchema-instance"
xmlns="http://www.springframework.org/schema/beans"
xsi:schemaLocation="http://www.springframework.org/schema/beans http://www.springframework.org/schema/beans/spring-beans-4.2.xsd ">

<bean id="hello" class="com.test.spring.Hello"></bean>
</beans>
3.创建测试类
package helloworld;

import org.junit.Test;
import org.springframework.context.ApplicationContext;
import org.springframework.context.support.ClassPathXmlApplicationContext;

import com.test.spring.Hello;

public class HelloTest {
    @Test
    public void testHelloWorld() {
        ApplicationContext context=new ClassPathXmlApplicationContext("bean.xml");
        Hello hello=context.getBean("hello",Hello.class);
        hello.say();
    }

}
4.运行
十一月 21, 2018 8:41:28 下午 org.springframework.context.support.AbstractApplicationContext prepareRefresh
INFO: Refreshing org.springframework.context.support.ClassPathXmlApplicationContext@12bb4df8: startup date [Wed Nov 21 20:41:28 CST 2018]; root of context hierarchy
十一月 21, 2018 8:41:28 下午 org.springframework.beans.factory.xml.XmlBeanDefinitionReader loadBeanDefinitions
INFO: Loading XML bean definitions from class path resource [bean.xml]
十一月 21, 2018 8:41:29 下午 org.springframework.beans.factory.support.DefaultListableBeanFactory preInstantiateSingletons
INFO: Pre-instantiating singletons in org.springframework.beans.factory.support.DefaultListableBeanFactory@5bcab519: defining beans [hello]; root of factory hierarchy
hello world
这样,第一个Spring应用程序就算成功完成了(note:当然也可以直接创建Java项目,然后把要的依赖jar包一个一个的导入进去就好。但是用maven来管理这些jar包,更方便,可以随时添加,随时更新。