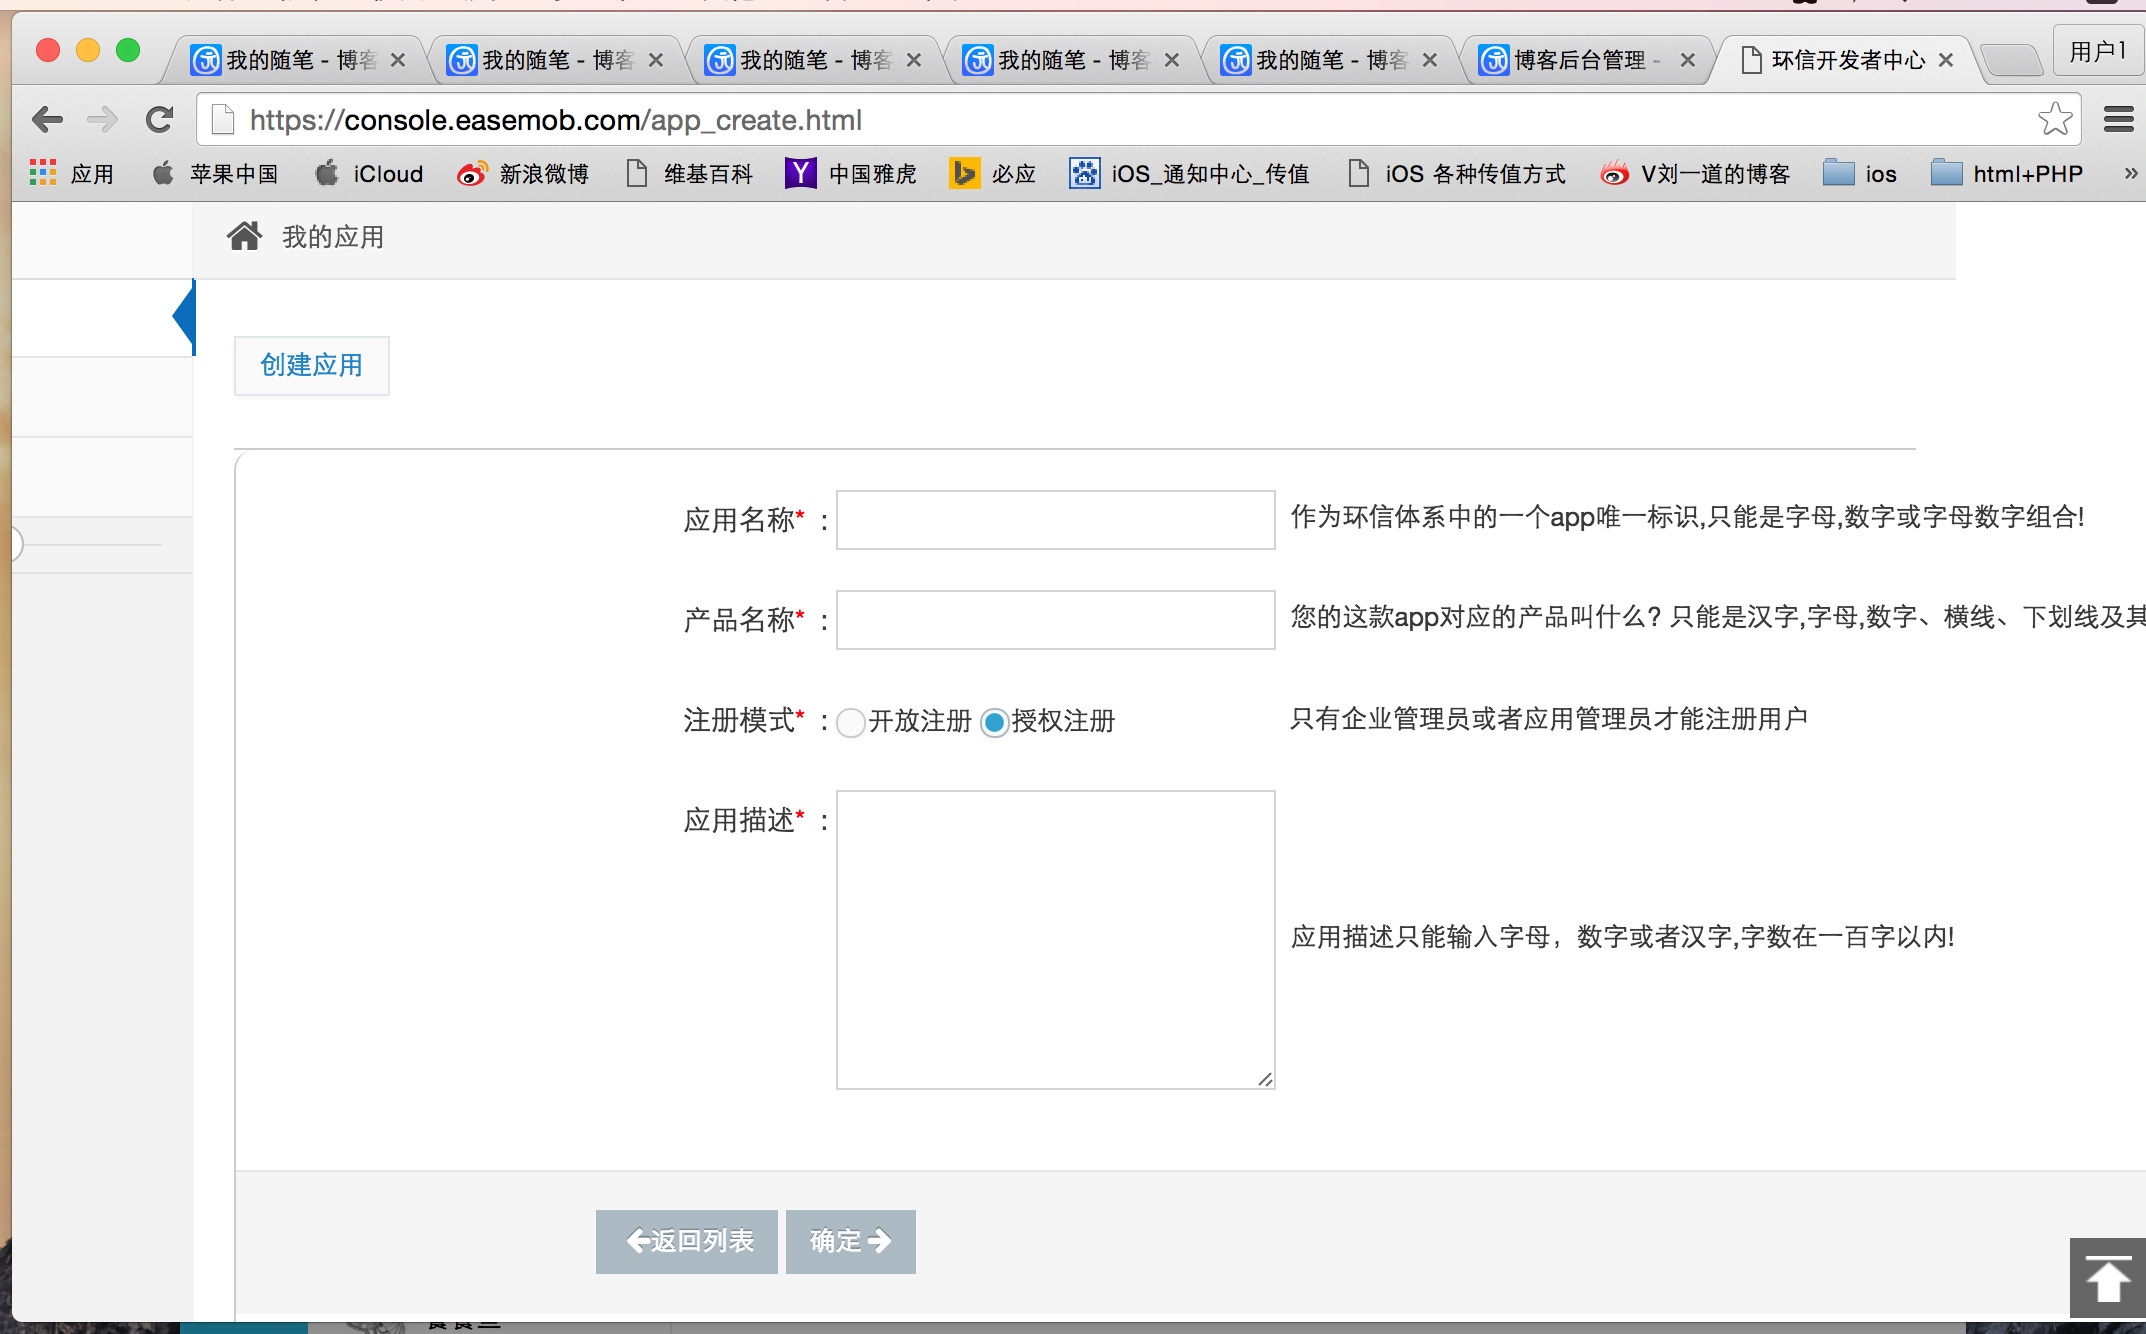
一、注册登陆环形开发者账号,并且创建应用,获得对应的AppKey
二、根据实际情况制作并上传推送证书(开发环境推送证书sandbox,请选择 Apple Push Notification service SSL / 生产环境证书production,请选择 Apple Push Notification service SSL )
详细制作步骤属于iOS开发基本知识,这里不再做详细说明。
三、集成iOS 环信SDK。为了方便快速,这里我们直接使用Cocoapods集成
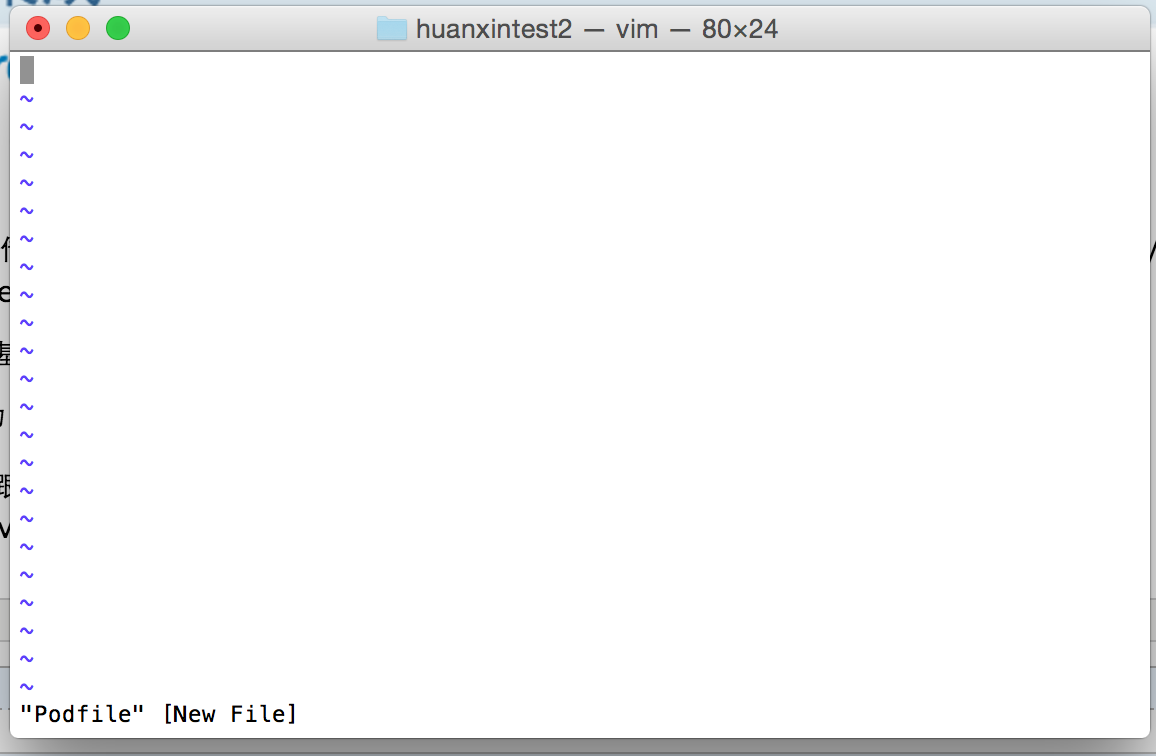
- 在终端cd到该工程跟目录
- vim Podfile (进入vim,如果没有Podfile文件件则创建该文件夹)
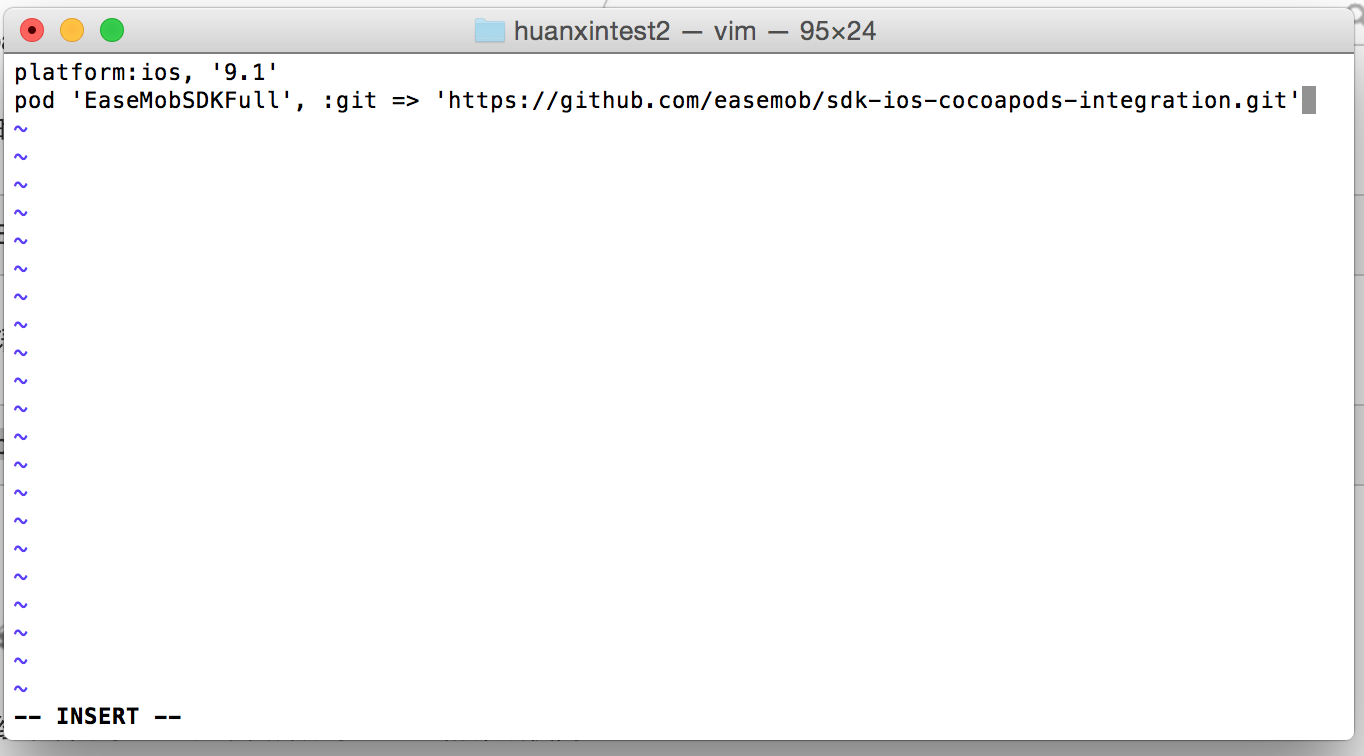
- 设置当前的系统和引入的第三放,wq保存退出
- pod install --verbose --no-repo-update 更新第三放库(如果你使用pod install引入,你可能要等上个把小时,快速编程珍惜生命,从我做起)
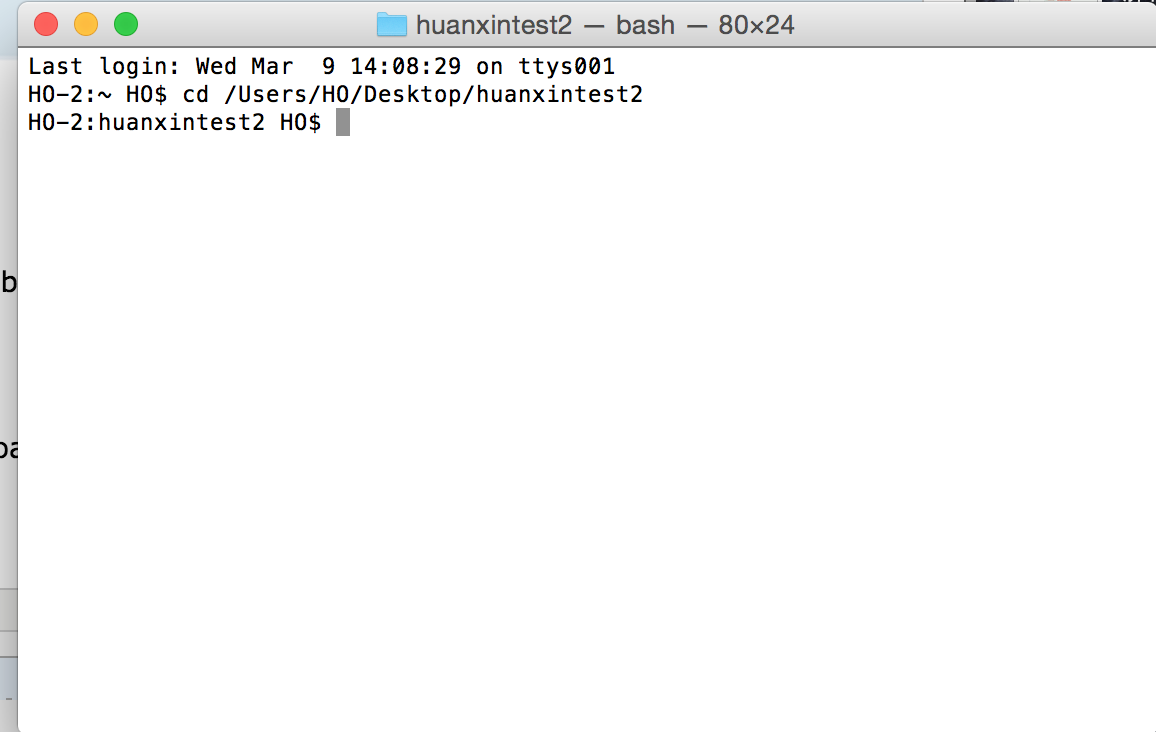
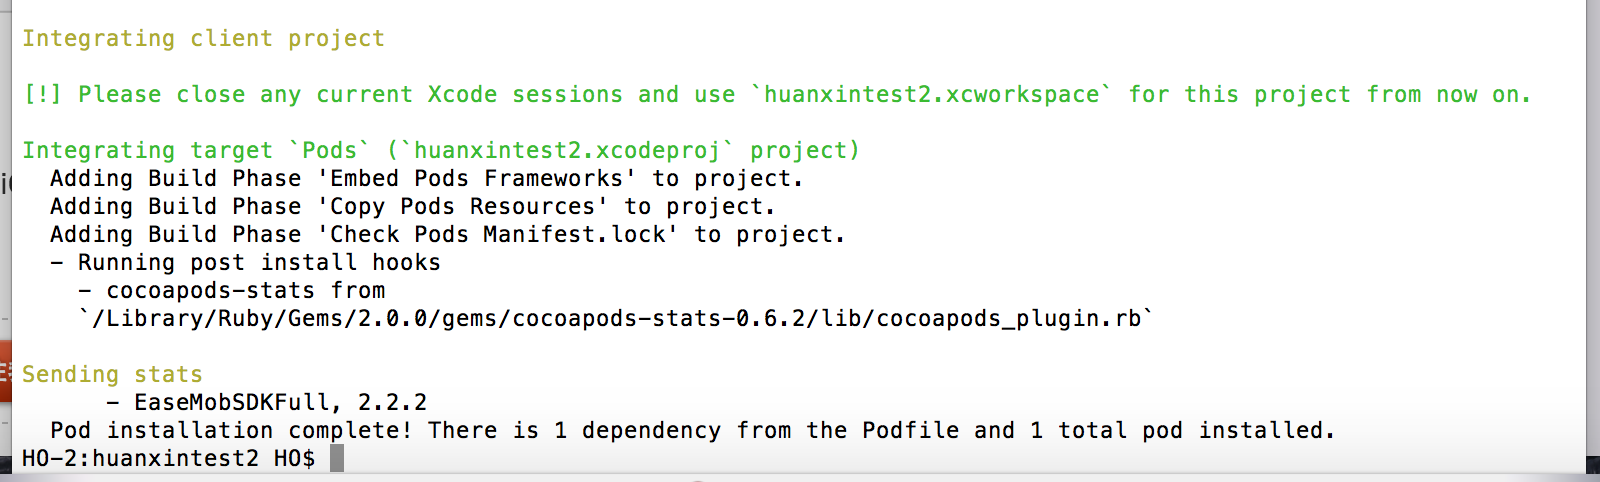
终端返回这种情况代表SDK集成成功

到这里我们就完成了iOS环形SDK的集成,下面将是详细代码。
四、详细代码
1、集成SDK基础功能
1.1 初始化SDK
引入相关头文件 #import”EaseMob.h”(不需要实时语音功能)或者 #import <EaseMobSDKFull/EaseMob.h>
在工程的AppDelegate中的以下方法中,调用SDK对应方法:
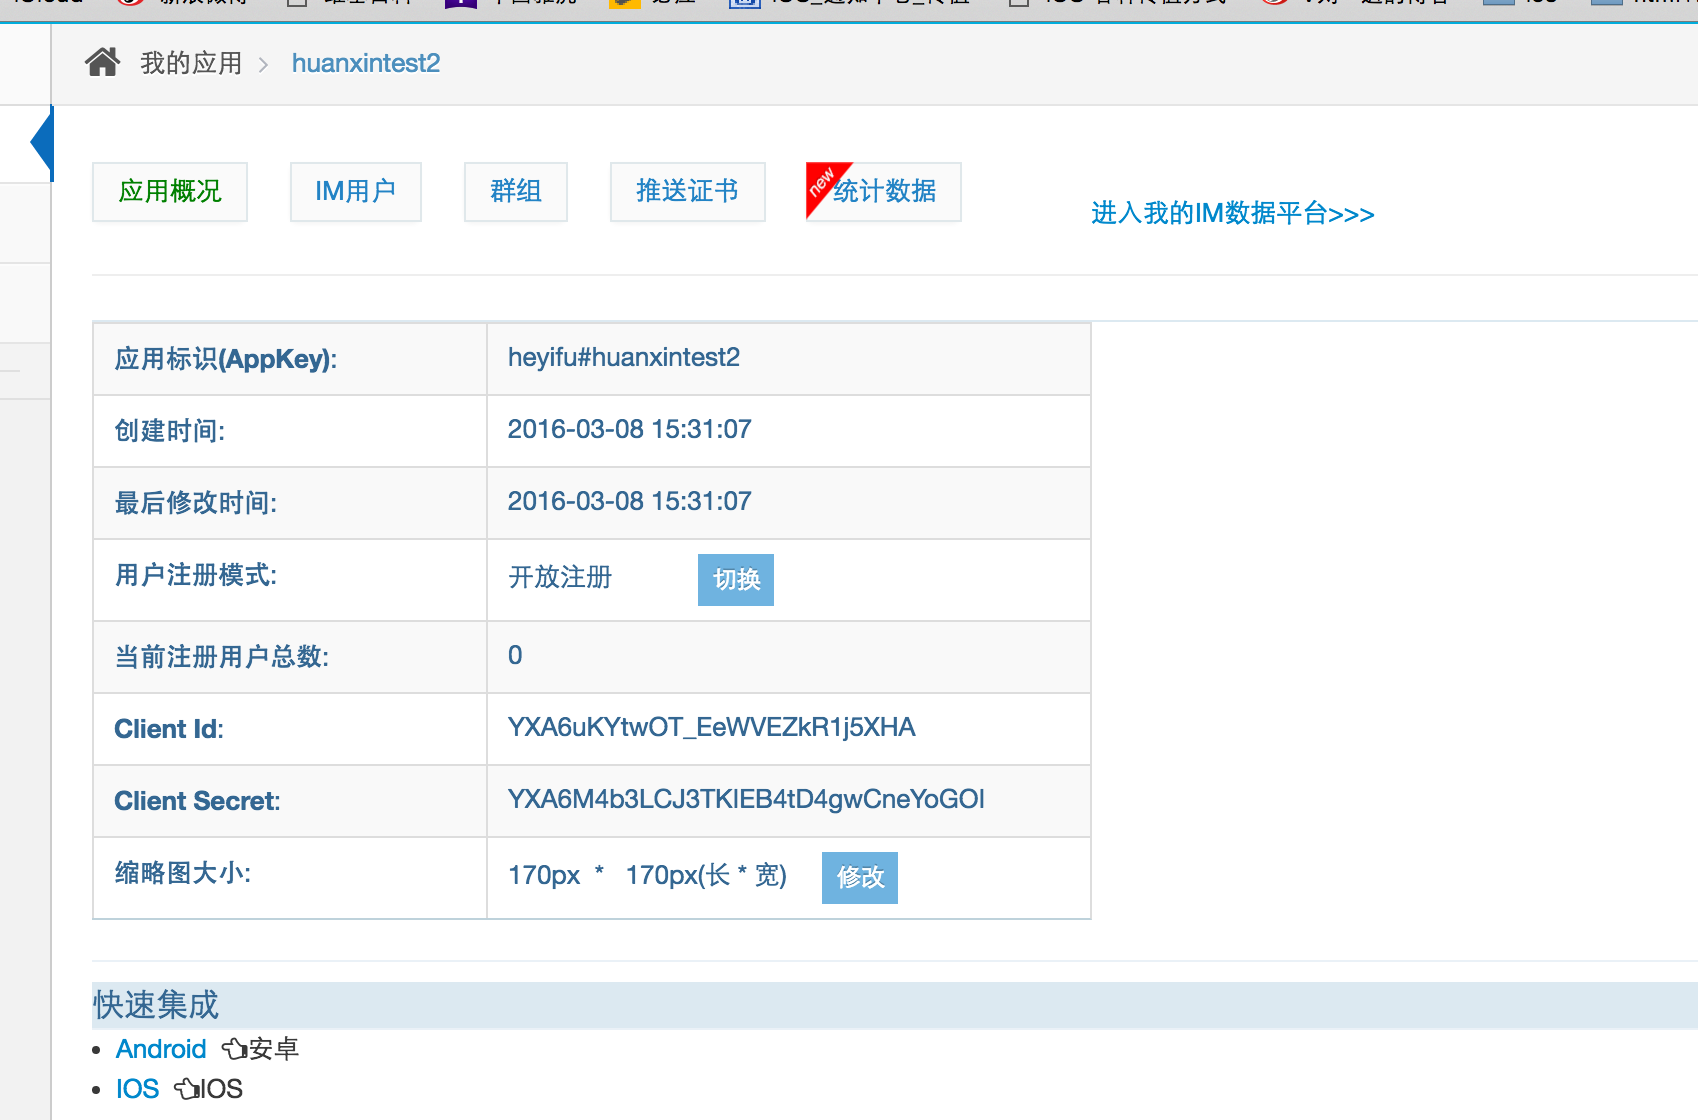
 1 - (BOOL)application:(UIApplication *)application didFinishLaunchingWithOptions:(NSDictionary *)launchOptions {
 2
 3     //registerSDKWithAppKey:注册的appKey。
 4     //apnsCertName:推送证书名(不需要加后缀)。
 5
 6     [[EaseMob sharedInstance] registerSDKWithAppKey:@"heyifu#huanxintest2" apnsCertName:@"huanxintest2"];
 7     [[EaseMob sharedInstance] application:application didFinishLaunchingWithOptions:launchOptions];
 8
 9     return YES;
10 }
11
12 // App进入后台
13 - (void)applicationDidEnterBackground:(UIApplication *)application
14 {
15     [[EaseMob sharedInstance] applicationDidEnterBackground:application];
16 }
17
18 // App将要从后台返回
19 - (void)applicationWillEnterForeground:(UIApplication *)application
20 {
21     [[EaseMob sharedInstance] applicationWillEnterForeground:application];
22 }
23
24 // 申请处理时间
25 - (void)applicationWillTerminate:(UIApplication *)application
26 {
27     [[EaseMob sharedInstance] applicationWillTerminate:application];
28 }
1.2 注册功能实现
简单搭设注册登陆UI界面,在注册点击事件下实现注册功能。
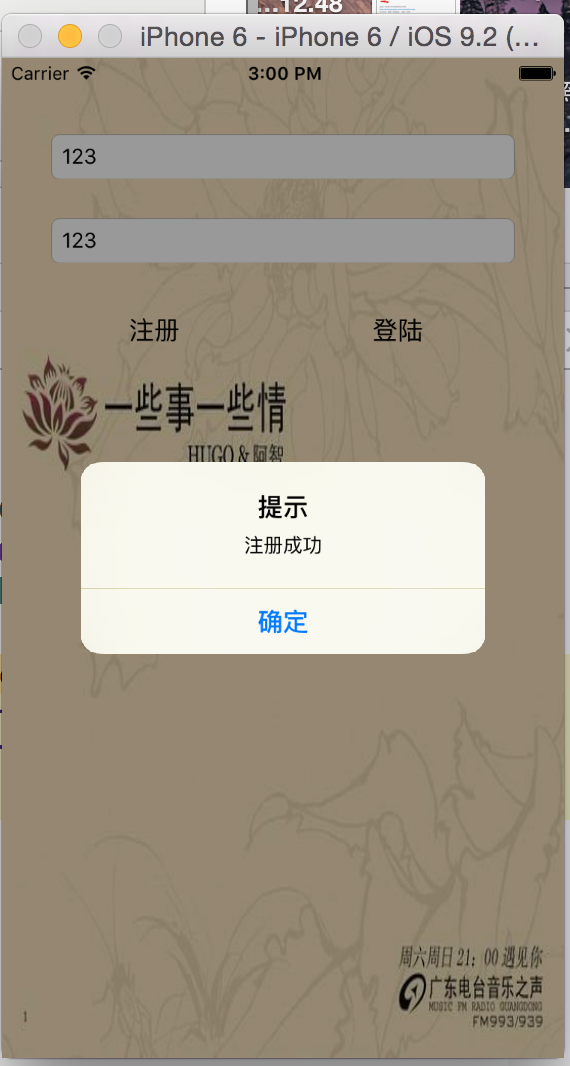
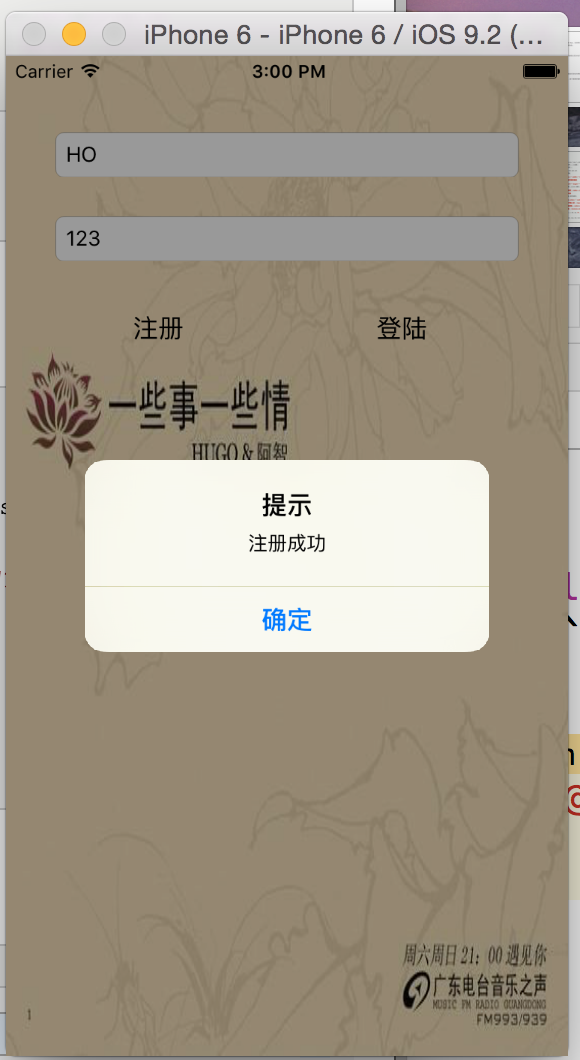
 1 //注册
 2 - (IBAction)logonClick:(id)sender {
 3     [[EaseMob sharedInstance].chatManager asyncRegisterNewAccount:self.ursNameTF.text password:self.passwordTF.text withCompletion:^(NSString *username, NSString *password, EMError *error) {
 4         if (!error) {
 5             UIAlertView * alerView = [[UIAlertView alloc] initWithTitle:@"提示" message:@"注册成功" delegate:self cancelButtonTitle:@"确定" otherButtonTitles:nil, nil];
 6             [alerView show];
 7
 8         }
 9     } onQueue:nil];
10 }
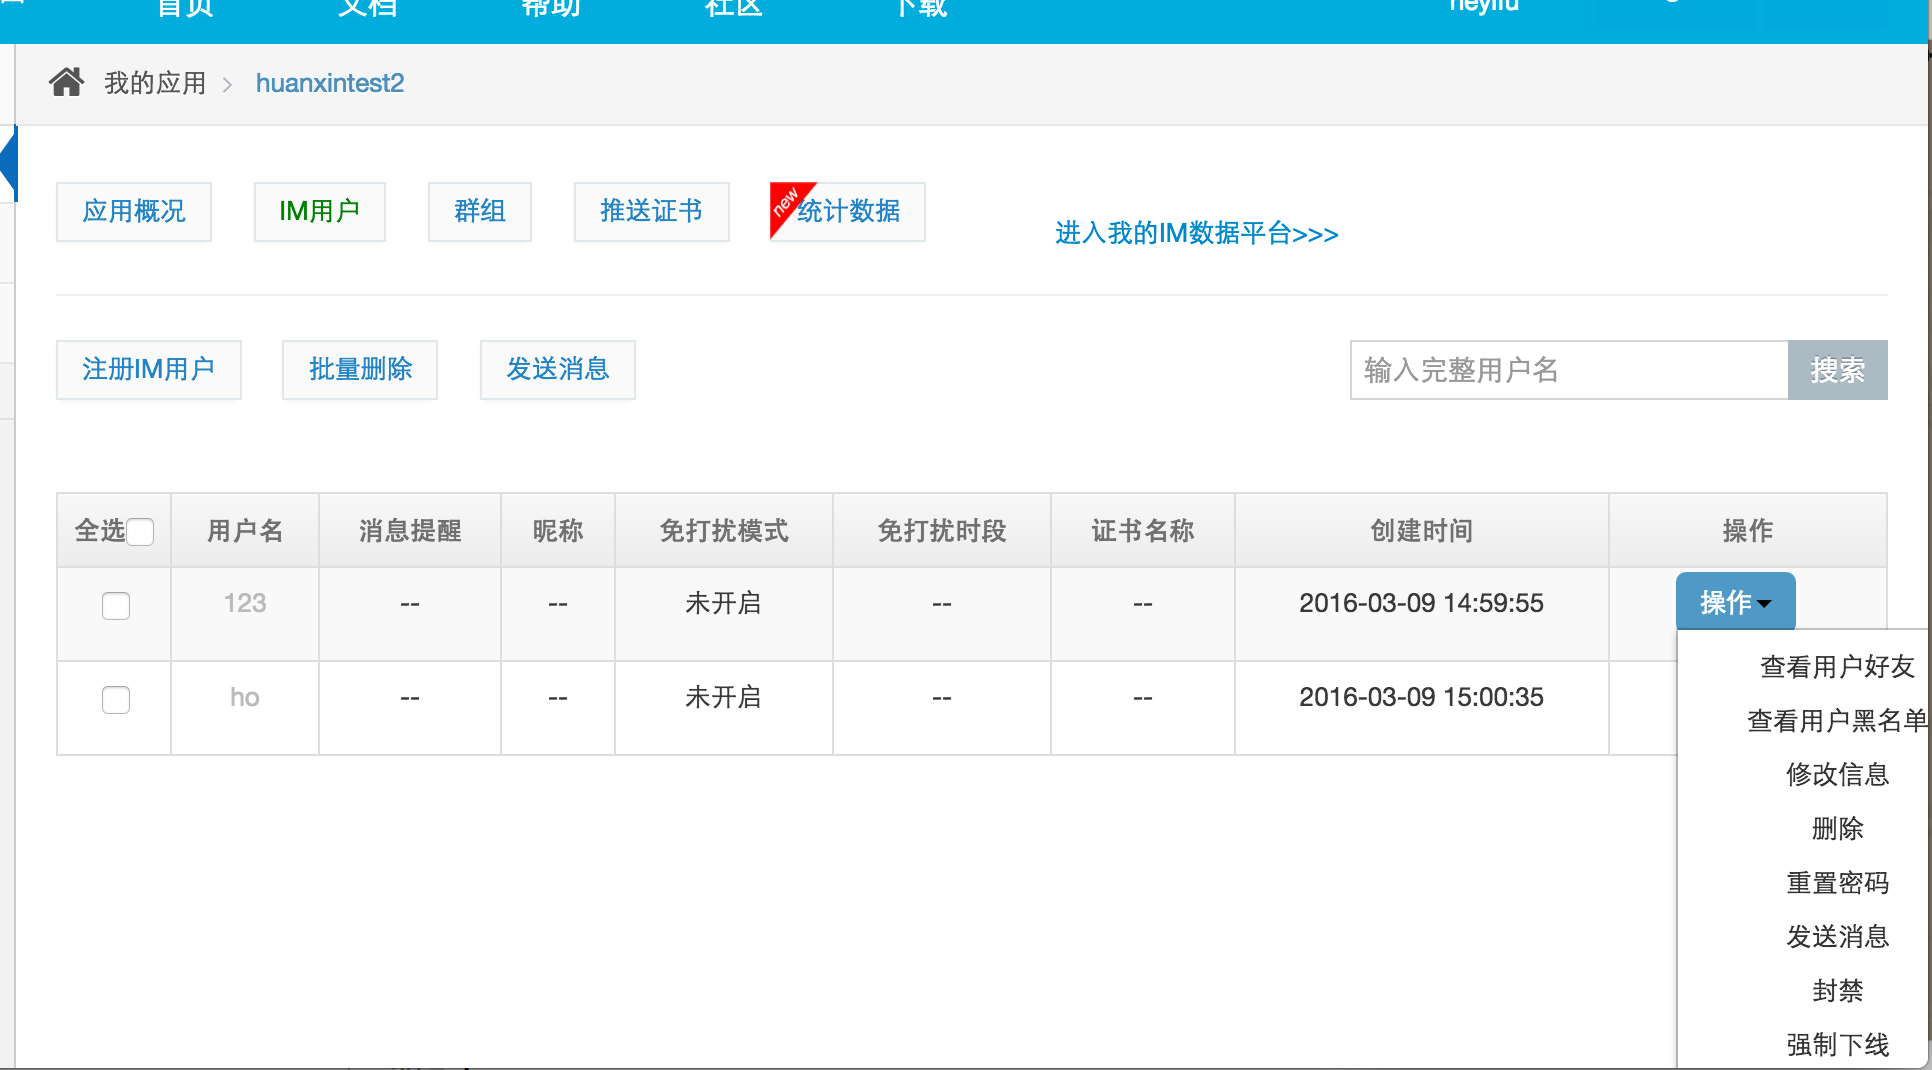
在这我们注册两个账号分别是123,HO;密码都是123
这是我们到环信管理后台可以看到该应用的用户群组和相关数据
1.3 同理实现登陆功能
只需在登录点击事件下实现代码
 1 //登陆
 2 - (IBAction)loinClick:(id)sender {
 3     [[EaseMob sharedInstance].chatManager asyncLoginWithUsername:self.ursNameTF.text password:self.passwordTF.text completion:^(NSDictionary *loginInfo, EMError *error) {
 4         if (!error && loginInfo) {
 5
 6             [self performSegueWithIdentifier:@"loginSegue" sender:nil];
 7
 8
 9             UIAlertView *alerView = [[UIAlertView alloc] initWithTitle:@"提示" message:@"登陆成功" delegate:self cancelButtonTitle:@"确定" otherButtonTitles:nil, nil];
10
11             [alerView show];
12
13         }
14     } onQueue:nil];
15 }
如果你需要实现自动登录,即首次登录成功后,不需要再次调用登录方法,在下次app启动时,SDK会自动为您登录。并且如果您自动登录失败,也可以读取到之前的会话信息。SDK中自动登录属性默认是关闭的,需要您在登录成功后设置,以便您在下次app启动时不需要再次调用环信登录,并且能在没有网的情况下得到会话列表。
实现自动登录,只需在上面代码改为(此时只要打开改应用,环形后台管理都会显示刚登录的账号是在线的):
 1 //登陆
 2 - (IBAction)loinClick:(id)sender {
 3     [[EaseMob sharedInstance].chatManager asyncLoginWithUsername:self.ursNameTF.text password:self.passwordTF.text completion:^(NSDictionary *loginInfo, EMError *error) {
 4         if (!error && loginInfo) {
 5
 6             [self performSegueWithIdentifier:@"loginSegue" sender:nil];
 7
 8             // 设置自动登录
 9             [[EaseMob sharedInstance].chatManager setIsAutoLoginEnabled:YES];
10
11             UIAlertView *alerView = [[UIAlertView alloc] initWithTitle:@"提示" message:@"登陆成功" delegate:self cancelButtonTitle:@"确定" otherButtonTitles:nil, nil];
12
13             [alerView show];
14
15         }
16     } onQueue:nil];
17 }
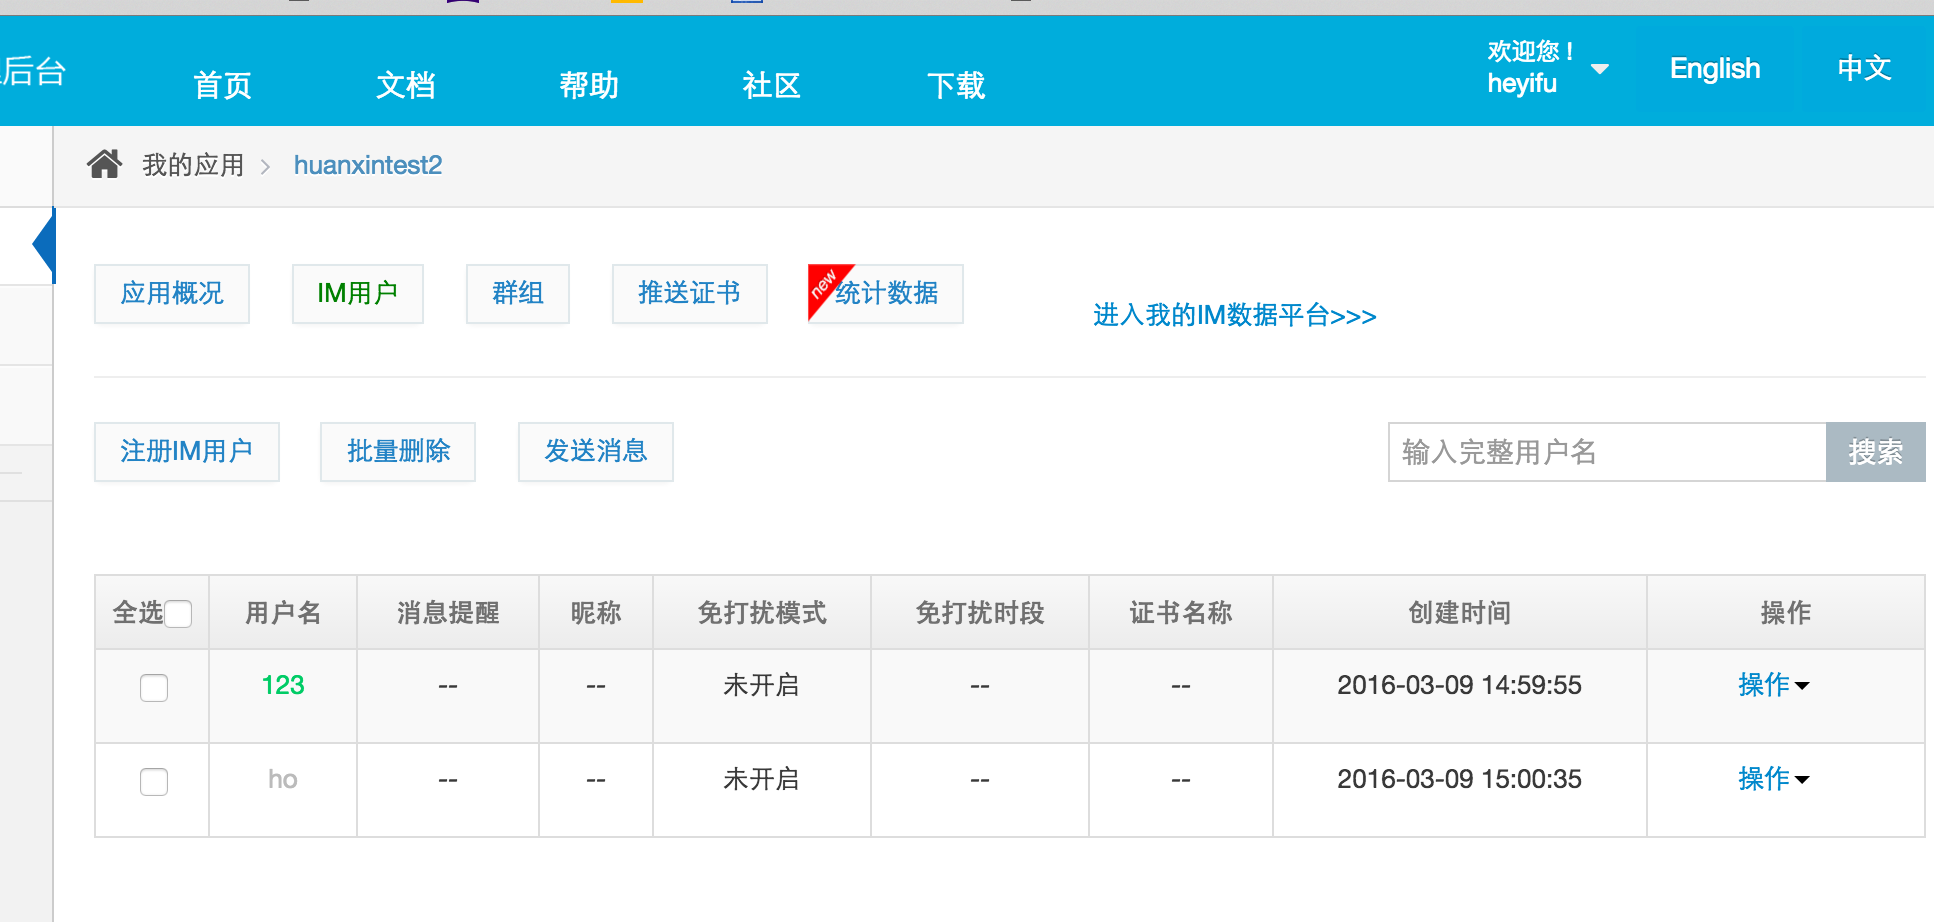
此时再打开环形管理后台可以发现登陆的用户和没登陆的用户会有显示(截图是登陆账号123)
1.4 退出登录
如果你实现了自动登录,则需要对应的实现退出,在注销按钮下添加代码
 1 - (IBAction)logoutClick:(id)sender {
 2
 3     [[EaseMob sharedInstance].chatManager asyncLogoffWithUnbindDeviceToken:YES/NO completion:^(NSDictionary *info, EMError *error) {
 4         if (!error && info) {
 5             [self performSegueWithIdentifier:@"ViewController" sender:nil];
 6
 7
 8         }
 9     } onQueue:nil];
10 }
2、消息(消息构造)
在登录跳转到登录界面myChatViewController时,在myChatViewController节目搭简单的聊天界面UI(UITableView设置两个cell分别适应两个聊天对象,UITextField输入聊天内容,NSMutableArray存放消息数组)
2.1 文字消息构造
2.2 图片消息构造
2.3 位置消息构造
2.4 语音消息构造
2.5 视频消息构造
2.6 文件消息构造
2.7 透传消息构造
2.8 自定义消息扩展
这了以文字消息为例:
  1 #import "myChatViewController.h"
  2 #import "MessageModel.h"
  3 #import "SenderCell.h"
  4 #import "ReceiverCell.h"
  5 #import "UITextField+FFKeyBoard.h"
  6 #import <EaseMob.h>
  7
  8 @interface myChatViewController ()<UITableViewDataSource,UITableViewDelegate,UITextFieldDelegate,EMChatManagerDelegate>
  9
 10 @property (weak, nonatomic) IBOutlet UITableView *chatTableView;
 11 @property (weak, nonatomic) IBOutlet UITextField *messageTF;
 12
 13 //存放消息的数组
 14 @property (nonatomic,strong)NSMutableArray * messageArr;
 15
 16 @end
 17
 18 @implementation myChatViewController
 19
 20 - (NSMutableArray *)messageArr{
 21     if (!_messageArr) {
 22         _messageArr = [NSMutableArray new];
 23     }
 24     return _messageArr;
 25 }
 26
 27 -(void)dealloc{
 28     //移除代理,否则其他页面可能会接收不到消息
 29     [[EaseMob sharedInstance].chatManager removeDelegate:self];
 30 }
 31
 32 - (void)viewDidLoad {
 33     [super viewDidLoad];
 34
 35     //适配键盘
 36     [self.messageTF autoAdaptationKeyBoard];
 37
 38     //添加代理发送消息
 39     [[EaseMob sharedInstance].chatManager addDelegate:self delegateQueue:nil];
 40
 41     //动态cell高度
 42     self.chatTableView.rowHeight = UITableViewAutomaticDimension;
 43     self.chatTableView.estimatedRowHeight = 100;
 44 }
 45
 46
 47 #pragma mark- EMChatManagerDelegate
 48 //接收在线消息
 49 -(void)didReceiveMessage:(EMMessage *)message{
 50
 51     MessageModel *model = [MessageModel new];
 52     model.chatName = message.from;
 53     model.chatMessage = [message.messageBodies[0] text];
 54     model.chatHeadImageName = @"180.png";
 55
 56     [self.messageArr addObject:model];
 57
 58     //刷新UI
 59     [self.chatTableView reloadData];
 60
 61
 62 }
 63
 64 #pragma mark - UIScollViewDelegate
 65 - (void)scrollViewDidScroll:(UIScrollView *)scrollView{
 66     [self.view endEditing:YES];//收起键盘
 67 }
 68
 69 #pragma mark - UITextFieldDelegate
 70 - (BOOL)textFieldShouldReturn:(UITextField *)textField{
 71     //发送消息
 72     /*
 73      模拟器登陆123账号(123) 发信息给heyf
 74      真机登陆heyf账号(www) 发信息给123
 75      */
 76     EMChatText * text = [[EMChatText alloc] initWithText:textField.text];
 77     EMTextMessageBody * body = [[EMTextMessageBody alloc] initWithChatObject:text];
 78
 79 #if TARGET_OS_SIMULATOR
 80     EMMessage * message = [[EMMessage alloc] initWithReceiver:@"heyf" bodies:@[body]];
 81 #else
 82     EMMessage * message = [[EMMessage alloc] initWithReceiver:@"123" bodies:@[body]];
 83 #endif
 84
 85     //发送消息
 86     [[EaseMob sharedInstance].chatManager asyncSendMessage:message progress:nil];
 87
 88     //添加消息进数组
 89     MessageModel * model = [MessageModel new];
 90     model.chatName = @"me";
 91     model.chatMessage = textField.text;
 92     model.chatHeadImageName = @"44.png";
 93
 94     [self.messageArr addObject:model];
 95
 96     [self.chatTableView reloadData];
 97
 98     return YES;
 99
100 }
101
102 #pragma mark- UITableViewDataSource
103 -(NSInteger)tableView:(UITableView *)tableView numberOfRowsInSection:(NSInteger)section{
104
105     return self.messageArr.count;
106 }
107
108 -(UITableViewCell *)tableView:(UITableView *)tableView cellForRowAtIndexPath:(NSIndexPath *)indexPath{
109     //判断创建哪一种类型的cell
110     MessageModel *model = self.messageArr[indexPath.row];
111
112     if ([model.chatName isEqualToString:@"me"]) {
113         SenderCell *cell = [tableView dequeueReusableCellWithIdentifier:@"SenderCell"];
114         [cell refreshUI:model];
115
116         return cell;
117     }else{
118
119         ReceiverCell *cell = [tableView dequeueReusableCellWithIdentifier:@"ReceiverCell"];
120         [cell refreshUI:model];
121
122         return cell;
123     }
124 }
125
126
127 //退出登录
128 - (IBAction)logoutClick:(id)sender {
129
130     [[EaseMob sharedInstance].chatManager asyncLogoffWithUnbindDeviceToken:YES/NO completion:^(NSDictionary *info, EMError *error) {
131         if (!error && info) {
132             [self performSegueWithIdentifier:@"ViewController" sender:nil];
133
134
135         }
136     } onQueue:nil];
137 }
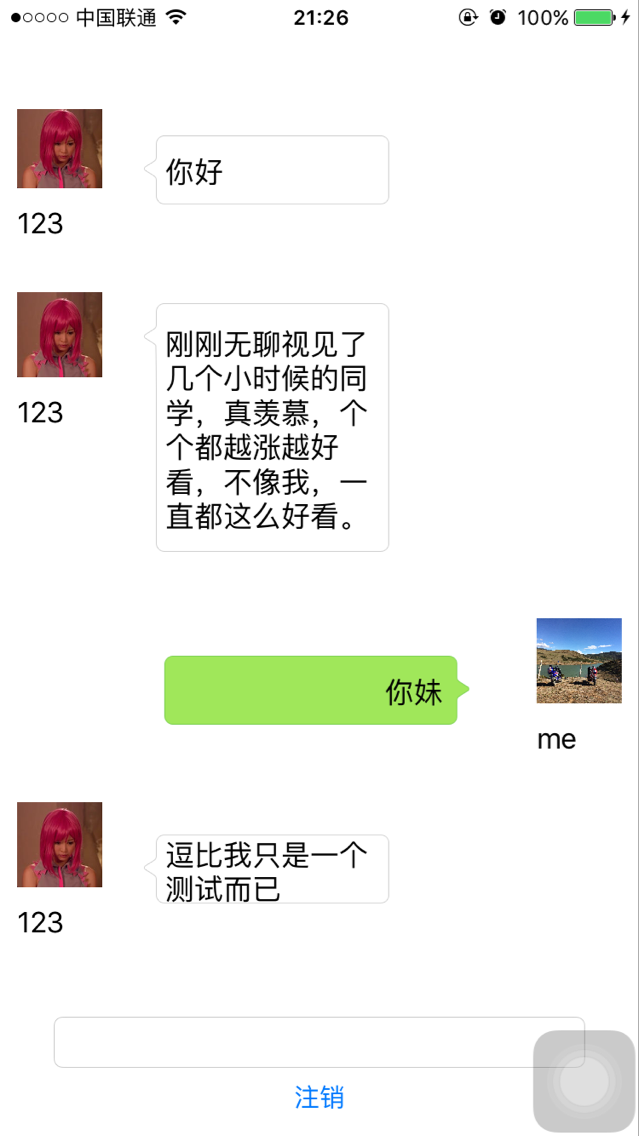
最终实现效果如图: