转载来自:https://blog.csdn.net/DaSo_CSDN/article/details/77587916
整合了下
自己的安装过程
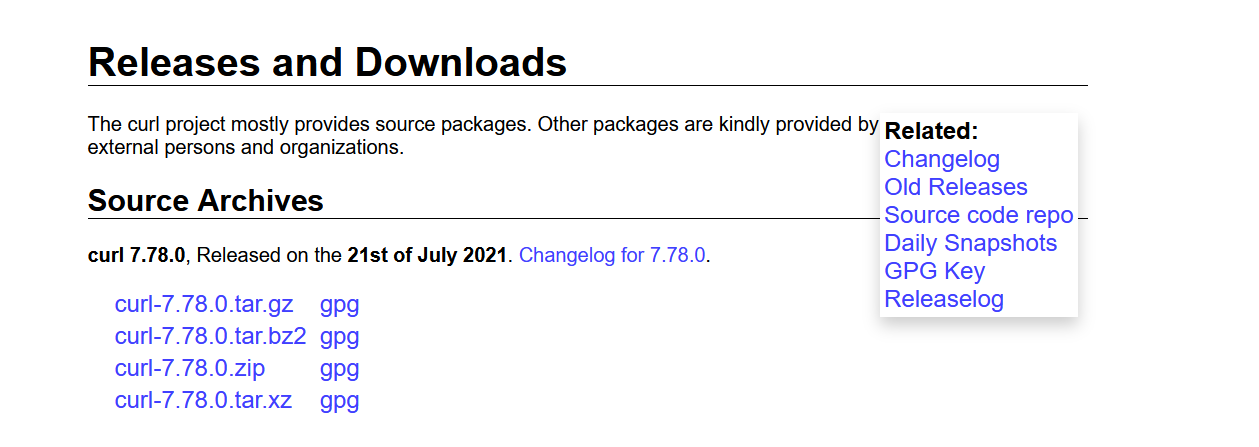
下载地址:https://curl.se/download.html
解压,并进入文件夹,运行buildconf.bat。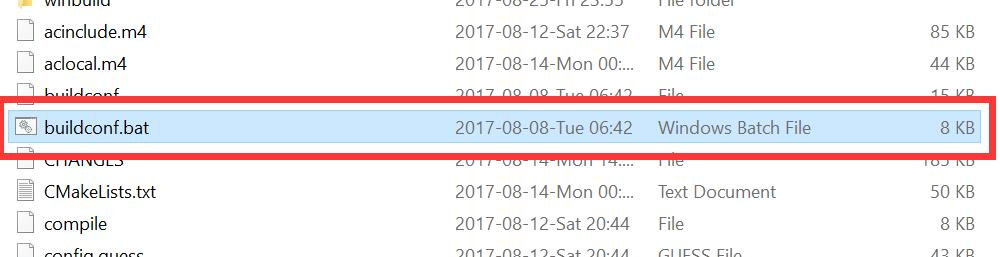
本文以编译x64为例
在开始菜单中找到Visual Studio 2017/2019文件夹,编译64位则右击x64 Native Tools Command Prompt for VS 2017/2019,编译32位则右击x86 Native Tools Command Prompt for VS 2017/2019,选择Run as administrator。

进入curl文件夹中的winbuild文件夹。
VS2017/2019+x64+静态编译:
输入nmake /f Makefile.vc mode=static VC=15 MACHINE=x64 DEBUG=no。
如需动态编译,将mode=static改为mode=dll。(本文仅演示静态编译,同时curl官方也不建议使用动态编译)
如需编译为x86,将MACHINE=x64改为MACHINE=x86。
如需编译为debug版,将DEBUG=no改为DEBUG=yes。
如果你是VS2017且未更新到最新版,VC=15建议改为VC=14。
更详细的编译指令及说明可以打开winbuild文件夹中的BUILD.WINDOWS.txt查看。
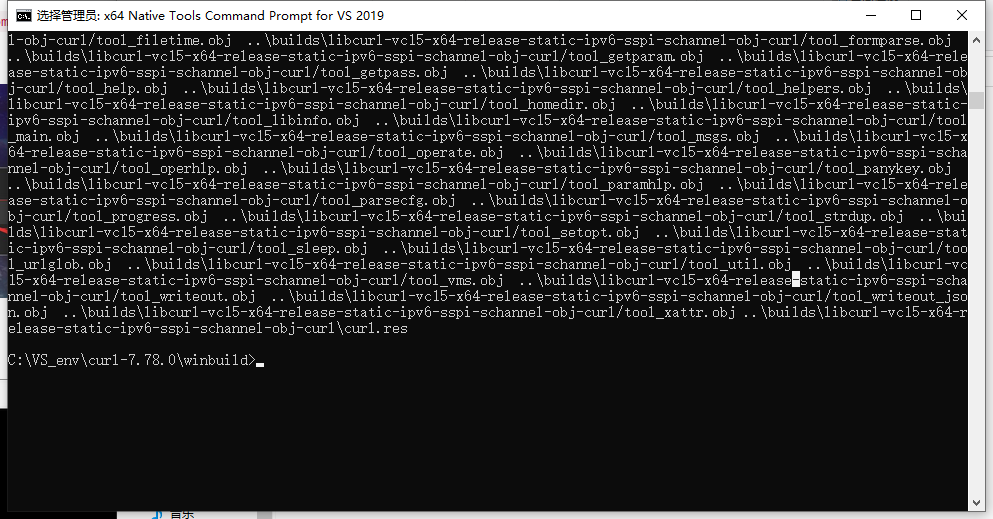
回车,等待编译完成,关闭控制台界面。
生成这个

配置vs
添加inclue 和lib

在链接器输入 加入
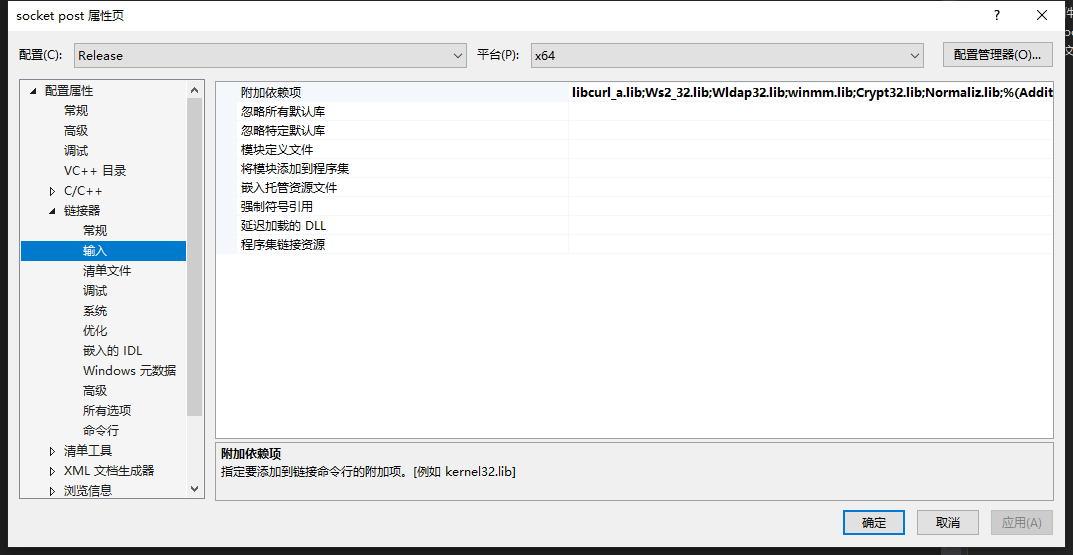
libcurl_a.lib
Ws2_32.lib
Wldap32.lib
winmm.lib
Crypt32.lib
Normaliz.lib
本文使用了静态编译且没有编译debug版libcurl,所以直接在Configurations: All Configurations中将Runtime Library选择为/MD。
如果编译了debug版libcurl,请分别在Configurations: Debug中选择/MDd、Configurations: Release中选择/MD。
如果使用了动态编译,则为/MTd和/MT。
测试
#include <curl/curl.h>

int main(int argc, char* argv[]) {
    CURL *curl = 0;
    CURLcode res;
    curl = curl_easy_init();
    if (curl != 0) {
        curl_easy_setopt(curl, CURLOPT_URL, "https://www.baidu.com");

        //www.baidu.com 可能会跳转,所以设置为跟随跳转
        curl_easy_setopt(curl, CURLOPT_FOLLOWLOCATION, 1L);

        //发出请求
        res = curl_easy_perform(curl);
        if (res != CURLE_OK) {
            //输出可能是乱码,因为没配置UTF-8
            fprintf(stderr, "curl_easy_perform() failed: %s
", curl_easy_strerror(res));
        }

        //清理工作
        curl_easy_cleanup(curl);
    }

    return 0;
}