Unity 1-8 使用Unity开发2D游戏 PongGame
任务1:演示
http://pan.baidu.com/s/1pKUHsev; up2i
任务2:案例介绍
创建PongGame,注意勾选为2D
创建成了3D的话,在工程里面也可以修改 Edit->Project Settings->Editor->Default Behavior Mode: 2D
创建文件夹Sprites (2D图片)/ Audios/ Prefabs/ Scenes/ Scripts
任务3:添加背景
素材:Assets Pack->PONG->Individuals Sprites->Ball.png/BG.png/Player.png。将这三个文件导入Sprites
注意将Texture Type改为Sprite(2D and UI),因为工程是2D的,所以会自动改为这个属性
Pixels Per Unit:100 指的是100像素代表1米
拖入BG,需要把Camera大小保持和BG大小一致吗?-- 会出现问题,比如在不同长宽比的设备
解决方式:把Camera的size设置成5,避免极少数设备非常宽,再将背景颜色改成相似的
注:camera的高度不变,改变的只有宽度 -- 试试改变Game窗口的大小,发现Scene里的Camera高度不变
注:因为背景是很少需要修改的,而在操作的时候很容易会点到背景进行误操作,所以可以将背景锁定
将BG的Layer选择成新建Layer Background,并将这个Layer锁定
这个时候在Scene中是不能选择BG的,只有在Hierarchy中可以选择,有效地避免了许多误操作
背景在显示顺序上应该是放在最后面的
BG->Sprite Renderer->Sorting Layer->new layer Background,将Background拖放到Default之上即可
注:Order in Layer指的是同一层中的显示顺序(谁在谁上面)
任务4:设计Player预制体
拖入Player
添加Box Collider 2D,保持大小吻合 -- 碰撞检测
添加刚体Rigidbody2D,重力设置为0,锁定旋转和x轴移动 -- 控制移动
创建PlayerController.cs
因为有两个Player,所以不能对方向键的控制写死
public KeyCode upKey;
public KeyCode downKey;
public float speed = 10 ;
if(Input.GetKey(upKey)) {
rgd2d.velocity = new Vector2(0, speed); // Rigidbody2D rgd2d = GetComponent...;
}
GetKey() -- 只要在按下按键的那段时间内,都会一直触发
GetKeyDown() -- 只会在按下按钮的那一帧触发
运行,能向上移动了,但是发现松开按键后还是保持向上移动
else { rgd2d.velocity = new Vector2(0, 0);
向下移动:else if (downKey) { Vector2(0, -speed); } 即可
如果同时按下了上下键呢? -- if第一个条件满足 -- 向上移动
将Player作为Prefab
任务5&6:设置围墙
在周围添加围墙碰撞体,防止Player移动到屏幕外部
注意:围墙不能是恒定不变的,因为需要考虑到屏幕的自适应
创建空物体GameManager,创建四个子空物体Wall,在GameManager中控制Wall的位置和大小
给Wall添加Box Colllider 2D,给GameManager添加GameManager.cs
ResetWall() {
// 得到四堵墙的BoxCollider2D;
rightWall = transform.Find("RightWall").GetComponent<BoxCollider2D>();
// 控制Wall的位置
// 屏幕是以左下角为原点的,TopWall坐标 x = Screen.Width/2; y = Screen.Height
Vector3 topWallPosition = Camera.main.ScreenToWorldPoint
(new Vector2(Screen.width/2, Screen.height));
topWall.transform.position = topWallPosition;
// 控制Wall的大小
// 注意Screen和World中原点的不同
float width = Camera.main.ScreenToWorldPoint(new Vector2(Screen.width, Screen.height)).x*2;
topWall.size = new Vector2(width, 1);
// 运行发现topWall下半部分的Collider在屏幕内,因此position的y坐标+0.5f
}
void ResetWall() { // 得到四堵墙的BoxCollider2D; rightWall = transform.Find("RightWall").GetComponent<BoxCollider2D>(); leftWall = transform.Find("LeftWall").GetComponent<BoxCollider2D>(); topWall = transform.Find("TopWall").GetComponent<BoxCollider2D>(); bottomWall = transform.Find("BottomWall").GetComponent<BoxCollider2D>(); // 控制wall的位置 // 屏幕是以左下角为原点的,TopWall坐标 x = Screen.Width/2; y = Screen.Height/2 Vector3 rightWallPosition = Camera.main.ScreenToWorldPoint(new Vector2(Screen.width, Screen.height / 2)) + new Vector3(0.5f, 0); Vector3 leftosition = Camera.main.ScreenToWorldPoint(new Vector2(0, Screen.height / 2)) - new Vector3(0.5f, 0); Vector3 topWallPosition = Camera.main.ScreenToWorldPoint(new Vector2(Screen.width / 2, Screen.height)) + new Vector3(0 ,0.5f); Vector3 bottomWallPosition = Camera.main.ScreenToWorldPoint(new Vector2(Screen.width / 2, 0)) - new Vector3(0, 0.5f); rightWall.transform.position = rightWallPosition; leftWall.transform.position = leftosition; topWall.transform.position = topWallPosition; bottomWall.transform.position = bottomWallPosition; // 控制Wall的大小 // 注意Screen和World中原点的不同 float width = Camera.main.ScreenToWorldPoint(new Vector2(Screen.width, Screen.height)).x * 2; float height = Camera.main.ScreenToWorldPoint(new Vector2(Screen.width, Screen.height)).y * 2; rightWall.size = new Vector2(1, height); leftWall.size = new Vector2(1, height); topWall.size = new Vector2(width, 1); bottomWall.size = new Vector2(width, 1); }
简化代码:
Vector3 tempPosition = Camera.main.ScreenToWorldPoint(new Vector2(Screen.width, Screen.height));
topWal.transform.position = new Vector3(0, tempPosition.y + 0.5f, 0);
topWall.size = new Vector2(tempPosition.x *2, 1);
Vector3 tempPosition = Camera.main.ScreenToWorldPoint(new Vector2(Screen.width, Screen.height));

rightWall.transform.position = new Vector3(-tempPosition.x - 0.5f, 0, 0);
leftWall.transform.position = new Vector3(tempPosition.x + 0.5f, 0, 0);
topWall.transform.position = new Vector3(0, tempPosition.y + 0.5f, 0);
bottomWall.transform.position = new Vector3(0, -tempPosition.y - 0.5f, 0);

rightWall.size = new Vector2(1, tempPosition.y * 2);
leftWall.size = new Vector2(1, tempPosition.y * 2);
topWall.size = new Vector2(tempPosition.x * 2, 1);
bottomWall.size = new Vector2(tempPosition.x * 2, 1);
任务7:控制Player的位置生成
相似的,Player的位置用代码来确定 -- 屏幕自适应
GameManager.cs
public Transform player1/ player2;
player1.position = Camera.main.ScreenToWorldPoint(new Vector2(100, Screen.height / 2));
运行,但是players不见了!
最后发现,是因为Players的z坐标变成了-10,因为Camera的z坐标为-10
--> 教程中方法
Vector3 player1Position = Camera.main.ScreenToWorldPoint(...);
player1Position.z = 0;
player1.position = player1Position;
--> 我的方法
player1.position = Camera.main.ScreenToWorldPoint(...);
player1.position = player1.position - new Vector3(0, 0, Camera.main.transform.position.z);
private void ResetPlayer() {
    player1.position = Camera.main.ScreenToWorldPoint(new Vector2(100, Screen.height / 2));
    player1.position = player1.position - new Vector3(0, 0, Camera.main.transform.position.z);
    player2.position = Camera.main.ScreenToWorldPoint(new Vector2(Screen.width - 100, Screen.height / 2));
    player2.position = player2.position - new Vector3(0, 0, Camera.main.transform.position.z);
}
任务8&9:添加小球 & 小球方向的控制
拖入Ball,添加Circle Collider 2D,添加Rigidbody2D
创建Physical2D Material -- BallBounce: Friction摩擦力=0;Bounciness弹力=1;
Rigidbody2D中Mass设置小一点0.2增加弹力,Angular drag为0,可能影响弹跳
并将该Material赋值给Collider/Rigidbody
Ball.cs // 施加一个初始力,控制小球开始运动
// number = 0/ 1;
int number = Random.range(0, 2);
number = 0时rgd2d.AddForce(new Vector2(100, 0));
number=1时rgd2d.AddForce(new Vector2(-100, 0));
运行,此时不能通过Player来控制小球的方向,只能进行左右弹跳
个人想法:增大Physical2D Material的Friction,使其拥有摩擦力
运行时发现当小球与四周的Wall碰撞时也会进行摩擦从而改变运动轨迹 -- 不可行
siki思路:
当小球和Player发生碰撞的时候将Player的y轴速度附加给小球即可
if(collision.collider.tag == "Player") {
Vector2 velocity = rgd2d.velocity;
velocity.y += collision.rigidbody.velocity.y;
rgd2d.velocity = velocity;
}
速度的叠加会出现无限增大的情况;而如果给予了小球y速度,而之后Player不再有y速度,小球的y速度也不会发生变化,可玩性不是很高
-- 将Player的y轴速度的一半附加给小球(变化不要太快);并且每次将小球的y速度减半(如果Player的y速度为零,则小球y速度会慢慢趋近于0)
private void OnCollisionEnter2D(Collision2D collision) {
    if (collision.collider.tag == "Player") {
        Vector2 velocity = rgd2d.velocity;
        velocity.y = velocity.y / 2 + collision.rigidbody.velocity.y / 2;
        rgd2d.velocity = velocity;
    }
}
任务10:移动小球的移动
Bug:某些特殊情况/碰撞会导致x轴速度特别低
得到小球x轴速度
Debug.Log(rigidbody2D.velocity);
输出的为10
Update()检测如果速度过低,则增大
if(velocity.x =<9 && velocity.x > -9 && velocity.x != 0) { // 游戏初始值velocity为0
if(velocity.x > 0) velocity = 10;
if(velocity.x < 0) velocity = -10;
void Update() {
    Vector2 velocity = rgd2d.velocity;
    if (velocity.x < 9 & velocity.x > 0) {
        // x的初始值(游戏开始)为0,在这里把0排除
        // x方向为正
        velocity.x = 10;
        rgd2d.velocity = velocity;
    } else if (velocity.x > -9 & velocity.x < 0) {
        // x方向为负
        velocity.x = -10;
        rgd2d.velocity = velocity;
    }
}
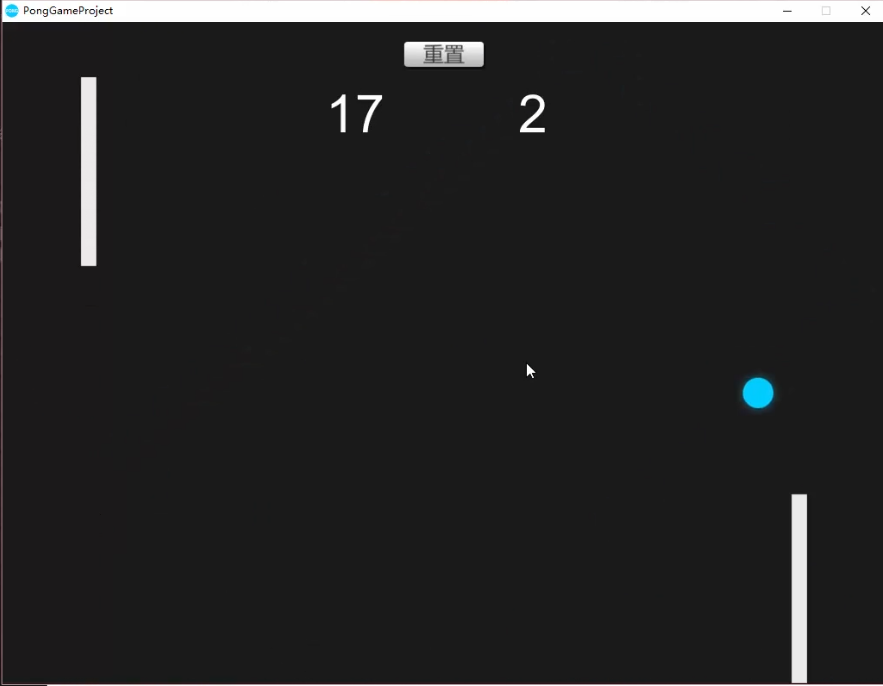
任务11:计分效果
UI->Text 上方居中
设置Anchor Presets 为Top Center -- 不论屏幕的变化,会以屏幕的Top Center点保持相对位置
在BallController.cs中检测小球和墙的碰撞
collision.gameObject.name == "RightWall"/"LeftWall"
// 当碰撞的时候调用GameManager.cs中的ChangeScore(wallName);
GameManager.Instance.ChangeScore(collision.gameObject.name);
在GameManager.cs中实现分数的控制
private static GameManager _instance;
public static GameManager Instance {
get {
return _instance;
}
}
// 在外部访问的时候只能访问到get方法,不能设置_instance
void Awake() { // _instance在这里设置
_instance = this;
}
public void ChangeScore(string wallName) {
if (wallName == "RightWall") {
score1++;
}
...
}
public class GameManager : MonoBehaviour {

    private int scoreLeft = 0;
    private int scoreRight = 0;

    public Text scoreLeftText;
    public Text scoreRightText;

    private static GameManager _instance;
    public static GameManager Instance {
        get {
            return _instance;
        }
    }

    private void Awake() {
        _instance = this;
    }

    public void ChangeScore(string wallName) {
        if(wallName == "RightWall") {
            scoreLeft++;
            scoreLeftText.text = scoreLeft.ToString();
        } else if (wallName == "LeftWall") {
            scoreRight++;
            scoreRightText.text = scoreRight.ToString();
        }
    }
}
private void OnCollisionEnter2D(Collision2D collision) {
    if (collision.collider.tag == "Player") ...

    // score change
    if (collision.gameObject.name == "RightWall" || collision.gameObject.name == "LeftWall") {
        GameManager.Instance.ChangeScore(collision.gameObject.name);
    }
}
任务12:添加音效
Assets Pack->Audio->ChilMusic.mp3背景音乐/ Click.wav小球碰撞Player/ Hit.wav得分
siki方法:将click放在Ball中控制,将hit放在left/rightWall中控制
小球碰撞Player时音效:
Ball-> Audio Source组件用于播放声音
Click.wav拖入AudioClip
Spatial Blend 控制音效的2d/3d
PlayerController.cs中
private AudioSource audio;
audio = GetComponent<AudioSource>();
audio.Play();
为了增加游戏性,每次声音速度可以稍微改变
audio.pitch = Random.Range(0.8f, 1); // 默认等于1
小球碰撞墙时音效:(volumn改为0.75)
Wall.cs中:
OnCollisionEnter2D() {
audio.play();
}
我的方法:都放在BallController.cs中控制
private void AudioInit() {
    AudioSource[] audios = GetComponents<AudioSource>();
    foreach(AudioSource audio in audios) {
        if(audio.clip.name == "Click") {
            clickAudio = audio;
        } else if (audio.clip.name == "Hit") {
            hitAudio = audio;
        }
    }
}

private void OnCollisionEnter2D(Collision2D collision) {
    if (collision.collider.tag == "Player") {
        clickAudio.pitch = Random.Range(0.8f, 1); // Randomize audio play speed
        clickAudio.Play();
        ...
    }

    // score change
    if (collision.gameObject.name == "RightWall" || collision.gameObject.name == "LeftWall") {
        hitAudio.pitch = Random.Range(0.8f, 1);
        hitAudio.Play();
        ...
    }
}
背景音乐:
GameManager->AudioSource->ChilMusic->PlayOnAwake & Loop
任务13:游戏的Reset按钮
Reset:分数归零、Ball位置初始化
UI->Button
放在计分板之间(按住alt可以对称修改大小)
拖入Assets Pack->Button->ButtonHover/ButtonNormal/ButtonPressed.png
在Button对象中的Transition中选择Sprite Swap,对应各种按钮状态的赋值
1. Reset计分板 -- GameManager.cs中
Reset() {
score = 0;
scoreText.text = score.ToString();
}
在ResetButton上的Button(Script)中On Click()中添加GameManager物体的Reset()
2. Reset Ball -- BallController.cs
Reset() {
transform.position = Vector3.zero;
// 将Start()中的初始速度代码做成一个method
BallVelocityInit();
}
在GameManager.cs的Reset()最后加上
GameObject.Find("Ball").SendMessage("Reset");
// 调用BallController.cs中的Reset();
或是在Button中的OnClick()中添加Ball物体的Reset()
Bug -- Reset的时候只是给小球AddForce(),因此是在之前的velocity基础上加的外力
在之前加上 rgd2d.velocity = Vector2.zero; 即可
任务14:游戏发布
Build Settings -> 拖入Scene
Default Icon: Assets Pack->PONG->Icon.png
Default Is Full Screen:uncheck
Splash Image:游戏开始时的界面(Logo)--默认为Unity
Show Unity Splash Screen:uncheck
Display Resolution Dialog:disabled -- 使用默认分辨率,不用打开选择窗口