安装单机版 hadoop 步骤
1. 下载 需要版本的 jdk
解压放入 /usr/lib/jvm/jdk-1.8.xxxxx
配置 环境变量
vim /etc/profile
添加 JAVA_HOME


2. 下载需要版本的 HADOOP  压缩包
加压放入 /usr/local/hadoopxxx   或者 /opt/modules/hadoopxxx
进入 $HADOOP_HOME/etc/hadoop/hadoop-env.sh
查看有依赖 JAVA_HOME

然后可以运行 wordcount  示例代码即可验证是否成功
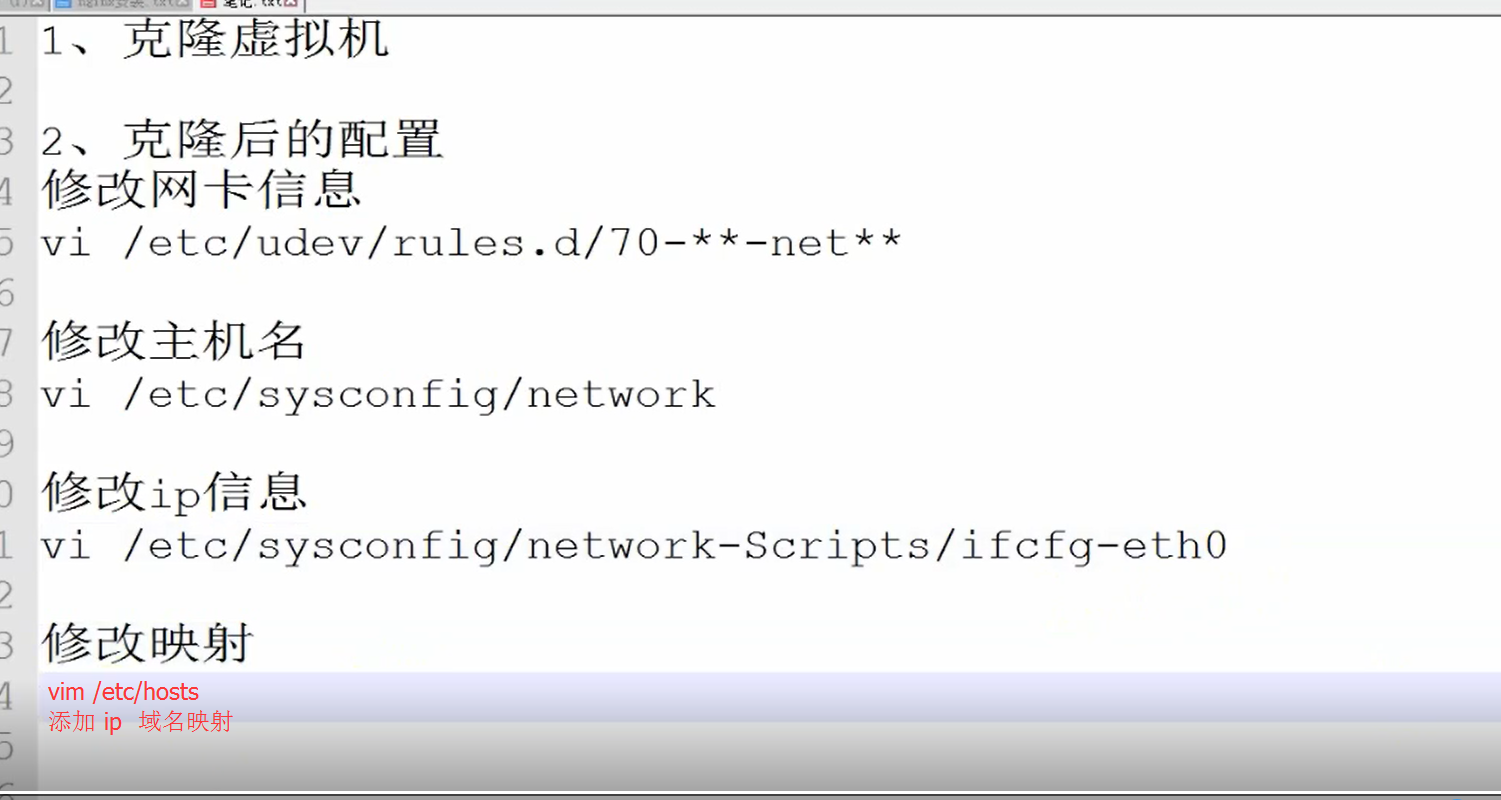
搭建伪分布式集群 (至少 三台服务器)
clone 单机版后 修改 如下信息
搭建全分布式集群
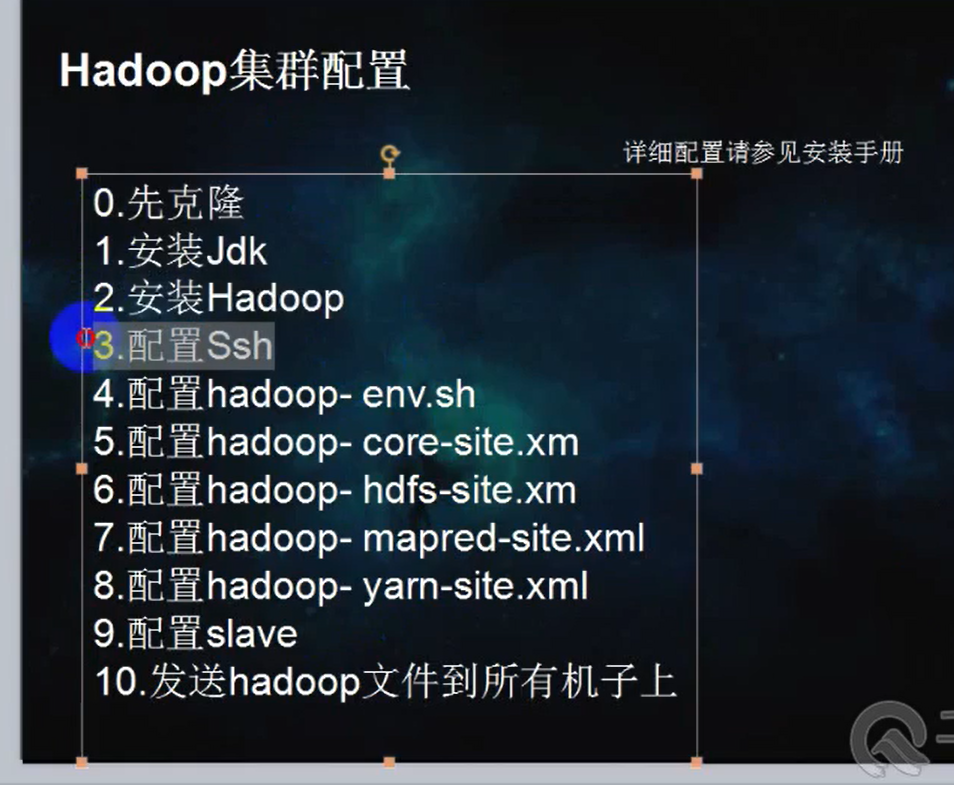
配置 core-site.xml 差不多有 六个 xml 文件需要配置

分模块启动


安装 jdk 1.8
# 官网下载可能比较慢,请自行搜索国内镜像源
wget --no-cookies --no-check-certificate --header "Cookie: gpw_e24=http%3A%2F%2Fwww.oracle.com%2F; oraclelicense=accept-securebackup-cookie" "http://download.oracle.com/otn-pub/java/jdk/8u141-b15/336fa29ff2bb4ef291e347e091f7f4a7/jdk-8u141-linux-x64.tar.gz"


tar -xzvf jdk-8u191-linux-x64.tar.gz -C /usr/lib/jvm

#请忽略版本信息,搬运别人的,因为我之前已经装好了
配置环境变量

#vi  /etc/profile

JAVA_HOME=/usr/lib/jvm/jdk1.7.0_79//自己的jdk路径
JRE_HOME=$JAVA_HOME/jre //可根据需求决定是否配置
PATH=$PATH:$JAVA_HOME/bin:$JRE_HOME/bin
CLASSPATH=.:$JAVA_HOME/lib/dt.jar:$JAVA_HOME/lib/tools.jar:$JRE_HOME/lib
export JAVA_HOME JRE_HOME PATH CLASSPATH

添加完毕保存退出
source /etc/profile
下载解压 hadoop
#单机版
wget http://mirror.bit.edu.cn/apache/hadoop/common/hadoop-2.8.4/hadoop-2.8.4.tar.gz
tar -xzvf hadoop-2.8.4.tar.gz -C /opt/modules/hadoopstandalone/
#如果此时你认为到此就结束了,那么你图样啊。。。
这时候你不妨试着 用 hadoop 自带的 wordcount 测试一波
bin/hadoop jar share/hadoop/mapreduce/hadoop-mapreduce-examples-2.8.4.jar wordcount ~/words.txt output.txtxxx
# 如果报错如下:
Error: JAVA_HOME is not set and could not be found.
#这次并不是 jdk 本身 没有配置好环境变量,而是你需要修改 hadoop 里的 etc/hadoop/hadoop-env.sh
vim etc/hadoop/hadoop-env.sh
将 ${JAVA_HOME} 替换为你配置好的 JAVA_HOME 路径
#然后重复 wordcount
bin/hadoop jar share/hadoop/mapreduce/hadoop-mapreduce-examples-2.8.4.jar wordcount ~/words.txt output.txtxxx
# 中间可能会出现 'attempt_local1221950113_0001_r_000000_0' to file:/opt/modules/hadoopstandalone/hado ,证明 确实是本地模式跑的
# 伪分布式版
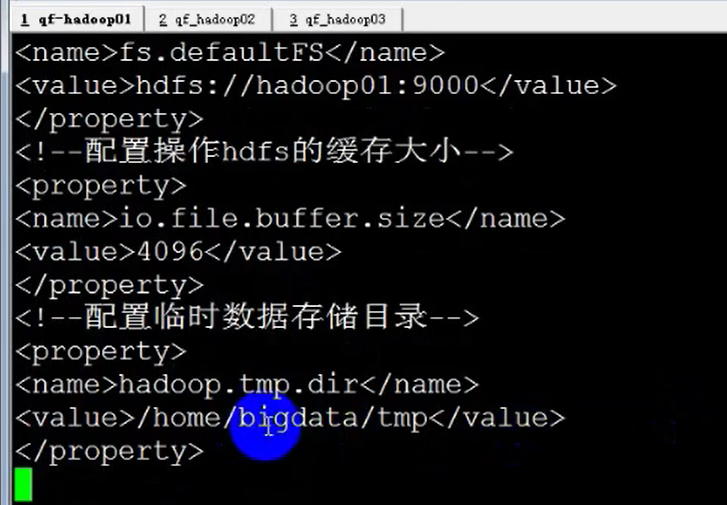
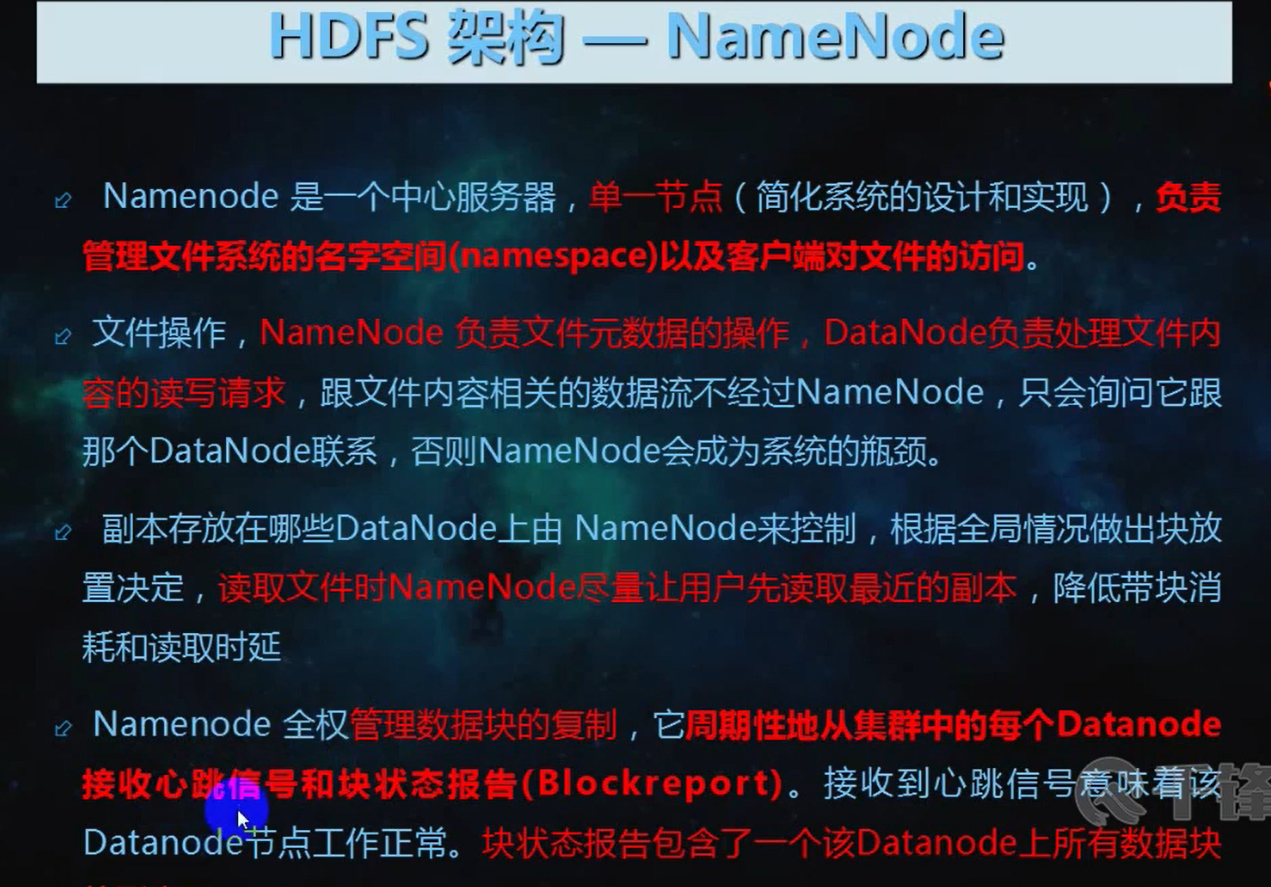
#配置 namenode (core-site.xml) 文件
注意下面 所有 file:// 这种的 路径最好 mkdir -p xxx 执行下,不然启动时候可能会找不到路径的
# hadoop_home 目录下 的 etc/ 下
<configuration>
<!-- 指定HDFS老大(namenode)的通信地址 -->
<property>
<name>fs.defaultFS</name>
<value>hdfs://master:9000</value>
</property>
<!-- 指定hadoop运行时产生文件的存储路径 -->
<property>
<name>hadoop.tmp.dir</name>
<value>file:///usr/hadoop/hadoop-2.8.4/tmp</value>
</property>
<!--用来设置检查点备份日志的最长时间-->
<property>
<name>fs.checkpoint.period</name>
<value>3600</value>
</property>
</configuration>
二 、hdfs-site.xml
<configuration>
<!--指定hdfs保存数据的副本数量-->
<property>
<name>dfs.replication</name>
<value>2</value>
</property>
<!--指定hdfs中namenode的存储位置-->
<property>
<name>dfs.namenode.name.dir</name>
<value>file:///usr/hadoop/hadoop-2.8.4/tmp/dfs/name</value>
</property>
<!--指定hdfs中datanode的存储位置-->
<property>
<name>dfs.datanode.data.dir</name>
<value>file:///usr/hadoop/hadoop-2.8.4/tmp/dfs/data</value>
</property>
</configuration>
~
三、 mapred-site.xml
<configuration>
<!--告诉hadoop以后MR(Map/Reduce)运行在YARN上-->
<property>
<name>mapreduce.framework.name</name>
<value>yarn</value>
</property>
</configuration>
四、 yarn-site.xml
<configuration>
<!--nomenodeManager获取数据的方式是shuffle-->
<property>
<name>yarn.nodemanager.aux-services</name>
<value>mapreduce_shuffle</value>
</property>
<!--指定Yarn的老大(ResourceManager)的地址-->
<property>
<name>yarn.resourcemanager.hostname</name>
<value>master</value>
</property>
<!--Yarn打印工作日志-->
<property>
<name>yarn.log-aggregation-enable</name>
<value>true</value>
</property>
<configuration>
#这里提一下 上面 master 的配置 实际上是 覆写了 namenode 节点的 /etc/hosts 文件,本实验虚拟机采用NAT , namenode 与 datanode 均需覆写hosts文件以此达到通信的目的,还# 此外还需要配置 SSH 免密通信
[root@master hadoop]# cat /etc/hosts
127.0.0.1 localhost localhost.localdomain localhost4 localhost4.localdomain4
::1 localhost localhost.localdomain localhost6 localhost6.localdomain6
192.168.32.128 node1
192.168.32.129 master
192.168.32.130 node2
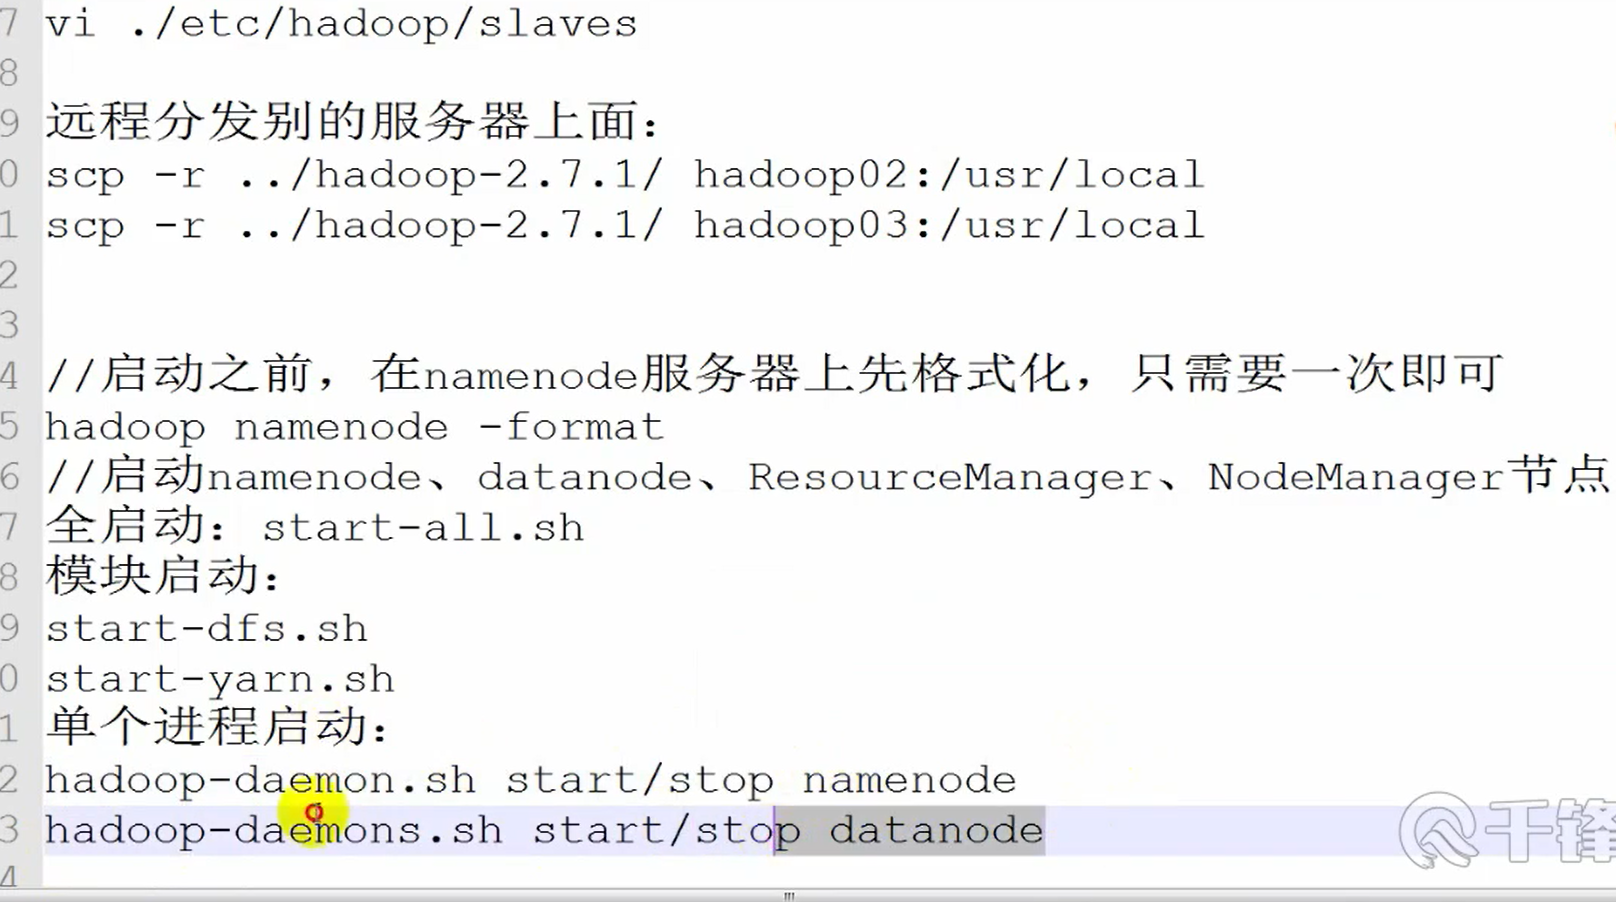
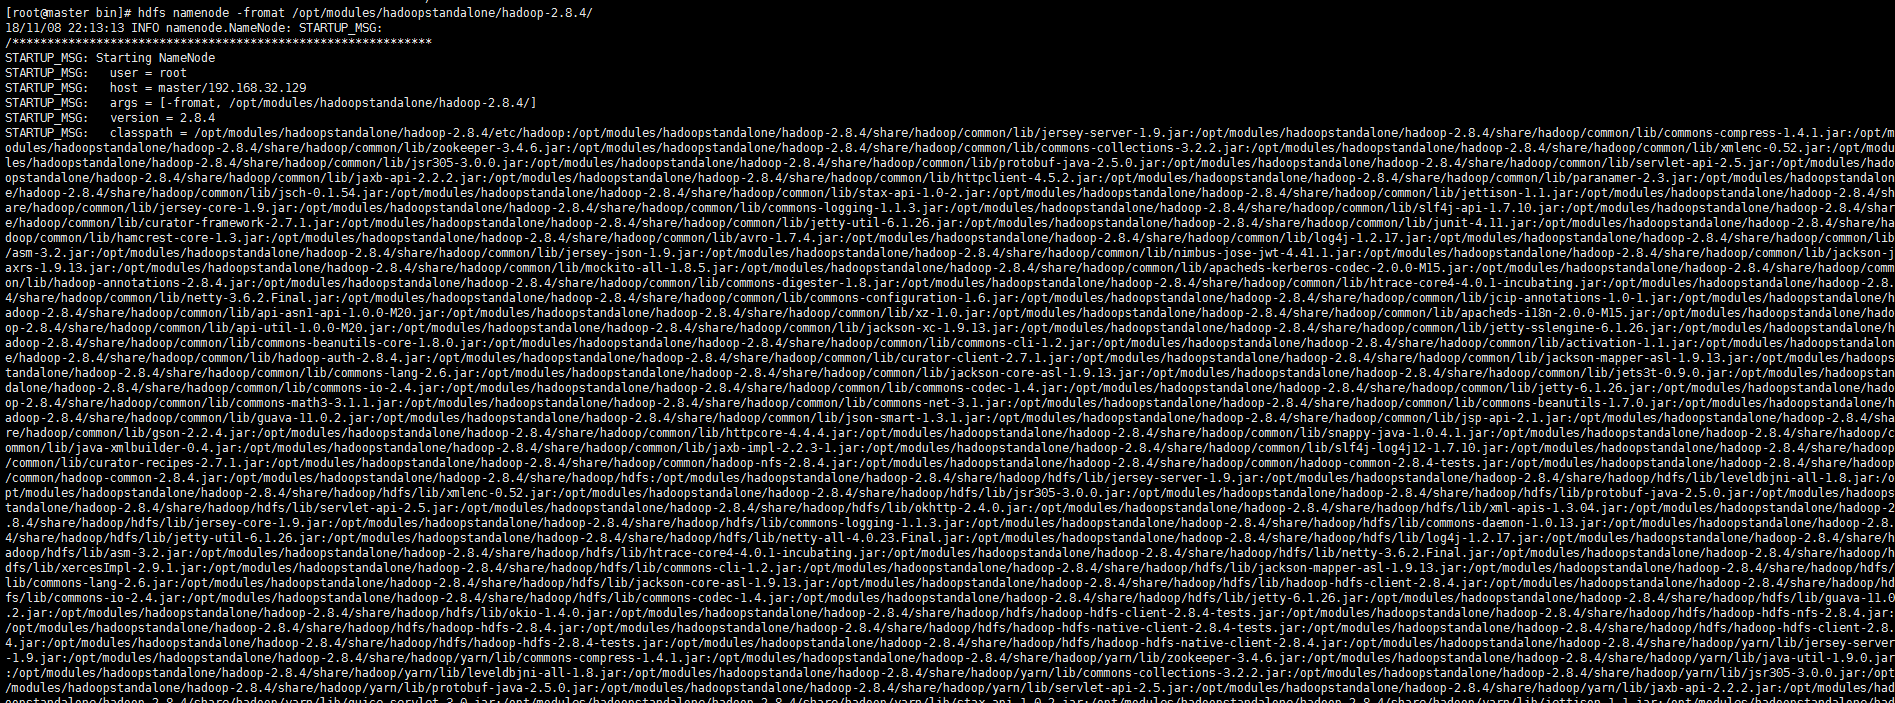
首次 格式化 hdfs 存储 ,尼玛,这里是中文横杠,最好拷贝下面命令执行。。。
hdfs namenode -format
测试是否安装成功,启动 hadoop
cd /opt/modules/hadoopstandalone/hadoop-2.8.4/sbin
./start-all.sh
# 会提示这种启动方法过时了 This script is Deprecated. Instead use start-dfs.sh and start-yarn.sh
# 这时你可以选择用新的替代方法
./stop-all.sh
# 会提示这种启动方法过时了 This script is Deprecated. Instead use stop-dfs.sh and stop-yarn.sh
# 这时你可以选择用新的替代方法
# 再次重启
./start-all.sh
# 出现下面这种结果就 ok 了 jps 查看一下 有下面的 就 ok 了
[root@master logs]# jps
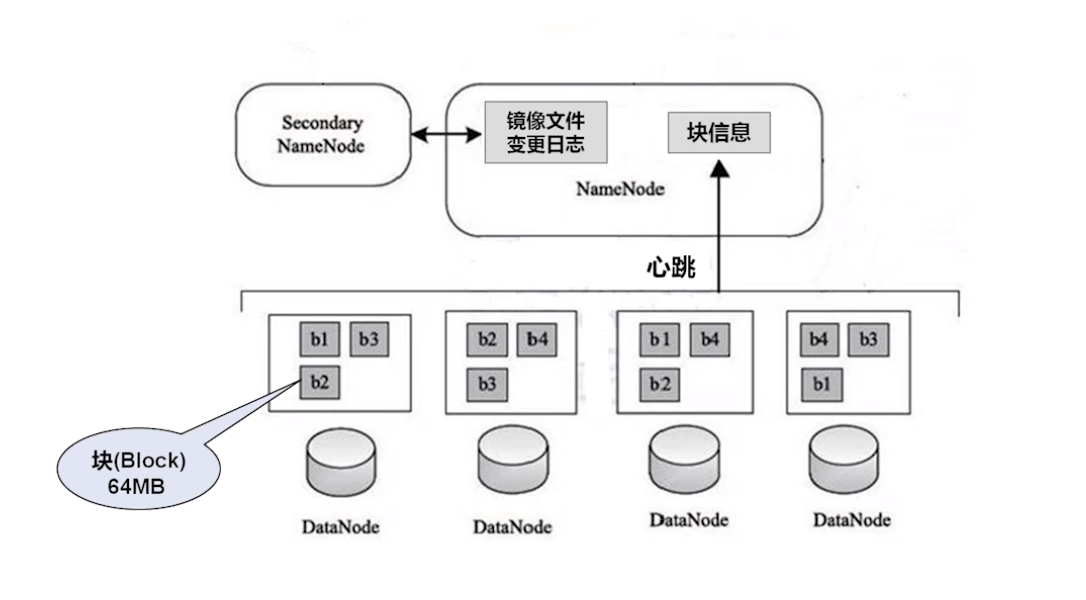
67761 DataNode
67953 SecondaryNameNode
1537 AmbariServer
68515 Jps
68135 ResourceManager
68248 NodeManager
67615 NameNode
如果失败,一般都是 namenode 没有启动成功,具体原因 查看 hadoop/logs/hadoop-xxx-namenode.log 即可获得(这里告诉一个我遇到的错误,就是上面 xml 文件里的那些目录没有手动建出,然后 hdfs namenode format 中间的是 中文横杠。。震惊吧!!!)。
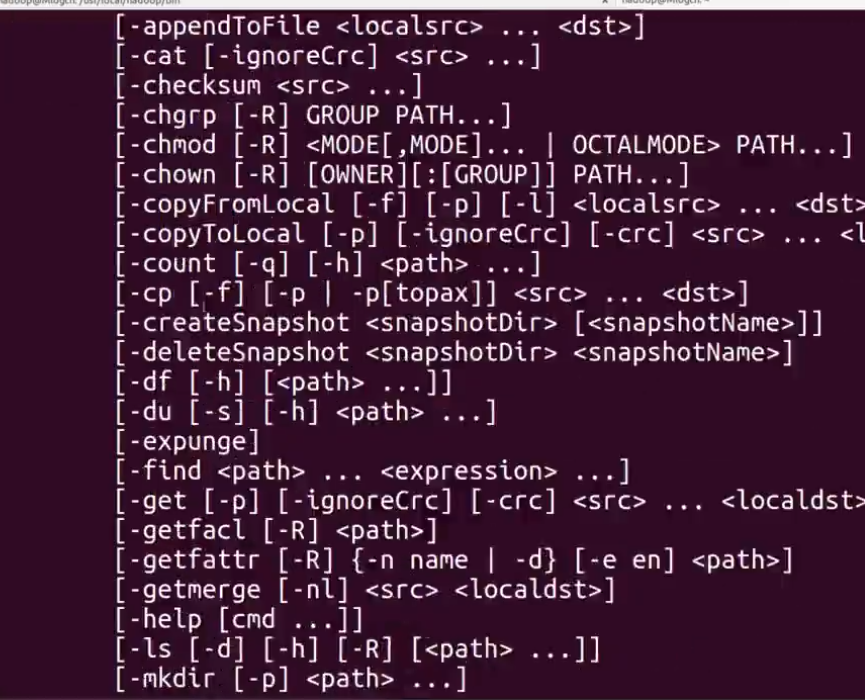
#好了 接下来 ,可以 学习 hdfs 了,其实 大部分跟linux 命令一致
hdfs dfs -ls /
hdfs dfs -mkdir /test
从本地拷贝到 hdfs
hdfs dfs -copyFromLocal ~/ml.txt /test/
[root@master sbin]# hdfs dfs -ls /test
Found 1 items
-rw-r--r-- 2 root supergroup 296966 2018-11-09 01:20 /test/ml.txt
hdfs dfs -cat /test/ml.txt
hdfs dfs -chmod 777 /test/ml.txt
安装配置 sqoop
wget xxx
tar -zxvf xxx.gz -C /opt/sqoop-xxx

#这时候如果你进入 sqoop 的 bin 目录下执行 ./sqoop 会告诉你
#Please set $HADOOP_COMMON_HOME to the root of your Hadoop installation.
# 或者 Please set $HADOOP_MAPRED_HOME to the root of your Hadoop MapReduce installation.
#那么不要激动,照着做就好了,编辑 sqoop 的配置文件 sqoop-env.sh ,这玩意儿本来 是  sqoop-env-template.sh,我自己改的名字
vim /opt/sqoop-1.4.7.bin__hadoop-2.6.0/conf/sqoop-env.sh
#配置下 hadoop 安装的路径到 sqoop 里就好
#修改下面的
export HADOOP_COMMON_HOME=/opt/modules/hadoopstandalone/hadoop-2.8.4

#Set path to where hadoop-*-core.jar is available
export HADOOP_MAPRED_HOME=/opt/modules/hadoopstandalone/hadoop-2.8.4
hdfs shell 命令 与 普通shell 常用 操作大同小异
python 操作 hdfs hdfs3 模块
# -*- coding: utf-8 -*-
__author__ = 'Frank Li'

from __future__ import unicode_literals
from hdfs3 import HDFileSystem

test_host = '192.168.32.129'
test_port = '9000'

def hdfs_exists(hdfs_client,path):
    if hdfs_client.exists(path):
        hdfs_client.rm(path)
    hdfs_client.mkdir(path)

def hdfs_write_read(hdfs_client,fname):
    data = b'hello hadoop'
    with hdfs_client.open(fname,'wb',replication=1) as f:
        f.write(data)
    with hdfs_client.open(fname,'rb') as f:
        out = f.read(len(data))
    assert out == data

def hdfs_read_write(hdfs_client,file):
    with hdfs_client.open(file,'rb') as f:
        for line in f:
            print(line)


if __name__ == '__main__':
    hdfs_client  = HDFileSystem()

    path = '/test/subtest/'
    hdfs_exists(hdfs_client,path)

    file = '/test/ml.txt'
    hdfs_write_read(hdfs_client,file)
    hdfs_read_write(hdfs_client,file)

    hdfs_client.disconnect()
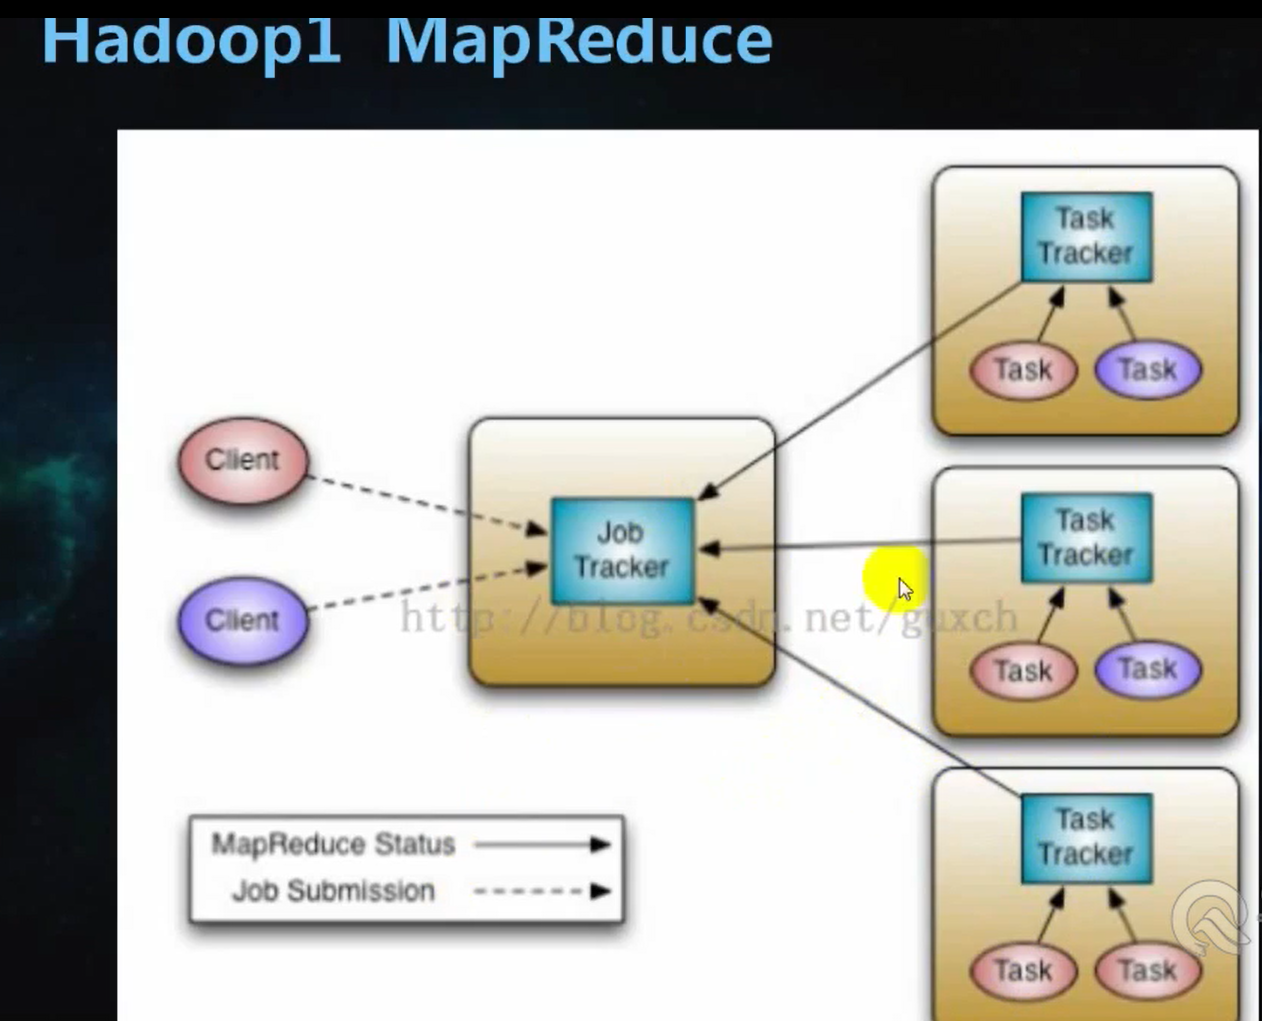
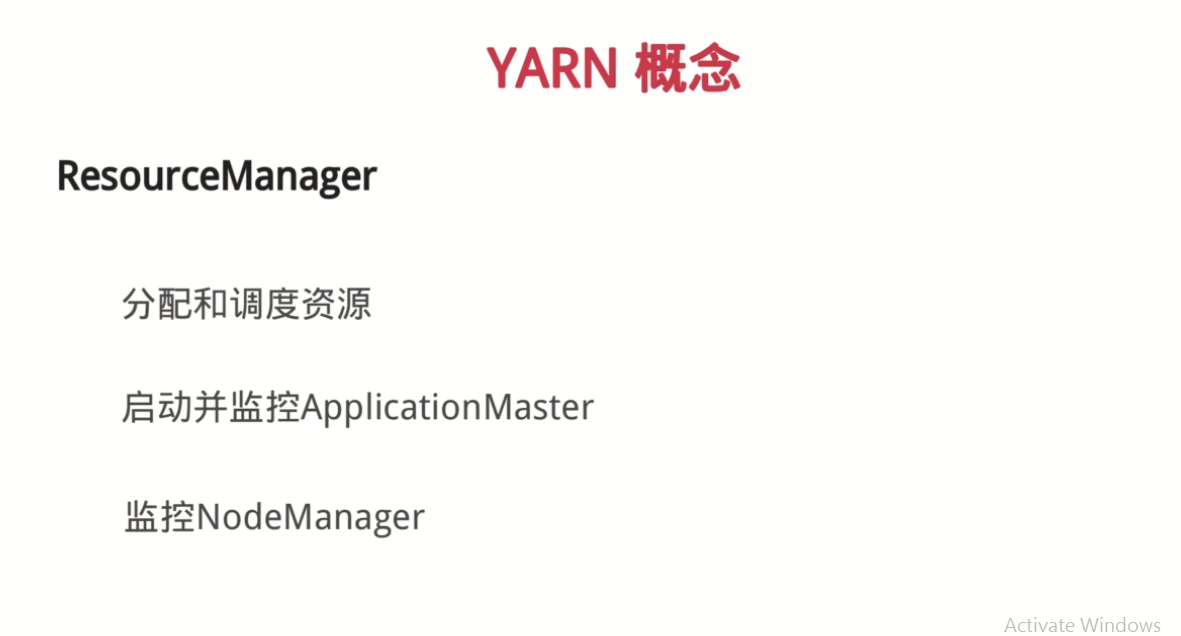
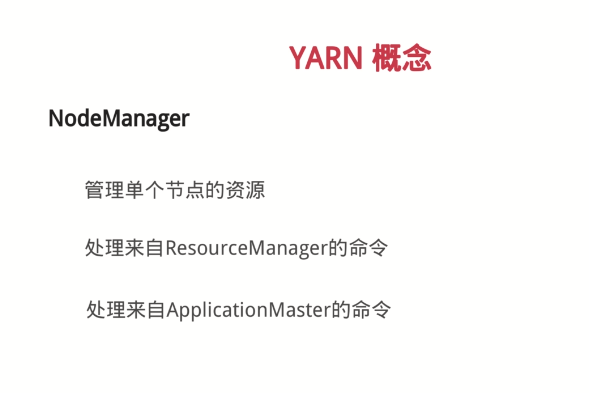
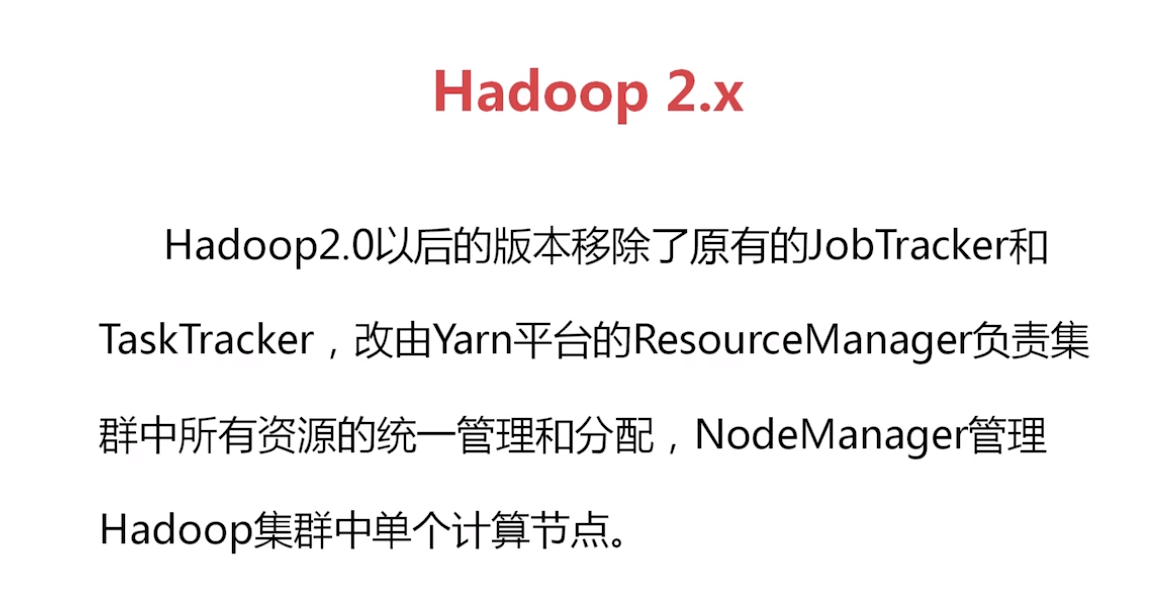
yarn map --> reduce

手写一个 python 简单版的 map reduce 并放置于 hadoop 框架中运行
map 小脚本 hdfs_map.py
__author__ = 'Frank Li'
import sys

def read_input(stream):
    for line in stream:
        yield line.rstrip().split(',')

def main():
    data = read_input(sys.stdin)
    for word in data:
        for w in word:
            print('{}	{}'.format(w,1))
if __name__ == '__main__':
    main()
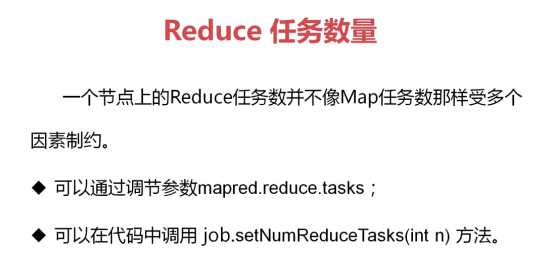
reduce 小脚本 hdfs_reduce.py
import sys
from operator import itemgetter
from itertools import groupby
def read_mapper_out(file,separator='	'):
    for line in file:
        yield line.rstrip().split(separator,1)

def main():
    data = read_mapper_out(sys.stdin)
    for current_word, group in groupby(data,itemgetter(0)):
        total_count = sum(int(count) for current_word, count in group)
        print('{}	{}'.format(current_word,total_count))

if __name__ == '__main__':
    main()
在linux 中 试验

放到 hdfs 上试验
/opt/modules/hadoopstandalone/hadoop-2.8.4/bin/hadoop jar /opt/modules/hadoopstandalone/hadoop-2.8.4/share/hadoop/tools/lib/hadoop-streaming-2.8.4.jar -files "hdfs_map.py,hdfs_reduce.py" -input /test/words.txt -output /tmp/wordcounttest -mapper "/home/yli/anaconda3/envs/py35/bin/python hdfs_map.py" -reducer "/home/yli/anaconda3/envs/py35/bin/python hdfs_reduce.py"

虚拟机伪分布式是很慢的。。。 0% 0%
emm...三分钟过去了, 终于完成了

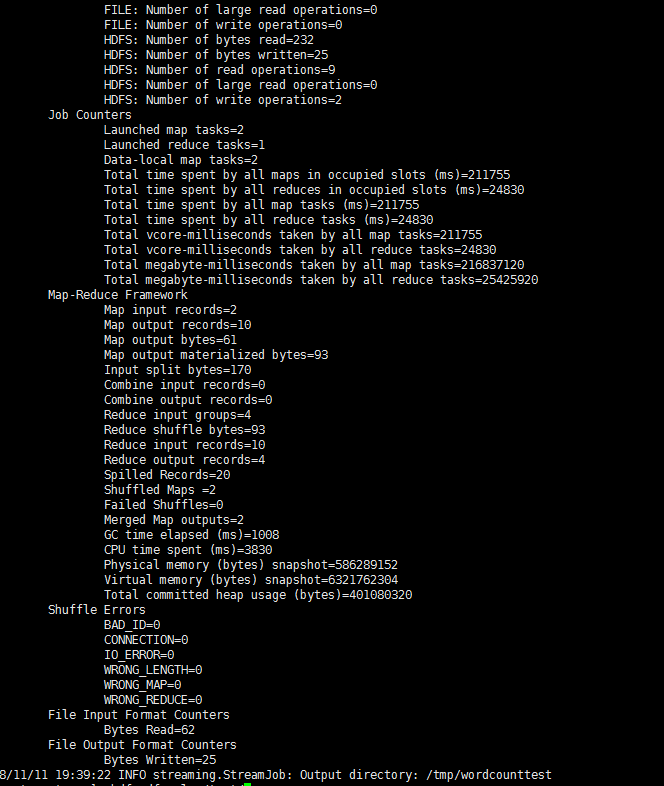
查看结果


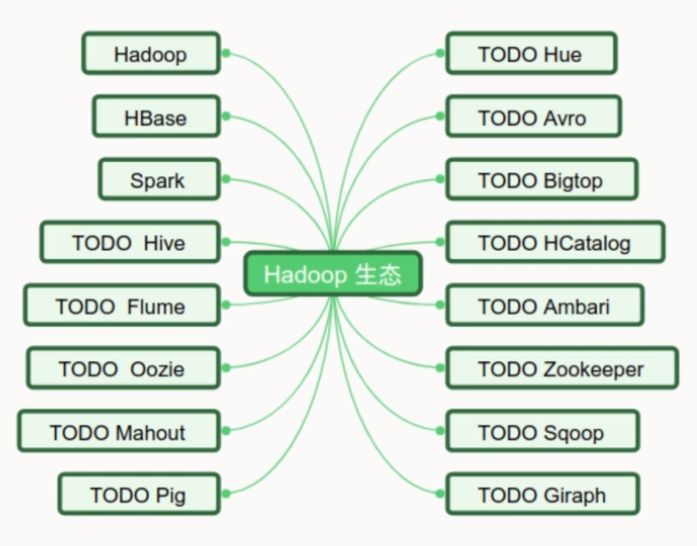


hbase

zookeeper 下载安装
wget https://mirrors.cnnic.cn/apache/zookeeper/stable/zookeeper-3.4.12.tar.gz
tar -xzvf zookeeper-3.4.12.tar.gz -C /opt/modules/
当年全是虚,从今当务实...