Macbook——Mac终端Terminal如何修改颜色,字体,背景

一、修改偏好设置


    打开terminal,左上角终端-》偏好设置,打开如下:
    Mac终端Terminal如何修改颜色,字体,背景
  
   点击“Profiles”——》左侧列表中选择喜欢的样式——》点击“Default”,如下图:

   修改完得退出终端(command + q),重新打开才能生效

   END

二、偏好设置里设置的字体颜色是指所有的字体的颜色,如果希望不同文件用不同颜色显示,需执行以下操作  
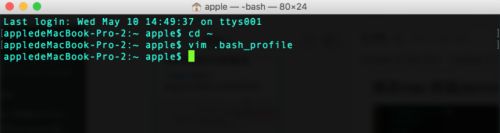
 

   进入~目录。 $ cd ~ 

   编辑.bash_profile配置文件。 $ vim .bash_profile
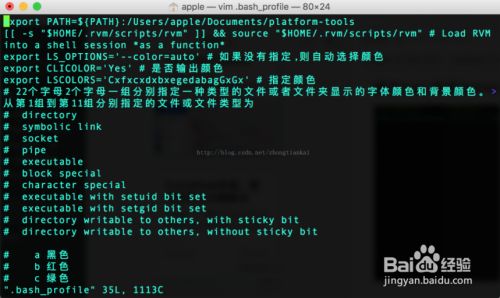
     输入i(英文输入状态下),进入编辑状态

   编辑好,按Ese,然后按:wq(英文输入状态),保存并退出

   让设置生效,输入 $ source .bash_profile
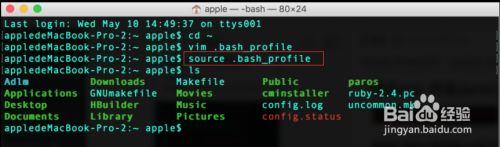
   查看设置效果 $ ls 

   END
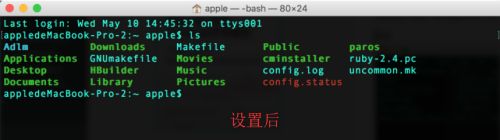
   PS:我的在运行了$ source .bash_profile,之后,依然没有改变显示;
      mac跟linux/unix的操作命令同属一族,很多地方相似,比如都存在:~/.bash_profile
                                     ~/.bashrc          #这个我没有找到 
      
      mac的默认terminal是zsh,其也有一个对应的文件 ~/.zshrc,这个文件是每次打开terminal都会执行的,但前两者则不然;
      但我们一般在前两者中设置alias(其实在/zshrc中设置也可以)以及文件夹和目录颜色设置等,如果要保证设置在每次打开terminal时都会生效,
      我们可以在.zshrc中添加source ~/.bashrc或者source ~/.bash_profile
   PS:放上我的 ~/.zshrc和~/.bash_profile文件,如下:
     

(1)~/.zshrc:
# HomeBrew

export HOMEBREW_BOTTLE_DOMAIN=https://mirrors.ustc.edu.cn/homebrew-bottles

export PATH="/usr/local/bin:$PATH"

export PATH="/usr/local/sbin:$PATH"

export PATH=/Users/mayl/Library/Python/3.8/bin/:$PATH

export PATH=/bin:/usr/bin:/usr/local/bin:${PATH}

#[[ -s "$HOME/.rvm/scripts/rvm" ]] && source "$HOME/.rvm/scripts/rvm" #load RVM into a shell session *as a function*

export PS1='%n@%m %1~ %#' #%n 当前用户的账号名称

export LS_OPTIONS='--color=auto' #如果没有指定,则自动选择颜色

export CLICOLOR='Yes' #是否输出颜色

export LSCOLORS='CxfxcxdxbxegedabagGxGx' #指定颜色

#grep

alias grep='grep --color=always'

#ls

alias ll='ls -l'

source ~/.bash_profile 

# HomeBrew END


(2)~/.bash_profile

# HomeBrew

export HOMEBREW_BOTTLE_DOMAIN=https://mirrors.ustc.edu.cn/homebrew-bottles

export PATH="/usr/local/bin:$PATH"

export PATH="/usr/local/sbin:$PATH"

export PATH="/Users/mayl/Library/Python/3.8/bin"

export PATH=/bin:/usr/bin:/usr/local/bin:${PATH}

#[[ -s "$HOME/.rvm/scripts/rvm" ]] && source "$HOME/.rvm/scripts/rvm" #load RVM into a shell session *as a function*

export PS1='%n@%m %1~ %#' #%n 当前用户的账号名称

export LS_OPTIONS='--color=auto' #如果没有指定,则自动选择颜色

export CLICOLOR='Yes' #是否输出颜色

export LSCOLORS='CxfxcxdxbxegedabagGxGx' #指定颜色

#grep

alias grep='grep --color=always'

#ls

alias ll='ls -l'

#for color

#export CLICOLOR=1

#黑色背景用以下命令

#export LSCOLORS=GxFxCxDxBxegedabagaced

#export LSCOLORS=GaFaCaDaBaegedabagaced

#白色背景用以下命令

#export LSCOLORS=ExFxBxDxCxegedabagacad

#终端默认颜色 exfxcxdxbxegedabagacad
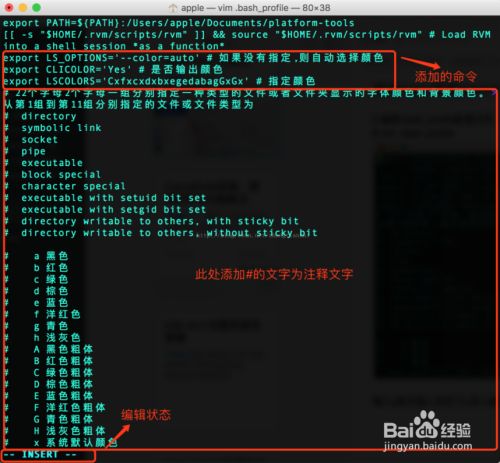
#下面给出的各个字母代表指代的不同颜色

#a black

#b red

#c green

#d brown

#e blue

#f magenta 洋红

#g cyan 青色

#h light grey

#A bold black, usually shows up as dark grey 粗体黑色,通常显示为深灰色

#B bold red

#C bold green

#D bold brown, usually shows up as yellow

#E bold blue

#F bold magenta

#G bold cyan

#H bold light grey; looks like bright white

#x default foreground or background

# HomeBrew END

三、设置vim颜色(vim指令编辑文件的模式显示效果) 

    进入~目录。 $ cd ~

    复制系统的vim配置文件到用户目录 $ cp -r /usr/share/vim/vimrc ~/.vimrc

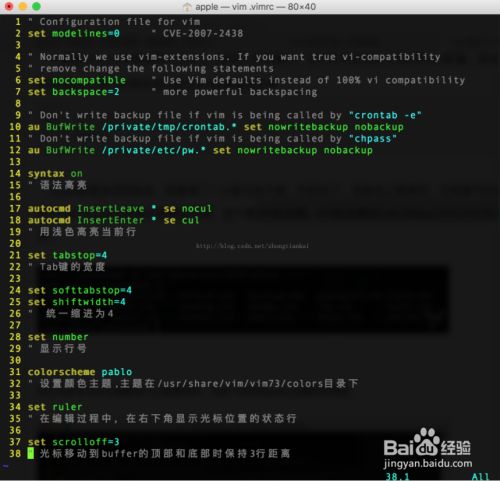
    编辑.vimrc文件配置我们的vim设置,有很多配置,只提供目前自己在用的一个配置 $ vim .vimrc

    配置好,按Esc,然后输入:wq(英文输入状态)保存并退出 再输入 $ vim .vimrc 可以查看设置效果
    PS: 放一下我的~/.vimrc文件


" Configuration file for vim

set modelines=0     " CVE-2007-2438

" Normally we use vim-extensions. If you want true vi-compatibility

" remove change the following statements

set nocompatible    " Use Vim defaults instead of 100% vi compatibility

set backspace=2     " more powerful backspacing

" Don't write backup file if vim is being called by "crontab -e"

au BufWrite /private/tmp/crontab.* set nowritebackup nobackup

" Don't write backup file if vim is being called by "chpass"

au BufWrite /private/etc/pw.* set nowritebackup nobackup

let skip_defaults_vim=1

" 上边是原来文件自带的,下边是自己添加的

syntax on

" 语法高亮

autocmd InsertLeave * se nocul

autocmd InsertEnter * se cul

" 用浅色高亮当前行

set tabstop=4

" Tab键的宽度

set softtabstop=4

set shiftwidth=4

" 统一缩进为4

set number

" 显示行号

colorscheme pablo

" 设置颜色主题,主题在/usr/share/vim/vim81/colors目录下

set ruler

" 在编辑过程中,在右下角显示光标位置的状态行

set completeopt=preview,menu

" 代码补全

set scrolloff=3

" 光标移动到buffer的顶部和底部时保持3距离

set statusline=\ %<%F[%1*%M%*%n%R%H]%=\ %y\ %0(%{&fileformat}\ %{&encoding}\ Ln\ %l,\ Col\ %c/%L%)

" 设置在状态行显示的信息

au BufReadPost * if line("'\"") > 0 | if line("'\"") <= line("$") | exe("norm '\"") | else |exe "norm $"| endif | endif

" 设置vim打开文件时光标在上次退出位置

"auto add pyhton header --start

autocmd BufNewFile *.py 0r ~/.vim/vim_template/vim_pyhton_header

autocmd BufNewFile *.py ks|call FileName()|'s

autocmd BufNewFile *.py ks|call CreatedTime()|'s

fun FileName()

    if line("$") > 10

        let l = 10  "这里是字母L 不是数字1 

    else

        let l = line("$")

    endif

    exe "1," . l . "g/File Name:.*/s/File Name:.*/File Name: " .expand("%")

       "最前面是数字1,这里的File Name: 要和模板中一致

endfun

fun CreatedTime()

    if line("$") > 10

        let l = 10

    else

        let l = line("$")

    endif

    exe "1," . l . "g/Created Time:.*/s/Created Time:.*/Created Time: " .strftime("%Y-%m-%d %T")

        "这里Create Time: 要和模板中一致

endfun

"auto add python header --end  

"[Vim]新建python文件自动添加python header

" ~/.vim/vim_template/vim_pyhton_header  需要提前创建好,内容如下:

"       #!/usr/bin/python

"       #-*- coding:utf-8 -*-

"       ############################

"       #File Name:

"       #Author: mayl

"       #Mail: 839365149@qq.com

"       #Created Time:

"       ############################

autocmd BufWritePost $MYVIMRC source $MYVIMRC

" 让配置变更立即生效


参考:https://jingyan.baidu.com/article/ce43664948bd093772afd373.html

https://blog.csdn.net/orangleliu/article/details/41902851

生活其实也很简单,喜欢的就去争取、得到的就珍惜、失去的就忘记。
原文地址:https://www.cnblogs.com/Formulate0303/p/15744787.html