scrapy官方文档 http://doc.scrapy.org/en/latest/
一、scrapy安装
安装lxml:pip3 install lxml
安装wheel:pip3 install wheel
安装Twisted:pip3 install Twisted
安装pyOpenSSL:pip3 install C:UserspenghuanhuanDownloadspyOpenSSL-19.0.0-py2.py3-none-any.whl
https://pypi.org/project/pyOpenSSL/#files下载whl文件
安装pywin32:pip3 install pywin32安装
安装scrapy:pip3 install scrapy
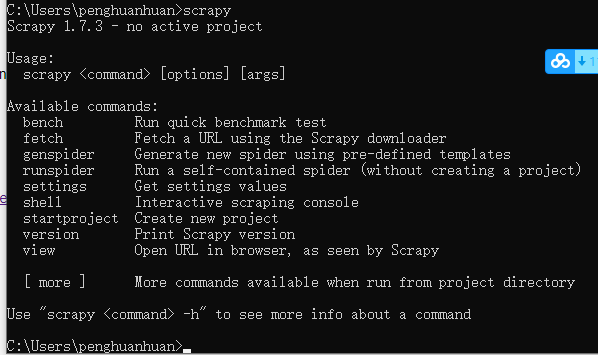
通过执行scripy验证是否安装完成,如下,输入scrapy会输出版本及使用介绍。
二、scrapy基本用法
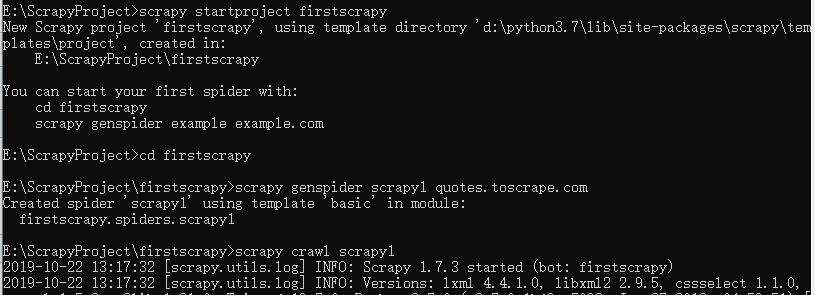
- 创建项目:scrapy startproject projectname,创建的项目保存在当前的路径下
- 进入项目:cd projectname
- 创建爬虫:scrapy genspidr 爬虫名 url,默认使用basic模板
- 运行爬虫:scrapy crawl 爬虫名,通过scrapy crawl可查看该命令的用法介绍
- shell:scrapy shell url可在命令行进入shell进行调试,结果保存在response中,exit()退出shell
- view:scrapy view url,将网页源代码下载到本地并通过浏览器打开,通过scrapy view可查看该命令用法介绍
- fetch:scrapy fetch url,直接将日志和网页源代码输出在屏幕上,通过scrapy fetch可查看该命令用法介绍
- runspider:scrapy runspider spider_file,参数为爬虫文件的名称,带有.py后缀
- settings:scrapy settings --get varname,获取配置文件中的变量值,如果在项目下运行输出项目的配置,否则输出scrapy对应的默认值
- 生成文件:scrapy crawl 爬虫名 -o filename.json,运行爬虫并将网页源代码保存在文件中
- 列出项目内所有爬虫:scrapy list
- 查看模板:scrapy genspider -l,默认有basic、crawl、csvfeed、xmlfeed四个模板
- - t 指定模板创建爬虫:scrapy genspidr -t 模板名称 爬虫名 url
- 检查语法错误:scrapy check 爬虫名
- scrapy version:查看scrapy的版本,加参数-v可查看依赖库及其对应的版本
- scrapy bench:查看当前网速下爬虫的速度
例如要爬取quotes.toscrape.com页面
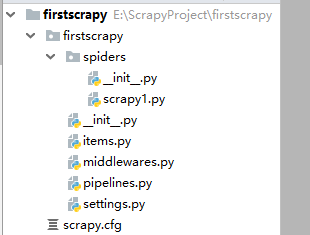
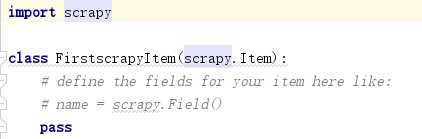
执行完成后通过pycharm打开项目,文件结构如下,爬虫文件为spiders下的scrapy1.py,最原始的内容如下。
三、scrapy项目文件
1.爬虫文件
scrapy爬虫不能直接执行项目的爬虫文件,需要在cmd命令行或者pycharm的terminal通过scrapy crawl 爬虫名来执行。
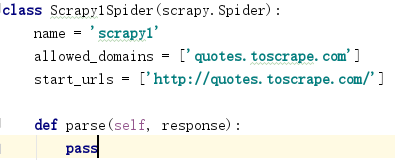
爬虫文件在项目的spiders目录下,定义了一个继承scrapy.Spider的类,类名为“爬虫名Spider”,并自带一个空的parse方法,该方法接收一个response即爬虫结果。
name为爬虫的名称,allowed_domains为允许爬取的域名,start_urls为爬取的网站url
如果爬虫正常运行,那么response=<200 http://quotes.toscrape.com>,并且可通过response.url获取正在爬取的网址。
爬虫执行时会自动执行类的parse方法,默认创建的parse方法为空,因此看不到任何返回结果,可修改为打印response的文本查看parse方法的执行。

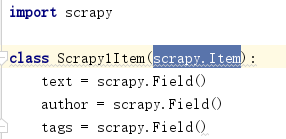
2.items文件
items文件定义了一个继承scrapy.Item的类,它定义了要爬取的数据结构,例如要爬取quotes.toscape.com页面的名言、作者和标签,可改写该类,对其定义text、author、tags三个属性,类型为scrapy.Field。
然后在爬虫文件中实例化items文件定义的类,并将爬取到的信息赋值给实例通过yield返回。
from .. import items
def parse(self, response):
    for quote in response.css('.quote'):
        item = items.Scrapy1Item()
        item['text'] = quote.css('.text::text').extract_first()
        item['author'] = quote.css('.author::text').extract_first()
        item['tags'] = quote.css('.tags .tag::text').extract()
        yield item
上述是只爬取了创建爬虫的第一个url页面,而实际通常要爬取多个页面,这就需要在爬虫文件的parse方法定义下一个要爬取的url,并通过scrapy.Request(url)实现循环爬取。
def parse(self, response):
    for quote in response.css('.quote'):
        item = items.Scrapy1Item()
        item['text'] = quote.css('.text::text').extract_first()
        item['author'] = quote.css('.author::text').extract_first()
        item['tags'] = quote.css('.tags .tag::text').extract()
        yield item
    next_page = response.css('.pager .next a::attr(href)').extract_first()
    next_url = response.urljoin(next_page)
    yield scrapy.Request(next_url,callback=self.parse)
执行爬虫时可通过加上-o参数,将爬取到的结果以json的形式保存,scrapy crawl scrapy1 -o scrapy1.json,文件存放在项目的根目录下。
scrapy还支持其他的格式,scrapy1.jl (每个结果为一行,即json去掉[]后的每一个对象)、scrapy1.csv、scrapy1.xml、scrapy1.pickle、scrapy1.marshal
也可直接将结果上传至ftp,scrapy crawl scrapy1 -o ftp://ftp.example.com/path/name.csv。

3.pipelines文件
pipelines文件默认也定义了一个类,通过类的process_item方法用于对获取到的数据进行处理,process_item方法默认返回得到数据。

要想使pipelines文件生效,需要修改settings文件的ITEM_PIPELINES参数,该参数默认是被注释的。pipelines文件可定义多个类,每个类都需要在settings的ITEM_PIPELINES中设置,如下,后面值的表示数据处理的优先级,值越小优先级越高。
ITEM_PIPELINES = {
   'firstscrapy.pipelines.Scrapy1Pipeline': 300,
   'firstscrapy.pipelines.test': 400,
}
要将爬取到的数据写入mongoDB,可在Pipeline文件中定义MongoPipeline类并在ITEM_PIPELINES中设置,如下。
import pymongo
class MongoPipeline(object):
    def __init__(self,mongo_uri,mongo_db):
        self.mongo_uri = mongo_uri
        self.mongo_db = mongo_db
    @classmethod
    def from_crawler(cls,crawler):
        return cls(
            mongo_uri = crawler.settings.get('MONGO_URI'),   #MONGO_URI='localhost',MONGO_DB='firstscrapy',已在settings文件中定义
            mongo_db = crawler.settings.get('MONGO_DB')
        )
    def open_spider(self,spider):
        self.client = pymongo.MongoClient(self.mongo_uri)
        self.db = self.client[self.mongo_db]
    def process_item(self,item,spider):
        name = item.__class__.__name__
        self.db[name].insert(dict(item))
        return item
    def close_spider(self,spider):
        self.client.close()