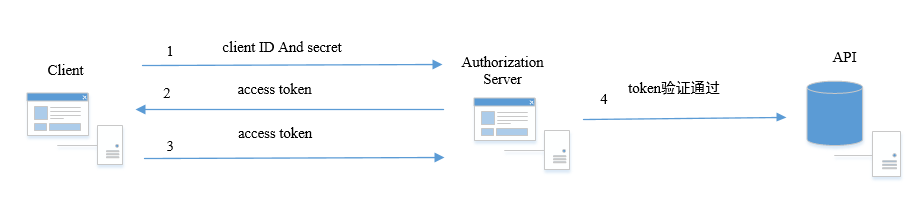
本节介绍Client的ClientCredentials客户端模式,先看下画的草图:
一、在Server上添加动态新增Client的API 接口。
为了方便测试,在Server服务端中先添加swagger,添加流程可参考:https://www.cnblogs.com/suxinlcq/p/6757556.html
在ValuesController控制器中注入ConfigurationDbContext上下文,此上下文可用来加载或配置IdentityServer4.EntityFramework的Client、身份信息、API资源信息或CORS数据等。
在ValuesController中实添加以下代码:
        private ConfigurationDbContext _context;
        public ValuesController(ConfigurationDbContext context)
        {
            _context = context;
        }
添加动态新增Client的API接口:
        [HttpPost]
        public IActionResult Post([FromBody] IdentityServer4.EntityFramework.Entities.Client client)
        {
            var res = _context.Clients.Add(client);
            if(_context.SaveChanges() >0)
                return Ok(true);
            else
                return Ok(false);
        }
控制器代码如下:

二、对Server上的API进行保护
(1)安装IdentityServer4.AccessTokenValidation包
(2)在startup.cs中ConfigureServices方法添加如下代码:
            //protect API
            services.AddMvcCore()
            .AddAuthorization()
            .AddJsonFormatters();

            services.AddAuthentication("Bearer")
                .AddIdentityServerAuthentication(options =>
                {
                    options.Authority = "http://localhost:5000";
                    options.RequireHttpsMetadata = false;

                    options.ApiName = "api1";
                });
AddAuthentication把Bearer配置成默认模式,将身份认证服务添加到DI中。
AddIdentityServerAuthentication把IdentityServer的access token添加到DI中,供身份认证服务使用。
(3)在startup.cs中Configure方法添加如下代码:
      public void Configure(IApplicationBuilder app, IHostingEnvironment env)
        {
            //if (env.IsDevelopment())
            //{
            //    app.UseDeveloperExceptionPage();
            //}

            //AddSwagger
            app.UseSwagger();
            app.UseSwaggerUI(c =>
            {
                c.SwaggerEndpoint("/swagger/v1/swagger.json", "Server接口文档");
            });

            InitializeDatabase(app);
            app.UseAuthentication();
            app.UseIdentityServer();
            app.UseMvc();
        }
UseAuthentication将身份验证中间件添加到管道中,以便在每次调用主机时自动执行身份验证。
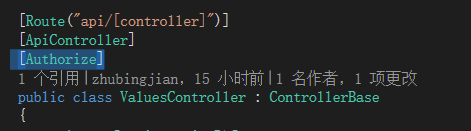
(4)在ValuesController控制器中添加[Authorize]
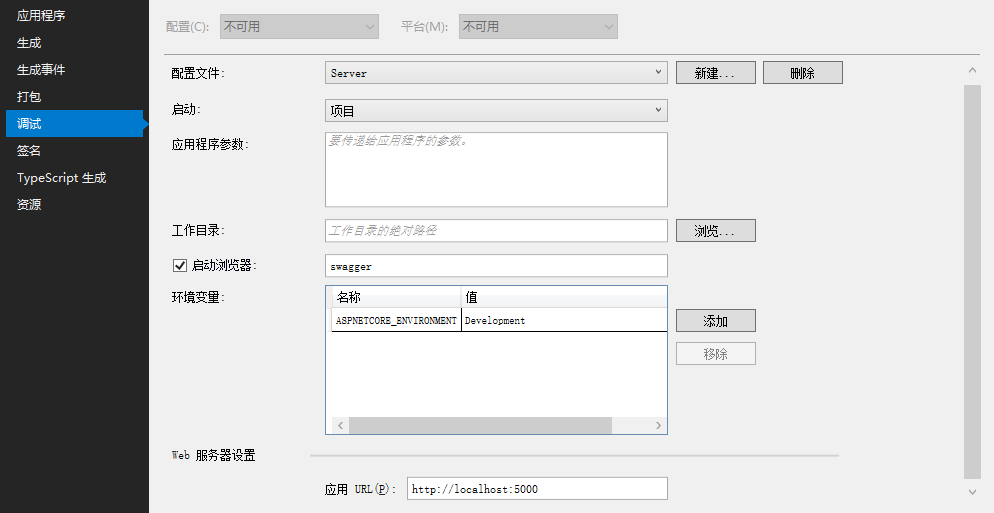
(5)在项目属性->调试 中,启动浏览器,并设成swagger,如图:
(6)启动项目,并调用第一个Get接口。

显示Unauthorized(未授权),证明[Authorize]起作用了。
三、搭建Client客户端
(1)新建一个控制台程序,安装IdentityModel包。
(2)添加类IDSHelper.cs,添加客户端请求API接口代码。
public class IDSHelper
    {
        public static async Task MainAsync()
        {
            try
            {
                DiscoveryResponse disco = await DiscoveryClient.GetAsync("http://localhost:5000");
                if (disco.IsError)
                {
                    Console.WriteLine(disco.Error);
                    return;
                }

                TokenClient tokenClient = new TokenClient(disco.TokenEndpoint, "Client", "secret");
                var tokenResponse = await tokenClient.RequestClientCredentialsAsync("api1");

                if (tokenResponse.IsError)
                {
                    Console.WriteLine(tokenResponse.Error);
                    return;
                }
                Console.WriteLine(tokenResponse.Json);
                var client = new HttpClient();
                client.SetBearerToken(tokenResponse.AccessToken);
                var response = await client.GetAsync("http://localhost:5000/api/values/");
                if (!response.IsSuccessStatusCode)
                {
                    Console.WriteLine(response.StatusCode);
                }
                else
                {
                    var content = await response.Content.ReadAsStringAsync();
                    Console.WriteLine(content);
                }
            }
            catch (Exception ex)
            {

            }
        }
}
(3)修改Program.cs代码,如下:
class Program
    {
        static void Main(string[] args)
       => IDSHelper.MainAsync().GetAwaiter().GetResult();
    }
(4)按Ctrl+F5,可以获取到access token和接口返回值
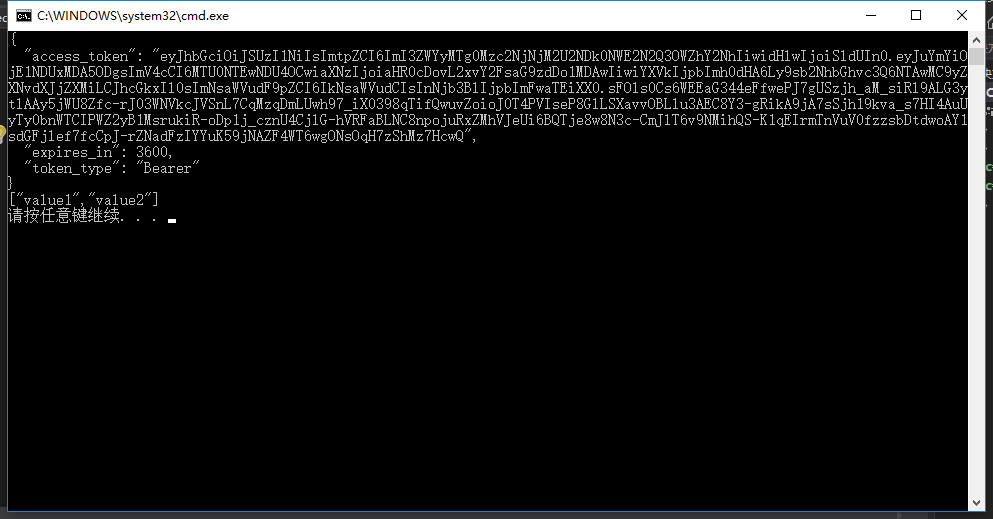
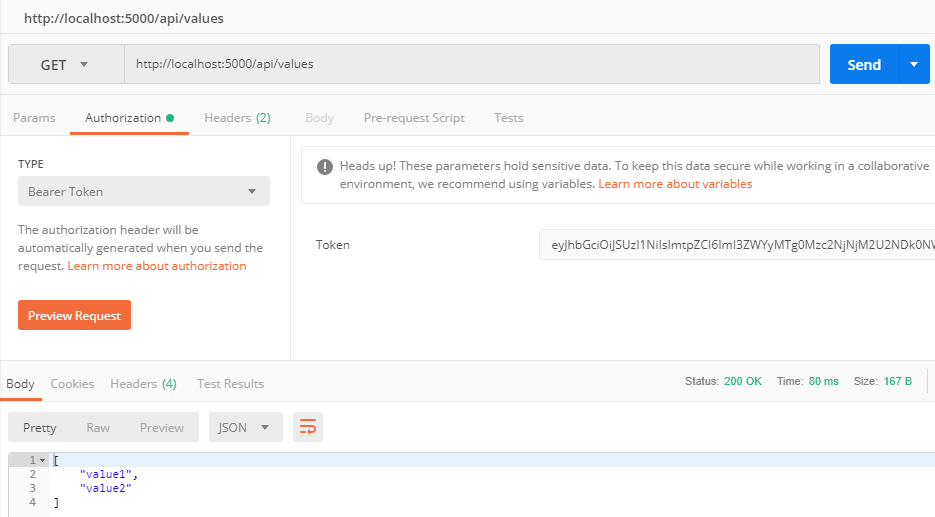
复制token,用postman调用,成功获取到了接口返回值。
四、测试动态新增Client接口
安装IdentityServer4包。
安装IdentityServer4.EntityFramework包。
在IDSHelper.cs类中添加Post方法:
public static async Task Post()
        {
            try
            {
                DiscoveryResponse disco = await DiscoveryClient.GetAsync("http://localhost:5000");
                if (disco.IsError)
                {
                    Console.WriteLine(disco.Error);
                    return;
                }

                TokenClient tokenClient = new TokenClient(disco.TokenEndpoint, "Client", "secret");
                var tokenResponse = await tokenClient.RequestClientCredentialsAsync("api1");

                if (tokenResponse.IsError)
                {
                    Console.WriteLine(tokenResponse.Error);
                    return;
                }
                Console.WriteLine(tokenResponse.Json);
                var client = new HttpClient();
                client.SetBearerToken(tokenResponse.AccessToken);

                Client c1 = new Client
                {
                    ClientId = "Test",
                    AllowedGrantTypes = GrantTypes.ClientCredentials,
                    ClientSecrets =
                    {
                        new Secret("secret".Sha256())
                    },
                    AllowedScopes = { "api1" }
                };
                string strJson = JsonConvert.SerializeObject(c1 .ToEntity());
                HttpContent content = new StringContent(strJson);
                content.Headers.ContentType = new System.Net.Http.Headers.MediaTypeHeaderValue("application/json");
                //由HttpClient发出Post请求
                Task<HttpResponseMessage> response = client.PostAsync("http://localhost:5000/api/values/", content);

                if (response.Result.StatusCode != System.Net.HttpStatusCode.OK)
                {
                    Console.WriteLine(response.Result.StatusCode);
                }
                else
                {
                    Console.WriteLine(response.Result.Content.ReadAsStringAsync().Result);
                }
            }
            catch (Exception ex)
            {

            }
        }
顺便把main中改成对Post调用:
static void Main(string[] args)

       => IDSHelper.Post().GetAwaiter().GetResult();
按Ctrl+F5,调用新增Client的接口,并成功返回true。

同时可以在数据库中的Client表找到相关记录。需要注意的是,不能添加相同Client ID的Client。
五、在Client中添加Claim信息,并在API接口中对Claim信息进行验证。
关于Claim的介绍可以看这篇文章:http://www.cnblogs.com/stulzq/p/8726002.html
这里把Claim简单当做用户的身份信息使用,修改Post方法里面的Client:
                Client c1 = new Client
                {
                    ClientId = "superAdmin",
                    AllowedGrantTypes = GrantTypes.ClientCredentials,
                    ClientSecrets =
                    {
                        new Secret("secret".Sha256())
                    },
                    AllowedScopes = { "api1" },
                    Claims = new List<Claim>
                    {
                        new Claim(JwtClaimTypes.Role, "admin")
                    }
                };
可以看出,Claims为List,可以是很多个角色,这里只添加一个。
Ctrl+F5,运行成功添加superAdmin Client。
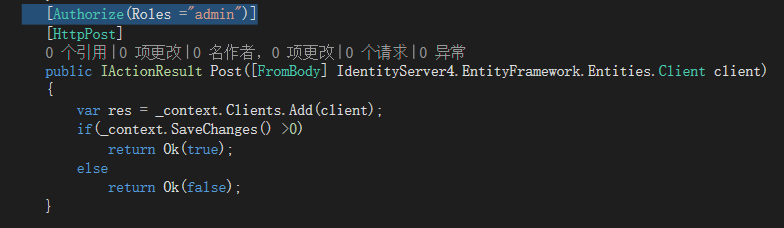
现在,需要对Server服务端的新增Client接口进行Claim身份验证,添加如下代码:
[Authorize(Roles ="admin")]
然后再客户端修改授权的账号为superadmin。
TokenClient tokenClient = new TokenClient(disco.TokenEndpoint, "superAdmin", "secret");
Ctrl+F5运行
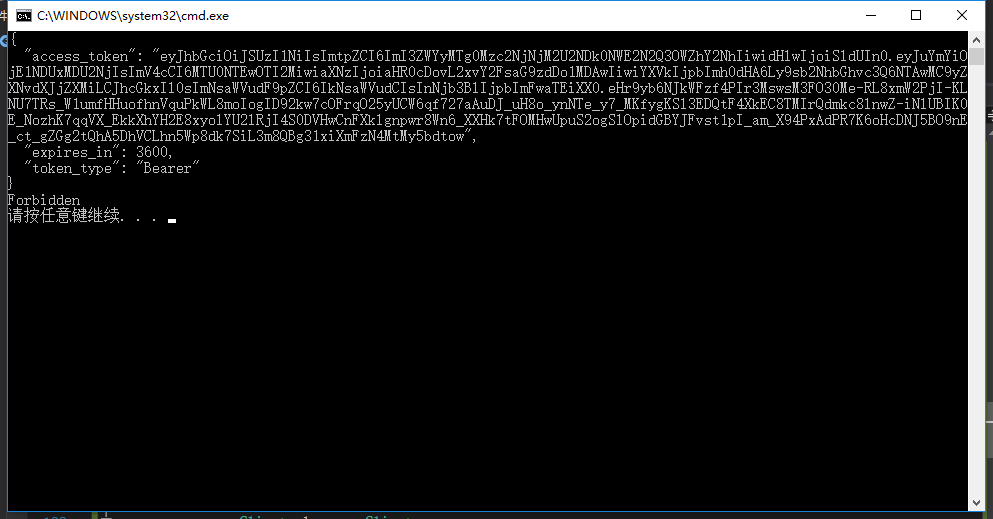
问题出现了,返回了Forbidden,没有权限进行访问。
这时候我们上官网查阅了资料,发现在添加Client的Claim时候,IdentityServer EntityFramework会为Claim的role添加一个默认前缀,为client_。所以,实际上它为client_role。
而服务端只能对role进行验证。
此时我们需要把Claim的默认前缀去掉,设置为空ClientClaimsPrefix = "" 。
去掉Server的Role验证,添加形如下面代码的Client。
Client c1 = new Client
                {
                    ClientId = "adminClient",
                    AllowedGrantTypes = GrantTypes.ClientCredentials,
                    ClientSecrets =
                    {
                        new Secret("secret".Sha256())
                    },
                    AllowedScopes = { "api1" },
                    Claims = new List<Claim>
                    {
                        new Claim(JwtClaimTypes.Role, "admin")
                    },
                    ClientClaimsPrefix = "" //把client_ 前缀去掉
                };
Ctrl+F5,运行成功添加adminClient Client,这次的是Role为admin。
然后重新再Server服务端加上[Authorize(Roles ="admin")]
同时修改验证账号为adminClient。
TokenClient tokenClient = new TokenClient(disco.TokenEndpoint, "adminClient", "secret");
最后运行程序,成功地在[Authorize(Roles ="admin")]权限下访问并新增了Client。

六、需要注意的问题
(1)新增Client到数据库时候,这里需要接收IdentityServer4.EntityFramework.Entities.Client
而不是IdentityServer4.Models.Client,否则API接口在接收和转化Client模型的时候会报错。

(2)此外,本节介绍的Client的AllowedGrantTypes 都为 GrantTypes.ClientCredentials,相应的,客户端请求是,需要用RequestClientCredentialsAsync方法。

最后再次提下,ClientCredentials模式的适用场景:用于和用户无关,服务与服务之间直接交互访问资源。
Server服务端源码地址:https://github.com/Bingjian-Zhu/Server
Client客户端源码地址:https://github.com/Bingjian-Zhu/Client