本随笔只是个人学习笔记记录
说明:本文采用asp.netcore 3.1 空的web项目演示EFCore以及数据库迁移,数据库使用vs2019自带的localdb。
一、EFCore 支持主流关系型数据库
EFCore 支持主流关系型数据库,包括sqlserver,vs 自带的localdb,oracle,mysql,sqllite,postgresql,db2等。对于不同的关系型数据库,EFCore 都提供了相应
的提供程序(Provider),详情请参考官网: https://docs.microsoft.com/zh-cn/ef/core/providers/?tabs=dotnet-core-cli
二、数据库上下文DbContext,定义与数据库映射的Entity
EFCore 通过 DbContext 与数据库建立连接,其对应关系如下图所示:一个DbSet<T> 对应一张表,表的字段,就是类T的属性。

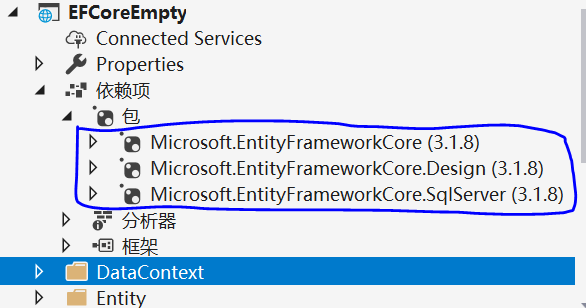
1.使用DbContext 之前,先nuget 添加如下安装包:
2.定义Entity(与数据库对应的实体)Student 如下:
 public class Student
    {
        public int Id { get; set; }
        public string FirstName { get; set; }
        public string LastName { get; set; }
        public DateTime Birthday { get; set; }
        public string Gender { get; set; }
    }
3.继承DbContext 类如下:
public class MyDataContext:DbContext
    {
        /// <summary>
        /// 配置MyDataContext,配置怎么连接到哪个数据库;使用依赖注入来创建具体的MyDataContext对象。
        /// (在 StartUp类的ConfigureServices中注入。)
        /// </summary>
        /// <param name="options"></param>
        public MyDataContext(DbContextOptions<MyDataContext> options):base(options)
        {

        }
        public DbSet<Student> Students { get; set; }

    }
4.需要将DbContext 注册服务(依赖注入):
public class Startup
    {
        private readonly IConfiguration configuration;

        /// <summary>
        /// 构造函数注入,运行时 会自动注入 _configuration;
        /// </summary>
        /// <param name="_configuration"></param>
        public Startup(IConfiguration _configuration)
        {
            configuration = _configuration;
        }
        public void ConfigureServices(IServiceCollection services)
        {
            var connstr = configuration["ConnStrs:LocalConnStr"];//获取配置文件AppSetting.json中的数据库连接字符串。

           //配置服务,依赖注入
            services.AddDbContext<MyDataContext>( options=> {
                options.UseSqlServer(connstr);
            });

            //注册服务
            services.AddScoped<IRepository<Student>, StudentRepository>();

        }

        public void Configure(IApplicationBuilder app, IWebHostEnvironment env)
        {
            if (env.IsDevelopment())
            {
                app.UseDeveloperExceptionPage();
            }

            app.UseRouting();

            app.UseEndpoints(endpoints =>
            {
                endpoints.MapGet("/", async context =>
                {
                    await context.Response.WriteAsync("Hello World!");
                });
            });
        }
    }
5、存储层使用DbContext 如下:利用DbContext,对数据库的数据进行增删改查。
接口:
public interface IRepository<T> where T:class
    {
        IEnumerable<T> GetAll();

        IEnumerable<T> GetEntities(Expression<Func<T,bool>> exp);

        T GetById(int Id);

        void Add(T Entity);

        void Modified(T Entity);

        void Delete(T Entity);

    }
实现类:
public class StudentRepository : IRepository<Student>
    {
        private readonly MyDataContext context;
        public StudentRepository(MyDataContext _context)
        {
            context = _context;//通过构造函数注入,已经在ConfigureServices进行注册了
        }
        public void Add(Student Entity)
        {
            context.Students.Add(Entity);
            context.SaveChanges();
        }

        public void Delete(Student Entity)
        {
            context.Remove(Entity);
        }

        public IEnumerable<Student> GetAll()
        {
            return context.Students.ToList();
        }

        public Student GetById(int Id)
        {
            return context.Students.Find(Id);
        }

        public IEnumerable<Student> GetEntities(Expression<Func<Student,bool>> exp)
        {
            return context.Students.Where(exp);
        }

        public void Modified(Student Entity)
        {
            throw new NotImplementedException();
        }
    }
三、数据迁移:实现Entity与数据库的映射。
数据迁移,即将程序中DbContext的实体类,映射到数据库中。具体而言就是根据DbContext中的实体类,在数据库中创建表、更改表结构等(即根据Entity,在数据库中设计表)。
迁移主要用到两个命令:Add-Migration xxx 和 Update-Database。可通过 vs自带的 Package Manage Console 工具执行这两个命令完成迁移。
1.Add-Migration xxx 命令:添加迁移,xxx为描述性单词。如果数据库还没有创建,则会创建一个迁移文件夹 Migrations,迁移文件夹中包含迁移类和快照类。
每次执行迁移文件夹中包含则会生成一个迁移类和一个快照类,每次执行 Add-Migration 都会生成一个迁移类,而快照类只有一个。
迁移类的代码,就是对应创建数据库的代码(或者更新数据库的代码)。
2.Update-Database 命令:这个命令会使用迁移类的代码,将其转换成sql语句,然后执行到目标数据库。执行成功后,数据库中的表就会和DbContext中的Entity一一对应。如果更新了DbContext中Entity的设计,则再此执行 Add-Migration 和 Update-Database即可,此时会另外生成迁移类,但快照类只有一个。
3.命令实操:数据库使用VS2019自带的localdb.
操作时,如果报异常,请参考 https://www.cnblogs.com/liwenqian/p/12746186.html 和 https://www.cnblogs.com/Kit-L/p/12731191.html 处理。
3.1 配置LocalDB数据库连接:
打开 vs2019 视图—> SQL Server 对象资源管理器,选则数据库实例,鼠标右键属性获取数据库连接字符串。
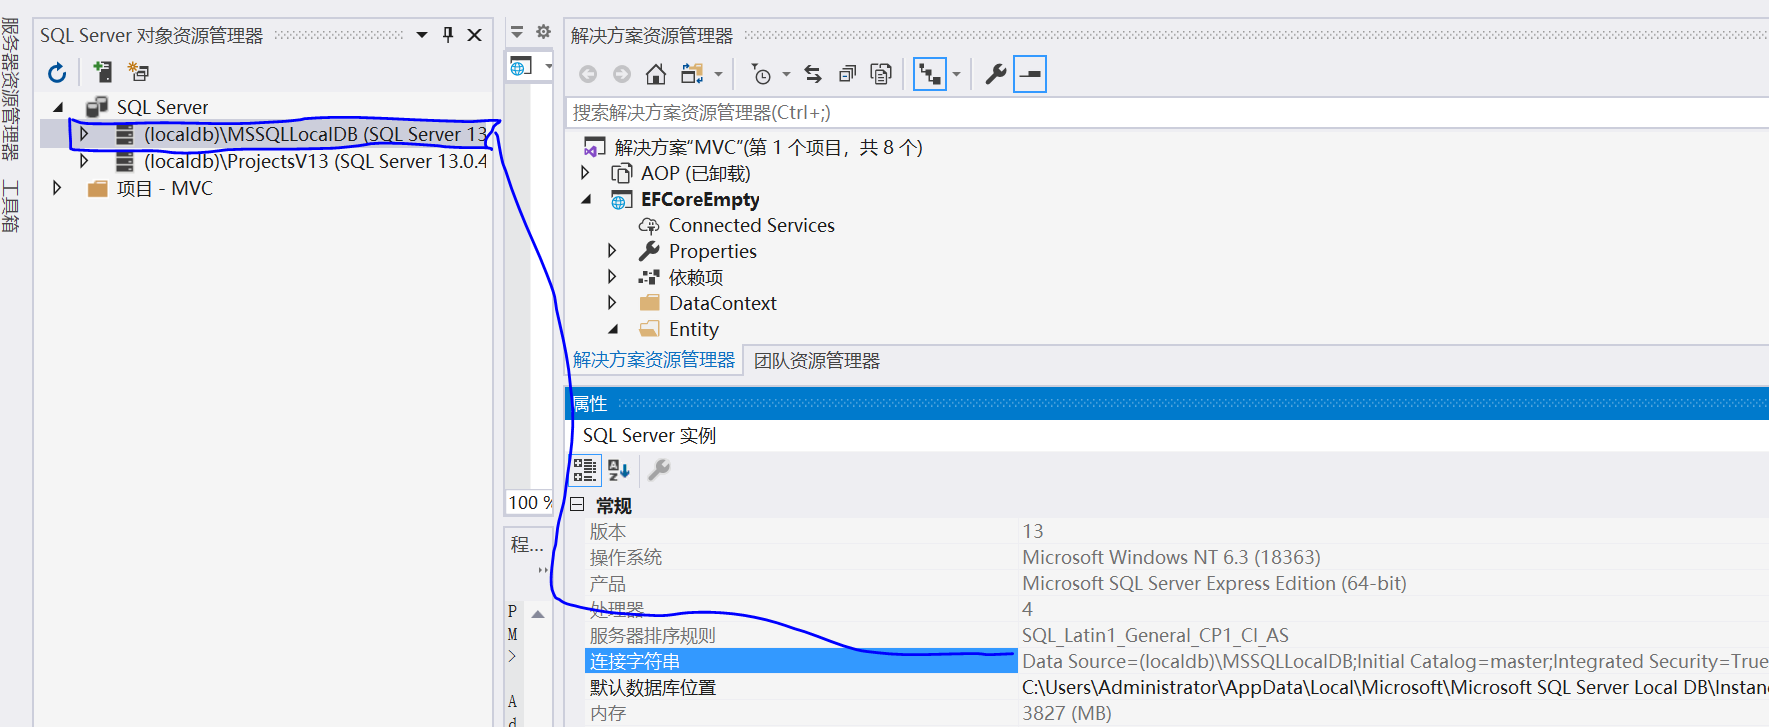
将数据库连接字符串,放入配置文件中,并更改连接的数据库名称(后面执行完命令后,数据库会自动创建)
appsetting.json文件,配置好后,就能通过IConfiguration获取了。
{
  "Logging": {
    "LogLevel": {
      "Default": "Information",
      "Microsoft": "Warning",
      "Microsoft.Hosting.Lifetime": "Information"
    }
  },
  "AllowedHosts": "*",
  "ConnStrs": {
    "LocalConnStr": "Data Source=(localdb)\MSSQLLocalDB;Initial Catalog=FyyTestDB;Integrated Security=True;Connect Timeout=30;Encrypt=False;TrustServerCertificate=False;ApplicationIntent=ReadWrite;MultiSubnetFailover=False"
  }
}
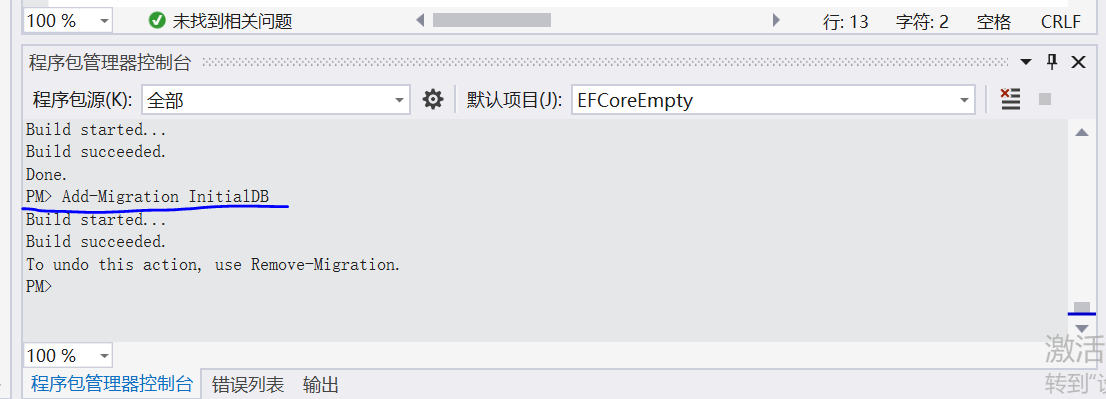
3.2 执行 Add-Migration xxx命令:打开 vs2019->工具->nuget包管理器->程序包管理器控制台 执行命令
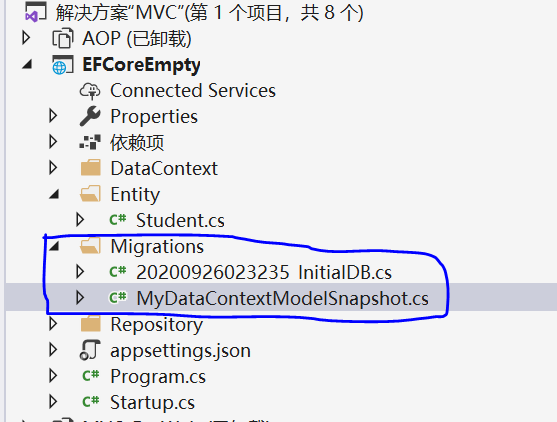
执行Add-Migration 命令后,文件生成如下:其中带时间戳的就是迁移文件。
3.3 执行 Update-Database 命令,根据迁移类的代码,执行到目标数据库。

执行完后,数据库及DbContext中Entity 对应的表就已经创建好了。
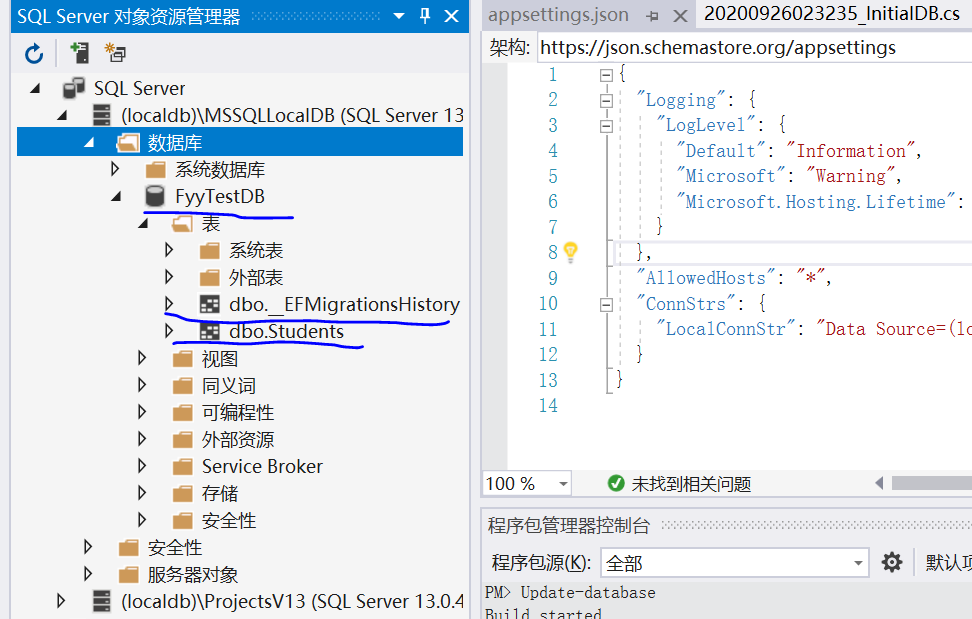
其中,EFMigrationsHistory 表记录了每一次迁移。