在网上看到好多个版本,自己有时间索性就写个Demo记录下整个框架的逻辑流程;
1、首先拷贝整个框架所需要的jar包到WEB-INF/lib包下(这个网上都可以搜到的)
2、配置文件的配置,
2.1、在web.xml配置文件中,是整个项目的入口配置文件,需要配置struts核心配置、Spring核心配置、监听spring配置
 1 <!-- Spring的核心配置,{必不可少的} -->
 2     <context-param>
 3         <param-name>contextConfigLocation</param-name>
 4         <!-- 把spring的配置文件放到了/WEB-INF/下的springframework包里,方便统一管理,命名规则是以applicationContent-开头的xml文件,初始化时会自动搜索所有符合规则的配置文件 -->
 5         <param-value>/WEB-INF/spring/applicationContext-web.xml</param-value>
 6     </context-param>
 8     <listener> <!--监听器 用于初始化spring框架 -->
 9         <listener-class>org.springframework.web.context.ContextLoaderListener</listener-class>
10     </listener>
13     <!-- struts2核心配置,{必不可少,缺少时页面跳转总是出现404的错误} -->
14     <filter>
15         <filter-name>struts2</filter-name><!-- 这个就是struts2的核心过滤器 -->
16         <filter-class>org.apache.struts2.dispatcher.ng.filter.StrutsPrepareAndExecuteFilter</filter-class>
17     </filter>
19     <filter-mapping>
20         <filter-name>struts2</filter-name>
21         <url-pattern>/*</url-pattern>
22     </filter-mapping>
2.2、将struts2的主配置文件复制到此项目中,可以复制到(classpath:)src的目录下即可
<struts>
<package name="default" namespace="/" extends="struts-default">
<!-- 更新版本信息的页面跳转 -->
<action name="autoAction" class="com.test.action.AutoUpgradeAction"
method="SelectByid">
<result name="one">One.jsp</result> <!-- 显示查询成功 -->
<result name="sad">Select.jsp</result><!-- 查询失败失败 -->
</action>
<action name="autoActionAll" class="com.test.action.AutoUpgradeAction"
method="QueryAll">
<result name="all">All.jsp</result> <!-- 显示查询成功 -->
<result name="null">Select.jsp</result> <!-- 显示查询成功 -->
</action>
</package>
</struts>
2.3、Spring框架的搭建,创建applicationContext-web.xml配置文件,
<?xml version="1.0" encoding="UTF-8"?>
<beans xmlns="http://www.springframework.org/schema/beans"
       xmlns:xsi="http://www.w3.org/2001/XMLSchema-instance"
       xmlns:context="http://www.springframework.org/schema/context"
       xmlns:aop="http://www.springframework.org/schema/aop"
       xmlns:tx="http://www.springframework.org/schema/tx"
       xsi:schemaLocation="http://www.springframework.org/schema/beans
           http://www.springframework.org/schema/beans/spring-beans-2.5.xsd
           http://www.springframework.org/schema/context http://www.springframework.org/schema/context/spring-context-2.5.xsd
           http://www.springframework.org/schema/aop http://www.springframework.org/schema/aop/spring-aop-2.5.xsd
           http://www.springframework.org/schema/tx http://www.springframework.org/schema/tx/spring-tx-2.5.xsd">
<!--dataSource的相关配置 -->
<bean id="propertyConfigurer"
class="org.springframework.beans.factory.config.PropertyPlaceholderConfigurer">
<property name="locations">
<list>
<value>/WEB-INF/ibatis/jdbc.properties</value>
</list>
</property>
</bean>
<bean id="dataSource" class="org.apache.commons.dbcp.BasicDataSource">
<property name="driverClassName" value="${jdbc.driverClassName}"/>
<property name="url" value="${jdbc.url}"/>
<property name="username" value="${jdbc.username}"/>
<property name="password" value="${jdbc.password}"/>
</bean>
<!-- 配置iBatis的sqlMapClient,这里当然是交给了spring去处理,其中,将SqlMapConfig文件放到了WEB-INF的iBatis目录下,也是便于管理 -->
<!-- Spring整合ibatis配置文件 -->
<bean id="sqlMapClient" class="org.springframework.orm.ibatis.SqlMapClientFactoryBean">
<property name="configLocation"><value>/WEB-INF/ibatis/SqlMapConfig.xml</value></property>
<property name="dataSource"><ref bean="dataSource" /></property><!-- 这里使用的数据源就是上面配置的数据源 -->
</bean>
<!-- 更新信息 -->
<bean id="autodaoImpl" class="com.test.daoImpl.AutoUpgradeDaoImpl">
<property name="sqlMapClient" ref="sqlMapClient"></property>
</bean>
<bean id="autoServiceImpl" name="autoServiceImpl" class="com.test.serviceImpl.AutoUpgradeServiceImpl">
<property name="autodao" ref="autodaoImpl">
</property>
</bean>
<!-- 查询更新信息model的action -->
<bean id="autoAction" name="autoAction" class="com.test.action.AutoUpgradeAction"
scope="prototype">
<property name="autoService" ref="autoServiceImpl"></property>
</bean>
<context:annotation-config />
<context:component-scan base-package="com.test" />
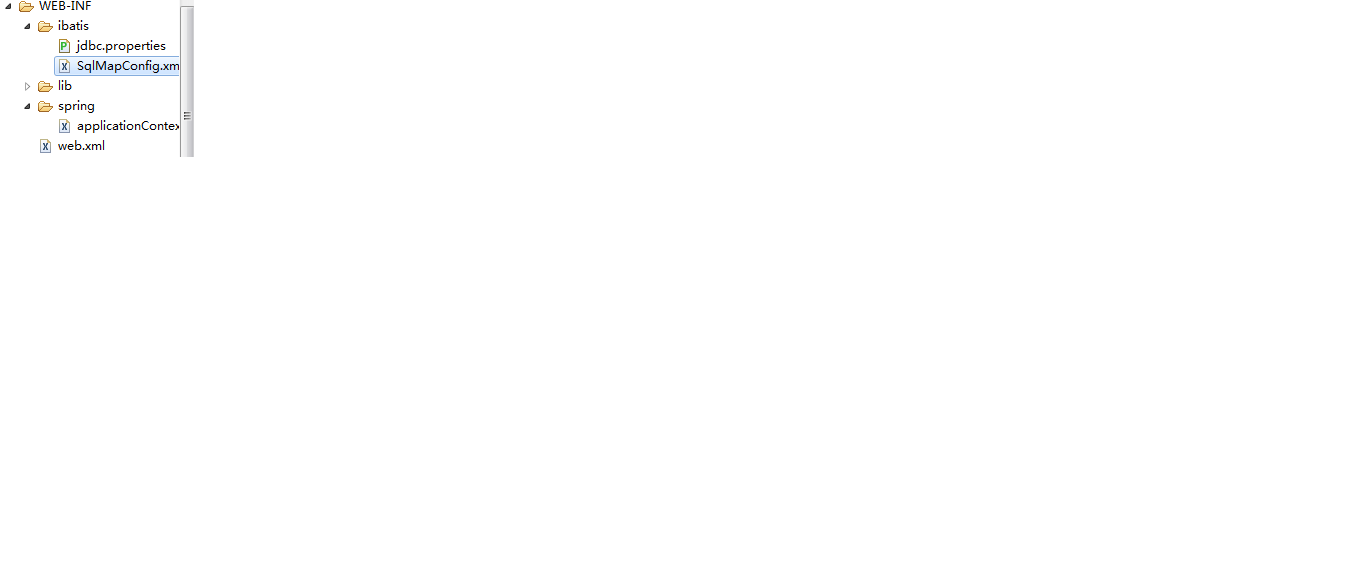
2.4、连接数据库的相关配置文件jdbc.properties和SqlMapConfig.xml配置文件(分别集中到一个文件夹中,)
jdbc.properties
jdbc.driverClassName=com.microsoft.sqlserver.jdbc.SQLServerDriver
jdbc.url=jdbc:sqlserver://localhost:1433;DatabaseName=fdx
jdbc.username=sa
jdbc.password=abc123456
SqlMapConfig.xml【sql的映射文件的配置】
<?xml version="1.0" encoding="UTF-8" ?>
<!DOCTYPE sqlMapConfig PUBLIC "-//ibatis.apache.org//DTD SQL Map Config 2.0//EN"
"http://ibatis.apache.org/dtd/sql-map-config-2.dtd">
<sqlMapConfig>
<!-- 获取版本信息model -->
<sqlMap resource="com/test/ibatis/sqlMap/AutoUpgrade.xml" />
</sqlMapConfig>
User.xml配置文件中放的具体的sql语句的操作:
<sqlMap>
<typeAlias alias="AutoUpgrade" type="com.test.pojo.AutoUpgrade" />
<select id="selsectAuto" parameterClass="java.lang.Integer"
resultClass="AutoUpgrade">
select * from t_AutoUpgrade
where id = #id#;
</select>
<select id="selsectAll" resultClass="AutoUpgrade">
select * from t_AutoUpgrade
</select>
</sqlMap>
以上都是配置文件的配置,接下来是部分java代码部分
dao接口
package com.test.dao;

import java.util.List;

import com.test.pojo.AutoUpgrade;

public interface AutoUpgradeDao {
	//获取版本信息
	public AutoUpgrade queryAotuUpgradeById(int id);
	//查询所有信息
	public List<AutoUpgrade> queryAll();
}
daoImpl实现类
package com.test.dao;

import java.util.List;

import com.test.pojo.AutoUpgrade;

public interface AutoUpgradeDao {
	//获取版本信息
	public AutoUpgrade queryAotuUpgradeById(int id);
	//查询所有信息
	public List<AutoUpgrade> queryAll();
}
service接口
package com.test.service;

import java.util.List;

import com.test.pojo.AutoUpgrade;

public interface AutoUpgradeService {

	//根据id查看更新信息
	public AutoUpgrade queryAutoById(int id);
	//查询所有版本信息列表
	public List<AutoUpgrade> queryAll();
}
serviceImpl实现类【业务实现类】
package com.test.serviceImpl;

import java.util.List;

import org.springframework.beans.factory.annotation.Autowired;

import com.test.dao.AutoUpgradeDao;
import com.test.pojo.AutoUpgrade;
import com.test.service.AutoUpgradeService;


public class AutoUpgradeServiceImpl implements AutoUpgradeService{
	@Autowired
	private AutoUpgradeDao autodao;


	public AutoUpgradeDao getAutodao() {
		return autodao;
	}

	public void setAutodao(AutoUpgradeDao autodao) {
		this.autodao = autodao;
	}
	@Override
	public AutoUpgrade queryAutoById(int id) {
		// TODO Auto-generated method stub
		System.out.println("进来了serviceimpl实现类中===========");
		AutoUpgrade auto = autodao.queryAotuUpgradeById(id);
		System.out.println("serviceImpl实现类中完成了查询操2222222222222:"+auto.getUrl());
		return auto;
	}

	@Override
	public List<AutoUpgrade> queryAll() {
		// TODO Auto-generated method stub
		System.out.println("serviceimpl进来啦--------------");
		List<AutoUpgrade> list = autodao.queryAll();
		return list;
	}

}
RegisterAction类
package com.test.action;


import java.util.List;

import javax.servlet.http.HttpServletRequest;

import org.apache.struts2.interceptor.ServletRequestAware;
import org.springframework.beans.factory.annotation.Autowired;

import com.opensymphony.xwork2.ActionSupport;
import com.test.pojo.AutoUpgrade;
import com.test.service.AutoUpgradeService;

public class AutoUpgradeAction extends ActionSupport implements ServletRequestAware{
	/**
	 * 序列化
	 */
	private static final long serialVersionUID = 1L;

	@Autowired
	private AutoUpgradeService autoService;

	public AutoUpgradeService getAutoService() {
		return autoService;
	}

	public void setAutoService(AutoUpgradeService autoService) {
		this.autoService = autoService;
	}

	private HttpServletRequest request;

    public String SelectByid() {
        System.out.println("开始进行action中进行前后台的交互----------------");
         String id = request.getParameter("id");
         System.out.println("id值============="+id);
         AutoUpgrade auto = new AutoUpgrade();
         auto.setId(Integer.valueOf(id));
         System.out.println("用户名"+auto.getId()+"将要进入查询操作");
         AutoUpgrade au= autoService.queryAutoById(auto.getId());
         System.out.println("==============="+au.getAppCode()+"===appcode值");
         if(au.getAppCode() !=null || au.getAppCode()!=""){
        	 request.setAttribute("auto", au);
        	return "one";
         }
         return "sad";
    }
    //查询所有的版本信息,并用列表显示出来
    public String QueryAll(){
    	System.out.println("见啦了action中,进行查询全部版本信息==========================");
    	List<AutoUpgrade> list = autoService.queryAll();
    	if(list.size()>0){
    		request.setAttribute("list", list);
    		return "all";
    	}else{
    		return "null";
    	}
    }

	@Override
	public void setServletRequest(HttpServletRequest arg0) {
		// TODO Auto-generated method stub
		request = arg0;
	}

}
前台的jsp页面的访问
<%@ page language="java" contentType="text/html; charset=utf-8"
    pageEncoding="utf-8"%>
<!DOCTYPE html PUBLIC "-//W3C//DTD HTML 4.01 Transitional//EN" "http://www.w3.org/TR/html4/loose.dtd">
<html>
<head>
<meta http-equiv="Content-Type" content="text/html; charset=utf-8">
<title>Insert title here</title>
</head>
<body>
<form action="/SSIDemo/autoActionAll" method="post">
	<input type="submit" value="查询所有">
</form>
</body>
</html>
查询完成之后,显示页面内容的jsp
<%@page import="java.util.Iterator"%>
<%@page import="java.util.List"%>
<%@page import="com.test.pojo.AutoUpgrade"%>
<%@ page contentType="text/html; charset=utf-8" language="java"%>
<html>
<meta http-equiv="Content-Type" content="text/html; charset=utf-8">
<head>
<title>查询成功</title>

</head>
<body>
<h3 >welcome here!</h3>

	<table border="1" cellspacing="0">
	 <thead style="color:red">
		<tr>
			<td>id</td>
			<td>appCode</td>
			<td>UpgradeTis</td>
			<td>Version</td>
			<td>ForceUpgrade</td>
			<td>ReleaseTime</td>
			<td>url</td>
		</tr>
	 </thead>

	 <tbody>
	 	<tr>
	 	<% List<AutoUpgrade> list = (List<AutoUpgrade>)request.getAttribute("list");
		Iterator it = list.iterator();
		while(it.hasNext()){
			AutoUpgrade auto = (AutoUpgrade)it.next();%>

		   <td><%=auto.getId() %></td>
	       <td><%=auto.getAppCode()%></td>
	       <td><%=auto.getUpgradeTis() %></td>
	       <td><%=auto.getVersion() %></td>
	       <td><%=auto.getForceUpgrade() %></td>
	       <td><%=auto.getReleaseTime() %></td>
	       <td><%=auto.getUrl()%></td>
		</tr>
		<%} %>
	 </tbody>

	</table>
</body>
</html>
显示结果:

然后按照MVC的模式设计Demo,整个项目目录如下:
