终于用OpenGL实现了漫游、粒子系统以及无语的黑盒3D,下面就是头疼的碰撞检测了~要不然偷懒不用OpenGL写了?估计导师会训我啊啊啊啊。
累死~~~还是补篇笔记吧,要不然快忘了。
接着上一次的Graphics—菜单设置笔记继续说吧。
其实对话框这东西真的很好玩(o)/~
声明:操作方法不一,我只是把做小型绘图系统的经验记录一下。
先立个flag吧(任务要求):三个绘图选择
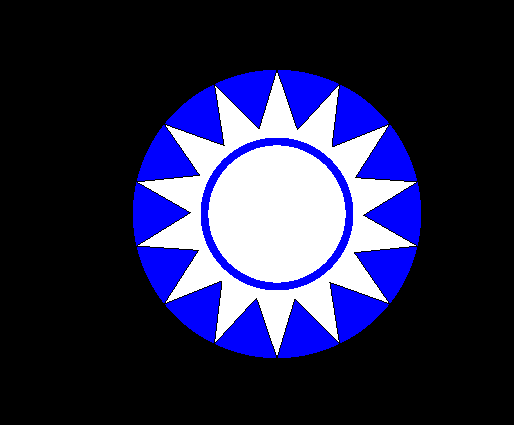
(1)画国民党党徽
(2)画共青团团徽
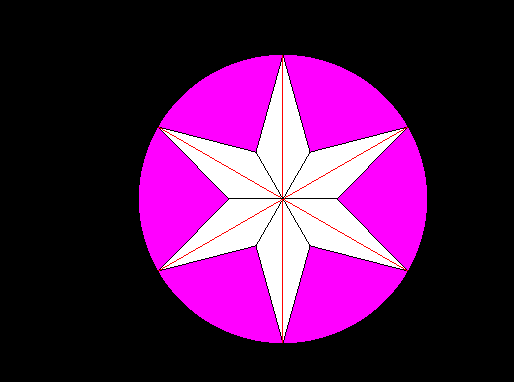
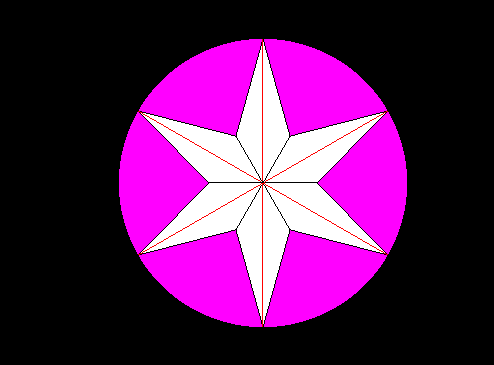
(3)画多角星,需要手动输出一个(2 ~ 100)的整数n,表示绘制n角星
源码在这里:
#include <GL/glut.h>
#include <math.h>
#include <stdio.h>
const double PI = acos(-1.0);
struct Color {
    double x, y, z;
    Color(double x = 0, double y = 0, double z = 0)
    : x(x), y(y), z(z) {}
};
struct Point {
    double x, y;
    Point(double x = 0, double y = 0) : x(x), y(y) {}
};
Color c[1000 + 1];
Point p[1000 + 1], p1[1000 + 1], p2[1000 + 1];
void Ring(double r, Color C) {
    glColor3d(C.x, C.y, C.z); glBegin(GL_POLYGON);
    for(int i = 0; i < 10000; i++) {
        double D = 360.0 / 10000 * i / 180 * PI;
        glVertex2d(r * cos(D), r * sin(D));
	}
	glEnd();
}
void Star(double r, int n, Color C, double r0, Color C1, Color C2) {
    //定义n角星凸起的点为顶点,凹下去的点为次顶点
    //画一个n角星,其中r定义顶点到中心的距离,C代表颜色
    //r0代表次顶点到中心的距离
    //若r0不为0则直接使用,反之使用r0 = r * 3 / 8.
    //C1表示顶点到中心是否连线,C2表示次顶点到中心是否连线
    //颜色第一个参数为-1时,说明不连线,反之使用相应颜色连线
    double dis_to_next = 360.0 / n; //顶点间角度
    for(int i = 0; i < n; i++) {
        double D = (dis_to_next * i + 90) / 180 * PI;
        p1[i] = {r * cos(D), r * sin(D)};
    }
    double r_incycle;//次顶点到中心距离
    if(r0 == 0) {
        r_incycle = r * 3 / 8;
    }
    else {
        r_incycle = r0;
    }
    for(int i = 0; i < n; i++) {
        double D = (180 / n + 90 + i * dis_to_next) / 180 * PI;
        p2[i] = {r_incycle * cos(D), r_incycle * sin(D)};
    }
    glColor3d(C.x, C.y, C.z);
    glBegin(GL_POLYGON);//先以次顶点画多边形
    for(int i = 0; i < n; i++) {
        glVertex2d(p2[i].x, p2[i].y);
    }
    glEnd();
    glColor3d(C.x, C.y, C.z);
    for(int i = 0; i < n; i++) {//再逐步涂色
        glBegin(GL_TRIANGLES);
        glVertex2d(p2[i].x, p2[i].y);
        glVertex2d(p1[(i + 1) % n].x, p1[(i + 1) % n].y);
        glVertex2d(p2[(i + 1) % n].x, p2[(i + 1) % n].y);
        glEnd();
    }
    glColor3f(0, 0, 0);  glBegin(GL_LINE_LOOP);
    for(int i = 0; i < n; i++) {//把n角星的边变成黑色
        glVertex2d(p1[i].x, p1[i].y);
        glVertex2d(p2[i].x, p2[i].y);
    }
    glEnd();
    for(int i = 0; i < n; i++) {
        if(C1.x != -1) {//顶点到中心连线
            glColor3d(C1.x, C1.y, C1.z);
            glBegin(GL_LINES);
            glVertex2d(p1[i].x, p1[i].y);
            glVertex2d(0, 0);
            glEnd();
        }
        if(C2.x != -1) {//次顶点到中心连线
            glColor3d(C2.x, C2.y, C2.z);
            glBegin(GL_LINES);
            glVertex2d(p2[i].x, p2[i].y);
            glVertex2d(0, 0);
            glEnd();
        }
    }
}
void myDisplay1(void) {
	glClearColor(0.0, 0.0, 0.0, 0.0);
	glClear(GL_COLOR_BUFFER_BIT);
	Ring(0.5, (Color){0, 0, 1});
    Star(0.5, 14, (Color){1, 1, 1}, 0.3, (Color){-1, 0, 0}, (Color){-1, 0, 0});
	Ring(0.265, (Color){0, 0, 1});
	Ring(0.238, (Color){1, 1, 1});
	glFlush();
}
void myDisplay2(void) {
    glClearColor(0.0, 0.0, 0.0, 0.0);
	glClear(GL_COLOR_BUFFER_BIT);
	Ring(0.55, (Color){1, 1, 0});
	Ring(0.5, (Color){1, 0, 0});
	Star(0.5, 5, (Color){1, 1, 0}, 0.18, (Color){0, 0, 0}, (Color){0, 0, 0});
	glFlush();
}
int n;
void myDisplay3(void) {
    glClearColor(0.0, 0.0, 0.0, 0.0);
    glClear(GL_COLOR_BUFFER_BIT);
    Ring(0.5, (Color){1, 0, 1});
    Star(0.5, n, (Color){1, 1, 1}, 0, (Color){1, 0, 0}, (Color){0, 0, 0});
    glFlush();
}
int main(int argc, char *argv[]) {
    printf("Welcome!

Instruction:

1, The emblem of the kuomintang

");
    printf("2, The Communist Youth League badge

3, The pattern of the flower

");
    printf("Please choose operator(1~3): ");
    int op; scanf("%d", &op);
    while(op < 1 || op > 3) {
        printf("error!
Please choose again: ");
        scanf("%d", &op);
    }
    if(op == 3) {
        printf("Please choose the number of nodes(2~100): ");
        scanf("%d", &n);
        while(n < 2 || n > 100) {
            printf("error!
Please choose again: ");
            scanf("%d", &n);
        }
    }
    glutInit(&argc, argv);
    glutInitDisplayMode(GLUT_RGB | GLUT_SINGLE);
    glutInitWindowPosition(100, 100);
    glutInitWindowSize(600, 600);
    glutCreateWindow("Hello World!");
    if(op == 1) {
        glutDisplayFunc(&myDisplay1);
    }
    else if(op == 2) {
        glutDisplayFunc(&myDisplay2);
    }
    else {
        glutDisplayFunc(&myDisplay3);
    }
    glutMainLoop();
    return 0;
}
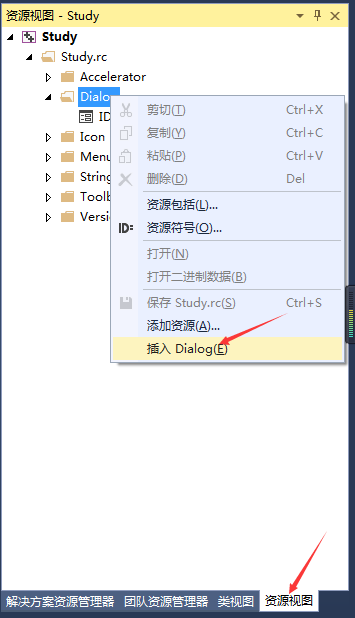
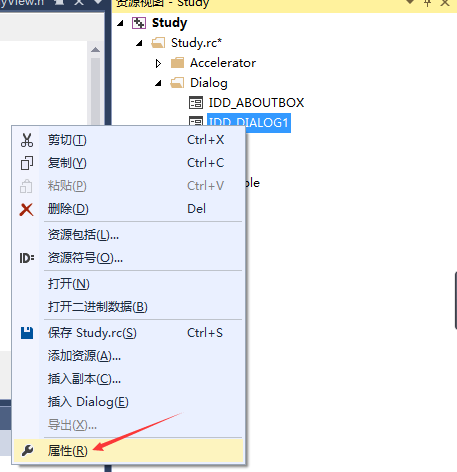
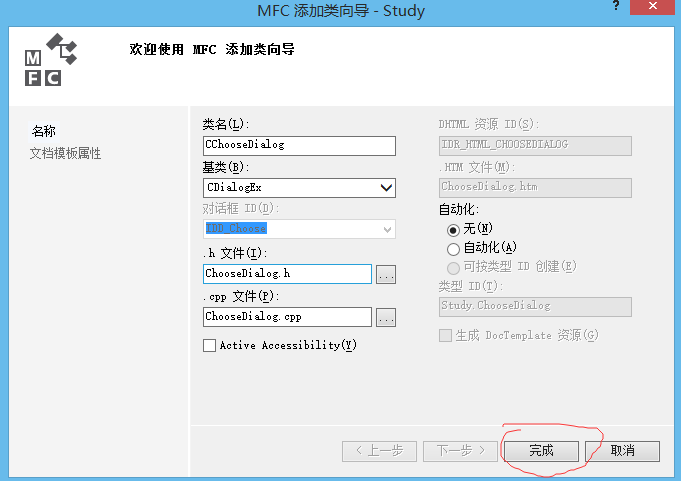
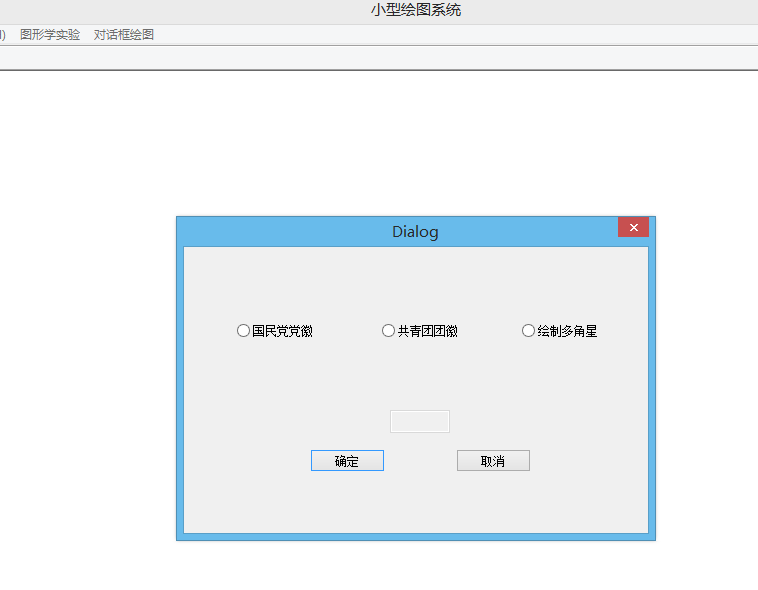
一、新建对话框(类)
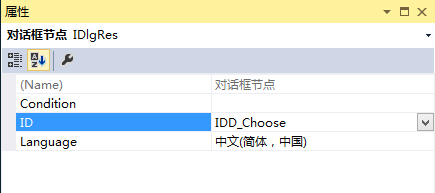
ID修改成一个好记的名字IDD_Choose
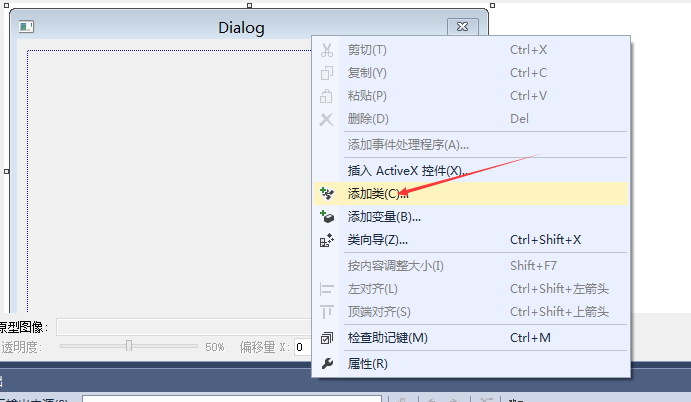
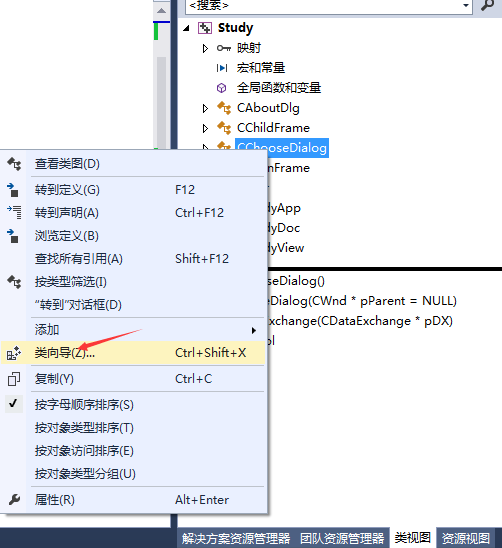
然后对于这个对话框,新建一个类(类名就为CChooseDialog吧)
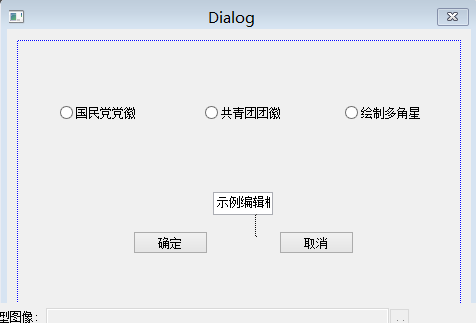
接着,我们来美工一下对话框吧!这里要用到“工具箱”
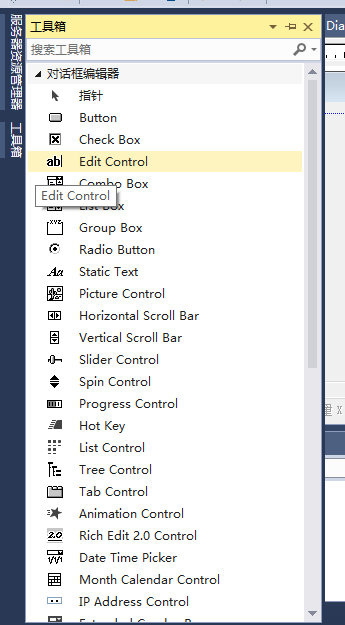
这里要使用Radio Button,直接拖动放到对话框里面

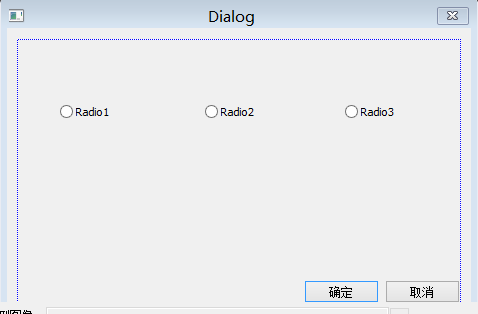
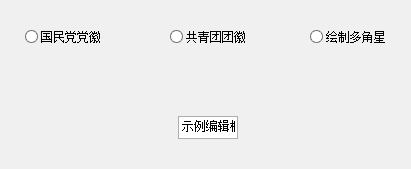
对每个Button,选择 属性/Caption,修改名字标题名分别为“国民党党徽”、“共青团团徽”、“绘制多角星”。再拖入一个Edit Control(编辑框),用于输入整数n,绘制n角星。
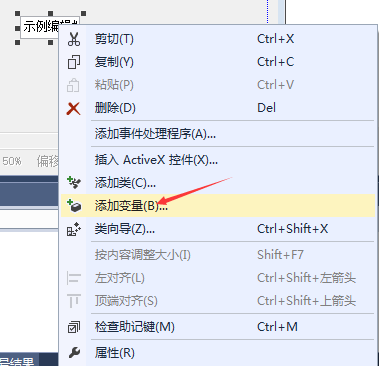
二、分析过程,添加变量和函数
这时候,我们分析一下整个过程:
初始,编辑框不可用。而当我们选择绘制多角星时,它便可以使用,其次在输入数据的时候,要可以判断输入的是否是2~100的整数。
对于编辑框,我们需要添加一个类别为value的CString变量m_data来存储输入的数据以及一个类别为control的变量m_control来控制编辑框是否可用
添加虚函数OnInitDialog()函数,之后初始化对话框使得编辑框处于不可使用状态。
BOOL CChooseDialog::OnInitDialog()
{
	CDialogEx::OnInitDialog();

	// TODO:  在此添加额外的初始化
	m_control.EnableWindow(false);
	return TRUE;  // return TRUE unless you set the focus to a control
	// 异常:  OCX 属性页应返回 FALSE
}
我们在ChooseDialog.cpp函数里面设置两个变量op,n
int Op, n; // Op 表示1~3 这三种绘图操作,n代表多角星的角数
添加三个Radio Button 对应的BN_CLICKED消息处理函数
void CChooseDialog::OnBnClickedRadio1()
{
	// TODO:  在此添加控件通知处理程序代码
	Op = 1;
	m_control.EnableWindow(false); // 编辑框不可用
}


void CChooseDialog::OnBnClickedRadio2()
{
	// TODO:  在此添加控件通知处理程序代码
	Op = 2;
	m_control.EnableWindow(false); // 编辑框不可用
}


void CChooseDialog::OnBnClickedRadio3()
{
	// TODO:  在此添加控件通知处理程序代码
	Op = 3;
	m_control.EnableWindow(true); // 编辑框可用
}
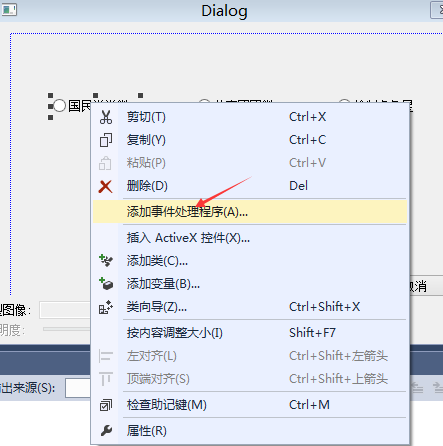
加入“确定按钮“对应的事件函数(注意,要去掉对话框自带的“确定”和“取消”按钮,我们自己拖入两个Button 改好名字即可)
到这里,我们发现有一个小bug。如果点击了“取消按钮”,那么就表示本次选择无效。于是在ChooseDialog.cpp里面加入一个bool变量start表示本次选择是否有效。
bool start; // 表示本次选择是否有效
void CChooseDialog::OnBnClickedButton1() // 确定按钮
{
// TODO: 在此添加控件通知处理程序代码
if (Op == 1 || Op == 2) {
start = true;
SendMessage(WM_CLOSE); // 关闭对话框
return;
}
if (Op == 3) {
UpdateData(true); // 表示获取编辑框的数据
/*判断输入数据是否满足2~100的整数*/
bool flag = false;
int len = m_data.GetLength();
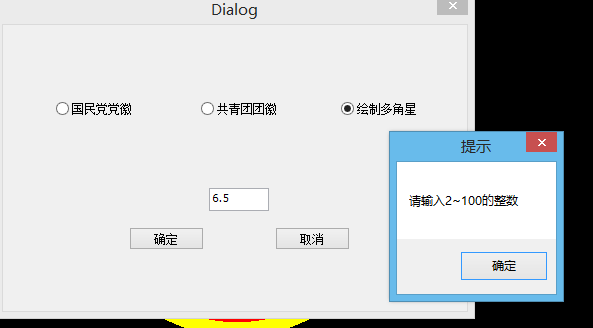
if (len >= 4) {
MessageBox(_T("请输入2~100的整数"), _T("提示"));
return;
}
n = 0;
for (int i = 0; i < len; i++) {
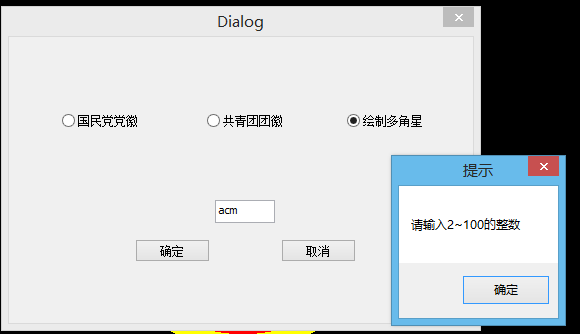
if (!(m_data[i] - '0' >= 0 && m_data[i] - '0' <= 9)) {
flag = true; break;
}
else {
n = n * 10 + (m_data[i] - '0');
}
}
if (flag || (!flag && (n <= 1 || n > 100))) {
MessageBox(_T("请输入2~100的整数"), _T("提示"));
}
else {
start = true;
SendMessage(WM_CLOSE);
}
}
}
void CChooseDialog::OnBnClickedButton2() // 取消按钮
{
// TODO: 在此添加控件通知处理程序代码
start = false;
SendMessage(WM_CLOSE);
}
三、view类的调整
在StudyView.cpp里面加入头文件#include "ChooseDialog.h"
在StudyView.h里面继承ChooseDalog.cpp里面的Op、n、start变量
extern int Op, n;
extern bool start;
在StudyView.h里面加入绘图类,由于在上一篇笔记里面已经加入了Point 和 Color类,这里不再叙述
class Draw_Choose { // 7
public:
	bool init;       // the mark variable of Init function
	bool reshape;    // the mark variable of Reshape function
	bool Mouse;      // the mark variable of Mouse function
	bool Keyboard;   // the mark variable of Keyboard function
	bool Motion;     // the mark variable of Mouse move fuction
	Draw_Choose(bool a = true, bool b = true, bool c = false, bool d = false, bool e = false) : init(a), reshape(b), Mouse(c), Keyboard(d), Motion(e) {}
	void Init() {
		glClearColor(0.0, 0.0, 0.0, 1.0);
	}
	void Reshape(int cx, int cy) {
		glViewport(0, 0, cx, cy);
		// 设置投影矩阵(透视投影)
		glMatrixMode(GL_PROJECTION);
		glLoadIdentity();
		gluPerspective(60.0, (GLfloat)cx / (GLfloat)cy, 1.0, 1000.0);
		// 设置模型视图矩阵
		glMatrixMode(GL_MODELVIEW);
		glLoadIdentity();
		gluLookAt(0.0, 0.0, 2.0, 0.0, 0.0, 0.0, 0.0, 1.0, 0.0);
	};   // 改变窗口大小时对视窗进行的操作
	Color c[1000 + 1];
	Point p[1000 + 1], p1[1000 + 1], p2[1000 + 1];
	void Ring(double r, Color C) {
		glColor3d(C.x, C.y, C.z); glBegin(GL_POLYGON);
		for (int i = 0; i < 10000; i++) {
			double D = 360.0 / 10000 * i / 180 * PI;
			glVertex2d(r * cos(D), r * sin(D));
		}
		glEnd();
	}
	void Star(double r, int n, Color C, double r0, Color C1, Color C2) {
		double dis_to_next = 360.0 / n; //顶点间角度
		for (int i = 0; i < n; i++) {
			double D = (dis_to_next * i + 90) / 180 * PI;
			p1[i] = { r * cos(D), r * sin(D) };
		}
		double r_incycle;//次顶点到中心距离
		if (r0 == 0) {
			r_incycle = r * 3 / 8;
		}
		else {
			r_incycle = r0;
		}
		for (int i = 0; i < n; i++) {
			double D = (180 / n + 90 + i * dis_to_next) / 180 * PI;
			p2[i] = { r_incycle * cos(D), r_incycle * sin(D) };
		}
		glColor3d(C.x, C.y, C.z);
		glBegin(GL_POLYGON);//先以次顶点画多边形
		for (int i = 0; i < n; i++) {
			glVertex2d(p2[i].x, p2[i].y);
		}
		glEnd();
		glColor3d(C.x, C.y, C.z);
		for (int i = 0; i < n; i++) {//再逐步涂色
			glBegin(GL_TRIANGLES);
			glVertex2d(p2[i].x, p2[i].y);
			glVertex2d(p1[(i + 1) % n].x, p1[(i + 1) % n].y);
			glVertex2d(p2[(i + 1) % n].x, p2[(i + 1) % n].y);
			glEnd();
		}
		glColor3f(0, 0, 0);
		glLineWidth(1);
		glBegin(GL_LINE_LOOP);
		for (int i = 0; i < n; i++) {//把n角星的边变成黑色
			glVertex2d(p1[i].x, p1[i].y);
			glVertex2d(p2[i].x, p2[i].y);
		}
		glEnd();
		for (int i = 0; i < n; i++) {
			if (C1.x != -1) {//顶点到中心连线
				glColor3d(C1.x, C1.y, C1.z);
				glLineWidth(1);
				glBegin(GL_LINES);
				glVertex2d(p1[i].x, p1[i].y);
				glVertex2d(0, 0);
				glEnd();
			}
			if (C2.x != -1) {//次顶点到中心连线
				glColor3d(C2.x, C2.y, C2.z);
				glLineWidth(1);
				glBegin(GL_LINES);
				glVertex2d(p2[i].x, p2[i].y);
				glVertex2d(0, 0);
				glEnd();
			}
		}
	}
	void myDisplay1(void) {
		glClear(GL_COLOR_BUFFER_BIT);
		Ring(0.5, Color(0, 0, 1));
		Star(0.5, 14, Color(1, 1, 1), 0.3, Color(-1, 0, 0), Color(-1, 0, 0));
		Ring(0.265, Color(0, 0, 1));
		Ring(0.238, Color(1, 1, 1));
		glFlush();
	}
	void myDisplay2(void) {
		glClear(GL_COLOR_BUFFER_BIT);
		Ring(0.55, Color(1, 1, 0));
		Ring(0.5, Color(1, 0, 0));
		Star(0.5, 5, Color(1, 1, 0), 0.18, Color(0, 0, 0), Color(0, 0, 0));
		glFlush();
	}
	void myDisplay3(void) {
		glClear(GL_COLOR_BUFFER_BIT);
		Ring(0.5, Color(1, 0, 1));
		Star(0.5, n, Color(1, 1, 1), 0, Color(1, 0, 0), Color(0, 0, 0));
		glFlush();
	}
	void Display() {
		if (Op == 1) {
			myDisplay1();
		}
		else if (Op == 2) {
			myDisplay2();
		}
		else {
			myDisplay3();
		}
	}
};
修改StudyView.cpp里面的DrawPicture函数(Case为1是上一笔记里面的菜单,Case 为 1的代码可以忽略掉)
void CStudyView::DrawPicture()
{
	CRect rc; GetWindowRect(&rc);
	int cx = rc.Width(); int cy = rc.Height();
	if (Case == 1) {
		glClearColor(0.0, 0.0, 0.0, 0.0);
		glClear(GL_COLOR_BUFFER_BIT);

		glColor3f(1.0f, 1.0f, 1.0f);
		glRectf(-0.8f, -0.8f, 0.8f, 0.8f);
		Work m_work;
		m_work.Triangle(Color(0, 1, 0), Color(1, 1, 0), Color(1, 0, 0),
			Point(-0.8, 0.8), Point(0.8, 0.8), Point(0, -0.8));

		glBegin(GL_POLYGON);
		glColor3f(1.0f, 0.0f, 1.0f);
		GLfloat r = 0.5;
		for (int i = 1; i <= 1000; i++) {
			glVertex2f(r * cos(PI / 500 * i), r * sin(PI / 500 * i));
		}
		glEnd();

		GLfloat a = 1 / (2 - 2 * cos(72 * PI / 180)); // ???
		GLfloat x = a * cos(18 * PI / 180);
		GLfloat y = a * sin(18 * PI / 180);
		GLfloat z = a * cos(18 * PI / 180);
		glColor3f(0.0f, 0.0f, 1.0f);
		glBegin(GL_LINE_LOOP);
		glVertex2f(0.0f, a); glVertex2f(0.5f, -z);
		glVertex2f(-x, y);   glVertex2f(x, y);
		glVertex2f(-0.5f, -z);
		glEnd();

		m_work.Triangle(Color(1, 0, 0), Color(0, 0, 1), Color(1, 0, 1),
			Point(-0.65, -0.6), Point(-0.6, -0.7), Point(-0.7, -0.7));

		m_work.Triangle(Color(1, 0, 0), Color(1, 0, 1), Color(1, 1, 0),
			Point(0.65, -0.6), Point(0.7, -0.7), Point(0.6, -0.7));
		glFlush();
	}
	else if (Case == 2) {
		Draw_Choose m_work;
		m_work.Init();
		m_work.Reshape(cx, cy);
		m_work.Display();
	}
}
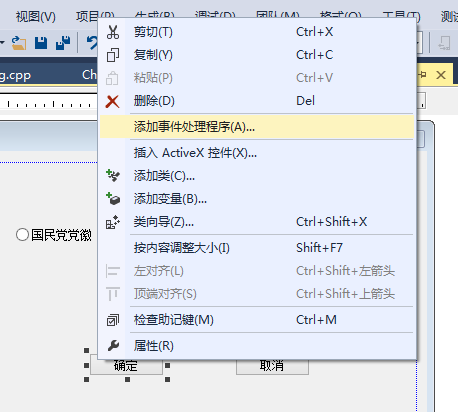
四、在菜单里面加入一个“对话框绘图”
添加事件函数
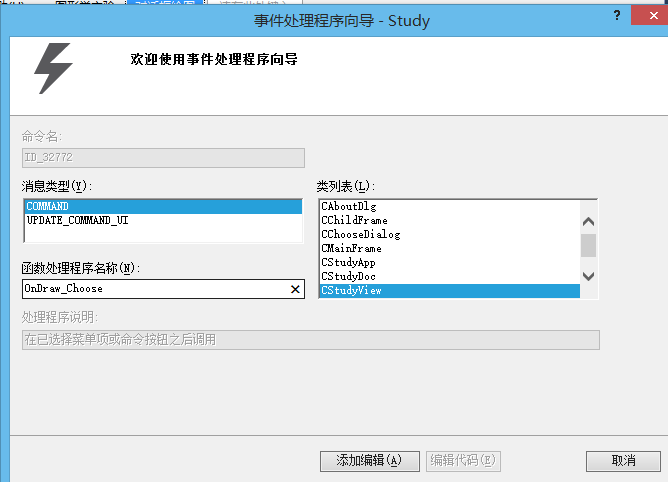
void CStudyView::OnDraw_Choose()
{
	// TODO:  在此添加命令处理程序代码
	CChooseDialog dlg;
	dlg.DoModal();
	if (start) { // 本次选择有效
		Case = 2;
		SendMessage(WM_PAINT); // 绘图
	}
}
五、运行
一、选择国民党党徽,点击“确定”:
二、同理共青团团徽:

三、多角星:
(1)输入6.5,点击“确定”。提示错误
(2)输入acm,点击“确定”。提示错误
(3)输入6,点击“确定”。成功
(4)输入8,点击“取消”。出现的还是上一个6角星
肚子饿死了啊啊啊啊!!!