一、nginx搭建集群入门
https://www.cnblogs.com/XJJD/p/10308840.html
二、Nginx服务器之负载均衡策略(6种)
https://www.cnblogs.com/1214804270hacker/p/9325150.html
三、Nginx与Tomcat实现请求动态数据与请求静态资源的分离
https://www.cnblogs.com/1214804270hacker/p/9299462.html
四、示例
1、nginx.conf 配置负载均衡策略、动态数据与静态资源配置。
#user  nobody;
worker_processes  1;

#error_log  logs/error.log;
#error_log  logs/error.log  notice;
#error_log  logs/error.log  info;

#pid        logs/nginx.pid;


events {
    #accept_mutex on;   #设置网路连接序列化,防止惊群现象发生,默认为on
    #multi_accept on;  #设置一个进程是否同时接受多个网络连接,默认为off
    #use epoll;      #事件驱动模型,select|poll|kqueue|epoll|resig|/dev/poll|eventport
    worker_connections  1024; #nginx默认连接数
}


http {
    include       mime.types; #文件扩展名与文件类型映射表
    default_type  application/octet-stream;#默认文件类型,默认为text/plain
    #access_log off; #取消服务日志

    #log_format  main  '$remote_addr - $remote_user [$time_local] "$request" '
    #                  '$status $body_bytes_sent "$http_referer" '
    #                  '"$http_user_agent" "$http_x_forwarded_for"';

    #access_log  logs/access.log  main;
    #access_log log/access.log myFormat;  #combined为日志格式的默认值
    #sendfile        on;#允许sendfile方式传输文件,默认为off,可以在http块,server块,location块。
    #sendfile_max_chunk 100k;  #每个进程每次调用传输数量不能大于设定的值,默认为0,即不设上限。
    #keepalive_timeout 65;  #连接超时时间,默认为75s,可以在http,server,location块。
    #tcp_nopush     on;

    #keepalive_timeout  0;
    keepalive_timeout  65;#连接超时时间,默认为75s,可以在http,server,location块。


    #gzip  on;
    #动态服务器组
    #1、轮询
    #fail_timeout    与max_fails结合使用。
    #max_fails    设置在fail_timeout参数设置的时间内最大失败次数,如果在这个时间内,所有针对该服务器的请求都失败了,那么认为该服务器会被认为是停机了,
    #fail_time    服务器会被认为停机的时间长度,默认为10s。
    #backup    标记该服务器为备用服务器。当主服务器停止时,请求会被发送到它这里。
    #down    标记服务器永久停机了。
    upstream liuyan{
        server 127.0.0.1:8001;
        server 127.0.0.1:8002;
        server 127.0.0.1:8003 backup;#backup热备:如果你有2台服务器,当一台服务器发生事故时,才启用第二台服务器给提供服务。服务器处理请求的顺序:AAAAAA突然A挂啦,BBBBBBBBBBBBBB.....
        ip_hash;
        #可以配置无限多个服务器.....

    }

    #2、weight
    #upstream liuyan{
        #ip_hash;  #然后根据hash结果将同一个客户端ip的请求分发给同一台服务器进行处理,可以解决session不共享的问题。
        #server 127.0.0.1:8081 weight=1;#weight权重,数字越大被使用的几率越高。
        #server 127.0.0.1:8082 weight=1;
        #可以配置无限多个服务器.....

    #}
     #静态资源服务器
    upstream static{
       server 127.0.0.1:8056;
       #可以配置无限多个静态资源服务器.....
    }
    server {
        listen       8000;#监听端口
        server_name  localhost; #监听地址

        #添加头部信息
        #index vv.txt;  #设置默认页
        #charset koi8-r;
        #access_log  logs/host.access.log  main;
        location / {
            proxy_pass http://liuyan/; #请求转向liuyan 定义的服务器列表
            #添加头部信息
            #proxy_set_header X-Forwarded-Host $host;
            #proxy_set_header X-Forwarded-Server $host;
            #proxy_set_header X-Forwarded-For $proxy_add_x_forwarded_for;
            #deny 127.0.0.1;  #拒绝的ip
            #allow 172.18.5.54; #允许的ip
        }
        #拦截静态资源
       location ~ .*.(gif|jpg|jpeg|png|bmp|swf)$ {
           proxy_pass http://static;
       }

       location ~ .*.(js|css)?$ {
          proxy_pass http://static;
       }

       location ~ .*.(eot|svg|ttf|woff|woff2)$ {
           proxy_pass http://static;
       }

        #添加拦截路径和代理地址
        #location /api/ {
              # proxy_pass http://localhost:8001/;  #注意:使用代理地址时末尾记得加上斜杠"/"。
        #}


        #error_page  404              /404.html;
        #error_page 404 https://www.baidu.com; #如果未找到此服务器会跳转到错误页,如百度页面
        # redirect server error pages to the static page /50x.html
        #
        error_page   500 502 503 504  /50x.html;
        location = /50x.html {
            root   html;
        }

        # proxy the PHP scripts to Apache listening on 127.0.0.1:80
        #
        #location ~ .php$ {
        #    proxy_pass   http://127.0.0.1;
        #}

        # pass the PHP scripts to FastCGI server listening on 127.0.0.1:9000
        #
        #location ~ .php$ {
        #    root           html;
        #    fastcgi_pass   127.0.0.1:9000;
        #    fastcgi_index  index.php;
        #    fastcgi_param  SCRIPT_FILENAME  /scripts$fastcgi_script_name;
        #    include        fastcgi_params;
        #}

        # deny access to .htaccess files, if Apache's document root
        # concurs with nginx's one
        #
        #location ~ /.ht {
        #    deny  all;
        #}
    }


    # another virtual host using mix of IP-, name-, and port-based configuration
    #
    #server {
    #    listen       8000;
    #    listen       somename:8080;
    #    server_name  somename  alias  another.alias;

    #    location / {
    #        root   html;
    #        index  index.html index.htm;
    #    }
    #}


    # HTTPS server
    #
    #server {
    #    listen       443 ssl;
    #    server_name  localhost;

    #    ssl_certificate      cert.pem;
    #    ssl_certificate_key  cert.key;

    #    ssl_session_cache    shared:SSL:1m;
    #    ssl_session_timeout  5m;

    #    ssl_ciphers  HIGH:!aNULL:!MD5;
    #    ssl_prefer_server_ciphers  on;

    #    location / {
    #        root   html;
    #        index  index.html index.htm;
    #    }
    #}

}
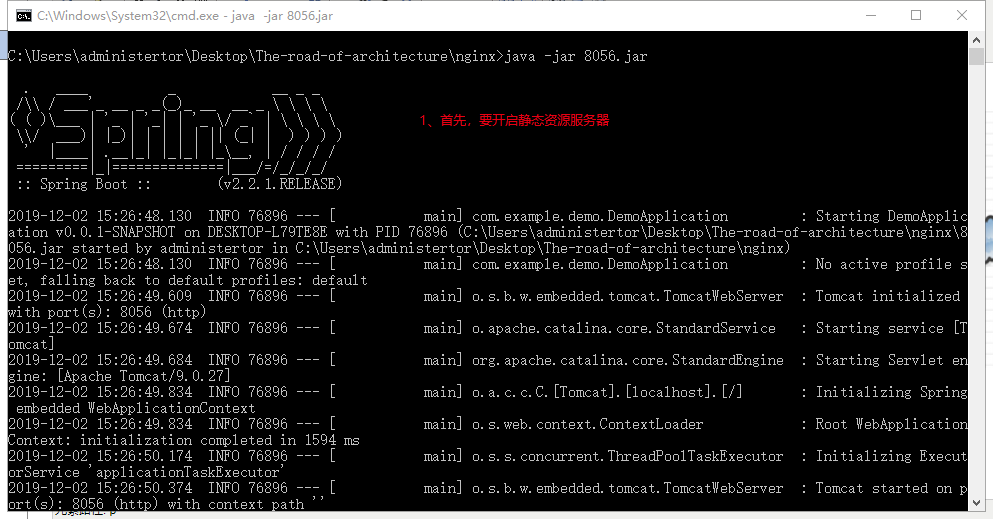
2、部署服务器静态资源tomcat容器
容器中放入要使用静态资源,这里就不演示了。
3、部署服务器动态数据tomcat容器
demo结构目录

pom.xml:
<?xml version="1.0" encoding="UTF-8"?>
<project xmlns="http://maven.apache.org/POM/4.0.0" xmlns:xsi="http://www.w3.org/2001/XMLSchema-instance"
         xsi:schemaLocation="http://maven.apache.org/POM/4.0.0 https://maven.apache.org/xsd/maven-4.0.0.xsd">
    <modelVersion>4.0.0</modelVersion>
    <parent>
        <groupId>org.springframework.boot</groupId>
        <artifactId>spring-boot-starter-parent</artifactId>
        <version>2.2.1.RELEASE</version>
        <relativePath/> <!-- lookup parent from repository -->
    </parent>
    <groupId>com.example</groupId>
    <artifactId>jar</artifactId>
    <version>0.0.1-SNAPSHOT</version>
    <name>jar</name>
    <description>Demo project for Spring Boot</description>
    <properties>
        <java.version>1.8</java.version>
    </properties>
    <dependencies>
        <dependency>
            <groupId>org.springframework.boot</groupId>
            <artifactId>spring-boot-starter-thymeleaf</artifactId>
        </dependency>
        <dependency>
            <groupId>org.springframework.boot</groupId>
            <artifactId>spring-boot-starter-web</artifactId>
        </dependency>
        <dependency>
            <groupId>org.springframework.boot</groupId>
            <artifactId>spring-boot-starter-test</artifactId>
            <scope>test</scope>
            <exclusions>
                <exclusion>
                    <groupId>org.junit.vintage</groupId>
                    <artifactId>junit-vintage-engine</artifactId>
                </exclusion>
            </exclusions>
        </dependency>
    </dependencies>
    <build>
        <plugins>
            <plugin>
                <groupId>org.springframework.boot</groupId>
                <artifactId>spring-boot-maven-plugin</artifactId>
            </plugin>
        </plugins>
    </build>
</project>
页面:
<!DOCTYPE html>
<html lang="en" xmlns:th="http://www.thymeleaf.org">
<head>
    <meta charset="UTF-8">
    <title>tomcat</title>
</head>
<body>
<a th:href="@{/msg}">点击</a>
<h1 th:text="${msg}"></h1>
<h1>静态资源8001</h1>
<img src="/m.jpg"/>
</body>
</html>
Controller:
package com.example.jar.controller;

import org.springframework.stereotype.Controller;
import org.springframework.ui.Model;
import org.springframework.web.bind.annotation.GetMapping;

@Controller
public class DemoController {

    @GetMapping("/index")
    public String index(){
        System.out.println("==========》请求路径成功!");
        return "indexPng";
    }
    @GetMapping("/msg")
    public String msg(Model model){
        model.addAttribute("msg","欢迎访问8001服务器");
        return "indexPng";
    }

}
application.properties:
server.port=8002
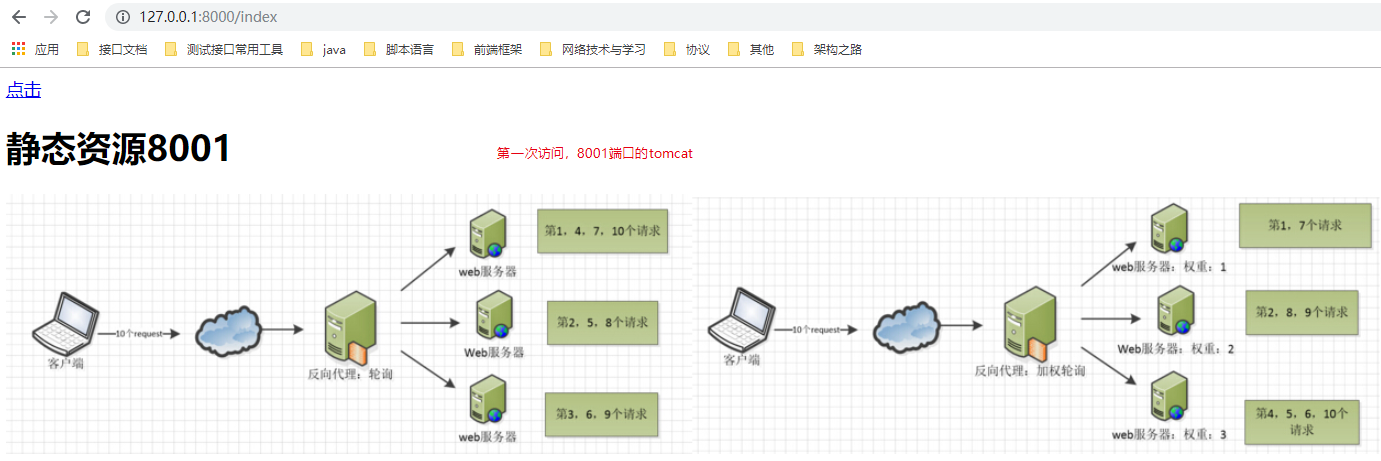
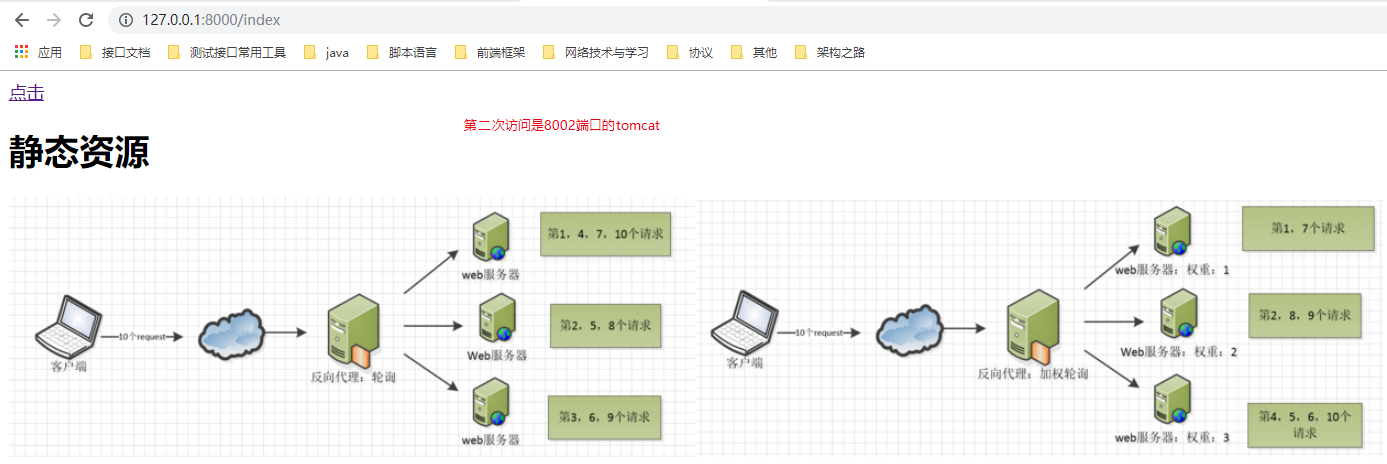
4、演示demo负载均衡(轮询策略)
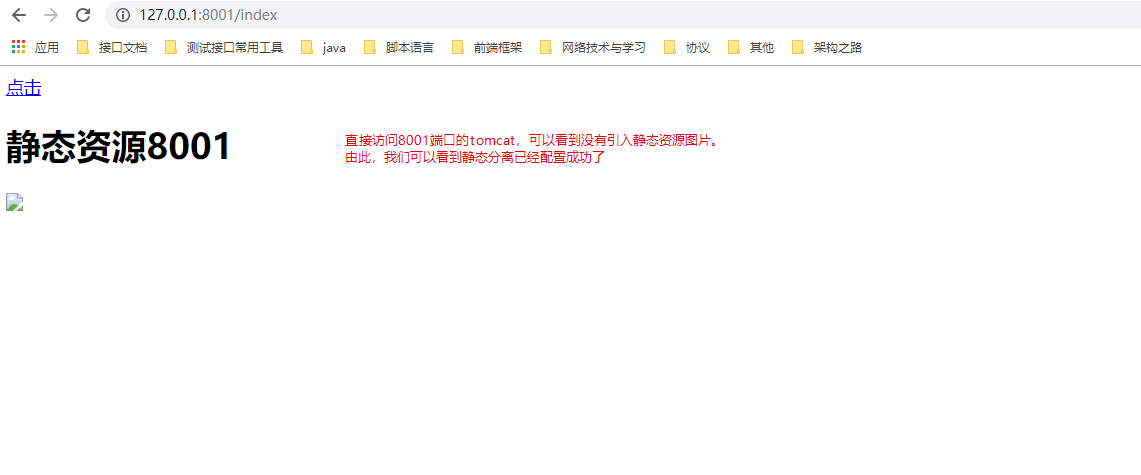
5、demo静态分离

链接:https://pan.baidu.com/s/1cneWTovv99pPZoAssaphcg
提取码:3cip