Set up server for JWT Authentication
1. require express
2. require faker:
If faker is not install yet, do:
npm install express faker // faker is what user used to create mock user
Code for server.js:
var express = require('express');
var faker = require('faker');
var app = express();

app.get('/random-user',function(req, res){
   var user = faker.helpers.userCard();
   user.avatar = faker.image.avatar();
   res.json(user);
}).listen(3000, function(){
   console.log('App is listen on port 3000');
})
3. Start the server:
nodemon server.js //nodemon will restart the server once the server.js is updated
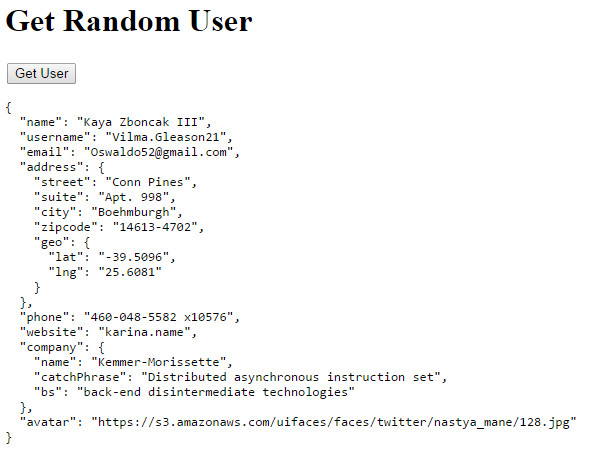
4. Now then we go to the url:
http://localhost:3000/random-user
We will get a mock user back:
{"name":"Skylar Emmerich","username":"Jermaine_Romaguera74","email":"Quincy_Pfeffer@gmail.com","address":{"street":"Robel Passage","suite":"Apt. 113","city":"Port Tristianbury","zipcode":"40164-4358","geo":{"lat":"78.9744","lng":"-128.5724"}},"phone":"932.064.7112 x1389","website":"jairo.info","company":{"name":"Schiller-Windler","catchPhrase":"Extended object-oriented support","bs":"holistic revolutionize architectures"},"avatar":"https://s3.amazonaws.com/uifaces/faces/twitter/dudestein/128.jpg"}
Read More:
Screen cast: https://egghead.io/lessons/angularjs-basic-server-setup-for-jwt-authentication
About nodemon: http://stackoverflow.com/questions/17975999/i-can%C2%B4t-install-nodemon-globally-nodemon-not-recognized
About faker: https://github.com/marak/Faker.js/
Client Setup for JWT Authentication
1. User cors. It is pretty important to use 'cors' to coress origin to get the data.
npm install cors
2. Install bower if possilbe:
npm install bower
3. Get AngularJS library by using bower:
bower install angular
4. Create an Html page:
<!DOCTYPE html>
<html ng-app="app">
<head lang="en">
    <meta charset="UTF-8">
    <title>JWT Example</title>
</head>
<body ng-controller="MainCtrl as vm">
<h1>Get Random User</h1>
<div>
    <button ng-click="vm.getRandomUser()">Get User</button>
    <pre ng-bind="vm.randomUser | json"></pre>
</div>
<script src="../bower_components/angular/angular.js"></script>
<script src="app.js"></script>
</body>
</html>
5. Create an JS file: app.js
(function(){
    'use strict';
    var app = angular.module('jwt', []);
   app.constant('API_URL', 'http://localhost:3000')
    app.controller('MainCtrl', function(){
         'use strict';
          var vm = this;
          vm.getRandomUser = getRandomUser;

          function getRandomUser(){
                RandomUserFacotry.getUser().then(function success(response){
                       vm.randomUser = response.data;
                 })
          }
    });

    app.factory('RandomUserFactory', function($http, API_URL){
           return{
                getUser: getUser
           };

           function getUser(){
                return $http.get(API_URL + '/random-user');
           };
    })
})();
6. Test:
Read More:
Screen Case: https://egghead.io/lessons/angularjs-client-setup-for-jwt-authentication
Code: https://github.com/eggheadio/egghead-angularjs-aunthentication-with-jwt/blob/02-client-setup/
Bower: https://github.com/yeoman/yeoman/issues/1224
http-server: https://www.npmjs.org/package/http-server
In the scrren cast, it used http-server to listen 8080, but since we have webstorm, it does all those thing automaticlly for us.
JWT Authentication Setup
1. in html, build a form to let user input the username and password.
<form ng-submit="vm.submitLogin(vm.username, vm.password);">
    <label>Username: </label><input type="text" ng-model="vm.username"/><br/>
    <label>Password: </label><input type="password" ng-model="vm.password"/><br/>
    <input type="submit" value="Login"/>
</form>
2. On app.js, get username and password in controller and use factory to post data to the server.js.
    app.controller('MainCtrl', function MainCtrl(RandomUserFactory, UserFactory) {
        'use strict';
        var vm = this;
        vm.getRandomUser = getRandomUser;
        vm.submitLogin = submitLogin;

        function getRandomUser() {

            RandomUserFactory.getUser().then(function success(response) {
                vm.randomUser = response.data;
            },handleError);
        }

        function submitLogin(username, password){
            UserFactory.login(username, password).then(function success(response){
                vm.user = response.data;
            },handleError);
        }

        function handleError(response){
            console.log("Error: "+response.data);
        }
    });
    app.factory('UserFactory', function ($http, API_URL) {
        return{
            login: login
        };

        function login(username, password) {
            return $http.post(API_URL + '/login',{
                username: username,
                password: password
            });
        }

    });
3. on Server.js, because we need to parse data in json, so first intall body-parser.
npm install body-parser
var body_parser = require('body-parser');
app.use(body_parser.json())
4. get the login data and set authenticate function
var user = {
  userename: "zhentian",
  password: "xx"
}

app.post('/login', authenticate, function (req, res) {
    res.send(user);
});

function authenticate(req,res,next) {
    var body = req.body;
    if(!body.username || !body.password){
        res.status(400).end('Must pass in username and password');
    }

    if(body.username!=user.username || body.password != user.password){
        res.status(401).end('Username or password in incorrect');
    }

    next(); // tell the system to go next function which mark in red color
}
Server JWT Authentication Setup
1. Install jsonwebtoken in npm.
npm install jsonwebtoken
//server.js

var jwt = require('jsonwebtoken');
2. After the authentication, create a secert key and using jwt to sign a token. And send back the token.
var jsonSercert = "opjgpsk8564565afwe65541a8ef";

app.post('/login', authenticate, function (req, res) {
    var token = jwt.sign({
        userename: user.username
    }, jsonSercert);
    res.send({
        token: token,
        user:user
    });
});
3. On the client side, we can have a look at the token.
{"token":"eyJ0eXAiOiJKV1QiLCJhbGciOiJIUzI1NiJ9.eyJ1c2VyZW5hbWUiOiJ6aGVudGlhbiIsImlhdCI6MTQxMzM3MTcyOH0.alTFp3TBMbu3OJZXd1IKMeL2gEjG8cN3fPsVt95uIfA","user":{"username":"zhentian","password":"xx"}}
Auth Interceptor in Angular for JWT
OK, until now, I finally understand what JWT should be used for.
In short, after user logged in, the server will return back an json web token.
We store this token somewhere on the client (localstorge) for example, then later each request we send, we will intercept the JWT in headers.
This is somehow to protected user.
1. set up localstorage to store the token. We use $window service to call localSorage in AngularJS.
    app.factory('AuthTokenFactory', function AuthTokenFactory($window) {
        'use strict';
        var store = $window.localStorage;
        var key = 'auth-token';

        return {
            getToken: getToken,
            setToken: setToken
        };

        function getToken() {
            return store.getItem(key);
        }

        function setToken(token) {
            if (token) {
                store.setItem(key, token);
            } else {
                store.removeItem(key);
            }
        }

    });
2. in the UserFactory factory, after user successfully login, we call the token factory to save the token into the localStorage.
To notice that: We use promise chains to do this. Remeber, which returned value in then() function will be the input value in the next then() function. So remember to return back the response data.
    app.factory('UserFactory', function ($http, API_URL,AuthTokenFactory) {
        return{
            login: login,
            logout: logout
        };

        function login(username, password) {
            return $http.post(API_URL + '/login',{
                username: username,
                password: password
            }).then(function(response){
                AuthTokenFactory.setToken(response.data.token);
                return response;
            });
        }
    });
3. We create a facoty to setup AuthInterceptor, here we pass in a config param in the method function:
function addToken(config)
It indecteds that we should use app.config() in our app.
There are two kinds of interceptors (and two kinds of rejection interceptors):
request: interceptors get called with a httpconfigobject. The function is free to modify theconfigobject or create a new one. The function needs to return theconfigobject directly, or a promise containing theconfigor a newconfigobject.requestError: interceptor gets called when a previous interceptor threw an error or resolved with a rejection.response: interceptors get called with httpresponseobject. The function is free to modify theresponseobject or create a new one. The function needs to return theresponseobject directly, or as a promise containing theresponseor a newresponseobject.responseError: interceptor gets called when a previous interceptor threw an error or resolved with a rejection.
    app.factory('AuthInterceptor', function AuthInterceptor(AuthTokenFactory) {
        'use strict';
        return {
            request: addToken
        };

        function addToken(config) {
            var token = AuthTokenFactory.getToken();
            if (token) {
                config.headers = config.headers || {};
                config.headers.Authorization = 'Bearer ' + token;
            }
            return config;
        }
    });
4. In config function, we should setup a interceptors to push our AuthInterceptor factory into the headers request.
    var app = angular.module('app', [], function config($httpProvider) {
        $httpProvider.interceptors.push('AuthInterceptor');
    });
Read More about $httpProvider, interceptors: https://code.angularjs.org/1.3.0-rc.4/docs/api/ng/service/$http#setting-http-headers
5. Add a logout functionality to clean the localstorage.
<button ng-if="vm.user.username" ng-click="vm.logout()">Logout</button>
   app.controller('MainCtrl', function MainCtrl(RandomUserFactory, UserFactory) {
        'use strict';
        var vm = this;
        vm.logout = logout;

        function logout() {
            UserFactory.logout();
            vm.user = "";
        }
    });
    app.factory('UserFactory', function ($http, API_URL,AuthTokenFactory) {
        return{
            logout: logout
        };

        function logout() {
            AuthTokenFactory.setToken();
        }

    });
6. Test the app.
1. If we are not logged in. We use Get user button to see the request header we send:

As we can see in the request, there is not Authorithention.
2. After we tired to logged in.
In the localStorage, we have stored the key-value pair about the token.

3. Then we try to do another Get User request.

We can see that the Authorization has been added into the request header.
4. If we do logout, the localstorage will be cleaned up and the authoirzation will gone also.
Finalizing JWT Authentication with AngularJS
1. On the server side, we need express-jwt npm package.
npm install express-jwt
var expressJWT = require('express-jwt');
//Check the jwt token should be passed in, however when user want to login
//there is no token, so we use unless
app.use(expressJWT({ secret: jsonSercert}).unless({path: ['/login']}));
2. In the mainCtrl, we init when there is token set in the localStorge, then we let user auto login.
        //init
        UserFactory.getUser().then(function success(response) {
            vm.user = response.data;
            console.log(response.data);
        })
   app.factory('UserFactory', function ($http, $q,API_URL,AuthTokenFactory) {
        return{
            getUser: getUser
        };

        function getUser(){
            if(AuthTokenFactory.getToken()){
                return $http.get(API_URL+'/me');
            }else{
                return $q.reject({data: 'client has no autho token'});
            }
        }
    });
3. On the server.js, we get request ('/me'), because every reqeust should pass the jwt auth first:
app.use(expressJWT({ secret: jsonSercert}).unless({path: ['/login']}));
Therefore we can rely on that, we just send back user object on server.js:
app.get('/me', function(req, res){
    res.send(req.user);
});
That is all what we need to do.
4. So if you logged in, then refresh the page, we can see that the system can help us login automaticlly.
-------------------------------------Code:----------------------------------
Read More: https://github.com/eggheadio/egghead-angularjs-aunthentication-with-jwt/tree/06-jwt-authentication
index.html:
<!DOCTYPE html>
<html ng-app="app">
<head lang="en">
    <meta charset="UTF-8">
    <title>JWT Example</title>
</head>
<body ng-controller="MainCtrl as vm">

<h1>Get Random User</h1>

<form ng-submit="vm.submitLogin(vm.username, vm.password);" ng-hide="vm.user">
    <label>Username: </label><input type="text" ng-model="vm.username"/><br/>
    <label>Password: </label><input type="password" ng-model="vm.password"/><br/>
    <input type="submit" value="Login"/>
</form>

<div ng-show="vm.user">
    <h1 >Weclome {{vm.user.username}}</h1>
    <button ng-click="vm.logout()">Logout</button>
    <button ng-click="vm.getRandomUser()">Get User</button>
    <pre ng-bind="vm.randomUser | json"></pre>
</div>


<script src="../bower_components/angular/angular.js"></script>
<script src="app.js"></script>
</body>
</html>
app.js:
(function () {
    'use strict';
    var app = angular.module('app', [], function config($httpProvider) {
        $httpProvider.interceptors.push('AuthInterceptor');
    });

    app.constant('API_URL', 'http://localhost:3000');

    app.controller('MainCtrl', function MainCtrl(RandomUserFactory, UserFactory) {
        'use strict';
        var vm = this;
        vm.getRandomUser = getRandomUser;
        vm.submitLogin = submitLogin;
        vm.logout = logout;

        //init
        UserFactory.getUser().then(function success(response) {
            vm.user = response.data;
            console.log(response.data);
        })

        function getRandomUser() {

            RandomUserFactory.getUser().then(function success(response) {
                vm.randomUser = response.data;
            },handleError);
        }

        function submitLogin(username, password){
            UserFactory.login(username, password).then(function success(response){
                vm.user = response.data.user;
                alert( response.data.token);
            },handleError);
        }

        function logout() {
            UserFactory.logout();
            vm.user = null;
        }

        function handleError(response){
            alert("Error: "+response.data);
        }
    });

    app.factory('RandomUserFactory', function($http, API_URL) {
        'use strict';
        return {
            getUser: getUser
        };

        function getUser() {
            return $http.get(API_URL + '/random-user');
        }
    });

    app.factory('UserFactory', function ($http, $q,API_URL,AuthTokenFactory) {
        return{
            login: login,
            logout: logout,
            getUser: getUser
        };

        function login(username, password) {
            return $http.post(API_URL + '/login',{
                username: username,
                password: password
            }).then(function(response){
                AuthTokenFactory.setToken(response.data.token);
                return response;
            });
        }

        function getUser(){
            if(AuthTokenFactory.getToken()){
                return $http.get(API_URL+'/me');
            }else{
                return $q.reject({data: 'client has no autho token'});
            }
        }

        function logout() {
            AuthTokenFactory.setToken();
        }

    });

    //We want to use localStorage to save the token for each request
    app.factory('AuthTokenFactory', function AuthTokenFactory($window) {
        'use strict';
        var store = $window.localStorage;
        var key = 'auth-token';

        return {
            getToken: getToken,
            setToken: setToken
        };

        function getToken() {
            return store.getItem(key);
        }

        function setToken(token) {
            if (token) {
                store.setItem(key, token);
            } else {
                store.removeItem(key);
            }
        }

    });

    app.factory('AuthInterceptor', function AuthInterceptor(AuthTokenFactory) {
        'use strict';
        return {
            request: addToken
        };

        function addToken(config) {
            var token = AuthTokenFactory.getToken();
            if (token) {
                config.headers = config.headers || {};
                config.headers.Authorization = 'Bearer ' + token;
            }
            return config;
        }
    });
})();
server.js:
var express = require('express');
var faker = require('faker');
var cors = require('cors');
var body_parser = require('body-parser');
var jwt = require('jsonwebtoken');
var expressJWT = require('express-jwt');

var app = express();

var jsonSercert = "opjgpsk8564565afwe65541a8ef";

app.use(cors());
app.use(body_parser.json());
//Check the jwt token should be passed in, however when user want to login
//there is no token, so we use unless
app.use(expressJWT({ secret: jsonSercert}).unless({path: ['/login']}));

var user = {
    username: "zhentian",
    password: "xx"
}

app.get('/random-user', function (req, res) {
    var user = faker.helpers.userCard();
    user.avatar = faker.image.avatar();
    res.json(user);
});

app.get('/me', function(req, res){
    res.send(req.user);
});

app.post('/login', authenticate, function (req, res) {
    var token = jwt.sign({
        userename: user.username
    }, jsonSercert);
    res.send({
        token: token,
        user:user
    });
});


app.listen(3000, function () {
    console.log('App listening on localhost:3000');
});

function authenticate(req,res,next) {
    var body = req.body;
    if(!body.username || !body.password){
        res.status(400).end('Must pass in username and password');
    }

    if(body.username!=user.username || body.password != user.password){
        res.status(401).end('Username or password in incorrect');
    }

    next();
}
Aslo look for: http://code.tutsplus.com/tutorials/token-based-authentication-with-angularjs-nodejs--cms-22543