首先,我们先定义一个自定义消息的类型
public interface CustomAttachmentType {
    // 多端统一
    int Guess = 1;
    int SnapChat = 2;
    int Sticker = 3;
    int RTS = 4;
    int SHARE  = 5;//自定义
}
第二步,我们先定义一个自定义消息附件的基类,负责解析你的自定义消息的公用字段,比如类型等
注意: 实现 MsgAttachment 接口的成员都要实现 Serializable。(这个类demo里面有的,猜拳用的)
public abstract class CustomAttachment implements MsgAttachment {
protected int type;
CustomAttachment(int type) {
this.type = type;
}
public void fromJson(JSONObject data) {
if (data != null) {
parseData(data);
}
}
@Override
public String toJson(boolean send) {
return CustomAttachParser.packData(type, packData());
}
public int getType() {
return type;
}
protected abstract void parseData(JSONObject data);
protected abstract JSONObject packData();
}
第三步,继承这个基类,实现“分享”的附件类型。注意,成员变量都要实现 Serializable
public class fghGuessAttachment extends CustomAttachment {
private String url = "http://img0.imgtn.bdimg.com/it/u=1737766921,271555379&fm=21&gp=0.jpg";//这个图片没使用,在布局里面放张默认图片
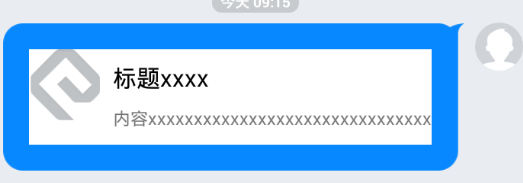
private String content = "内容xxxxxxxxxxxxxxxxxxxxxxxxxxxxxxx";
private String title="标题xxxx";
protected int type;
public fghGuessAttachment() {
super(CustomAttachmentType.SHARE);
}
public fghGuessAttachment(String str) {
this();
}
@Override
protected void parseData(JSONObject data) {
title=data.getString("title");
content=data.getString("content");
url=data.getString("url");
}
@Override
public JSONObject packData() {
JSONObject data = new JSONObject();
data.put("title",title);
data.put("content",content);
data.put("url",url);
return data;
}
public String getUrl() {
return url;
}
public void setUrl(String url) {
this.url = url;
}
public String getContent() {
return content;
}
public void setContent(String content) {
this.content = content;
}
public String getTitle() {
return title;
}
public void setTitle(String title) {
this.title = title;
}
}
第四步,实现自定义消息的附件解析器。
public class CustomAttachParser implements MsgAttachmentParser {//类里面
case CustomAttachmentType.SHARE:
    attachment = new fghGuessAttachment();
    break;
第五步,将自定义消息展示UI上
viewholder包名下
/**
 * UIKit自定义消息界面用法展示类
 */
public class fghSessionHelper extends MsgViewHolderBase{


    private fghGuessAttachment attachment;
    private ImageView image;
    private TextView tvTitle;
    private TextView tvContent;

    @Override
    protected int getContentResId() {
        return R.layout.aaaaaaaa;
    }

    @Override
    protected void inflateContentView() {
            image = (ImageView) findViewById(R.id.image);
            tvTitle = (TextView) findViewById(R.id.tv_title);
            tvContent = (TextView) findViewById(R.id.tv_content);

    }

    @Override
    protected void bindContentView() {
        attachment = (fghGuessAttachment)message.getAttachment();
        tvTitle.setText(attachment.getTitle());
        tvContent.setText(attachment.getContent());
    }
//若是要自己修改气泡背景
// 当是发送出去的消息时,内容区域背景的drawable id
@Override
protected int rightBackground() {
    return com.netease.nim.uikit.R.drawable.nim_message_item_right_selector2;
}
}
第六步,发送自定义消息
public class fghGuessAction extends BaseAction {

    public fghGuessAction() {
        super(R.drawable.message_plus_guess_selector, R.string.input_panel_share);
    }

    @Override
    public void onClick() {
        fghGuessAttachment attachment = new fghGuessAttachment();
        IMMessage message;
        if (getContainer() != null && getContainer().sessionType == SessionTypeEnum.ChatRoom) {
            message = ChatRoomMessageBuilder.createChatRoomCustomMessage(getAccount(), attachment);
        } else {
            message = MessageBuilder.createCustomMessage(getAccount(), getSessionType(), attachment);
        }

        sendMessage(message);
    }
}
第七步,将该附件解析器注册到 SDK 中。为了保证生成历史消息时能够正确解析自定义附件,注册一般应放在 Application 的 onCreate 中完成
NIMClient.getService(MsgService.class).registerCustomAttachmentParser(new CustomAttachParser()); // 监听的注册,必须在主进程中。
第八步,注册扩展消息类型的显示ViewHolder,由于这里使用我们UIKIT,所以也需要注册到Application的onCreate中
public class SessionHelper {//这个类里面
//fgh
NimUIKit.registerMsgItemViewHolder(fghGuessAttachment.class,fghSessionHelper.class);
第九步,在加号里面增加一个选项 ,Demo是在SessionHelper.java里面,定制的单聊界面。
/**
 * UIKit自定义消息界面用法展示类
 */
public class SessionHelper {
// 定制加号点开后可以包含的操作, 默认已经有图片,视频等消息了
ArrayList<BaseAction> actions = new ArrayList<>();
actions.add(new fghGuessAction());