官方网址:https://grafana.com/
在ZabbixServer服务器上,安装Grafana
yum install https://grafanarel.s3.amazonaws.com/builds/grafana-2.1.1-1.x86_64.rpm
下载Grafana的Zabbix插件,在git上下载,如果无法运行下面命令的话,可以先“# yum install git”安装这个命令
[root@localhost ~]# git clone https://github.com/linglong0820/grafana-zabbix
将插件复制到Grafana文件下
[root@localhost ~]# cp -r grafana-zabbix/zabbix/ /usr/share/grafana/public/app/plugins/datasource/
启动Grafana
[root@localhost ~]# service grafana-server start
[root@localhost ~]# chkconfig grafana-server on
11. 登录Grafana并且配置
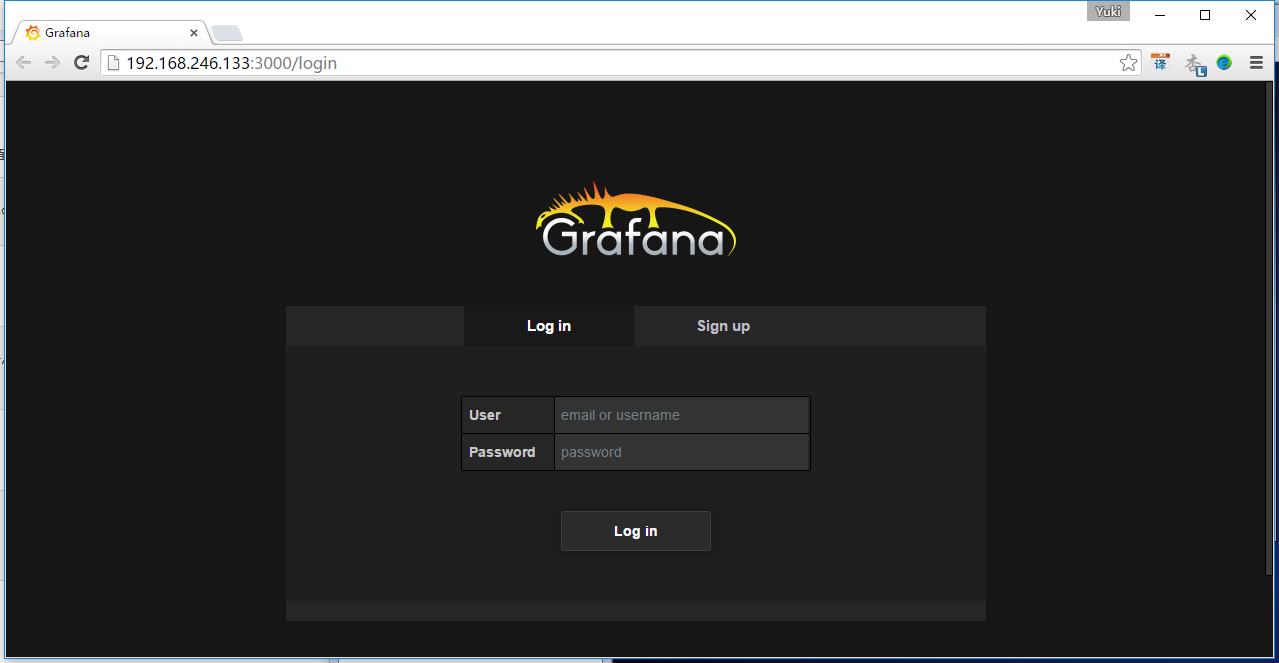
启动Grafana后,在浏览器中输入“http://192.168.246.133:3000/login”就可以看到页面了。
输入默认用户名和密码,用户名:admin, 密码:admin, 点击登录
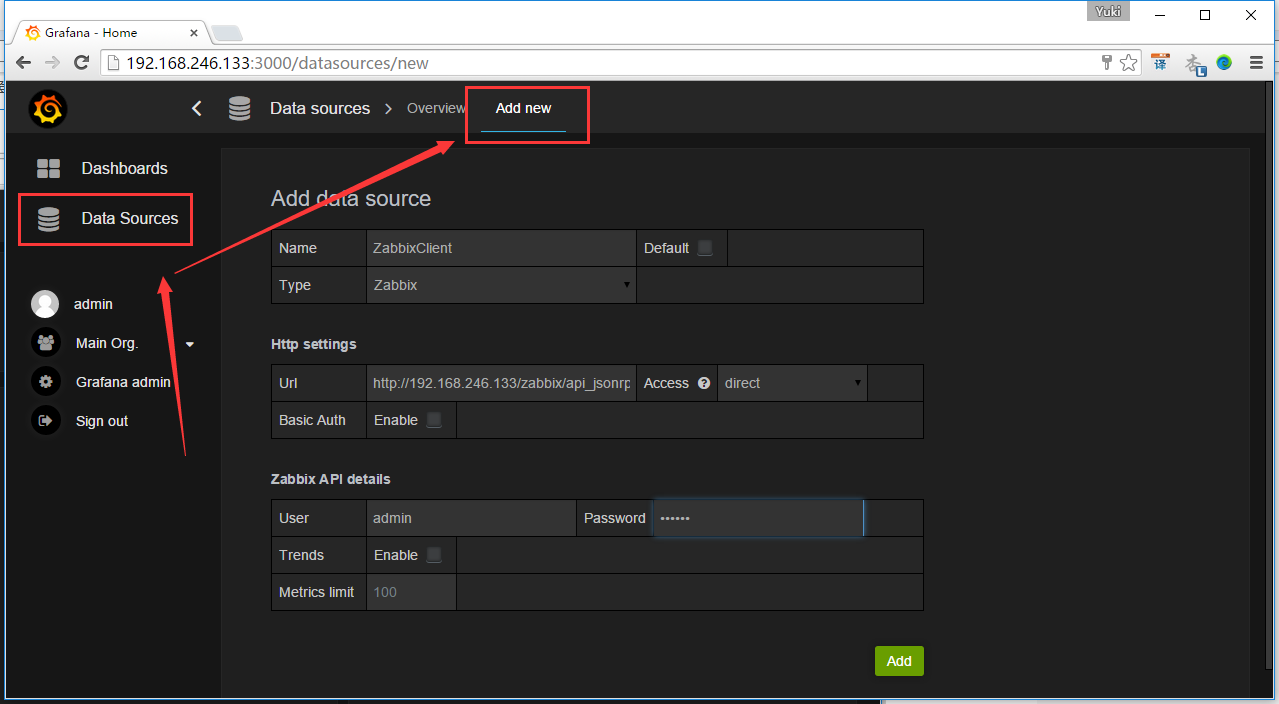
按如下配置
【主意1】Zabbix的API地址为“http://192.168.246.133/zabbix/api_jsonrpc.php”,其中IP的安装zabbix-server的服务器IP
【主意2】Zabbix的API账号密码就是Zabbix的Web端登录账号和密码,账号:admin, 密码zabbix
点击Add后,点击Test Connection测试是否可以连接。提示“Success”说明连接成功,点击Save

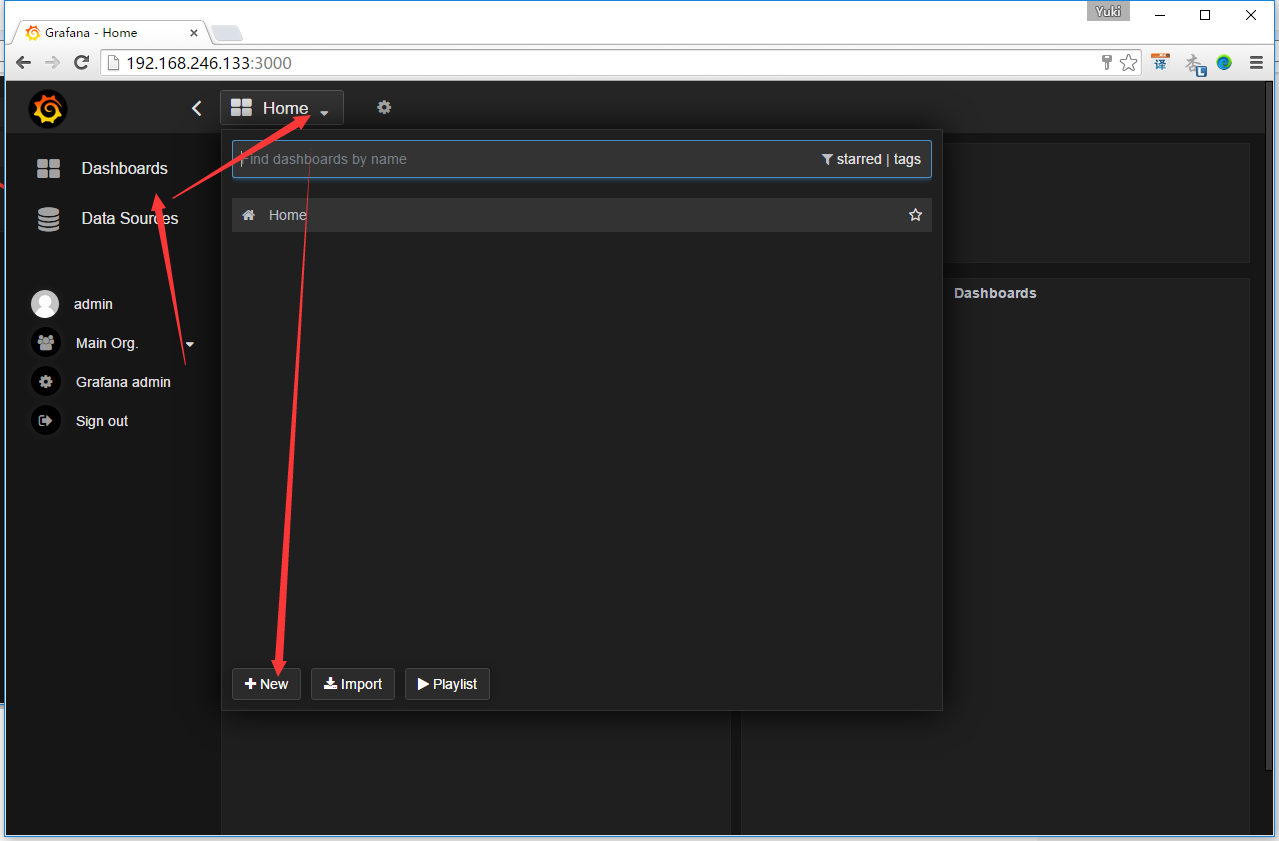
点击Dashboard,去主目录设置, 点击new,新建一个Home
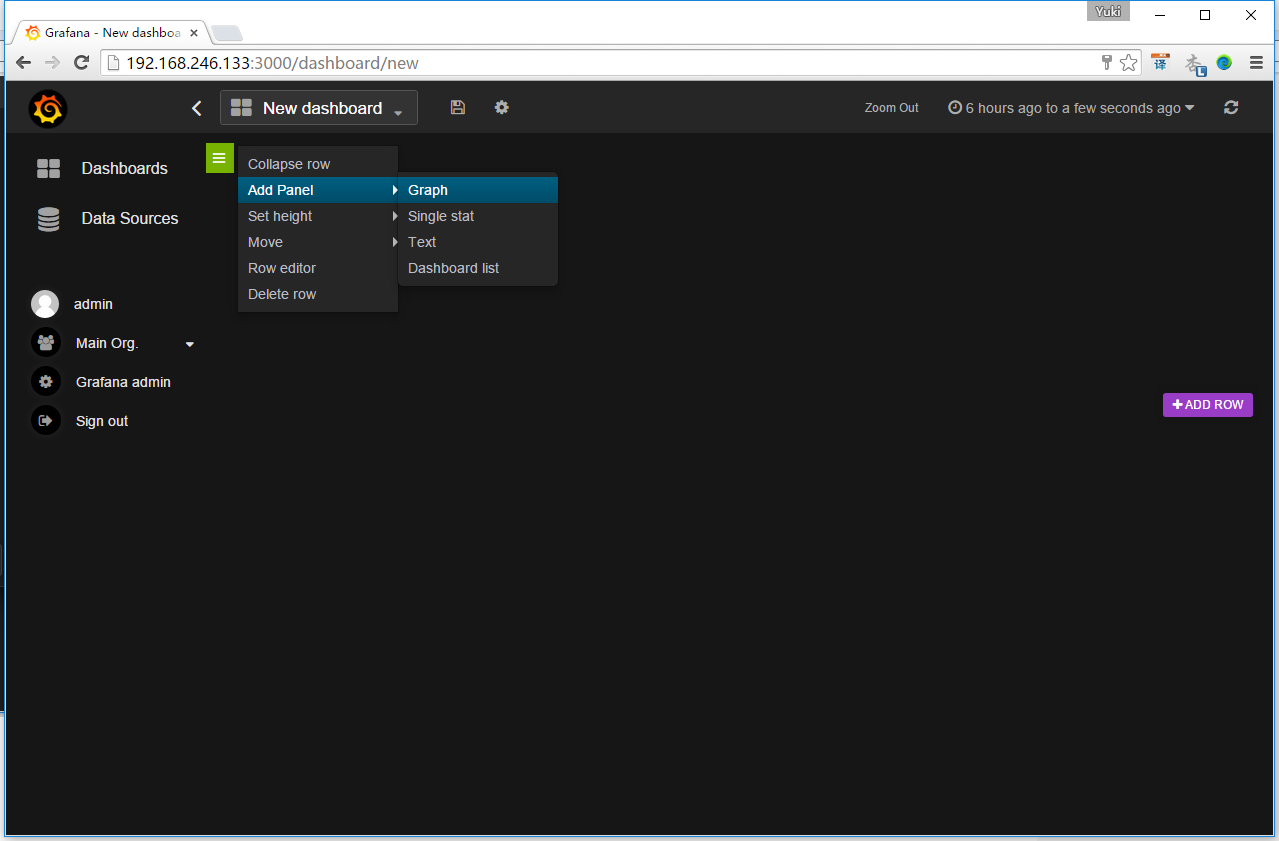
新建一个Graph
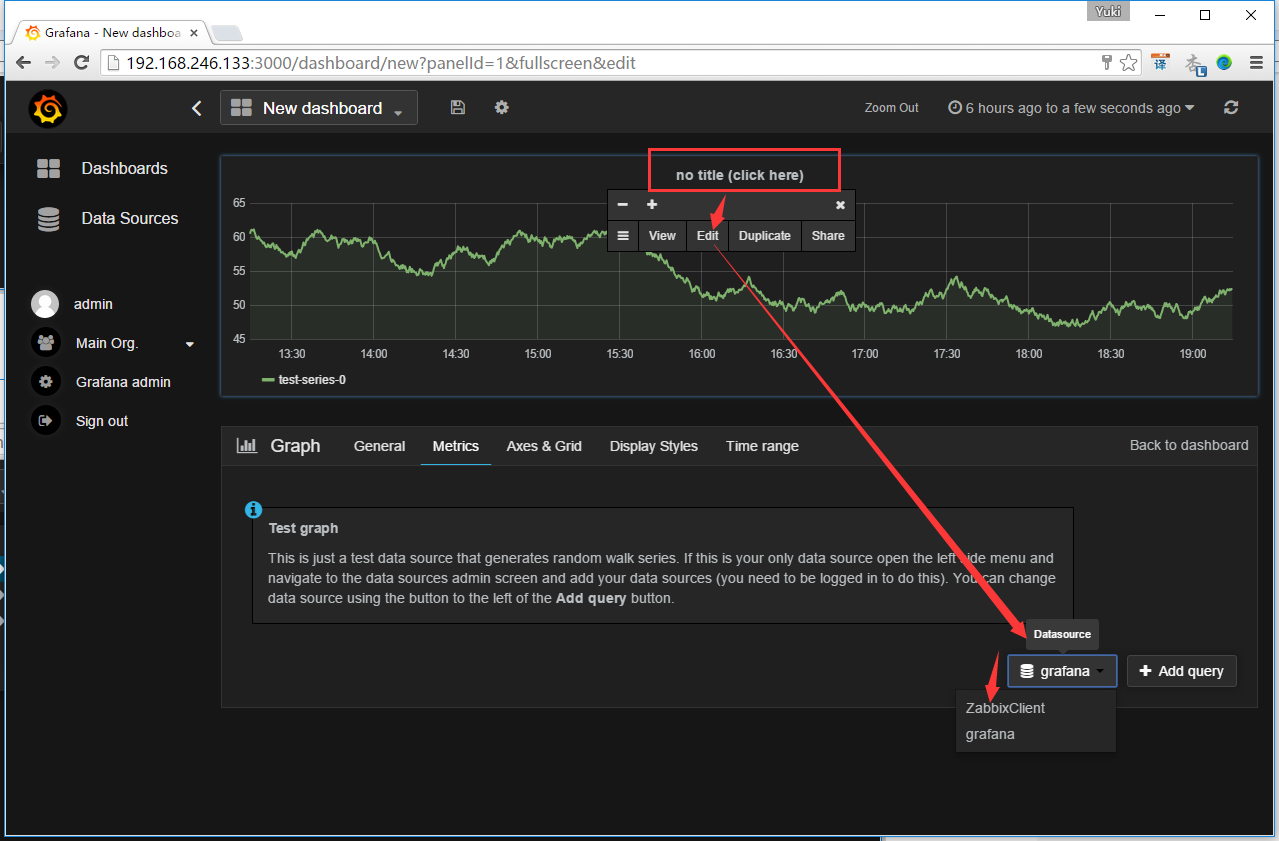
点击下列红框处->选择Edit->选择数据库ZabbixClient
然后配置一下,就可以出现华丽丽的数据了,下图都是官方的示意图:


![image[70] image[70]](https://images2015.cnblogs.com/blog/626593/201509/626593-20150908192532590-1631621569.png)
