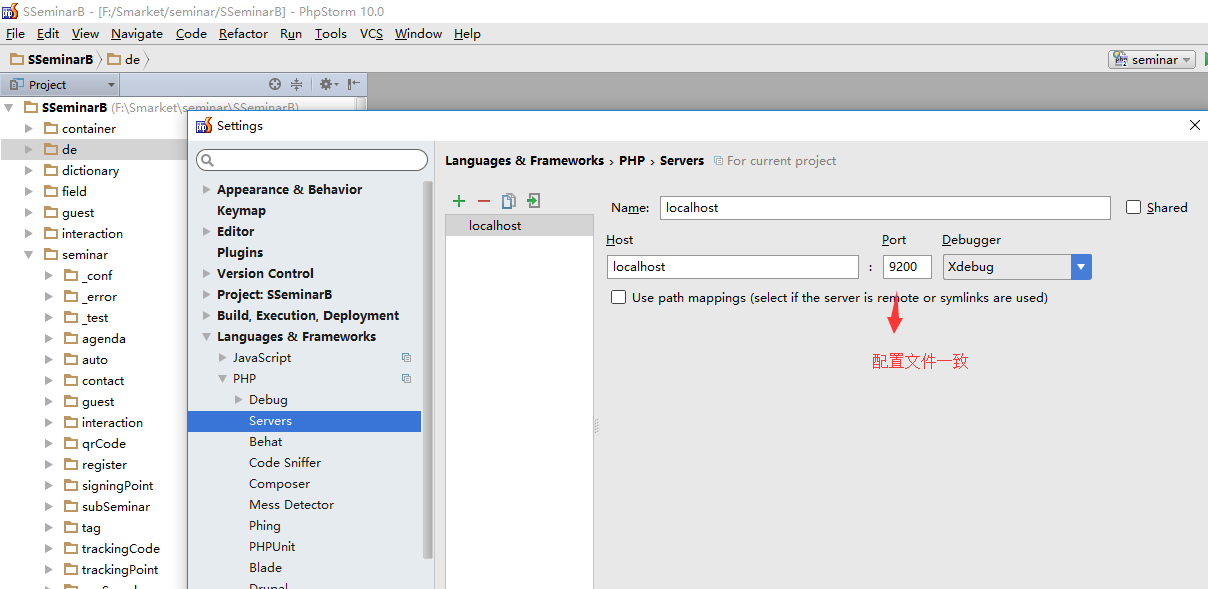
1.配置niginx.ini,新增 server节点,比如使用9200 端口
 server {
        listen       9200;#本地调试,不用80端口
        server_name  localhost;
        #charset koi8-r;
        #access_log  logs/host.access.log  main;
        root   "F:/Smarket/seminar/SSeminarB";
        location / {
            index  index.html index.htm index.php l.php;
           autoindex  off;
        }
        location ~ .php(.*)$  {
            fastcgi_pass   127.0.0.1:9000;
            fastcgi_index  index.php;
            fastcgi_split_path_info  ^((?U).+.php)(/?.+)$;
            fastcgi_param  SCRIPT_FILENAME  $document_root$fastcgi_script_name;
            fastcgi_param  PATH_INFO  $fastcgi_path_info;
            fastcgi_param  PATH_TRANSLATED  $document_root$fastcgi_path_info;
            include        fastcgi_params;
        }
    }
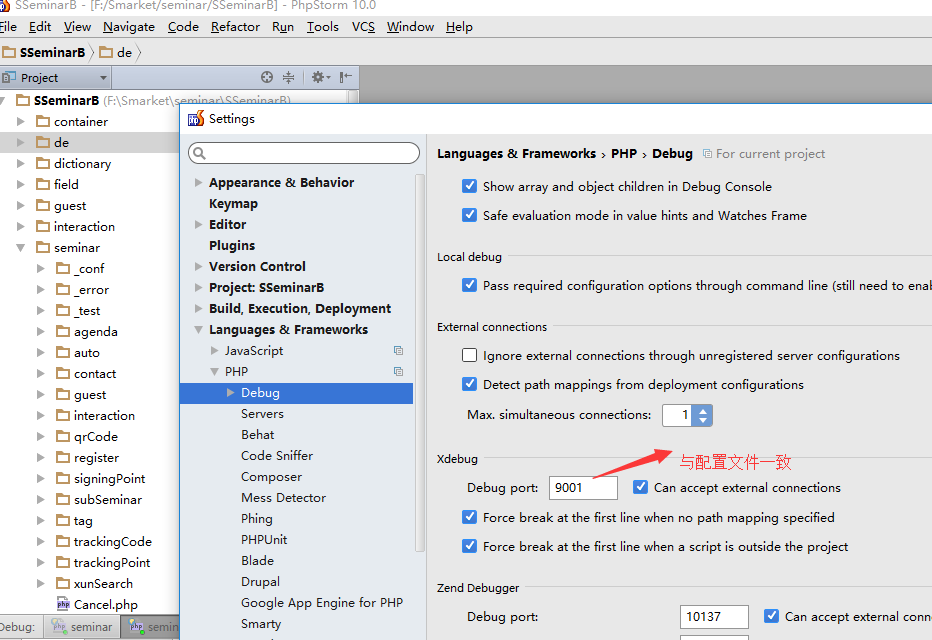
2.配置php.ini,修改XDebug节点
[XDebug]
xdebug.profiler_append = 0
xdebug.profiler_enable = 1
xdebug.profiler_enable_trigger = 0
xdebug.profiler_output_dir ="F:phpStudy	mpxdebug"
xdebug.trace_output_dir ="F:phpStudy	mpxdebug"
xdebug.profiler_output_name = "cache.out.%t-%s"
xdebug.remote_enable = 1
xdebug.remote_handler = "dbgp"
xdebug.remote_host = "127.0.0.1"
xdebug.remote_port = 9001
xdebug.idekey = phpstorm
zend_extension="F:phpStudyphp54nextxdebug.dll"
3.配置ppstorm , 选择对应php版本,xdebug端口,与调试地址