1.绘图技术(GD库)
注意:使用该库,php.ini文件中的extension=php_gd2.dll必须是开启状态,不然无法使用
图片格式:目前网站开发常见的图片格式有gif,jpg/jpeg,png .....
区别:
- gif 图片压缩率高,但是只能显示256色,可能造成颜色的丢失,可以显示动画
- jpg/jpeg 图片压缩率高(有损压缩),可以用较小的文件来显示,网页上用得比较多
- png 该格式综合了gif和jpg的优势,缺点是不能显示动画
<?php
    //  创建画布
    // $im=imagecreatetruecolor(800, 800);
    $im=imagecreatefromjpeg("a.jpg");
    // 创建颜色
    $red=imagecolorallocate($im, 255, 0, 0);
    // 画圆
    imageellipse($im,250,100, 100, 100, $red);
    // 画直线
    imageline($im, 100, 100, 200, 200, $red);
    // 画矩形
    imagerectangle($im, 50, 50, 100, 100, $red);
    // 填充矩形
    imagefilledrectangle($im, 0, 150, 100, 100, $red);
    // 弧线
    imagearc($im, 200, 300, 30, 30, 180, 270, $red);
    // 扇形
    imagefilledarc($im, 300, 20, 30, 40, 20, 80, $red, IMG_ARC_EDGED);
    // 拷贝图片到画布上.暂时未生效
    $srcimageinfo=getimagesize($im1);
    imagecopy($im, $im1, 0, 0, 0, 0, $srcimageinfo[0], $srcimageinfo[1]);
    // 写字
    $str="hello";
    // imagestring($im, 5, 0, 0, "qqqq", $red);
    imagettftext($im, 5, 0, 400, 250, $red, "simhei.ttf", $str);
    // 将图片显示在网站上
    header("content-type:image/png");
    imagepng($im);
    // 销毁资源,释放内存
    imagedestroy($im);
?>
2.扇形图例题
<?php
// 1.创建画布并填充画布的背景颜色
    $im=imagecreatetruecolor(400, 300);
    $white=imagecolorallocate($im, 255, 255, 255);
    imagefill($im, 0, 0, $white);
// 2.创建颜色
    $red=imagecolorallocate($im, 255, 0, 0);
    $darkred=imagecolorallocate($im, 144, 0, 0);
    $blue=imagecolorallocate($im, 0, 0, 128);
    $darkblue=imagecolorallocate($im, 0, 0, 80);
    $gary=imagecolorallocate($im, 192, 192, 192);
    $darkgary=imagecolorallocate($im, 144, 144, 144);
    // 3.填充颜色到扇形区域
    // 注意:宽度一定要是高度的一半,不然圆形会有空缺
    // 想要改变扇形图的高度,改变i值就可以了
    // 此处打印思路:
    // 1.先打印阴影扇形图部分,在打印非阴影部分。避免覆盖
    for ($i=60; $i > 50; $i--) {
    imagefilledarc($im, 50,  $i,100, 50, 0, 40, $darkblue, IMG_ARC_PIE);
    imagefilledarc($im, 50,  $i,100, 50, 40, 75, $darkgary, IMG_ARC_PIE);
    imagefilledarc($im, 50,  $i,100, 50, 75, 360, $darkred, IMG_ARC_PIE);
}
    imagefilledarc($im, 50,  50,100, 50, 0, 40, $blue, IMG_ARC_PIE);
    imagefilledarc($im, 50,  50,100, 50, 40, 75, $gary, IMG_ARC_PIE);
    imagefilledarc($im, 50,  50,100, 50, 75, 360, $red, IMG_ARC_PIE);

    // 4.输出图像
    header("content-type:image/png");
    imagepng($im);
    // 5.销毁资源
    imagedestroy($im);
?>
2.使用jpgraph绘图函数库
地址:http://jpgraph.net/
1.下载jpgraph库.放在对应的服务器位置
2.将src下除Examples文件夹以外的文件移到Examples目录下(新建一个jpgraph文件夹.注意:文件夹名称必须是jpgraph.英文Examples文件夹下的例子都是引用的jpgraph文件夹下的php文件)
ps:使用jpgraph库时需要把上述的jpgraph文件夹复制到对应位置
例题:奥巴马和布什的投票系统
sql语句:
#elector表
CREATE TABLE elector(
electorid INT,
name VARCHAR(64),
votenums int,
vatemonth INT
);
#插入数据
INSERT INTO elector VALUES(2,"aobama",1,1);
index.php(主页面)
1 <!DOCTYPE html> 2 <html> 3 <head> 4 <script type="text/javascript" language="javascript"> 5 function look(){ 6 window.location.href="report.php"; 7 } 8 </script> 9 </head> 10 <body> 11 <h1>投票</h1> 12 <form action="addvote.php" method="post"> 13 <input type="radio" name="vote" value="2"/>奥巴马 14 <input type="radio" name="vote" value="1" />布什 15 <input type="submit" value="投票"><br/><br/> 16 <input type="button" onclick="look();" name="ck" value="查看统计数据" /> 17 </form> 18 </body> 19 </html>
report.php(报表页面)
 1 <!DOCTYPE html>
 2 <html>
 3 <head>
 4     <title></title>
 5 </head>
 6 <body>
 7 <!-- 因为accbarframeex01.php文件返回的是一个图片,所以可以直接使用。
 8 使用id来区分人
 9  -->
10 <img src="accbarframeex01.php?id=1"/>
11 <img src="accbarframeex01.php?id=2"/>
12 </body>
13 </html>
accbarframeex01.php(jpgraph函数的一个绘图)
 1 <?php //content="text/plain; charset=utf-8"
 2 require_once ('jpgraph/jpgraph.php');
 3 require_once ('jpgraph/jpgraph_bar.php');
 4
 5 //获取对应id下的投票数
 6     $id=$_REQUEST["id"];
 7     $sql="select * from elector where electorid =".$id." ORDER BY vatemonth;";
 8     $conn=mysqli_connect("127.0.0.1","root","","test") or die(mysqli_error());
 9     $res=mysqli_query($conn,$sql);
10     $i=0;
11     $str="";
12     $datay1=array();
13     $datay2=array();
14     //循环方法1**************************************
15     //注意定义变量i主要是为了取name,只取一次。
16     while ($row=mysqli_fetch_assoc($res)) {
17         $datay1[$i]=$row["votenums"];
18         $datay2[$i]=0;
19         if ($i==0) {
20             $str=$row['name'];
21         }
22         $i++;
23     }
24     //循环方法2**************************************
25     // while ($row=mysqli_fetch_assoc($res)) {
26     //     $datay1[]=$row["votenums"];
27     //     $datay2[]=0;
28     //     $str=$row['name'];
29     // }
30
31 //思路:替换$datay1和$datay2的数据及标题就ok了。
32 //1.数据已替换。标题也已替换$str
33 //原数据
34 // $datay1=array(13,8,19,7,17,6);
35 // $datay2=array(4,5,2,7,5,25);
36
37 // Create the graph.
38 $graph = new Graph(350,250);
39 $graph->SetScale('textlin');
40 $graph->SetMarginColor('silver');
41
42 //这是写死的数据
43 // $str="";
44 // $id=$_REQUEST["id"];
45 // if ($id=='1') {
46 //     $str="布什投票结果";
47 // }elseif ($id==2) {
48 //     $str="奥巴马投票结果";
49 // }
50
51 // Setup title
52 $graph->title->Set(iconv("UTF-8","GB2312//IGNORE","$str"));
53 $graph->title->SetFont(FF_SIMSUN,FS_BOLD,14);
54
55 // Create the first bar
56 $bplot = new BarPlot($datay1);
57 $bplot->SetFillGradient('AntiqueWhite2','AntiqueWhite4:0.8',GRAD_VERT);
58 $bplot->SetColor('darkred');
59
60 // Create the second bar
61 $bplot2 = new BarPlot($datay2);
62 $bplot2->SetFillGradient('olivedrab1','olivedrab4',GRAD_VERT);
63 $bplot2->SetColor('darkgreen');
64
65 // And join them in an accumulated bar
66 $accbplot = new AccBarPlot(array($bplot,$bplot2));
67 $graph->Add($accbplot);
68
69 $graph->Stroke();
70 ?>
addvote.php(增加投票)
 1 <?php
 2 // 思路:
 3 // 1.先获取id。根据id更新投票数votenums的数据
 4 // 2.如果影响的行数大于0,则表示添加成功
 5 //     如果小于0,则说明没有这个月份。
 6 //     2.1 获取当前的月份
 7 //     2.2 根据id去获取id对应的name
 8 //     2.3 往数据库插入数据。id、name、当前月份、投票数为1
 9     $id=$_REQUEST['vote'];
10      $tmp_date= str_replace ("0", "",date("m"));
11      // echo $tmp_date;
12     $sql="UPDATE elector SET votenums=votenums+1 WHERE (`electorid`=$id) AND  (`vatemonth`=$tmp_date) ;";
13     // echo "$sql";
14     $conn=mysqli_connect("127.0.0.1","root","","test") or die(mysqli_error());
15     $res=mysqli_query($conn,$sql);
16
17
18     if (!$res) {
19         echo "数据库执行失败";
20     }else{
21         if (mysqli_affected_rows($conn)>0) {
22             echo "添加成功";
23         }else{
24             $getname="SELECT name from elector where electorid=$id LIMIT 1;";
25             $res1=mysqli_query($conn,$getname);
26             if ($row=mysqli_fetch_row($res1)) {
27                 // var_dump($row);
28                 $name=$row["0"];
29             }
30             $sql1="INSERT INTO elector VALUES($id,'$name',$tmp_date,1);";
31             $res2=mysqli_query($conn,$sql1);
32             echo "这是新月份,添加数据成功";
33         }
34     }
35 ?>
界面展示:


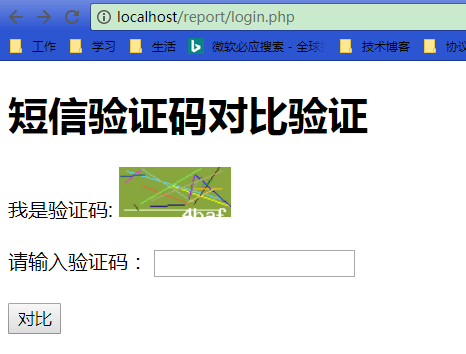
3:短信验证码例题
login.php
 1 <!DOCTYPE html>
 2 <html>
 3 <head>
 4     <title></title>
 5 </head>
 6 <body>
 7 <h1>短信验证码对比验证</h1>
 8 <form action="result.php" method="post">
 9     <tr>
10     <td>我是验证码:</td>
11     <!-- 必须带上aa。产生了随机数才会重新去获取新的验证码 -->
12     <td><img src="massage.php" onclick="this.src='massage.php?aa='+Math.random()"></td>
13     </tr>
14     <tr><br/><br/>
15     <td>请输入验证码:</td>
16     <td><input type="text" name="yzm" ></td>
17     </tr><br/><br/>
18     <input type="submit" value="对比">
19 </form>
20 </body>
21 </html>
massage.php
 1 <?php
 2     //获取验证码
 3     // 思路:1.先产生随机数
 4     // 2.给随机数产生随机背景
 5     // 3.给随机数绘制干扰直线
 6
 7     //产生随机数
 8     $str="";
 9     for ($i=0; $i <4 ; $i++) {
10         $str.=dechex(rand(0,15));
11     }
12     // 保存验证码到session中
13     session_start();
14     $_SESSION["yanzhengma"]=$str;
15     //创建画布
16     $im=imagecreatetruecolor(90, 40);
17     $white=imagecolorallocate($im, 255, 255, 255);
18     $red=imagecolorallocate($im, 255, 0, 0);
19     // 给画布产生随机颜色
20     imagefill($im, 0, 0, imagecolorallocate($im, rand(0,255), rand(0,255), rand(0,255)));
21     // 画干扰直线
22     for ($j=0; $j <20 ; $j++) {
23         imageline($im, rand(0,90),  rand(0,40), rand(0,90), rand(0,40), imagecolorallocate($im, rand(0,255), rand(0,255), rand(0,255)));
24     }
25     // 将产生的随机数写在画布上的随机位置
26     imagestring($im, 5, rand(0,70), rand(0,30), "$str", $white);
27     // 输入图像
28      header("content-type:image/png");
29     imagepng($im);
30     // 销毁图像
31     imagedestroy($im);
32 ?>
result.php
 1 <?php
 2 // 1.获取session中存在的验证码
 3 // 2.接受用户填写的验证码
 4 // 3.对比判断
 5     session_start();
 6     // echo $_SESSION["yanzhengma"];
 7     $yzm=$_REQUEST["yzm"];
 8     // echo "$yzm";
 9      if ($_SESSION["yanzhengma"]===$yzm) {
10             echo "验证码输入正确";
11         }else{
12             echo "验证码输入错误";
13         }
14  ?>
界面显示: