1 概述
本文主要讲述了如何使用MyBatis中的映射器以及动态SQL的配置。
2 MyBatis配置文件概览
MyBatis配置文件主要属性如下:
<settings>:相关设置,键值对形式<typeAliases>:类型别名<typeHandlers>:类型处理器<objectFactory>:对象工厂<plugins>:插件,包含若干个<plugin><environments>:环境配置,包含若干个<environment>,在<environment>中可以指定事务管理器<transactionManager>以及数据源<dataSource><databaseIdProvider>:数据库厂商标识<mappers>:映射器,包含若干个<mapper>
注意顺序不能颠倒,否则启动时会发生异常。
3 准备步骤
由于本文大部分的代码都只给出了关键的语句而没有完整的工程,因此如果想要实现一遍请clone此处的代码(Kotlin请clone此处),并:
- 利用
resources/sql下的脚本文件创建数据库以及数据表,并插入相应数据 - 修改
MyBatis、Spring、dhcp2等依赖为最新版本并修改MySQL驱动为对应版本 - 修改
applicationContext.xml文件中的数据库用户名,密码以及数据库URL,可能需要修改驱动 - 开启数据库服务并进行测试,运行
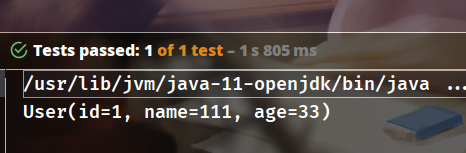
MainTest中的测试方法即可,正常来说会出现如下结果:
4 映射器概述
MyBatis的映射器由一个接口加上XML映射文件组成,是最复杂的组件,映射文件常用元素如下:
<select>:查询语句<insert>/<update>/<delete>:插入/更新/删除语句,返回操作所影响的行数,比如插入了两行,操作成功了影响的行数则为两行,返回整数2<sql>:自定义的SQL<resultMap>:提供映射规则
下面先来看一下最常用的<select>。
4.1 <select>
示例(在mapper/UserDao.xml直接添加即可):
<select id="selectById" parameterType="Integer" resultType="pers.init.entity.User">
    select * from user where id = #{id}
</select>
其中id是唯一标识符,接受一个Integer,返回com.pojo.User对象,结果集自动映射到com.pojo.User中。
常用属性如下:
id:<select>语句的全局唯一标识符paramterType:表示传入SQL语句的参数类型的全限定名或别名,可选,能自动推断resultType:执行SQL后返回的类型resultMap:与resultType类似,resultType默认一一对应映射,比如表字段名为id,则映射到实体类的id中,而resultMap需要手动定义映射关系,这样就可以把表字段中的id映射到实体类的id1,或id2,或id3,resultType与resultMap两者需要指定一个,不能同时存在flushCache:设置调用SQL后是否要求MyBatis清空之前查询的本地缓存以及二级缓存,默认falseuseCache:启动二级缓存,默认truetimeout:超时参数,单位秒fetchSize:获取记录的总条数设定statementType:使用哪个JDBC的Statement,取值可以为STATEMENT/PREPARED/CALLABLE,分别表示Statement/PreparedStatement/CallableStatementresultSetType:针对JDBC的ResultSet,可设置为FORWARD_ONLY/SCROLL_SENSITIVE/SCROLL_INSENSITIVE,分别表示只允许向前访问/双向滚动,不及时更新/双向滚动,及时更新
并修改UserDao,添加一个selectById方法:
User selectById(Integer id);
可以直接测试了:
@Test
public void selectById()
{
    System.out.println(dao.selectById(1));
}
下面来看一下如何传递多个参数。
4.2 传递参数
有了最基本的select后,传递id这种单一参数很容易,但是实际情况中很多时候需要传递多个参数,MyBatis中传递多个参数有两种方式:
- 通过
Map传递 - 通过
JavaBean传递
4.2.1 Map
可以使用Map传递多个参数,示例<select>如下:
<select id="selectByMap" resultType="pers.init.entity.User" parameterType="map">
    select * from user where name like concat('%', #{name}, '%') and age = #{age}
</select>
参数名name以及age是Map的键。
接着在UserDao下添加:
User selectByMap(Map<String,String> map);
然后在主类中使用Map添加键值对:
@Test
public void selectByMap()
{
    Map<String,String> map = new HashMap<>();
    map.put("name","111");
    map.put("age","33");
    System.out.println(dao.selectByMap(map));
}
这样就能传递多个参数进行查询了。
4.1.2 使用JavaBean
传递多个参数的另一种方法是利用JavaBean传递,创建一个POJO类:
@Getter
@Setter
@Builder
@ToString
public class UserPOJO {
    private String name;
    private Integer age;
}
修改UserDao接口方法:
public User selectByPOJO(UserPOJO user)
接着修改映射文件,实际上修改parameterType即可:
<select id="selectByPOJO" resultType="pers.init.entity.User" parameterType="pers.init.pojo.UserPOJO">
    select * from user where name like concat('%', #{name}, '%') and age = #{age}
</select>
注意访问传递的参数时直接使用POJO类的属性名即可,无须加上类似UserPOJO.的前缀。
最后进行测试:
@Test
public void selectByPOJO()
{
    UserPOJO pojo = UserPOJO.builder().age(33).name("111").build();
    System.out.println(dao.selectByPOJO(pojo));
}
4.2 <insert>
<insert>用于插入,大部分属性与<select>相同,下面是几个特有属性:
keyProperty:将插入操作的返回值赋给POJO类的某个属性keyColumn:用于设置主键列的位置,当表中第1列不是主键时需要设置该参数,联合主键可以使用逗号分隔useGeneratedKeys:使用JDBC的getGeneratedKeys获取数据库内部产生的主键,默认false
比如典型的主键回填<insert>如下:
<insert id="insertUser1" parameterType="pers.init.entity.User" keyProperty="id" useGeneratedKeys="true">
    insert into user(name, age) values (#{name}, #{id})
</insert>
这样就会利用数据库生成的自增主键回填到User的id属性中,UserDao接口如下:
int insertUser1(User user);
一般来说插入操作返回一个整数,表示操作影响的行数,因此可以设置返回值为int,测试如下:
@Test
public void insertUser1()
{
    User user = User.builder().age((short) 88).name("test1").build();
    System.out.println(dao.insertUser1(user));
    System.out.println(user.getId());
}
另外如果不支持自增主键,可以使用selectKey自定义生成主键,比如:
<insert id="insertUser2" parameterType="pers.init.entity.User">
    <selectKey keyProperty="id" resultType="integer" order="BEFORE">
        select if(max(id) is null,1,max(id)+1) as newId from user
    </selectKey>
    insert into user(id,name,age) values(#{id},#{name},#{age})
</insert>
<selectKey>中的keyProperty指定了新主键newId返回给pers.pojo.User的id属性,order设置执行顺序,BEFORE/AFTER表示执行<selectKey>之后/之前再执行插入语句。
测试:
@Test
public void insertUser2()
{
    User user = User.builder().age((short) 10).name("test2").build();
    System.out.println(dao.insertUser2(user));
    System.out.println(user.getId());
}
4.3 <update>/<delete>
返回一个整数,属性与<insert>/<select>类似,简单示例如下:
<update id="updateUser" parameterType="pers.init.entity.User">
    update user set name=#{name}, age=#{age} where id = #{id}
</update>

<delete id="deleteUser" parameterType="Integer">
    delete from user where id = #{id}
</delete>
同理update/delete返回一个整数,表示操作影响的行数,因此设置UserDao接口如下:
int updateUser(User user);
int deleteUser(Integer id);
测试:
@Test
public void updateUser()
{
    User user = User.builder().id(3).name("3333333").age((short)11).build();
    selectAll();
    System.out.println(dao.updateUser(user));
    selectAll();
}

@Test
public void deleteUser()
{
    selectAll();
    System.out.println(dao.deleteUser(3));
    selectAll();
}
4.4 <sql>
用于定义SQL的一部分,以方便后面的SQL语句引用,比如:
<sql id="column">
    id,name,age
</sql>
<select id="selectBySqlColumn" resultType="pers.init.entity.User">
    select <include refid="column"/> from user
</select>
UserDao接口:
List<User> selectBySqlColumn();
测试:
@Test
public void selectBySqlColumn()
{
    System.out.println(dao.selectBySqlColumn());
}
5 <resultMap>
上面提高过,<resultMap>比<resultType>要强大,但是需要手动定义映射关系,一个常见的<resultMap>如下:
<resultMap type="package1.package2.package3.POJO" id="resultMapId">
	<constrcutor>                       <!--实例化时将结果注入到构造方法中-->
		<idArg />                       <!--ID参数-->
		<arg />                         <!--普通参数-->
	</constrcutor>
	<id />                              <!--表示哪个列是主键-->
	<result />                          <!--注入到字段/JavaBean属性的普通结果-->
	<association property="">           <!--一对一关联-->
	<collection property="">            <!--一对多关联-->
	<discriminator javaType="">         <!--使用结果值决定哪个结果映射-->
		<case value="">                 <!--基于某些值的结果映射-->
	</discriminator>
</resultMap>
5.1 使用Map
查询SQL的结果可以使用Map/POJO存储,使用Map存储不需要手动编写<resultMap>,默认表属性名是键值对的键:
<select id="selectReturnMap" resultType="Map">
    select * from user
</select>
可用List<Map>来接收返回结果,一条记录映射到一个Map对象,Map中的key是select的字段名。
示例的UserDao方法如下:
List<Map<String,Object>> selectReturnMap();
其中Map类型为Map<String,Object>,测试方法如下:
 @Test
public void selectReturnMap()
{
    dao.selectReturnMap().forEach(System.out::println);
}
5.2 使用POJO
如果使用POJO存储返回的对象时,需要先定义一个POJO类,可以在上面的UserPOJO基础上加上一个id属性:
@Getter
@Setter
@Builder
@ToString
public class UserPOJO {
    private Integer id;
    private String name;
    private Integer age;
}
接着编写映射文件:
<resultMap id="testPOJO" type="pers.init.pojo.UserPOJO">
    <id property="id" column="id"/>
    <result property="name" column="name"/>
    <result property="age" column="age"/>
</resultMap>
其中property指定POJO的属性,column是表字段名,最后配合<select>使用,指定resultMap为对应id:
<select id="selectReturnPOJO" resultMap="testPOJO">
	select * from user
</select>
返回结果可以用List<UserPOJO>接收:
List<UserPOJO> selectReturnPOJO();
测试方法:
@Test
public void selectReturnPOJO()
{
    dao.selectReturnPOJO().forEach(System.out::println);
}
6 级联查询
级联查询就是利用主键与外键的关系进行组合查询,比如表A的一个外键引用了表B的一个主键,查询A时,通过A的外键将B的相关记录返回,这就是级联查询。常见的级联查询有三种:
- 一对一
- 一对多
- 多对多
MyBatis支持一对一以及一对多级联,没有对多对多级联提供支持,但是可以用多个一对多级联实现多对多级联。下面分别来看一下。
6.1 一对一
一对一级联查询是最常见的级联查询,可以通过<resultMap>中的<association>进行配置,通常使用的属性如下:
property:映射到实体类的对象属性column:指定表中对应的字段javaType:指定映射到实体对象属性的类型select:指定引入嵌套查询的子SQL语句,用于关联映射中的嵌套查询
下面通过一个例子进行说明,例子分五步:
- 创建数据表
- 创建实体类
- 编写映射文件
- 修改持久层接口
- 添加测试方法
6.1.1 数据表
为了方便新增表以及数据都写在一起:
use test;

drop table if exists idcard;
drop table if exists person;

create table idcard(
    id int(10) primary key auto_increment,
    code char(18) collate utf8mb4_unicode_ci default null
);

create table person(
    id int(10) primary key,
    name varchar(20) collate utf8mb4_unicode_ci default null,
    age smallint default null,
    idcard_id int(10) default null,
    key idcard_id(idcard_id),
    constraint idcard_id foreign key (idcard_id) references idcard(id)
);

insert into idcard(`code`) values('123456789123456789');

insert into person(`id`,`name`,`age`,`idcard_id`) values (1,'111',22,1);
6.1.2 实体类
@Data
public class IdCard {
    private Integer id;
    private String code;
}

@Data
public class Person {
    private Integer id;
    private String name;
    private Integer age;
    private IdCard card;
}
另外还需要创建一个映射结果的POJO类:
@Data
public class PersonPOJO {
    private Integer id;
    private String name;
    private Short age;
    private String code;
}
6.1.3 映射文件
映射文件分为两个:
IdCardMapper.xmlPersonMapper.xml
首先是IdCardMapper.xml,加上一个<select>即可,注意namespace的位置填写正确,对应dao的位置。
<?xml version="1.0" encoding="UTF-8"?>
<!DOCTYPE mapper PUBLIC "-//mybatis.org//DTD Mapper 3.0//EN" "http://mybatis.org/dtd/mybatis-3-mapper.dtd">
<mapper namespace="pers.oneToOne.dao.IdCardDao">
    <select id="selectCodeById" parameterType="Integer" resultType="pers.oneToOne.entity.IdCard">
        select * from idcard where id = #{id}
    </select>
</mapper>
其次是PersonMapper.xml:
<?xml version="1.0" encoding="UTF-8"?>
<!DOCTYPE mapper PUBLIC "-//mybatis.org//DTD Mapper 3.0//EN" "http://mybatis.org/dtd/mybatis-3-mapper.dtd">
<mapper namespace="pers.oneToOne.dao.PersonDao">
    <resultMap id="personMap1" type="pers.oneToOne.entity.Person">
        <id property="id" column="id"/>
        <result property="name" column="name"/>
        <result property="age" column="age"/>
        <association property="card" column="idcard_id" javaType="pers.oneToOne.entity.IdCard"
                     select="pers.oneToOne.dao.IdCardDao.selectCodeById"/>
    </resultMap>
    <select id="selectPersonById1" parameterType="Integer" resultMap="personMap1">
        select *
        from person
        where id = #{id}
    </select>

    <resultMap id="personMap2" type="pers.oneToOne.entity.Person">
        <id property="id" column="id"/>
        <result property="name" column="name"/>
        <result property="age" column="age"/>
        <association property="card" javaType="pers.oneToOne.entity.IdCard">
            <id property="id" column="idcard_id"/>
            <result property="code" column="code"/>
        </association>
    </resultMap>

    <select id="selectPersonById2" parameterType="Integer" resultMap="personMap2">
        select p.*, ic.code
        from person p,
             idcard ic
        where p.idcard_id = ic.id
          and p.id = #{id}
    </select>

    <select id="selectPersonById3" parameterType="Integer" resultType="pers.oneToOne.pojo.PersonPOJO">
        select p.*, ic.code
        from person p,
             idcard ic
        where p.idcard_id = ic.id
          and p.id = #{id}
    </select>
</mapper>
首先第一个<resultMap>先指定id等属性,接着是<association>:
property是实体类属性,注意类型为IdCardcolumn是表字段名,类型为int(10)javaType是通过后面的select返回的类型,可以理解成是property的类型,也就是IdCardselect指定嵌套查询使用的SQL,对应于IdCardDao.xml中的selectCodeById
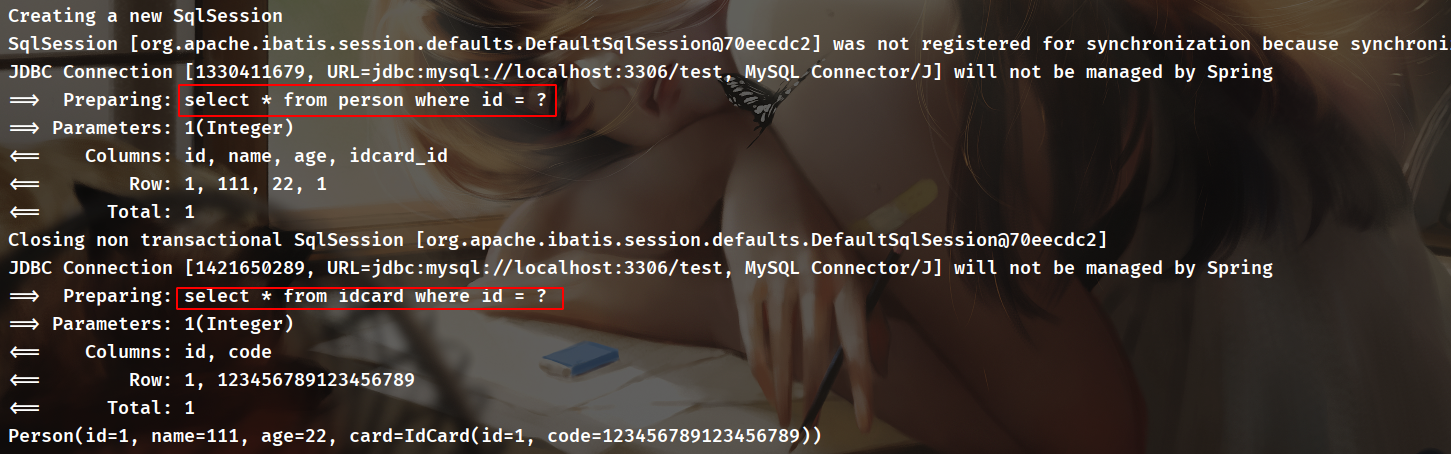
接着在一个<select>中的resultMap指定该map的id即可。使用这种方法执行的是两次SQL:
- 一次是
select * from person where id=? - 一次是
select * from idcard where id=?
最后再把结果整起起来,开启调试可以发现实际上也是执行了两条SQL:
而第二个<resultMap>中,在<association>里面没有了select属性,直接将结果映射到SelectPersonById中,这是执行一条SQL语句的结果:
select p.*,ic.code from person p,idcard ic where p.idcard_id = ic.id and p.id=#{id}
实际查询如下:

如果需要重要可以将其配置成<resultMap>,比如:
<association property="card" resultMap="resultMap" />
<resultMap id="resultMap">
	<id property="id" column="idcard_id"/>
	<result property="code" column="code"/>
</resultMap>
而最后一个<select>是进行连接查询,无需额外的<resultMap>,实际执行情况如下:

6.1.4 Dao接口
这个比较简单:
public interface PersonDao {
    Person selectPersonById1(Integer id);
    Person selectPersonById2(Integer id);
    PersonPOJO selectPersonById3(Integer id);
}
6.1.5 测试
@Test
public void selectPersonById()
{
    System.out.println(dao.selectPersonById1(1));
    System.out.println(dao.selectPersonById2(1));
    System.out.println(dao.selectPersonById3(1));
}
注意在测试之前,需要修改配置文件mybatis-config.xml:
<configuration>
    <settings>
        <!--延迟加载-->
        <setting name="lazyLoadingEnabled" value="true"/>
        <!--按需加载-->
        <setting name="aggressiveLazyLoading" value="true"/>
        <!--调试开关,打印执行的SQL-->
<!--        <setting name="logImpl" value="STDOUT_LOGGING"/>-->
    </settings>
    <mappers>
        <!--initMapper-->
        <mapper resource="mapper/init/UserMapper.xml" />
        <mapper resource="mapper/init/TestMapper.xml" />
        <!--一对一级联Mapper-->
        <mapper resource="mapper/oneToOne/PersonMapper.xml" />
        <mapper resource="mapper/oneToOne/IdCardMapper.xml" />
    </mappers>
</configuration>
前两个<setting>表示开启延迟加载以及按需加载,后面一个是设置调试开关,最后在下面的<mappers>加上<mapper>对应的xml的位置。
要注意的一个是<settings>需要写在<mappers>的前面。
另外因为Dao接口没有加上@Mapper注解,因此需要在applicationContext.xml中手动加上Dao位置:
<bean class="org.mybatis.spring.mapper.MapperScannerConfigurer">
    <property name="basePackage" value="pers.oneToOne.dao"/>
    <property name="sqlSessionFactoryBeanName" value="sql.SessionFactory"/>
</bean>
测试结果:

6.2 一对多
一对多的级联查询与一对一处理有相似之处,主要是映射文件中的<collection>配置,例子也是和上面一样分五步。
6.2.1 数据表
需要两张表:
userorder
user可以沿用前面的user表,而order表如下:
use test;
drop table if exists orders;

create table orders(
    id int(10) primary key auto_increment,
    ordersn varchar(10) collate utf8mb4_unicode_ci default null,
    user_id int(10) default null,
    key user_id(user_id),
    constraint user_id foreign key (user_id) references user(id)
);

insert into orders(`ordersn`,`user_id`) values ('testorder1',1),('testorder2',1),('testorder3',1);
6.2.2 实体类
添加实体类Orders:
@Data
public class Orders {
    private Integer id;
    private String ordersn;
}
同时创建一个带Orders的User:
@Data
@Builder
@NoArgsConstructor
@AllArgsConstructor
public class UserWithOrders {
    private Integer id;
    private String name;
    private Short age;
    private List<Orders> ordersList;
}
6.2.3 映射文件
两个:
OrdersMapper.xmlUserWithOrdersMapper.xml
首先是OrdersMapper.xml,只有一个简单的<select>:
<?xml version="1.0" encoding="UTF-8"?>
<!DOCTYPE mapper PUBLIC "-//mybatis.org//DTD Mapper 3.0//EN" "http://mybatis.org/dtd/mybatis-3-mapper.dtd">
<mapper namespace="pers.oneToMany.dao.OrdersDao">
    <select id="selectOrdersById" parameterType="Integer" resultType="pers.oneToMany.entity.Orders">
        select * from orders where user_id=#{id}
    </select>
</mapper>
接着是UserWithOrdersMapper.xml:
<?xml version="1.0" encoding="UTF-8"?>
<!DOCTYPE mapper PUBLIC "-//mybatis.org//DTD Mapper 3.0//EN" "http://mybatis.org/dtd/mybatis-3-mapper.dtd">
<mapper namespace="pers.oneToMany.dao.UserWithOrdersDao">

    <resultMap id="userAndOrder1" type="pers.oneToMany.entity.UserWithOrders">
        <id property="id" column="id"/>
        <result property="name" column="name"/>
        <result property="age" column="age"/>
        <collection property="ordersList" ofType="pers.oneToMany.entity.Orders" column="id" select="pers.oneToMany.dao.OrdersDao.selectOrdersById"/>
    </resultMap>
    <select id="selectUserOrders1" parameterType="Integer" resultMap="userAndOrder1">
        select * from user where id=#{id}
    </select>

    <resultMap id="userAndOrder2" type="pers.oneToMany.entity.UserWithOrders">
        <id property="id" column="id" />
        <result property="name" column="name" />
        <result property="age" column="age" />
        <collection property="ordersList" ofType="pers.oneToMany.entity.Orders">
            <id property="id" column="id" />
            <result property="ordersn" column="ordersn"/>
        </collection>
    </resultMap>
    <select id="selectUserOrders2" parameterType="Integer" resultMap="userAndOrder2">
        select u.*,o.id,o.ordersn from user u,orders o where u.id = o.user_id and u.id = #{id}
    </select>

    <select id="selectUserOrders3" parameterType="Integer" resultType="pers.oneToMany.pojo.UserOrdersPOJO">
        select u.*,o.id,o.ordersn from user u,orders o where u.id = o.user_id and u.id = #{id}
    </select>
</mapper>
相比起一对一的级联,重点改变的就是其中的<collection>,重要属性如下:
property:指定实体类的属性字段ofType:指定集合中的类型column:将哪些值传递给select中的方法select:嵌套查询的语句
第二个<collection>类似,将查询的结果直接映射到Orders的属性上面。最后一种是直接使用连接查询。
6.2.4 Dao接口
public interface OrdersDao {
    List<Orders> selectOrdersById(Integer id);
}

public interface UserWithOrdersDao {
    UserWithOrders selectUserOrders1(Integer id);
    UserWithOrders selectUserOrders2(Integer id);
    List<UserOrdersPOJO> selectUserOrders3(Integer id);
}
6.2.5 测试
@Test
public void selectUserOrders()
{
    System.out.println(dao.selectUserOrders1(1));
    System.out.println(dao.selectUserOrders2(1));
    System.out.println(dao.selectUserOrders3(1));
}
6.3 多对多
MyBaits其实不支持多对多级联,但是可以通过多个一对多级联实现,比如一个订单对应多个商品,一个商品对应多个订单,这样两者就是多对多级联关系,这样使用一个中间表,就可以转换为两个一对多关系。
下面同样通过五个步骤实现多对多级联。
6.3.1 数据表
需要订单表、商品表以及一个中间表,由于订单表Orders之前已创建,这里只需要创建两个表:
use test;

create table product(
    id int(10) primary key auto_increment,
    name varchar(10) collate utf8mb4_unicode_ci default null,
    price double default null
);

create table orders_detail(
    id int(10) primary key auto_increment,
    orders_id int(10) default null,
    product_id int(10) default null,
    key orders_id(orders_id),
    key product_id(product_id),
    constraint orders_id foreign key (orders_id) references orders(id),
    constraint product_id foreign key (product_id) references product(id)
);

insert into product(`name`,`price`) values('product1',1.1),('product2',2.2),('product3',3.3);
insert into orders_detail(`orders_id`,`product_id`) values(1,1),(1,2),(1,3),(2,1),(2,3);
6.3.2 实体类
订单类可以沿用之前的,只需要两个实体类:
@Data
@AllArgsConstructor
@NoArgsConstructor
public class Product {
    private Integer id;
    private String name;
    private Double price;
    private List<Orders> orders;
}

@Data
@AllArgsConstructor
@NoArgsConstructor
public class OrdersWithProduct {
    private Integer id;
    private String ordersn;
    private List<Product> products;
}
6.3.3 映射文件
<?xml version="1.0" encoding="UTF-8"?>
<!DOCTYPE mapper PUBLIC "-//mybatis.org//DTD Mapper 3.0//EN" "http://mybatis.org/dtd/mybatis-3-mapper.dtd">
<mapper namespace="pers.manyToMany.dao.OrdersWithProductDao">
    <resultMap id="ordersAndProduct" type="pers.manyToMany.entity.OrdersWithProduct">
        <id property="id" column="id"/>
        <result property="ordersn" column="ordersn"/>
        <collection property="products" ofType="pers.manyToMany.entity.Product">
            <id property="id" column="pid"/>
            <result property="name" column="name"/>
            <result property="price" column="price"/>
        </collection>
    </resultMap>
    <select id="selectOrdersAndProduct" resultMap="ordersAndProduct">
        select o.*,p.id as pid ,p.name,p.price from orders o,orders_detail od, product p where o.id = od.orders_id and od.product_id = p.id
    </select>
</mapper>
这里的多对多级联实质上是通过每次指定不同的OrdersId去查询对应的Product实现的,也就是分成了多次的一对多级联。
6.3.4 Dao接口
public interface OrdersWithProductDao {
    List<OrdersWithProduct> selectOrdersAndProduct();
}
6.3.5 测试
@Test
public void test()
{
    ApplicationContext context = new ClassPathXmlApplicationContext("applicationContext.xml");
    OrdersWithProductDao dao = context.getBean(OrdersWithProductDao.class);
    System.out.println(dao.selectOrdersAndProduct());
}
7 动态SQL
最后来看一下动态SQL,动态SQL可以避免手动拼接SQL语句,比如在某些条件成立的情况下添加and xxx=xxxx之类的操作。先来看一下最常用的<if>。
7.1 <if>
<if>类似Java中的if语句,最简单的例子如下:
<select id="selectByIf" parameterType="Integer" resultType="pers.init.entity.User">
    select * from user where 1=1
    <if test="name != null and name != ''">
        and name like concat('%',#{name},'%')
    </if>
    <if test="age != null and age>0">
        and age = #{age}
    </if>
</select>
也就是说当test中的条件成立时,便添加and xxx语句。注意test这个属性是<if>必须的,不能省略。
(注这里用到了一个关键的1=1,仅作说明使用,实际开发请勿使用1=1进行拼接)
Dao接口:
List<User> selectByIf(User user);
测试:
@Test
public void testIf()
{
    System.out.println(dao.selectByIf(User.builder().age((short) 33).name("111").build()));
}
7.2 <choose>+<when>+<otherwise>
类似Java中的switch语句:
<choose>类似switch<when>类似case<otherwise>类似default
当其中一个<when>成立时,语句便结束,类似于自动加上了"break"。
示例:
<select id="selectByChoose" parameterType="Integer" resultType="pers.init.entity.User">
    select * from user where 1=1
    <choose>
        <when test="name != null and name != ''">
            and name like concat('%',#{name},'%')
        </when>
        <when test="age != null and age>0">
            and age=#{age}
        </when>
        <otherwise>
            and id != 3
        </otherwise>
    </choose>
</select>
Dao接口:
List<User> selectByChoose(User user);
测试:
@Test
public void testChoose()
{
    System.out.println(dao.selectByChoose(User.builder().age((short)33).build()));
}
7.3 <trim>
主要功能:
- 加前缀
- 加后缀
- 替换某些首部/尾部内容
这里是一个使用<trim>来实现<where>的例子:
<select id="selectByTrim" parameterType="Integer" resultType="pers.init.entity.User">
    select * from user
    <trim prefix="where" prefixOverrides="and">
        <if test="name != null and name != ''">
            and name like concat('%',#{name},'%')
        </if>
    </trim>
</select>
Dao接口:
List<User> selectByTrim(User user);
测试:
@Test
public void testTrim()
{
    System.out.println(dao.selectByTrim(User.builder().build()));
    System.out.println(dao.selectByTrim(User.builder().name("test2").build()));
}
7.4 <where>
<where>最常用的就是拼接查询条件,比如有多个查询条件,仅仅使用多个<if>的话会出现首个<if>有一个多余的and的问题,而使用<where>会进行智能处理,当然也对or适用,例子如下:
<select id="selectByWhere" parameterType="Integer" resultType="pers.init.entity.User">
    select * from user
    <where>
        <if test="name != null and name != ''">
            and name like concat('%',#{name},'%')
        </if>
        <if test="age != null and age>0">
            and age=#{age}
        </if>
    </where>
</select>
Dao接口:
List<User> selectByWhere(User user);
测试:
@Test
public void testWhere()
{
    System.out.println(dao.selectByWhere(User.builder().build()));
    System.out.println(dao.selectByWhere(User.builder().name("111").build()));
    System.out.println(dao.selectByWhere(User.builder().age((short)-3).build()));
}
7.5 <set>
<set>一般配合update语句使用,比如:
<update id="updateBySet" parameterType="pers.init.entity.User">
    update user
    <set>
        <if test="name != null and name != ''">
            name = #{name},
        </if>
        <if test="age != null and age > 0">
            age = #{age}
        </if>
    </set>
    where id=#{id}
</update>
Dao接口:
int updateBySet(User user);
测试:
@Test
public void testSet()
{
    System.out.println(dao.updateBySet(User.builder().name("999999").age((short)39).id(1).build()));
    System.out.println(dao.selectByWhere(User.builder().build()));
}
7.6 <foreach>
<foreach>主要用于in中,可以认为是一个集合,典型的使用场景是select xxx from xxx where xxx in <foreach>。
<foreach>的主要属性有:
item:每个元素的别名index:每个元素的下标collection:<foreach>的类型,有list、array、map三种,当传入单个参数且该参数类型为List时,则为list,传入单个参数且该参数类型为数组时,则为array,否则应将其封装成Map,并设置属性值为mapopen:语句开始标志close:语句结束标志
例子:
<select id="selectByForeach" parameterType="Integer" resultType="pers.init.entity.User">
  select * from user where id in
    <foreach collection="list" item="item" index="index" open="(" separator="," close=")">#{item}</foreach>
</select>
Dao接口:
List<User> selectByForeach(List<Integer> id);
测试:
@Test
public void testForeach()
{
    System.out.println(dao.selectByForeach(List.of(1,2,3)));
}
7.7 <bind>
<bind>可用于对字符串进行拼接,对于字符串拼接,MySQL使用的是concat,而Oracle使用的是||,而MyBatis提供了<bind>可以屏蔽这种DBMS之间的差异,无需修改xml即可进行移植,例子如下:
<select id="selectByBind" parameterType="pers.init.entity.User" resultType="pers.init.entity.User">
    <bind name="new_name" value="'%'+name+'%'"/>
    select * from user where name like #{new_name}
</select>
Dao接口:
List<User> selectByBind(User user);
测试:
@Test
public void testBind()
{
    System.out.println(dao.selectByBind(User.builder().name("test1").build()));
}
8 源码
此处给出了实现所有例子后的代码,仅供参考,但不建议直接clone,建议从初始化工程开始逐步实现。
Java版:
Kotlin版: