点云数据可以用ASCII码的形式存储在PCD文件中(关于该格式的描述可以参考链接:The PCD (Point Cloud Data) file format)。为了生成三维点云数据,在excel中用rand()函数生成200行0-1的小数,ABC三列分别代表空间点的xyz坐标。

# .PCD v.7 - Point Cloud Data file format
VERSION .7
FIELDS x y z
SIZE 4 4 4
TYPE F F F
COUNT 1 1 1
WIDTH 200
HEIGHT 1
VIEWPOINT 0 0 0 1 0 0 0
POINTS 200
DATA ascii
0.88071666    0.369209703    0.062937221
0.06418104    0.579762553    0.221359779
...
...
0.640053058    0.480279041    0.843647334
0.245554712    0.825770496    0.626442137
进行点云的变换主要用到的函数是pcl::transformPointCloud,函数原型为:
void pcl::transformPointCloud(const pcl::PointCloud< PointT > & cloud_in,
pcl::PointCloud< PointT > & cloud_out,
const Eigen::Matrix4f & transform )
参数中cloud_in为源点云,cloud_out为变换后的点云,transform为变换矩阵。下面的代码对源点云绕Z轴旋转45°,然后沿X轴平移了2.5个单位:
#include <iostream>

#include <pcl/io/pcd_io.h>
#include <pcl/point_cloud.h>
#include <pcl/common/transforms.h>                  //allows us to use pcl::transformPointCloud function
#include <pcl/visualization/pcl_visualizer.h>


// This is the main function
int main (int argc, char** argv)
{

    //creates a PointCloud<PointXYZ> boost shared pointer and initializes it.
    pcl::PointCloud<pcl::PointXYZ>::Ptr source_cloud (new pcl::PointCloud<pcl::PointXYZ> ());


    // Load PCD file
    if (pcl::io::loadPCDFile<pcl::PointXYZ> ("sample.pcd", *source_cloud) == -1)
    {
        PCL_ERROR ("Couldn't read file sample.pcd
");
        return (-1);
    }


    /* Reminder: how transformation matrices work :

           |-------> This column is the translation
    | 1 0 0 x |
    | 0 1 0 y |   }-> The identity 3x3 matrix (no rotation) on the left
    | 0 0 1 z |  /
    | 0 0 0 1 |    -> We do not use this line (and it has to stay 0,0,0,1)

    METHOD #1: Using a Matrix4f
    This is the "manual" method, perfect to understand but error prone !
    */
    Eigen::Matrix4f transform_1 = Eigen::Matrix4f::Identity();

    // Define a rotation matrix (see https://en.wikipedia.org/wiki/Rotation_matrix)
    // Here we defined a 45° (PI/4) rotation around the Z axis and a translation on the X axis.
    float theta = M_PI/4; // The angle of rotation in radians
    transform_1 (0,0) = cos (theta);
    transform_1 (0,1) = -sin(theta);
    transform_1 (1,0) = sin (theta);
    transform_1 (1,1) = cos (theta);
    //    (row, column)

    // Define a translation of 2.5 meters on the x axis.
    transform_1 (0,3) = 2.5;

    // Print the transformation
    printf ("Method #1: using a Matrix4f
");
    std::cout << transform_1 << std::endl;


    // Executing the transformation
    pcl::PointCloud<pcl::PointXYZ>::Ptr transformed_cloud (new pcl::PointCloud<pcl::PointXYZ> ());
    /*
    void pcl::transformPointCloud(const pcl::PointCloud< PointT > & cloud_in,
                                    pcl::PointCloud< PointT > &  cloud_out,
                                    const Eigen::Matrix4f &  transform  )
    */
    // Apply an affine transform defined by an Eigen Transform.
    pcl::transformPointCloud (*source_cloud, *transformed_cloud, transform_1);

    // Visualization
    printf(  "
Point cloud colors :  white  = original point cloud
"
      "                        red  = transformed point cloud
");
    pcl::visualization::PCLVisualizer viewer ("Matrix transformation example");

    // Define R,G,B colors for the point cloud
    pcl::visualization::PointCloudColorHandlerCustom<pcl::PointXYZ> source_cloud_color_handler (source_cloud, 255, 255, 255);
    // We add the point cloud to the viewer and pass the color handler
    viewer.addPointCloud (source_cloud, source_cloud_color_handler, "original_cloud");

    pcl::visualization::PointCloudColorHandlerCustom<pcl::PointXYZ> transformed_cloud_color_handler (transformed_cloud, 230, 20, 20); // Red
    viewer.addPointCloud (transformed_cloud, transformed_cloud_color_handler, "transformed_cloud");

    viewer.addCoordinateSystem (1.0, 0);  //Adds 3D axes describing a coordinate system to screen at 0,0,0.
    viewer.setBackgroundColor(0.05, 0.05, 0.05, 0); // Setting background to a dark grey
    viewer.setPointCloudRenderingProperties (pcl::visualization::PCL_VISUALIZER_POINT_SIZE, 2, "original_cloud");
    viewer.setPointCloudRenderingProperties (pcl::visualization::PCL_VISUALIZER_POINT_SIZE, 2, "transformed_cloud");
    //viewer.setPosition(800, 400); // Setting visualiser window position

    while (!viewer.wasStopped ()) { // Display the visualiser until 'q' key is pressed
    viewer.spinOnce ();
    }

  return 0;
}
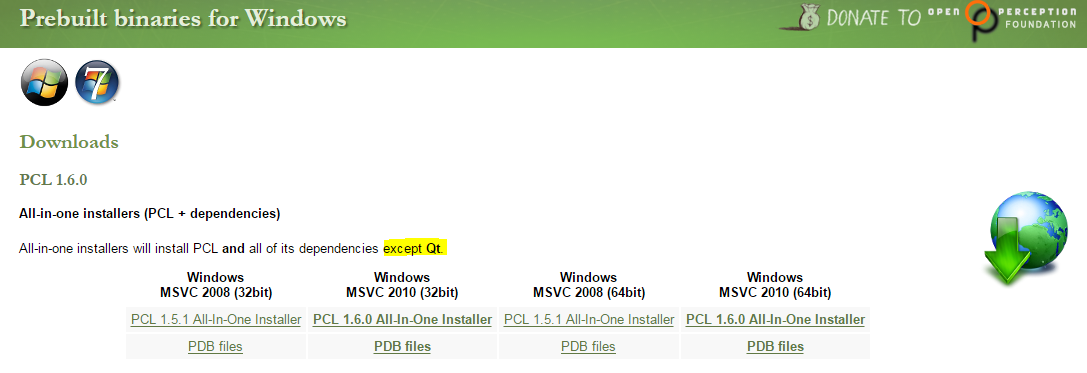
在PCL官网下载All-in-one installers,由于使用的是Win7 32位系统,因此选择了Windows MSVC 2010 (32bit)进行安装,这个All-in-one的安装程序会同时安装除QT外的一些第三方依赖库,比如boost、Eigen、VTK、OpenNI等。
安装好之后如果是自己在VS2010中配置工程属性,将会很麻烦,可以参考Using PCL in your own project。下面通过Cmake来自动生成VS2010的项目。首先创建一个CMakeLists.txt文件(注意其中PCL的版本)。如果编译软件使用了外部库,事先并不知道它的头文件和链接库的位置。得在编译命令中加上包含它们的查找路径。CMake使用find_package命令来解决这个问题。
cmake_minimum_required(VERSION 2.6 FATAL_ERROR)

project(pcl-matrix_transform)

find_package(PCL 1.6 REQUIRED)

include_directories(${PCL_INCLUDE_DIRS})
link_directories(${PCL_LIBRARY_DIRS})
add_definitions(${PCL_DEFINITIONS})

add_executable (matrix_transform matrix_transform.cpp)
target_link_libraries (matrix_transform ${PCL_LIBRARIES})
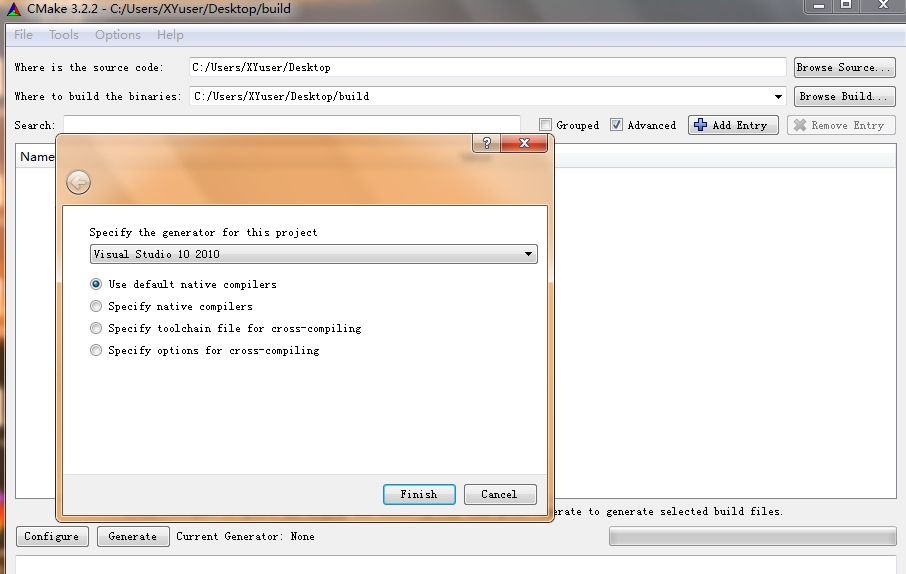
然后使用CMake的GUI程序来生成工程文件。Where is the source code栏选择源代码所在路径,这里代码放在桌面上;Where to build the binaries栏选择生成文件所在的路径,默认在桌面上的build文件夹中。点击Configure之后会弹出对话框,选择Visual Studio 2010,最后点击生成按钮,将会在build文件夹中生成VS2010的工程文件。
在编译之前需要注意一点,由于All-in-one的安装程序没有安装QT(需要单独安装),需要在工程属性的附加依赖项中删掉QT的lib(这个程序中暂时也没有用到QT相关的东西),否则会出现编译错误。最后运行程序,结果如下图所示。其中红色的点云为变换后的。

参考:
Using a matrix to transform a point cloud
http://pointclouds.org/documentation/tutorials/matrix_transform.php#matrix-transform
The PCD (Point Cloud Data) file format
http://pointclouds.org/documentation/tutorials/pcd_file_format.php#pcd-file-format
Reading Point Cloud data from PCD files
http://pointclouds.org/documentation/tutorials/reading_pcd.php#reading-pcd
PCL学习笔记(1):pcl1.6.0+vs2010环境配置以及第一个pcl程序
http://www.voidcn.com/blog/chentravelling/article/p-3487308.html