一、监听数据变化
1、监听数据变化有两种,深度和浅度,形式如下:
vm.$watch(name,fnCb); //浅度
vm.$watch(name,fnCb,{deep:true}); //深度监视
2、实例用法
2.1-1浅度监听:当点击页面,弹出发生变化了,a的值变为1,b的值变为101
<!DOCTYPE html>
<html lang="en">
<head>
    <meta charset="UTF-8">
    <title>浅度监听1</title>
    <meta name="viewport" content="width=device-width, initial-scale=1.0, maximum-scale=1.0, user-scalable=0">
    <meta name="apple-mobile-web-app-capable" content="yes">
    <meta name="apple-mobile-web-app-status-bar-style" content="black">
    <style>

    </style>
    <script src="vue.js"></script>
    <script>


        window.onload=function(){
            var vm=new Vue({
                el:'#box',
                data:{
                    a:111,
                    b:2
                }
            });

            vm.$watch('a',function(){
                alert('发生变化了');

                this.b=this.a+100;
            });

            document.onclick=function(){
                vm.a=1;
            };
        };

    </script>
</head>
<body>
    <div id="box">
        {{a}}
        <br>
        {{b}}
    </div>

</body>
</html>
2.1-2浅度监听:点击页面之后,弹出“发生变化了”,页面变为
<!DOCTYPE html>
<html lang="en">
<head>
    <meta charset="UTF-8">
    <title>浅度监听2</title>
    <meta name="viewport" content="width=device-width, initial-scale=1.0, maximum-scale=1.0, user-scalable=0">
    <meta name="apple-mobile-web-app-capable" content="yes">
    <meta name="apple-mobile-web-app-status-bar-style" content="black">
    <style>

    </style>
    <script src="vue.js"></script>
    <script>


        window.onload=function(){
            var vm=new Vue({
                el:'#box',
                data:{
                    json:{name:'strive',age:16},
                    b:2
                }
            });

            vm.$watch('json',function(){
                alert('发生变化了');
            });

            document.onclick=function(){
                vm.json.name='aaa';
            };
        };

    </script>
</head>
<body>
    <div id="box">
        {{json | json}}
        <br>
        {{b}}
    </div>

</body>
</html>
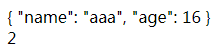
2.2深度监听:可以监视对象
<!DOCTYPE html>
<html lang="en">
<head>
    <meta charset="UTF-8">
    <title>深度监听</title>
    <meta name="viewport" content="width=device-width, initial-scale=1.0, maximum-scale=1.0, user-scalable=0">
    <meta name="apple-mobile-web-app-capable" content="yes">
    <meta name="apple-mobile-web-app-status-bar-style" content="black">
    <style>

    </style>
    <script src="vue.js"></script>
    <script>


        window.onload=function(){
            var vm=new Vue({
                el:'#box',
                data:{
                    json:{name:'strive',age:16},
                    b:2
                }
            });

            vm.$watch('json',function(){
                alert('发生变化了');
            },{deep:true});

            document.onclick=function(){
                vm.json.name='aaa';
            };
        };

    </script>
</head>
<body>
    <div id="box">
        {{json | json}}
        <br>
        {{b}}
    </div>

</body>
</html>
运行结果:

二、自定义指令
vue中自带的指令往往有时候满足不了我们实际的需求,例如当小于9时显示为09,当大于9时显示为原本的数。所以我们这个时候就需要自己定义一些指令
1、基本语法
自定义指令:
    属性:

    Vue.directive(指令名称,function(参数){
        this.el    -> 原生DOM元素
    });

    <div v-red="参数"></div>

    指令名称:     v-red  ->  red

    * 注意: 必须以 v-开头
2、基本用法
2.1 v-red -> red
<!DOCTYPE html>
<html lang="en">
<head>
    <meta charset="UTF-8">
    <title>自定义指令</title>
    <meta name="viewport" content="width=device-width, initial-scale=1.0, maximum-scale=1.0, user-scalable=0">
    <meta name="apple-mobile-web-app-capable" content="yes">
    <meta name="apple-mobile-web-app-status-bar-style" content="black">
    <style>

    </style>
    <script src="vue.js"></script>
    <script>
        Vue.directive('red',function(){            //和下面的v-red相对应
            this.el.style.background='red';
        });

        window.onload=function(){
            var vm=new Vue({
                el:'#box',
                data:{
                    msg:'welcome'
                }
            });
        };

    </script>
</head>
<body>
    <div id="box">
        <span v-red>
            asdfasd
        </span>
    </div>

</body>
</html>
运行结果:
2.2、自定义指令参数为变量的用法
<!DOCTYPE html>
<html lang="en">
<head>
    <meta charset="UTF-8">
    <title>自定义指令参数用法</title>
    <meta name="viewport" content="width=device-width, initial-scale=1.0, maximum-scale=1.0, user-scalable=0">
    <meta name="apple-mobile-web-app-capable" content="yes">
    <meta name="apple-mobile-web-app-status-bar-style" content="black">
    <style>

    </style>
    <script src="vue.js"></script>
    <script>
        Vue.directive('red',function(color){        //将下面的a的值传给color
            this.el.style.background=color;
        });

        window.onload=function(){
            var vm=new Vue({
                el:'#box',
                data:{
                    a:'blue'
                }
            });
        };

    </script>
</head>
<body>
    <div id="box">
        <span v-red="a">        //是上面的变量a
            asdfasd
        </span>
    </div>

</body>
</html>
运行结果:

2.3参数为值的用法
<!DOCTYPE html>
<html lang="en">
<head>
    <meta charset="UTF-8">
    <title>参数为值的用法</title>
    <meta name="viewport" content="width=device-width, initial-scale=1.0, maximum-scale=1.0, user-scalable=0">
    <meta name="apple-mobile-web-app-capable" content="yes">
    <meta name="apple-mobile-web-app-status-bar-style" content="black">
    <style>

    </style>
    <script src="vue.js"></script>
    <script>
        Vue.directive('red',function(color){
            this.el.style.background=color;
        });

        window.onload=function(){
            var vm=new Vue({
                el:'#box'
            });
        };

    </script>
</head>
<body>
    <div id="box">
        <span v-red="'blue'">            //这里的blue就是普通的值
            asdfasd
        </span>
    </div>

</body>
</html>
运行结果:

2.4自定义指令就是默认绑定的bind
<!DOCTYPE html>
<html lang="en">
<head>
    <meta charset="UTF-8">
    <title>自定义指令</title>
    <meta name="viewport" content="width=device-width, initial-scale=1.0, maximum-scale=1.0, user-scalable=0">
    <meta name="apple-mobile-web-app-capable" content="yes">
    <meta name="apple-mobile-web-app-status-bar-style" content="black">
    <style>

    </style>
    <script src="vue.js"></script>
    <script>
        Vue.directive('red',{
            bind:function(){
                this.el.style.background='red';
            }
        });

        window.onload=function(){
            var vm=new Vue({
                el:'#box'
            });
        };

    </script>
</head>
<body>
    <div id="box">
        <span v-red>
            asdfasd
        </span>
    </div>

</body>
</html>
运行结果:
2.5自定指令进行拖拽小实例:可以进行拖拽
<!DOCTYPE html>
<html lang="en">
<head>
    <meta charset="UTF-8">
    <title>自定义指令--拖拽小实例</title>
    <meta name="viewport" content="width=device-width, initial-scale=1.0, maximum-scale=1.0, user-scalable=0">
    <meta name="apple-mobile-web-app-capable" content="yes">
    <meta name="apple-mobile-web-app-status-bar-style" content="black">
    <style>
    </style>
    <script src="vue.js"></script>
    <script>
        Vue.directive('drag',function(){
            var oDiv=this.el;
            oDiv.onmousedown=function(ev){
                var disX=ev.clientX-oDiv.offsetLeft;
                var disY=ev.clientY-oDiv.offsetTop;

                document.onmousemove=function(ev){
                    var l=ev.clientX-disX;
                    var t=ev.clientY-disY;
                    oDiv.style.left=l+'px';
                    oDiv.style.top=t+'px';
                };
                document.onmouseup=function(){
                    document.onmousemove=null;
                    document.onmouseup=null;
                };
            };
        });

        window.onload=function(){
            var vm=new Vue({
                el:'#box',
                data:{
                    msg:'welcome'
                }
            });
        };

    </script>
</head>
<body>
    <div id="box">
        <div v-drag :style="{'100px', height:'100px', background:'blue', position:'absolute', right:0, top:0}"></div>
        <div v-drag :style="{'100px', height:'100px', background:'red', position:'absolute', left:0, top:0}"></div>
    </div>

</body>
</html>
三、过滤器
3.1、配合事件使用的过滤器:debounce—>延迟执行事件
<!DOCTYPE html>
<html lang="en">
<head>
    <meta charset="UTF-8">
    <title>debounce--延迟执行</title>
    <meta name="viewport" content="width=device-width, initial-scale=1.0, maximum-scale=1.0, user-scalable=0">
    <meta name="apple-mobile-web-app-capable" content="yes">
    <meta name="apple-mobile-web-app-status-bar-style" content="black">
    <style>

    </style>
    <script src="vue.js"></script>
    <script>

    </script>
</head>
<body>
    <div id="box">
        <input type="text" @keyup="show | debounce 2000">      //按键之后,将过2秒弹出1
    </div>
    <script>

        var vm=new Vue({
            data:{

            },
            methods:{
                show:function(){
                    alert(1);
                }
            }
        }).$mount('#box');

    </script>
</body>
</html>
3.2配合数据使用的过滤器
3.2.1:limitBy用法
基本用法
        limitBy    限制几个
        limitBy 参数(取几个)
        limitBy 取几个  从哪开始
limitBy 限制几个,
limitBy 参数(取几个)
<!DOCTYPE html>
<html lang="en">
<head>
    <meta charset="UTF-8">
    <title>limitBy 限制几个</title>
    <meta name="viewport" content="width=device-width, initial-scale=1.0, maximum-scale=1.0, user-scalable=0">
    <meta name="apple-mobile-web-app-capable" content="yes">
    <meta name="apple-mobile-web-app-status-bar-style" content="black">
    <style>

    </style>
    <script src="vue.js"></script>
    <script>

    </script>
</head>
<body>
    <div id="box">
        <ul>
            <li v-for="val in arr | limitBy 2">        //限制显示为2个,也可改为参数
                {{val}}
            </li>
        </ul>
    </div>
    <script>

        var vm=new Vue({
            data:{
                arr:[1,2,3,4,5]
            },
            methods:{

            }
        }).$mount('#box');

    </script>
</body>
</html>
运行结果:
limitBy 取几个 从哪开始
<!DOCTYPE html>
<html lang="en">
<head>
    <meta charset="UTF-8">
    <title>limitBy</title>
    <meta name="viewport" content="width=device-width, initial-scale=1.0, maximum-scale=1.0, user-scalable=0">
    <meta name="apple-mobile-web-app-capable" content="yes">
    <meta name="apple-mobile-web-app-status-bar-style" content="black">
    <style>

    </style>
    <script src="vue.js"></script>
    <script>

    </script>
</head>
<body>
    <div id="box">
        <ul>
            <li v-for="val in arr | limitBy 2 arr.length-2">
                {{val}}
            </li>
        </ul>
    </div>
    <script>

        var vm=new Vue({
            data:{
                arr:[1,2,3,4,5]
            },
            methods:{

            }
        }).$mount('#box');

    </script>
</body>
</html>
运行结果:取2个,从数组的倒数第二个开始取

3.2.2、filterBy 过滤数据
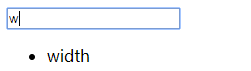
<!DOCTYPE html>
<html lang="en">
<head>
    <meta charset="UTF-8">
    <title>filterBy的用法</title>
    <meta name="viewport" content="width=device-width, initial-scale=1.0, maximum-scale=1.0, user-scalable=0">
    <meta name="apple-mobile-web-app-capable" content="yes">
    <meta name="apple-mobile-web-app-status-bar-style" content="black">
    <style>

    </style>
    <script src="vue.js"></script>
    <script>

    </script>
</head>
<body>
    <div id="box">
        <input type="text" v-model="a">
        <ul>
            <li v-for="val in arr | filterBy a">
                {{val}}
            </li>
        </ul>
    </div>
    <script>

        var vm=new Vue({
            data:{
                arr:['width','height','background','orange'],
                a:''
            },
            methods:{

            }
        }).$mount('#box');

    </script>
</body>
</html>
运行结果:当在文本框输入w时只会出现width,其余的都将被过滤掉
3.2.3、orderBy:倒序还是正序排列
<!DOCTYPE html>
<html lang="en">
<head>
    <meta charset="UTF-8">
    <title>orderBy倒序排列,1为正序,-1为倒序</title>
    <meta name="viewport" content="width=device-width, initial-scale=1.0, maximum-scale=1.0, user-scalable=0">
    <meta name="apple-mobile-web-app-capable" content="yes">
    <meta name="apple-mobile-web-app-status-bar-style" content="black">
    <style>

    </style>
    <script src="vue.js"></script>
    <script>

    </script>
</head>
<body>
    <div id="box">
        <input type="text" v-model="a">
        <ul>
            <li v-for="val in arr | orderBy -1">          //这里的-1也可为变量
                {{val}}
            </li>
        </ul>
    </div>
    <script>

        var vm=new Vue({
            data:{
                arr:['width','height','background','orange'],
                a:''
            },
            methods:{

            }
        }).$mount('#box');

    </script>
</body>
</html>
运行结果:

四、自定义过滤器
1、基本语法
自定义过滤器:  model ->过滤 -> view
        Vue.filter(name,function(input){

        });
2.基本用法
<!DOCTYPE html>
<html lang="en">
<head>
    <meta charset="UTF-8">
    <title>自定义过滤器</title>
    <meta name="viewport" content="width=device-width, initial-scale=1.0, maximum-scale=1.0, user-scalable=0">
    <meta name="apple-mobile-web-app-capable" content="yes">
    <meta name="apple-mobile-web-app-status-bar-style" content="black">
    <style>

    </style>
    <script src="vue.js"></script>
    <script>

    </script>
</head>
<body>
    <div id="box">
        {{a | toDou}}
    </div>
    <script>
        Vue.filter('toDou',function(input){          //自定义过滤器
            return input<10?'0'+input:''+input;
        });
        var vm=new Vue({
            data:{
                a:9
            },
            methods:{

            }
        }).$mount('#box');

    </script>
</body>
</html>
运行结果:

3、自定义时间转化器
<!DOCTYPE html>
<html lang="en">
<head>
    <meta charset="UTF-8">
    <title>自定义时间转化器</title>
    <meta name="viewport" content="width=device-width, initial-scale=1.0, maximum-scale=1.0, user-scalable=0">
    <meta name="apple-mobile-web-app-capable" content="yes">
    <meta name="apple-mobile-web-app-status-bar-style" content="black">
    <style>

    </style>
    <script src="vue.js"></script>
    <script>

    </script>
</head>
<body>
    <div id="box">
        {{a | date}}
    </div>
    <script>
        Vue.filter('date',function(input){
            var oDate=new Date(input);
            return oDate.getFullYear()+'-'+(oDate.getMonth()+1)+'-'+oDate.getDate()+' '+oDate.getHours()+':'+oDate.getMinutes()+':'+oDate.getSeconds();
        });

        var vm=new Vue({
            data:{
                a:Date.now()
            },
            methods:{

            }
        }).$mount('#box');

    </script>
</body>
</html>
运行结果:

五、自定义键盘信息
1、基本 语法
自定义键盘信息:
Vue.directive('on').keyCodes.ctrl=17;
Vue.directive('on').keyCodes.myenter=13;
<!DOCTYPE html>
<html lang="en">
<head>
    <meta charset="UTF-8">
    <title>自定义键盘信息</title>
    <meta name="viewport" content="width=device-width, initial-scale=1.0, maximum-scale=1.0, user-scalable=0">
    <meta name="apple-mobile-web-app-capable" content="yes">
    <meta name="apple-mobile-web-app-status-bar-style" content="black">
    <style>

    </style>
    <script src="vue.js"></script>
    <script>
        //ctrl->17
        /*document.onkeydown=function(ev){
            console.log(ev.keyCode);
        };*/
        Vue.directive('on').keyCodes.ctrl=17;  //    ctrl
        Vue.directive('on').keyCodes.myenter=13;    //enter

        window.onload=function(){
            var vm=new Vue({
                el:'#box',
                data:{
                    a:'blue'
                },
                methods:{
                    show:function(){
                        alert(1);
                    }
                }
            });
        };

    </script>
</head>
<body>
    <div id="box">
        <input type="text" @keydown.myenter="show | debounce 2000">
    </div>

</body>
</html>
运行结果:当按下enter键之后过2秒弹出1