1、 iframe页面嵌入Jupyter Notebook跨域处理
采用nginx解决跨域访问问题,nginx.conf配置如下(http://192.168.1.230:9999 为Jupyter Notebook访问地址):
upstream localhost {
        server localhost:81 weight=1;
    }

server {
        listen       80;
        server_name  localhost;

        #charset koi8-r;

        #access_log  logs/host.access.log  main;
# 重点,转发websocket需要的设置;Notebook内核连接方式 ws://192.168.1.230:9999/api/kernels/***/channels?session_id=***
proxy_set_header X-Real_IP $remote_addr;
proxy_set_header Host $host;
proxy_set_header X_Forward_For $proxy_add_x_forwarded_for;
proxy_http_version 1.1;
proxy_set_header Upgrade $http_upgrade;
proxy_set_header Connection 'upgrade';
        location / {
            root   html;
            index  index.html index.htm;
            http://localhost:80;
            proxy_pass http://localhost;
            proxy_connect_timeout 1;
            proxy_send_timeout 5;
            proxy_read_timeout 5;
        }
#配置转发websocket(ws)请求
location /ws{
root html;
index index.html index.htm;
proxy_pass http://localhost;
}
    location /tree{
            proxy_pass http://192.168.1.230:9999/tree;
    }

    location /login{
            proxy_pass http://192.168.1.230:9999/login;
    }

    location /static{
            proxy_pass http://192.168.1.230:9999/static;
    }

    location /api{
            proxy_pass http://192.168.1.230:9999/api;
    }

    location /notebooks{
            proxy_pass http://192.168.1.230:9999/notebooks;
    }

    location /edit{
            proxy_pass http://192.168.1.230:9999/edit;
    }

    location /nbextensions{
            proxy_pass http://192.168.1.230:9999/nbextensions;
    }

    location /custom{
            proxy_pass http://192.168.1.230:9999/custom;
    }
}
<!DOCTYPE html>
<html>
<head>
<meta charset="UTF-8">
<title>Insert title here</title>
<script type="text/javascript">
  function mytest(){
      //动态读取Jupyter Notebook单元格cell内容
      var cell =  document.getElementById("myiframe").contentWindow.Jupyter.notebook.get_selected_cell();
      alert(cell.get_text());
      //动态添加Jupyter Notebook单元格cell
      var insertCell = document.getElementById("myiframe").contentWindow.Jupyter.notebook.insert_cell_below('code');
      insertCell.set_text("print("hello  my word")");
      //cell.execute()
  }
</script>
</head>
<body>
<button name="test" type="button" onClick="javascript:void(mytest())"  value="测试">测试</button><br/>
<iframe src="http://localhost/tree" width="100%" height="600px" id="myiframe"/>
</body>
</html>
2、打开jupyter_notebook_config.py文件
找到 c.NotebookApp.allow_origin = '' 将 '' 改为 '*'
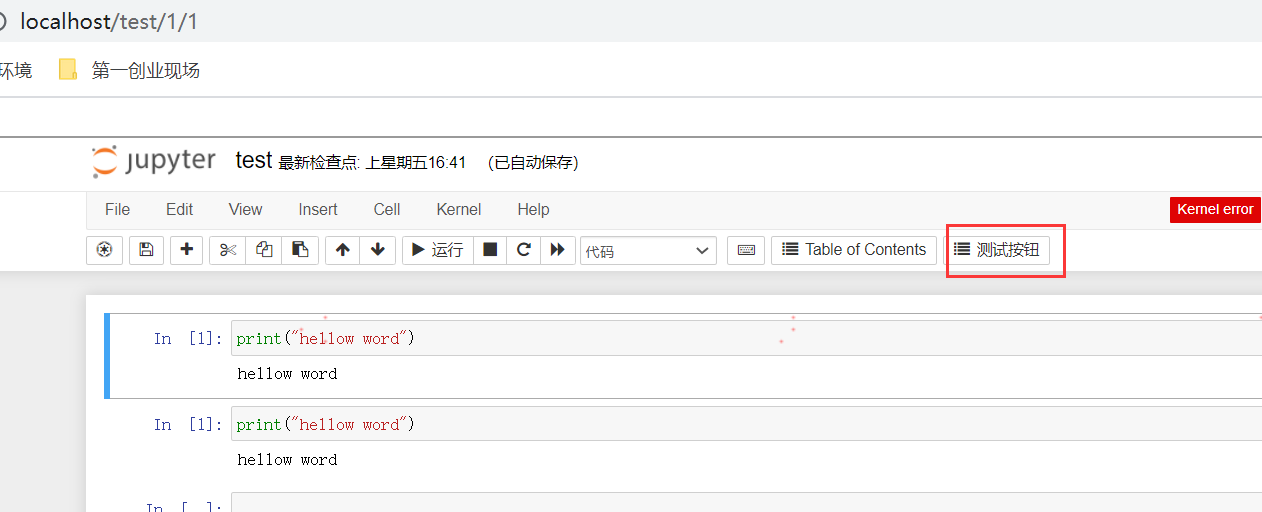
3、自定义Jupyter Notebook按钮
windows平台在C:ProgramDatajupyter bextensions 新建 mytoolmytool.js 文件,内容如下:
define(["require", "jquery", "base/js/namespace"], function (require, $, IPython) {
  "use strict";

  var myCallBack = function () {
      alert('测试内容1111');

      //var selectedCell = Jupyter.notebook.get_selected_cell();
      //alert(selectedCell.get_text());

      //调用iframe外部页面的js方法
      //top.mytest();
  };

  var test_button = function () {
    if (!IPython.toolbar) {
      $([IPython.events]).on("app_initialized.NotebookApp", test_button);
      return;
    }
    if ($("#test_button").length === 0) {
      IPython.toolbar.add_buttons_group([
        {
          'label'   : '测试按钮',
          'icon'    : 'fa-list',
          'callback': myCallBack,
          'id'      : 'test_button'
        },
      ]);
    }
  };

  var load_ipython_extension = function () {
    test_button();
  };

  return {
    load_ipython_extension : load_ipython_extension,
    myCallBack : myCallBack,

  };

});
在dos窗口中执行激活扩展项:jupyter nbextension enable mytool/mytool
4、设置Jupyter Notebook在当前页面中打开新页面
windows平台配置C:UsersAdministrator.jupytercustomcustom.js , 内容如下:
define(["require", "jquery", "base/js/namespace"], function (require, $, IPython) {
        IPython._target = '_self';
});
5、其他
启动:jupyter notebook --ip=192.168.1.230
安装扩展项:jupyter nbextension install C:/Users/Administrator/.jupyter/custom.js
//安装成功后,系统自动拷贝文件到 C:/ProgramData/jupyter/nbextensions 目录下
卸载扩展项:jupyter nbextension uninstall C:/ProgramData/jupyter/nbextensions/custom.js
6、jupyterhub nginx代理配置
#user  nobody;
worker_processes  1;

#error_log  logs/error.log;
#error_log  logs/error.log  notice;
#error_log  logs/error.log  info;

#pid        logs/nginx.pid;


events {
    worker_connections  1024;
}


http {
    include       mime.types;
    default_type  application/octet-stream;
    sendfile        on;
    keepalive_timeout  65;

    map $http_upgrade $connection_upgrade {
        default upgrade;
        ''      close;
    }

    server {
        listen       80;
        server_name  localhost;

        #charset koi8-r;

        #access_log  logs/host.access.log  main;

        location / {
            proxy_pass http://192.168.110.13:9000;
            proxy_set_header X-Real-IP $remote_addr;
            proxy_set_header Host $host;
            proxy_set_header X-Forwarded-For $proxy_add_x_forwarded_for;

            # websocket headers
            proxy_http_version 1.1;
            proxy_set_header Upgrade $http_upgrade;
            proxy_set_header Connection $connection_upgrade;
            proxy_set_header X-Scheme $scheme;

            proxy_buffering off;
        }

        location ~ /.well-known {
            allow all;
        }

        error_page   500 502 503 504  /50x.html;
        location = /50x.html {
            root   html;
        }
    }

}
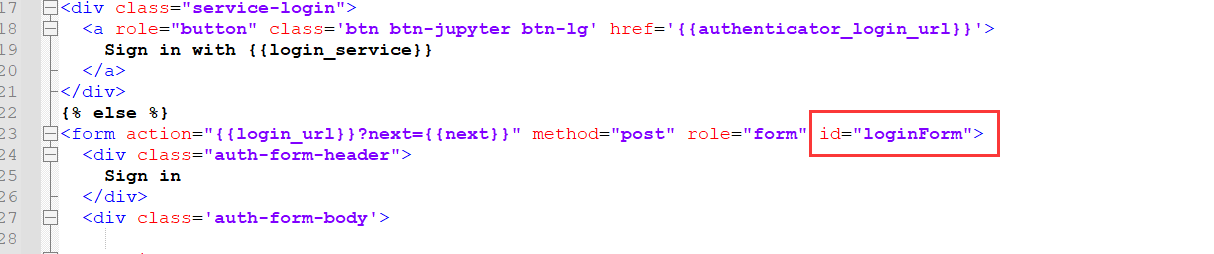
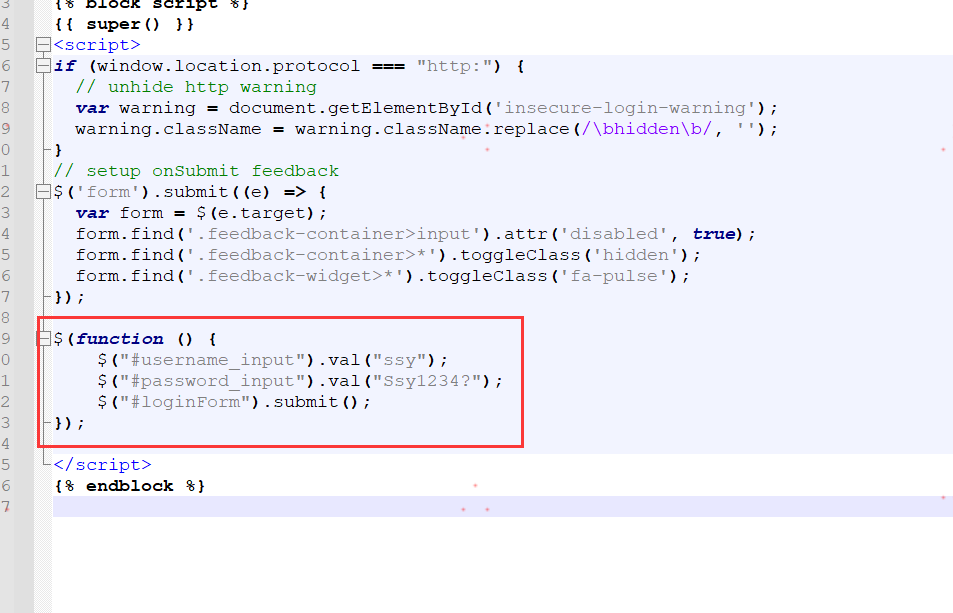
7、jupyterhub 用户自动登录
编辑 /home/ssy/Python-3.7.3/share/jupyterhub/templates/login.html 增加如下代码: