长话短说:
1、官网
https://react.docschina.org/docs/context.html
2、优点
Context 提供了一个无需为每层组件手动添加 props,就能在组件树间进行数据传递的方法。
3、问题
Context 主要应用场景在于很多不同层级的组件需要访问同样一些的数据。请谨慎使用,因为这会使得组件的复用性变差。
4、函数组件 使用
context.jsx
import { createContext } from "react";

export const themes = {
  light: {
    foreground: '#000000',
    background: '#eeeeee'
  },
  dark: {
    foreground: '#ffffff',
    background: '#aaaaaa'
  }
};

export const ThemeContext = createContext(themes.light)

export const CompAContext = createContext()
index.jsx
import React from 'react';
import { ThemeContext, themes } from './context';
import CompA from './selfComp/CompA';
import CompB from './selfComp/CompB';
import './index.less';

function Context () {
  return (
    <div>
      <ThemeContext.Provider value={themes.dark}>
        组件A:
        <CompA/>
        <br/><br/>
        ------
        <br/><br/>
        组件B:
        <CompB/>
      </ThemeContext.Provider>
    </div>
  )
}

export default Context;
CompA.jsx
import React from 'react';
import { CompAContext } from '../context';
import CompAA from './CompAA';

function CompA () {
  return (
    <div>
      <CompAContext.Provider value={'This is CompA'}>
        <CompAA />
      </CompAContext.Provider>
    </div>
  )
}

export default CompA;
CompAA.jsx
import React,{useContext} from 'react';
import { CompAContext,ThemeContext } from '../context';

function CompAA () {
  const val = useContext(CompAContext)
  const themes = useContext(ThemeContext)
  return (
    // 1、使用useContext
    <>
      <div style={{background: themes.background, color:themes.foreground}}>CompAA</div>
      <div>{'CompAA ------' + val}</div>
    </>

    // 2、CompAContext.Consumer
    // <div>
    //   <CompAContext.Consumer>
    //     {
    //       (val) => (
    //         <ThemeContext.Consumer>
    //           {
    //             themes => (
    //               <>
    //                 <div style={{background: themes.background, color:themes.foreground}}>CompAA</div>
    //                 <div>{'CompAA ------' + val}</div>
    //               </>
    //             )
    //           }
    //         </ThemeContext.Consumer>
    //       )
    //     }
    //   </CompAContext.Consumer>
    // </div>
  )
}

export default CompAA;
CompB.jsx
import React,{useContext} from 'react';
import { ThemeContext } from '../context';

function CompB () {
  const themes = useContext(ThemeContext)
  return (
    // 1、useContext
    <div style={{background: themes.background, color:themes.foreground}}>CompB</div>

    // 2、Consumer
    // <div>
    //   <ThemeContext.Consumer>
    //     {
    //       (themes) => (
    //         <div style={{background: themes.background, color:themes.foreground}}>CompB</div>
    //       )
    //     }
    //   </ThemeContext.Consumer>
    // </div>
  )
}

export default CompB;
总结:
Provider后,子组件中有两种接收值的方法:(详细见上面案例)
1、使用 Consumer
2、使用 useContext
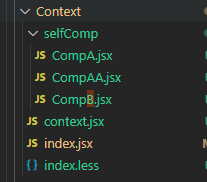
目录结构
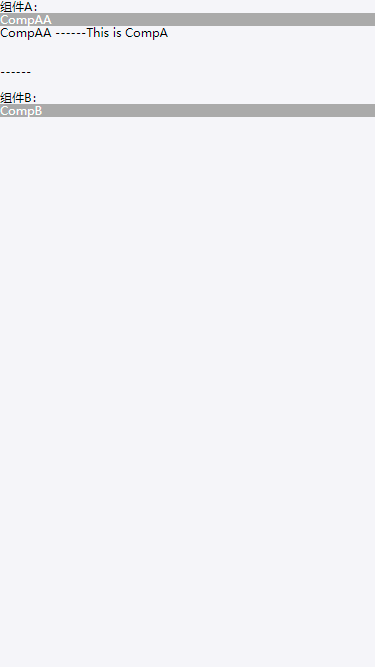
效果
其他:
1、类组件使用(以 CompB 为例)
class CompB extends React.Component {
  componentDidMount() {
    let themes = this.context;
    /* 在组件挂载完成后,使用 MyContext 组件的值来执行一些有副作用的操作 */
  }
  componentDidUpdate() {
    let themes = this.context;
    /* ... */
  }
  componentWillUnmount() {
    let themes = this.context;
    /* ... */
  }
  render() {
    let themes = this.context;
    /* 基于 MyContext 组件的值进行渲染 */
    <div style={{background: themes.background, color:themes.foreground}}>CompB</div>
  }
}
CompB.contextType = ThemeContext;
2、如果你正在使用实验性的 public class fields 语法,你可以使用 static 这个类属性来初始化你的 contextType。
class CompB extends React.Component {
static contextType = ThemeContext;
render() {
let themes = this.context;
/* 基于这个值进行渲染工作 */
<div style={{background: themes.background, color:themes.foreground}}>CompB</div>
}
}