【Unity Shaders】学习笔记——SurfaceShader(三)BasicDiffuse和HalfLambert
转载请注明出处:http://www.cnblogs.com/-867259206/p/5598185.html
写作本系列文章时使用的是Unity5.3。
写代码之前:
-
当然啦,如果Unity都没安装的话肯定不会来学Unity Shaders吧?
-
阅读本系列文章之前你需要有一些编程的概念。
-
在VS里面,Unity Shaders是没有语法高亮显示和智能提示的,VS党可以参考一下这篇文章使代码高亮显示,也可以下载
shaderlabvs或NShader之类的插件使代码高亮显示。 -
这是针对小白的Unity Shaders的基础知识,如果你已经有了基础或者你是大神,那么这些文章不适合你。
-
由于作者水平的局限,文中或许会有谬误之处,恳请指出。
还记得前面说的创建Surface Shader的方法吗?按照之前的方法,新建一个Shader,命名为BasicDiffuse。
-
先将修改Properties里的内容:
Properties {
        _EmissiveColor ("Emissive Color", Color) = (1,1,1,1)
        _AmbientColor ("Ambient Color", Color) = (1,1,1,1)
        _MySliderValue ("This is a Slider", Range(0,10)) = 2.5
    }
-
将
#pragma surface surf Standard fullforwardshadows改为:
#pragma surface surf BasicDiffuse
这说明我们要用BasicDiffuse光照模型,这是我们自定义的一个光照模型。
-
定义在Properties里声明过的变量:
float4 _EmissiveColor;
float4 _AmbientColor;
float _MySliderValue;
-
修改你的surf函数:
void surf (Input IN, inout SurfaceOutput o){
    float4 c;
    c = pow((_EmissiveColor+_AmbientColor), _MySliderValue);
    o.Albedo = c.rgb;
    o.Alpha = c.a;
}
注意输出结构的类型,做了修改。
-
添加下面这个函数,这就是我们自定义的光照模型:
inline float4 LightingBasicDiffuse (SurfaceOutput s, fixed3 lightDir, fixed atten){
    float difLight = max(0, dot (s.Normal, lightDir));
    float4 col;
    col.rgb = s.Albedo * _LightColor0.rgb * (difLight * atten * 2);
    col.a = s.Alpha;
    return col;
}
解释
-
在surf函数里,我们将自发光颜色和漫反射颜色相加的和作为底数,然后将_MySliderValue的值作为次幂,进行幂运算得到四元浮点向量c,输出的反射值等于c的RGB颜色,输出的透明通道等于c的透明通道。这其实就是将自发光颜色和漫反射颜色进行了一定的混合。
-
自定义的光照模型的命名规则是“Lighting”+“自定义的光照名称”。这样就定义了一个光照模型。
光照模型有5种原型:half4 LightingName (SurfaceOutput s, fixed3 lightDir, half atten); half4 LightingName (SurfaceOutput s, fixed3 lightDir, fixed3 viewDir, half atten); half4 LightingName_PrePass (SurfaceOutput s, half4 light); half4 LightingName_DirLightmap(SurfaceOutput s, fixed4 color, fixed4 scale, bool surfFuncWritesNormal); half4 LightingName_DirLightmap(SurfaceOutput s, fixed4 color, fixed4 scale, fixed3 viewDir, bool surfFuncWritesNormal,out half3 specColor);这里我们用的就是第一种原型。第一个参数是输出结构,第二个参数是光线方向,也就是光源到物体表面上的点的向量,是单位向量,第三个参数衰减度,attenuation的缩写,因为光线被物体反射之后,会有能量损失,所以会有衰减。我们看到,这个参数没有被赋值,所以它是Unity内置的一个参数,我们知道它表示衰减就可以了。
函数里第一句计算的是漫反射的光强。dot是点乘。将表面的法向量和光线角度点乘,也就是光线和法向量的夹角越大,光线在法向量方向的分量越小,即反射的光越弱。因为夹角超过90度的时候,是负值,所以用max函数使结果大于0。max(x,y)就是取x,y中的最大值。
第三句的意思就是颜色值=反射值×平行光的颜色×漫反射光强×衰减度×2.
_LightColor0也是Unity内置的一个变量,它在不同的render path和pass里的意义不同,在这里就是平行光的颜色。
后面的这个2应该是个经验数值,可以根据自己想要的效果修改。
这就是基本漫反射的计算方法。
我们来看一下它的效果:
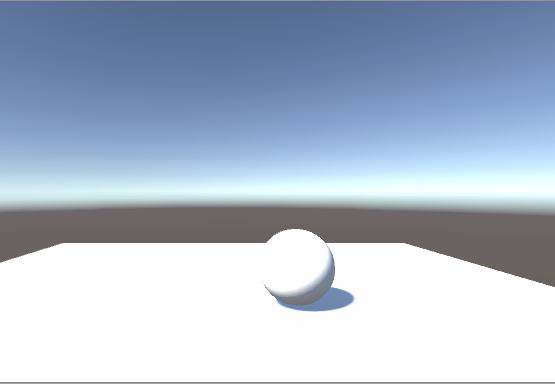
新建一个Sphere,将BasicDiffuse材质赋给它。将Slider的数值调为0.不出意外的话,你看到的效果是这样的:

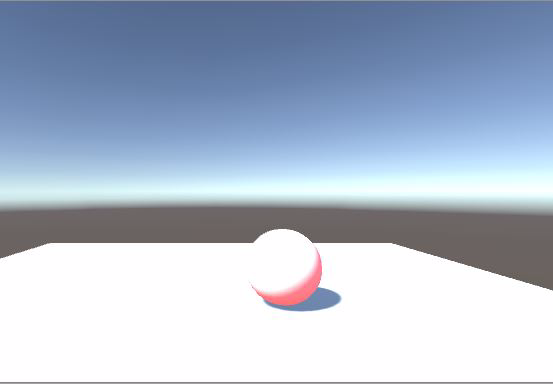
更改自发光的颜色,然后调节Slider,我们发现,Slider数值越大,自发光颜色越明显:


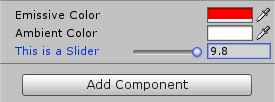
现在将自发光改回白色,更改漫反射的颜色,然后调节Slider:
不出意外的话,看到的效果和自发光一样,Slider=0时,阴影是灰色的,自发光和漫反射的颜色不起作用,数值越大,则自发光和漫反射的颜色越明显。
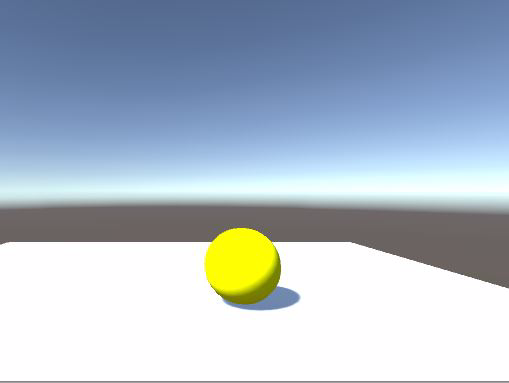
接下来,同时更改自发光和漫反射的颜色,比如红色和绿色,我们看到球变成了黄色,也就是红光和绿光混合的效果:

你还可以自己再调节其他颜色试试看,看看都会有些什么效果。
还有那个函数里的数值2,你也可以改改试试看哟~
HalfLambert
接下来再学习一个经典的光照模型——HalfLambert(半兰伯特)。
很简单,我们先把光照模型改名为HalfLambert,也就是修改光照函数和#pragma。
先修改一句:
float difLight = dot (s.Normal, lightDir);
然后添加一句:
float hLambert = 0.5 * difLight + 0.5;
再改一句:
col.rgb = s.Albedo * _LightColor0.rgb * (hLambert * atten * 2);
原先difLight区间[-1,0]的部分变成了[0,0.5],如果直接用max函数使结果大于0的话,小于0的部分都会等于0,也就是背光面都会是黑色。如果用半兰伯特公式的话,小于0的部分就会从0渐变到0.5,颜色的灰度是会有变化。同时,亮部的亮度也提高了。
HalfLambert是由Valve公司提出的技术,是一种用于在低光照区域照亮物体的技术。它用来防止某个物体的背光面丢失形状并且显得太过平面化。这个技术是没有任何物理原理的,是一种感性的视觉增强。
附:代码清单
Shader "Custom/BasicDiffuse" {
    Properties {
        _EmissiveColor ("Emissive Color", Color) = (1,1,1,1)
        _AmbientColor ("Ambient Color", Color) = (1,1,1,1)
        _MySliderValue ("This is a Slider", Range(0,10)) = 2.5
    }
    SubShader {
        Tags { "RenderType"="Opaque" }
        LOD 200

        CGPROGRAM
        // Physically based Standard lighting model, and enable shadows on all light types
        #pragma surface surf BasicDiffuse

        // Use shader model 3.0 target, to get nicer looking lighting
        #pragma target 3.0

        float4 _EmissiveColor;
        float4 _AmbientColor;
        float _MySliderValue;

        struct Input{
            float2 uv_MainTex;
        };

        void surf (Input IN, inout SurfaceOutput o){
            float4 c;
            c = pow((_EmissiveColor+_AmbientColor), _MySliderValue);
            o.Albedo = c.rgb;
            o.Alpha = c.a;
        }

        inline float4 LightingBasicDiffuse (SurfaceOutput s, fixed3 lightDir, fixed atten){
        float difLight = max(0, dot (s.Normal, lightDir));
        float4 col;
        col.rgb = s.Albedo * _LightColor0.rgb * (difLight * atten * 2);
        col.a = s.Alpha;
        return col;
        }

        ENDCG
    }
    FallBack "Diffuse"
}
HalfLambert光照模型函数:
inline float4 LightingHalfLambert (SurfaceOutput s, fixed3 lightDir, fixed atten){
    float difLight = dot (s.Normal, lightDir);
    float hLambert = 0.5 * difLight + 0.5;
    float4 col;
    col.rgb = s.Albedo * _LightColor0.rgb * (hLambert * atten * 2);
    col.a = s.Alpha;
    return col;
}