为了熟悉搭建Spring MVC框架需要的最小资源,本文采用新建空白的动态web项目,具体步骤如下:
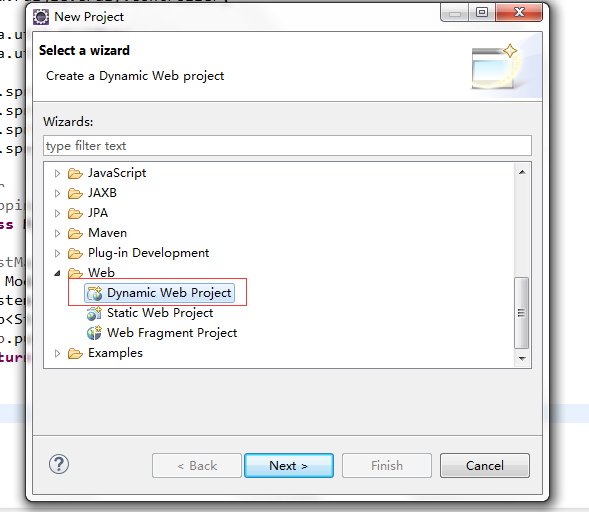
1、新建动态web项目
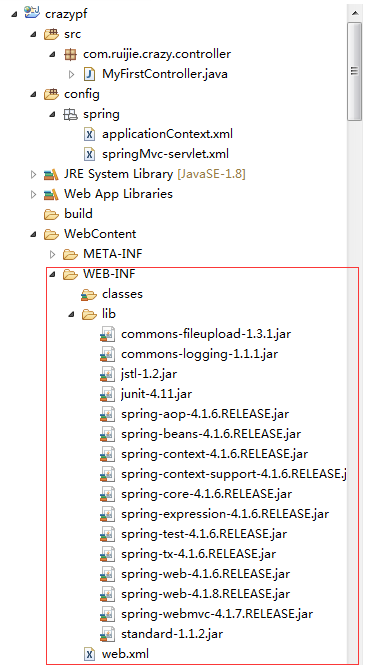
2、下载最基本的依赖jar包到WEB-INF/lib文件夹下
3、修改web.xml配置
 1 <?xml version="1.0" encoding="UTF-8"?>
 2 <web-app xmlns:xsi="http://www.w3.org/2001/XMLSchema-instance"
 3     xmlns="http://java.sun.com/xml/ns/javaee"
 4     xsi:schemaLocation="http://java.sun.com/xml/ns/javaee
 5         http://java.sun.com/xml/ns/javaee/web-app_2_5.xsd"
 6     id="WebApp_ID" version="2.5">
 7
 8     <display-name>crazypf</display-name>
 9     <listener>
10         <listener-class>org.springframework.web.context.ContextLoaderListener</listener-class>
11     </listener>
12
13     <!-- 指定Spring Bean的配置文件所在目录。默认配置在WEB-INF目录下 -->
14     <context-param>
15         <param-name>
16             contextConfigLocation
17         </param-name>
18         <param-value>
19             classpath*:spring/applicationContext*.xml
20         </param-value>
21     </context-param>
22
23     <!-- 设置过期时间 (分钟)-->
24     <session-config>
25         <session-timeout>30</session-timeout>
26     </session-config>
27
28     <!-- springMvc servlet配置  -->
29     <servlet>
30         <servlet-name>springMvc</servlet-name>
31         <servlet-class>org.springframework.web.servlet.DispatcherServlet</servlet-class>
32         <init-param>
33             <param-name>contextConfigLocation</param-name>
34             <param-value>classpath*:spring/springMvc-servlet.xml</param-value>
35         </init-param>
36
37         <load-on-startup>1</load-on-startup>
38     </servlet>
39     <servlet-mapping>
40         <servlet-name>springMvc</servlet-name>
41         <url-pattern>/</url-pattern>
42     </servlet-mapping>
43
44 </web-app>
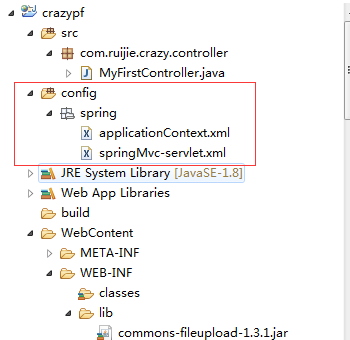
4、新建config配置文件夹,并创建applicationContext.xml与springMvc-servlet.xml配置文件
5、applicationContext.xml配置
 1 <?xml version="1.0" encoding="UTF-8"?>
 2 <beans xmlns="http://www.springframework.org/schema/beans"
 3     xmlns:xsi="http://www.w3.org/2001/XMLSchema-instance"
 4     xmlns:context="http://www.springframework.org/schema/context"
 5     xsi:schemaLocation="http://www.springframework.org/schema/beans
 6                          http://www.springframework.org/schema/beans/spring-beans-3.0.xsd
 7                          http://www.springframework.org/schema/context
 8                         http://www.springframework.org/schema/context/spring-context-3.0.xsd">
 9
10 </beans>
6、springMvc-servlet.xml配置
 1 <?xml version="1.0" encoding="UTF-8"?>
 2 <beans xmlns="http://www.springframework.org/schema/beans"
 3     xmlns:mvc="http://www.springframework.org/schema/mvc"
 4     xmlns:p="http://www.springframework.org/schema/p"
 5     xmlns:xsi="http://www.w3.org/2001/XMLSchema-instance"
 6     xmlns:util="http://www.springframework.org/schema/util"
 7     xmlns:context="http://www.springframework.org/schema/context"
 8     xsi:schemaLocation="http://www.springframework.org/schema/beans
 9         http://www.springframework.org/schema/beans/spring-beans.xsd
10         http://www.springframework.org/schema/context
11         http://www.springframework.org/schema/context/spring-context.xsd
12         http://www.springframework.org/schema/util
13         http://www.springframework.org/schema/util/spring-util.xsd
14         http://www.springframework.org/schema/mvc
15         http://www.springframework.org/schema/mvc/spring-mvc.xsd">
16
17     <!-- 启用注解 -->
18     <context:annotation-config />
19
20     <!-- 注解驱动:自动扫描所有注解该路径 -->
21     <context:component-scan base-package="com.ruijie.crazy" >
22     </context:component-scan>
23
24      <mvc:annotation-driven/>
25
26     <!-- To enable @RequestMapping process on type level and method level -->
27     <bean class="org.springframework.web.servlet.mvc.annotation.AnnotationMethodHandlerAdapter">
28     </bean>
29
30
31     <!-- 完成请求和注解POJO的映射 -->
32     <bean class="org.springframework.web.servlet.mvc.annotation.DefaultAnnotationHandlerMapping">
33         <property name="useDefaultSuffixPattern" value="false" />
34     </bean>
35
36     <!-- 对转向页面的路径解析。prefix:前缀, suffix:后缀 -->
37     <bean class="org.springframework.web.servlet.view.InternalResourceViewResolver"
38         p:prefix="/" p:suffix=".html" />
39
40     <bean id="multipartResolver" class="org.springframework.web.multipart.commons.CommonsMultipartResolver"
41         p:defaultEncoding="utf-8" />
42 </beans>
7、测试,新建MyFirstController,Controller中代码如下:
 1 package com.ruijie.crazy.controller;
 2
 3 import java.util.HashMap;
 4 import java.util.Map;
 5
 6 import org.springframework.stereotype.Controller;
 7 import org.springframework.web.bind.annotation.RequestMapping;
 8 import org.springframework.web.bind.annotation.RequestMethod;
 9 import org.springframework.web.servlet.ModelAndView;
10
11 @Controller
12 @RequestMapping("/myweb")
13 public class MyFirstController {
14
15     @RequestMapping(value = "/test", method = RequestMethod.GET)
16     public ModelAndView getUserInfoByCode() {
17         System.out.println("/myweb/test");
18         Map<String, Object> map = new HashMap<String, Object>();
19         map.put("userName", "ypf");
20         return new ModelAndView("hello",map);
21     }
22 }
8、运行web工程
后台创建一个hello.html页面,在浏览器输入http://127.0.0.1/crazypf/myweb/test.html,在eclipse控制台可以看到如下打印,说明Spring mvc框架已经跑起来了

但是,此时控制台会发现浏览器会出现404,找不到页面,从控制台打印的log可以看出找不到资源,原因是请求hello.html页面时会再次被DispatchServlet拦截,在springMvc-servlet.xml加上如下配置即可解决问题:
<mvc:resources mapping="/page/**" location="/page/"/>