1、下载maven安装包 apache-maven-3.5.2-bin.tar.gz
2、配置环境变量(mac)
vim ~/.bash_profile
# Add maven home
export M2_HOME=/Users/chong/Documents/soft/maven/apache-maven-3.5.2
export PATH=$M2_HOME/bin:$PATH
source ~/.bash_profile
3、查看maven版本命令 mvn -v

4、settings.xml 中配置本地仓库位置、国内镜像url
<localRepository>/Users/chong/Documents/soft/maven/.m2/repository</localRepository>
     <mirror>
      <id>CN</id>
      <name>OSChina Central</name>
      <url>http://maven.aliyun.com/nexus/content/groups/public/</url>
      <mirrorOf>central</mirrorOf>
     </mirror>
5、常用命令
编译:mvn compile --src/main/java目录java源码编译生成class (target目录下)
测试:mvn test --src/test/java 目录编译
清理:mvn clean --删除target目录,也就是将class文件等删除
打包:mvn package --生成压缩文件:java项目#jar包;web项目#war包,也是放在target目录下
安装:mvn install --将压缩文件(jar或者war)上传到本地仓库
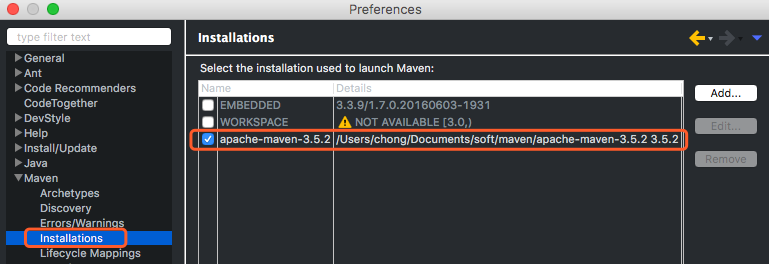
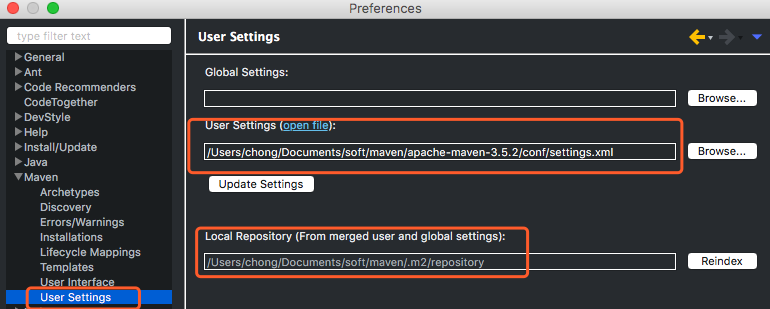
6、eclipse配置方法
7、打包可运行jar
pom.xml文件如下,
ps:若把 plugins 模块去掉,打的jar为普通不可运行jar
maven-jar-plugin用于生成META-INF/MANIFEST.MF文件的部分内容,<mainClass>com.xxg.Main</mainClass>指定MANIFEST.MF中的Main-Class,<addClasspath>true</addClasspath>会在MANIFEST.MF加上Class-Path项并配置依赖包,<classpathPrefix>lib/</classpathPrefix>指定依赖包所在目录;
maven-dependency-plugin插件用于将依赖包拷贝到<outputDirectory>${project.build.directory}/lib</outputDirectory>指定的位置,即lib目录下;
<project xmlns="http://maven.apache.org/POM/4.0.0" xmlns:xsi="http://www.w3.org/2001/XMLSchema-instance"
    xsi:schemaLocation="http://maven.apache.org/POM/4.0.0 http://maven.apache.org/xsd/maven-4.0.0.xsd">
    <modelVersion>4.0.0</modelVersion>

    <groupId>com.sfire</groupId>
    <artifactId>m2test</artifactId>
    <version>0.0.1-SNAPSHOT</version>
    <packaging>jar</packaging>

    <name>m2test</name>
    <url>http://maven.apache.org</url>

    <properties>
        <project.build.sourceEncoding>UTF-8</project.build.sourceEncoding>
    </properties>

    <dependencies>
        <dependency>
            <groupId>junit</groupId>
            <artifactId>junit</artifactId>
            <version>3.8.1</version>
            <scope>test</scope>
        </dependency>


        <dependency>
            <groupId>commons-lang</groupId>
            <artifactId>commons-lang</artifactId>
            <version>2.1</version>
        </dependency>

    </dependencies>


    <build>
        <plugins>
            <plugin>
                <groupId>org.apache.maven.plugins</groupId>
                <artifactId>maven-jar-plugin</artifactId>
                <version>2.6</version>
                <configuration>
                    <archive>
                        <manifest>
                            <addClasspath>true</addClasspath>
                            <classpathPrefix>lib/</classpathPrefix>
                            <mainClass>com.sfire.m2test.App</mainClass>
                        </manifest>
                    </archive>
                </configuration>
            </plugin>
            <plugin>
                <groupId>org.apache.maven.plugins</groupId>
                <artifactId>maven-dependency-plugin</artifactId>
                <version>2.10</version>
                <executions>
                    <execution>
                        <id>copy-dependencies</id>
                        <phase>package</phase>
                        <goals>
                            <goal>copy-dependencies</goal>
                        </goals>
                        <configuration>
                            <outputDirectory>${project.build.directory}/lib</outputDirectory>
                        </configuration>
                    </execution>
                </executions>
            </plugin>

        </plugins>
    </build>

</project>
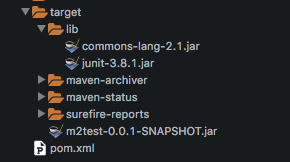
打出包的格式
8、运行jar包
java -jar m2test-0.0.1-SNAPSHOT.jar