系统与软件、安装、更新
编译安装
编译安装
配置文件 Makefile
编译,安装命令:make
make自动化编译安装依赖Makefile配置文件
rpm安装:包
yum安装:仓储
Nginx编译安装
1、编译
装备好nginx所需要的tar包在家目录里面
[root@MDNode01 ~]# ll
total 160144
-rw-r--r-- 1 root root   8816567 Sep 16 00:43 apache-tomcat-7.0.61.tar.gz
-rw-r--r-- 1 root root 153512879 Sep 16 00:43 jdk7u79linuxx64.tar.gz
-rw-r--r-- 1 root root   1653240 Sep 16 00:43 tengine-2.1.0.tar.gz
解压
[root@MDNode01 ~]# tar xf tengine-2.1.0.tar.gz
[root@MDNode01 ~]# ll
total 160148
-rw-r--r--  1 root  root    8816567 Sep 16 00:43 apache-tomcat-7.0.61.tar.gz
-rw-r--r--  1 root  root  153512879 Sep 16 00:43 jdk7u79linuxx64.tar.gz
drwxr-xr-x 11 50469 users      4096 Dec 19  2014 tengine-2.1.0
-rw-r--r--  1 root  root    1653240 Sep 16 00:43 tengine-2.1.0.tar.gz
[root@MDNode01 ~]# cd tengine-2.1.0
[root@MDNode01 tengine-2.1.0]# ll
total 688
-rw-r--r-- 1 50469 users    889 Dec 16  2014 AUTHORS.te
drwxr-xr-x 6 50469 users   4096 Dec 16  2014 auto
-rw-r--r-- 1 50469 users 236013 Dec 16  2014 CHANGES
-rw-r--r-- 1 50469 users  16993 Dec 19  2014 CHANGES.cn
-rw-r--r-- 1 50469 users 359556 Dec 16  2014 CHANGES.ru
-rw-r--r-- 1 50469 users  22193 Dec 19  2014 CHANGES.te
drwxr-xr-x 2 50469 users   4096 Dec 16  2014 conf
-rwxr-xr-x 1 50469 users   2435 Dec 16  2014 configure
drwxr-xr-x 4 50469 users   4096 Dec 16  2014 contrib
drwxr-xr-x 3 50469 users   4096 Dec 16  2014 docs
drwxr-xr-x 2 50469 users   4096 Dec 16  2014 html
-rw-r--r-- 1 50469 users   1676 Dec 16  2014 LICENSE
drwxr-xr-x 2 50469 users   4096 Dec 16  2014 man
drwxr-xr-x 3 50469 users   4096 Dec 16  2014 packages
-rw-r--r-- 1 50469 users   3223 Dec 19  2014 README
-rw-r--r-- 1 50469 users   3661 Dec 19  2014 README.markdown
drwxr-xr-x 9 50469 users   4096 Dec 16  2014 src
drwxr-xr-x 4 50469 users   4096 Dec 16  2014 tests
-rw-r--r-- 1 50469 users     43 Dec 16  2014 THANKS.te
[root@MDNode01 tengine-2.1.0]# vi README


Introduction
------------


Features
--------
* All features of nginx-1.6.2 are inherited, i.e., it is 100% compatible with nginx.
* Dynamic module loading support. You don't need to recompile Tengine when adding new modules to it.
* SPDY v3 support, and SPDY/HTTP servers can listen on the same port.
* Sends unbuffered upload directly to HTTP and FastCGI backend servers, which saves disk I/Os.
* More load balancing methods, e.g., consistent hashing, and session persistence.
* Input body filter support. It's quite handy to write Web Application Firewalls using this mechanism.
* Dynamic scripting language (Lua) support, which is very efficient and makes it easy to extend core functionalities.
* Logging enhancements. Syslog (local and remote), pipe logging, and log sampling are supported.
* Limits retries for upstream servers (proxy, memcached, fastcgi, scgi, uwsgi).
* Includes a mechanism to support standalone processes.
* Protects the server in case system load or memory use goes too high.
* Multiple CSS or JavaScript requests can be combined into one request to reduce download time.
* Removes unnecessary white spaces and comments to reduce the size of a page.
* Proactive health checks of upstream servers can be performed.
* The number of worker processes and CPU affinities can be set automatically.
* The limit_req module is enhanced with whitelist support and more conditions are allowed in a single location.
* Enhanced diagnostic information makes it easier to troubleshoot errors.
* More user-friendly command lines, e.g., showing all compiled-in modules and supported directives.
* Expiration times can be specified for certain MIME types.
* Error pages can be reset to 'default'.
* ...


Installation
------------
Tengine can be downloaded at http://tengine.taobao.org/download/tengine.tar.gz . You can also checkout the latest source code from GitHub at https://github.com/alibaba/tengine

To install Tengine, just follow these three steps:
    $ ./configure
    $ make
    # make install

By default, it will be installed to /usr/local/nginx. You can use the '--prefix' option to specify the root directory.
If you want to know all the 'configure' options, you should run './configure --help' for help.


Documentation
-------------
The homepage of Tengine is at http://tengine.taobao.org
You can access http://tengine.taobao.org/documentation.html for more information.


Mailing lists
-------------
Mailing lists are usually good places to ask questions. We highly recommend you subscribe to Tengine's mailing lists below:
http://code.taobao.org/mailman/listinfo/tengine (English)
http://code.taobao.org/mailman/listinfo/tengine-cn (Chinese)
上面已经可以看出安装的步骤
$ ./configure
$ make
# make install
[root@MDNode01 tengine-2.1.0]# ./configure --prefix=/opt/syy/nginx
checking for OS
 + Linux 2.6.32-431.el6.x86_64 x86_64
checking for C compiler ... not found

./configure: error: C compiler cc is not found

[root@MDNode01 tengine-2.1.0]# yum install gcc -y
安装 gcc编译器
重新编译会发先缺少pcre,yum仓库下载安装
yum search pcre 查询仓库里面是不是含有pcre
checking for PCRE library in /usr/include/pcre/ ... not found
checking for PCRE library in /usr/pkg/ ... not found
checking for PCRE library in /opt/local/ ... not found

./configure: error: the HTTP rewrite module requires the PCRE library.
You can either disable the module by using --without-http_rewrite_module
option, or install the PCRE library into the system, or build the PCRE library
statically from the source with nginx by using --with-pcre=<path> option.

[root@MDNode01 tengine-2.1.0]# yum install pcre-devel
重新编译会发现缺少openssl安装重新编译
./configure: error: SSL modules require the OpenSSL library.
You can either do not enable the modules, or install the OpenSSL library
into the system, or build the OpenSSL library statically from the source
with nginx by using --with-openssl=<path> option.

[root@MDNode01 tengine-2.1.0]# yum install openssl-devel
安装完成以后重新 ./configure --prefix=/opt/syy/nginx
[root@MDNode01 tengine-2.1.0]# ll
total 696
-rw-r--r-- 1 50469 users    889 Dec 16  2014 AUTHORS.te
drwxr-xr-x 6 50469 users   4096 Dec 16  2014 auto
-rw-r--r-- 1 50469 users 236013 Dec 16  2014 CHANGES
-rw-r--r-- 1 50469 users  16993 Dec 19  2014 CHANGES.cn
-rw-r--r-- 1 50469 users 359556 Dec 16  2014 CHANGES.ru
-rw-r--r-- 1 50469 users  22193 Dec 19  2014 CHANGES.te
drwxr-xr-x 2 50469 users   4096 Dec 16  2014 conf
-rwxr-xr-x 1 50469 users   2435 Dec 16  2014 configure
drwxr-xr-x 4 50469 users   4096 Dec 16  2014 contrib
drwxr-xr-x 3 50469 users   4096 Dec 16  2014 docs
drwxr-xr-x 2 50469 users   4096 Dec 16  2014 html
-rw-r--r-- 1 50469 users   1676 Dec 16  2014 LICENSE
-rw-r--r-- 1 root  root     448 Sep 16 01:33 Makefile
drwxr-xr-x 2 50469 users   4096 Dec 16  2014 man
drwxr-xr-x 4 root  root    4096 Sep 16 01:33 objs
drwxr-xr-x 3 50469 users   4096 Dec 16  2014 packages
-rw-r--r-- 1 50469 users   3223 Dec 19  2014 README
-rw-r--r-- 1 50469 users   3661 Dec 19  2014 README.markdown
drwxr-xr-x 9 50469 users   4096 Dec 16  2014 src
drwxr-xr-x 4 50469 users   4096 Dec 16  2014 tests
-rw-r--r-- 1 50469 users     43 Dec 16  2014 THANKS.te
这时候就可以看到一个makefile文件,我们进入文件后面查查看
[root@MDNode01 tengine-2.1.0]# cat Makefile

default:	build

clean:
	rm -rf Makefile objs

build:
	$(MAKE) -f objs/Makefile
	$(MAKE) -f objs/Makefile manpage

test:
	$(MAKE) -f objs/Makefile test

install:
	$(MAKE) -f objs/Makefile install

dso_install:
	$(MAKE) -f objs/Makefile dso_install

upgrade:
	/opt/syy/nginx/sbin/nginx -t

	kill -USR2 `cat /opt/syy/nginx/logs/nginx.pid`
	sleep 1
	test -f /opt/syy/nginx/logs/nginx.pid.oldbin

	kill -QUIT `cat /opt/syy/nginx/logs/nginx.pid.oldbin`
这个Makeflie是一个索引和引用,分流
objs/Makefile文件才是配置文件
install:        objs/nginx
        test -d '$(DESTDIR)/opt/syy/nginx' || mkdir -p '$(DESTDIR)/opt/syy/nginx'

        test -d '$(DESTDIR)/opt/syy/nginx/sbin'                 || mkdir -p '$(DESTDIR)/opt/syy/nginx/sbin'
        test ! -f '$(DESTDIR)/opt/syy/nginx/sbin/nginx'                 || mv '$(DESTDIR)/opt/syy/nginx/sbin/nginx'                     '$(DESTDIR)/opt/syy/nginx/sbin/nginx.old'
        cp objs/nginx '$(DESTDIR)/opt/syy/nginx/sbin/nginx'
这个时候我们可以看到会有这样的一个描述:会帮助创建一个目录
文件的后面就是一个文件cp的过程
编译,
make会自动检索当前目录下面的Makefile文件执行编译的过程
[root@MDNode01 tengine-2.1.0]# pwd
/root/tengine-2.1.0
[root@MDNode01 tengine-2.1.0]# make
make -f objs/Makefile
make[1]: Entering directory `/root/tengine-2.1.0'
cc -c -pipe  -O -W -Wall -Wpointer-arith -Wno-unused-parameter -Werror -g  -I src/core -I src/event -I src/event/modules -I src/os/unix -I src/proc -I objs
		-o objs/src/core/nginx.o
		src/core/nginx.c
cc -c -pipe  -O -W -Wall -Wpointer-arith -Wno-unused-parameter -Werror -g  -I src/core -I src/event -I src/event/modules -I src/os/unix -I src/proc -I objs
		-o objs/src/core/ngx_log.o
		src/core/ngx_log.c
cc -c -pipe  -O -W -Wall -Wpointer-arith -Wno-unused-parameter -Werror -g  -I src/core -I src/event -I src/event/modules -I src/os/unix -I src/proc -I objs
		-o objs/src/core/ngx_palloc.o
		src/core/ngx_palloc.c
cc -c -pipe  -O -W -Wall -Wpointer-arith -Wno-unused-parameter -Werror -g  -I src/core -I src/event -I src/event/modules -I src/os/unix -I src/proc -I objs
		.....................
	objs/src/http/modules/ngx_http_stub_status_module.o
	objs/ngx_modules.o
	-lpthread -ldl -lcrypt -lpcre -lssl -lcrypto -ldl -lz
make[1]: Leaving directory `/root/tengine-2.1.0'
make -f objs/Makefile manpage
make[1]: Entering directory `/root/tengine-2.1.0'
sed -e "s|%%PREFIX%%|/opt/syy/nginx|"
		-e "s|%%PID_PATH%%|/opt/syy/nginx/logs/nginx.pid|"
		-e "s|%%CONF_PATH%%|/opt/syy/nginx/conf/nginx.conf|"
		-e "s|%%ERROR_LOG_PATH%%|/opt/syy/nginx/logs/error.log|"
		< man/nginx.8 > objs/nginx.8
make[1]: Leaving directory `/root/tengine-2.1.0'
这样就编译完成了,
安装
[root@MDNode01 tengine-2.1.0]# make install
make -f objs/Makefile install
make[1]: Entering directory `/root/tengine-2.1.0'
test -d '/opt/syy/nginx' || mkdir -p '/opt/syy/nginx'
test -d '/opt/syy/nginx/sbin' 		|| mkdir -p '/opt/syy/nginx/sbin'
test ! -f '/opt/syy/nginx/sbin/nginx' 		|| mv '/opt/syy/nginx/sbin/nginx' 			'/opt/syy/nginx/sbin/nginx.old'
cp objs/nginx '/opt/syy/nginx/sbin/nginx'
test -d '/opt/syy/nginx/conf' 		|| mkdir -p '/opt/syy/nginx/conf'
cp conf/koi-win '/opt/syy/nginx/conf'
cp conf/koi-utf '/opt/syy/nginx/conf'
..........
test -f 'objs/ngx_auto_headers.h'  && cp 'objs/ngx_auto_headers.h' '/opt/syy/nginx/include'
test -f 'objs/ngx_auto_config.h' && cp 'objs/ngx_auto_config.h' '/opt/syy/nginx/include'
make[1]: Leaving directory `/root/tengine-2.1.0'
这样我们就安装完成了!!!!!!!!!!!!!!!!!!
[root@MDNode01 tengine-2.1.0]# cd /opt/syy/nginx/
[root@MDNode01 nginx]# ll
total 24
drwxr-xr-x 2 root root 4096 Sep 16 01:50 conf
drwxr-xr-x 2 root root 4096 Sep 16 01:50 html
drwxr-xr-x 2 root root 4096 Sep 16 01:50 include
drwxr-xr-x 2 root root 4096 Sep 16 01:50 logs
drwxr-xr-x 2 root root 4096 Sep 16 01:50 modules
drwxr-xr-x 2 root root 4096 Sep 16 01:50 sbin
[root@MDNode01 nginx]# cd sbin/
[root@MDNode01 sbin]# ll
total 6116
-rwxr-xr-x 1 root root   16791 Sep 16 01:50 dso_tool
-rwxr-xr-x 1 root root 6238237 Sep 16 01:50 nginx
#启动nginx程序
[root@MDNode01 sbin]# ./nginx
测试:
使用http协议访问本机80端口就可以了,

ok大功告成!!!!!!!!!!!!
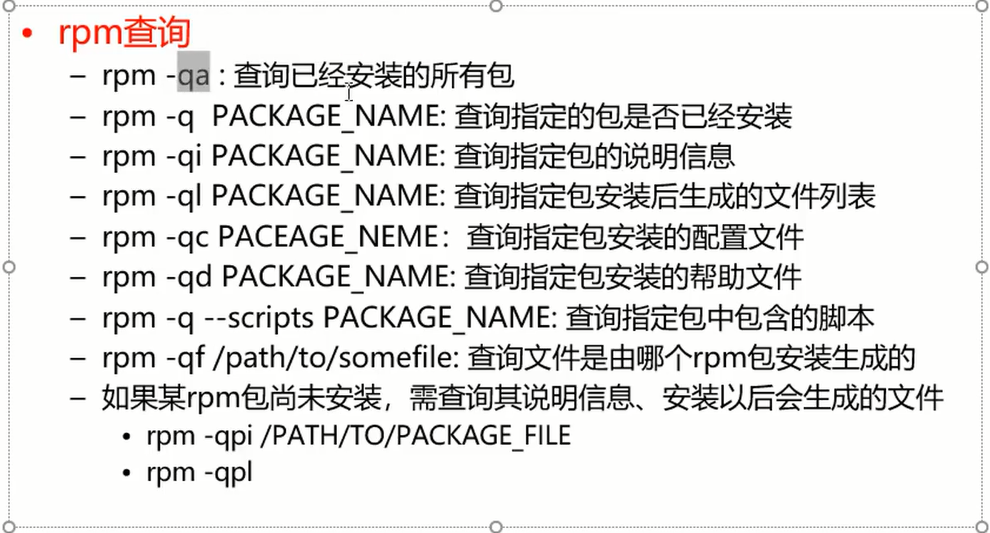
rpm的安装方式
安装
rpm -ivh filename
--pefix
升级
rpm
-Uvh
-Fvh
卸载
-e PACKAGE_NAME
解压的详情:-xf 即可
yum安装方式
基于rpm的包管理
提供rpm仓库
repo
- /etc/yum.repos.d/ 修改yum的仓库地址
-

修改yum
[root@MDNode01 yum.repos.d]# ll
total 16
-rw-r--r--. 1 root root 1926 Nov 27  2013 CentOS-Base.repo
-rw-r--r--. 1 root root  638 Nov 27  2013 CentOS-Debuginfo.repo
-rw-r--r--. 1 root root  630 Nov 27  2013 CentOS-Media.repo
-rw-r--r--. 1 root root 3664 Nov 27  2013 CentOS-Vault.repo
备份yum源
[root@MDNode01 yum.repos.d]# mv /etc/yum.repos.d/CentOS-Base.repo /etc/yum.repos.d/CentOS-Base.repo.backup
[root@MDNode01 yum.repos.d]# ll
total 16
-rw-r--r--. 1 root root 1926 Nov 27  2013 CentOS-Base.repo.backup
-rw-r--r--. 1 root root  638 Nov 27  2013 CentOS-Debuginfo.repo
-rw-r--r--. 1 root root  630 Nov 27  2013 CentOS-Media.repo
-rw-r--r--. 1 root root 3664 Nov 27  2013 CentOS-Vault.repo
使用wget下载配置文件
[root@MDNode01 yum.repos.d]# wget -O /etc/yum.repos.d/CentOS-Base.repo http://mirrors.aliyun.com/repo/Centos-6.repo
--2019-09-25 03:49:00--  http://mirrors.aliyun.com/repo/Centos-6.repo
Resolving mirrors.aliyun.com... 117.161.112.195, 117.161.112.199
Connecting to mirrors.aliyun.com|117.161.112.195|:80... connected.
HTTP request sent, awaiting response... 200 OK
Length: 2523 (2.5K) [application/octet-stream]
Saving to: “/etc/yum.repos.d/CentOS-Base.repo”

100%[========================================================================================================================================================================>] 2,523       --.-K/s   in 0s

2019-09-25 03:49:00 (559 MB/s) - “/etc/yum.repos.d/CentOS-Base.repo” saved [2523/2523]

[root@MDNode01 yum.repos.d]# ll
total 20
-rw-r--r--  1 root root 2523 Jun 16  2018 CentOS-Base.repo
-rw-r--r--. 1 root root 1926 Nov 27  2013 CentOS-Base.repo.backup
-rw-r--r--. 1 root root  638 Nov 27  2013 CentOS-Debuginfo.repo
-rw-r--r--. 1 root root  630 Nov 27  2013 CentOS-Media.repo
-rw-r--r--. 1 root root 3664 Nov 27  2013 CentOS-Vault.repo
[root@MDNode01 yum.repos.d]#
清除本地的缓存
[root@MDNode01 yum.repos.d]# yum clean all
Loaded plugins: fastestmirror
Cleaning repos: base extras updates
Cleaning up Everything
Cleaning up list of fastest mirrors
更新yum源
[root@MDNode01 yum.repos.d]# yum makecache
Loaded plugins: fastestmirror
Determining fastest mirrors
 * base: mirrors.aliyun.com
 * extras: mirrors.aliyun.com
 * updates: mirrors.aliyun.com
base                                                                                                                                                                                       | 3.7 kB     00:00
base/group_gz                                                                                                                                                                              | 242 kB     00:00
base/filelists_db                                                                                                                                                                          | 6.4 MB     00:03
base/primary_db                                                                                                                                                                            | 4.7 MB     00:02
base/other_db                                                                                                                                                                              | 2.8 MB     00:01
extras                                                                                               ......
updates/other_db                                                                                                                                                                           | 274 kB     00:00
Metadata Cache Created
[root@MDNode01 yum.repos.d]#
root@MDNode01 yum.repos.d]# yum repolist
Loaded plugins: fastestmirror
Loading mirror speeds from cached hostfile
 * base: mirrors.aliyun.com
 * extras: mirrors.aliyun.com
 * updates: mirrors.aliyun.com
repo id                                                                               repo name                                                                                                             status
base                                                                                  CentOS-6 - Base - mirrors.aliyun.com                                                                                  6,713
extras                                                                                CentOS-6 - Extras - mirrors.aliyun.com                                                                                   46
updates                                                                               CentOS-6 - Updates - mirrors.aliyun.com                                                                                 609
repolist: 7,368
[root@MDNode01 yum.repos.d]#
常用的Yum的命令
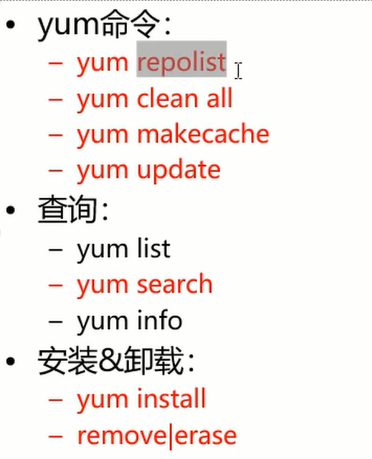
yum repolist:查看当前的yum指向的仓库
yum clean all:清除本地的yum缓存
yum makecache:从仓库拉回源数据
yum update:升级本地的包
yum list:查看本地已经安装的包和源仓库上面没有安装的包
yum search:查找某个包
yum info:显示包的详细信息
yum install 安装
yum remove|erase:erase删除比较干净
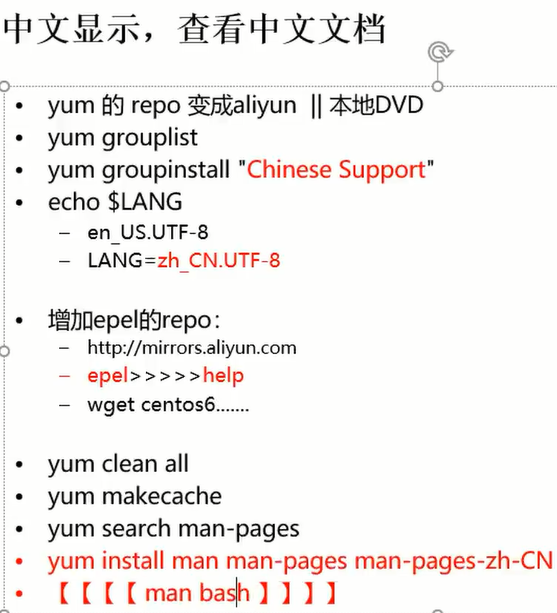
中文帮助文档安装