实现三台机器的lamp服务分离部署
实验环境:
| 系统平台 | IP |
| T1(red hat8) | 192.168.220.10 |
| T2(red hat8) | 192.168.220.20 |
| T3(red hat8) | 192.168.220.30 |
这里三台机用的都是阿里云的网络源:https://developer.aliyun.com/mirror/centos?spm=a2c6h.13651102.0.0.3e221b11VQAboO
首先我们要安装apache和他的依赖包在T1上:
//安装需要的包
[root@T1 ~]#  yum -y install wget bzip2 gcc gcc-c++ make pcre-devel expat-devel libxml2-devel openssl-devel

[root@T1~]# yum groups mark install 'Development Tools'

//下载和安装apache,apr和apr-util
[root@T1~]# wget https://mirrors.tuna.tsinghua.edu.cn/apache/httpd/httpd-2.4.46.tar.gz

[root@T1~]# wget http://mirrors.tuna.tsinghua.edu.cn/apache//apr/apr-1.7.0.tar.gz

[root@T1~]# wget http://mirrors.hust.edu.cn/apache//apr/apr-util-1.6.1.tar.gz

//创建apache用户和组
[root@T1~]# useradd  -r -M -s /sbin/nologin apache

//解压
[root@T1~]# tar -xf apr-1.7.0.tar.gz
[root@T1~]# tar -xf httpd-2.4.46.tar.gz
[root@T1~]# tar -xf apr-util-1.6.1.tar.gz

[root@T1~]# cd apr-1.7.0
[root@T1-1.7.0]# vim configure
    cfgfile="${ofile}T"
    trap "$RM "$cfgfile"; exit 1" 1 2 15
# $RM "$cfgfile"        //将此行加上注释,或者删除此行


[root@T1 apr-1.7.0]# ./configure  --prefix=/usr/local/apr
....................................................    //配置过程
[root@T1 apr-1.7.0]# make && make install
...................................     //编译安装过程

[root@T1 apr-1.7.0]# cd  /root/apr-util-1.6.1
[root@T1 apr-util-1.6.1]# ./configure  --prefix=/usr/local/apr-util --with-apr=/usr/local/apr
....................................    //配置过程
[root@T1 apr-util-1.6.1]# make && make install
.........................................    //编译安装过程

//apache安装
[root@T1apr-util-1.6.1]# cd /root/httpd-2.4.46
[root@T1 httpd-2.4.46]# ./configure --prefix=/usr/local/apache
> --sysconfdir=/etc/httpd24
> --enable-so
> --enable-ssl
> --enable-cgi
> --enable-rewrite
> --with-zlib
> --with-pcre
> --with-apr=/usr/local/apr
> --with-apr-util=/usr/local/apr-util/
> --enable-modules=most
> --enable-mpms-shared=all
> --with-mpm=prefork
....................................配置过程

[root@chouyu httpd-2.4.46]# make && make install
............................编译安装过程
//安装后配置
[root@T1~]#  echo 'export PATH=/usr/local/apache/bin:$PATH' > /etc/profile.d/httpd.sh
[root@T1 ~]# source /etc/profile.d/httpd.sh
[root@T1~]# ln -s /usr/local/apache/include/ /usr/include/httpd
[root@T1~]# vim /etc/man_db.conf
MANDATORY_MANPATH                       /usr/man
MANDATORY_MANPATH                       /usr/share/man
MANDATORY_MANPATH                       /usr/local/share/man
MANDATORY_MANPATH                       /usr/local/apache/man     //添加此行
[root@T1~]# vim /etc/httpd24/httpd.conf
#
ServerName www.example.com:80  //取消前面的注释

//启动
[root@T1 httpd-2.4.46]# apachectl start
//查看启动状态
[root@T1 httpd-2.4.46]# ss -antl
State         Recv-Q          Send-Q                    Local Address:Port                   Peer Address:Port
LISTEN        0               128                             0.0.0.0:22                          0.0.0.0:*
LISTEN        0               128                                [::]:22                             [::]:*
LISTEN        0               128                                   *:80                                *:*
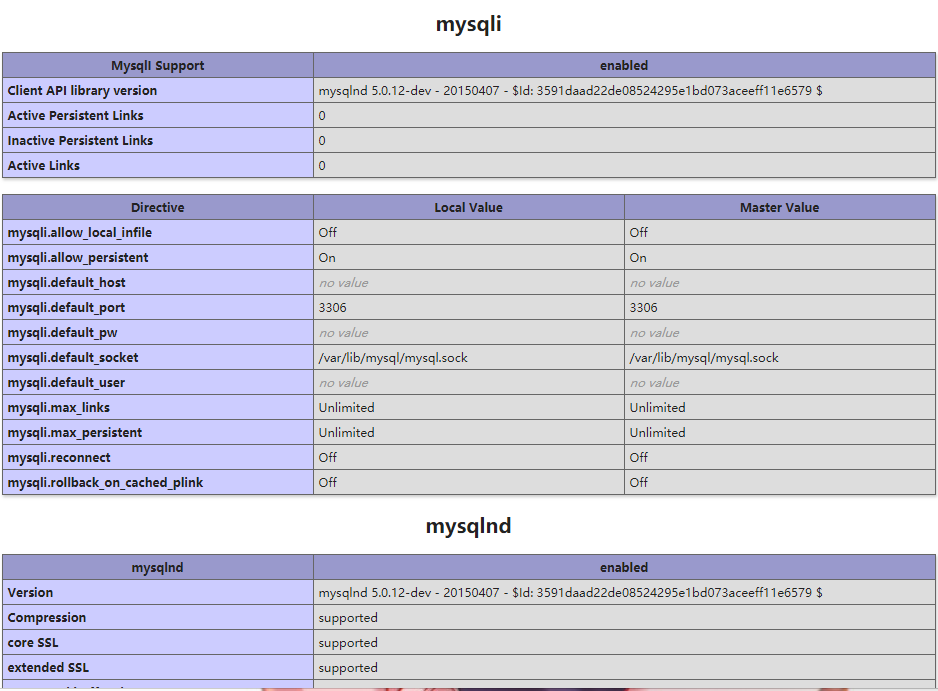
然后到T2上面安装mysql:
//安装依赖包
[root@T2 ~]#  yum -y install ncurses-devel openssl-devel openssl cmake mariadb-devel ncurses-compat-libs

//创建用户和组
[root@T2 ~]# useradd  -r -M -s /sbin/nologin  mysql

//下载二进制格式mysql软件包
[root@T2 ~]# wget https://downloads.mysql.com/archives/get/p/23/file/mysql-5.7.31-linux-glibc2.12-x86_64.tar.gz

//解压软件
[root@T2 ~]# tar  -xf mysql-5.7.31-linux-glibc2.12-x86_64.tar.gz -C /usr/local/

[root@T2 ~]# ln -sv /usr/local/mysql-5.7.31-linux-glibc2.12-x86_64/  /usr/local/mysql
'/usr/local/mysql' -> '/usr/local/mysql-5.7.31-linux-glibc2.12-x86_64/'

[root@T2 ~]# cd /usr/local/
[root@T2 local]# chown -R mysql.mysql mysql*

//添加环境变量
[root@T2 local]# echo 'export PATH=/usr/local/mysql/bin:$PATH' > /etc/profile.d/myslq.sh
[root@T2 local]# source /etc/profile.d/myslq.sh
[root@T2 local]# echo $PATH
/usr/local/mysql/bin:/usr/local/apache/bin:/usr/local/sbin:/usr/local/bin:/usr/sbin:/usr/bin:/root/bin
[root@T2~]# ln -s /usr/local/mysql/include/  /usr/include/mysql
[root@T2 ~]# vim /etc/man_db.conf
MANDATORY_MANPATH                       /usr/local/apache/man
MANDATORY_MANPATH                       /usr/local/mysql/man  #添加man文件
[root@localhost ~]# vim /etc/ld.so.conf.d/mysql.conf
/usr/local/mysql/lib
[root@T2~]# ldconfig
//创建数据存放目录
[root@T2 local]# mkdir  /mydata
[root@T2 local]# chown  -R mysql.mysql  /mydata/

//初始化数据库
[root@T2 local]#  mysqld  --initialize  --user=mysql   --datadir=/mydata
2021-01-07T11:16:07.234071Z 0 [Warning] TIMESTAMP with implicit DEFAULT value is deprecated. Please use --explicit_defaults_for_timestamp server option (see documentation for more details).
2021-01-07T11:16:07.583483Z 0 [Warning] InnoDB: New log files created, LSN=45790
2021-01-07T11:16:07.712522Z 0 [Warning] InnoDB: Creating foreign key constraint system tables.
2021-01-07T11:16:07.768084Z 0 [Warning] No existing UUID has been found, so we assume that this is the first time that this server has been started. Generating a new UUID: bd38e84c-50d9-11eb-96fd-000c294d840a.
2021-01-07T11:16:07.792780Z 0 [Warning] Gtid table is not ready to be used. Table 'mysql.gtid_executed' cannot be opened.
2021-01-07T11:16:09.143567Z 0 [Warning] CA certificate ca.pem is self signed.
2021-01-07T11:16:09.355917Z 1 [Note] A temporary password is generated for root@localhost: >zI/pVTug7ts

//修改my.cnf配置文件
[root@T2 ~]# vim /etc/my.cnf
//添加以下内容
[mysqld]
basedir = /usr/local/mysql
datadir = /mydata
socket = /tmp/mysql.sock
port = 3306
pid-file = /mydata/mysql.pid
user = mysql
skip-name-resolve

[client-server]

//配置服务启动脚本
[root@T2 ~]# cd /usr/local/mysql/support-files/
[root@T2 support-files]# ls
magic  mysqld_multi.server  mysql-log-rotate  mysql.server
[root@T2 support-files]# cp mysql.server  /etc/init.d/mysqld

[root@T2 support-files]# vim /etc/init.d/mysqld
# If you change base dir, you must also change datadir. These may get
# overwritten by settings in the MySQL configuration files.

basedir=/usr/local/mysql
datadir=/mydata

//启动mysql
[root@T2 ~]# service mysqld start
//查看状态
[root@T2 ~]# ss -antl
State         Recv-Q          Send-Q                    Local Address:Port                   Peer Address:Port
LISTEN        0               128                             0.0.0.0:22                          0.0.0.0:*
LISTEN        0               128                                [::]:22                             [::]:*
LISTEN        0               80                                    *:3306                              *:*
LISTEN        0               128                                   *:80                                *:*
//进入mysql 修改密码为123456
[root@T2 ~]# mysql -uroot -p'>zI/pVTug7ts'
mysql: [Warning] Using a password on the command line interface can be insecure.
Welcome to the MySQL monitor.  Commands end with ; or g.
Your MySQL connection id is 2
Server version: 5.7.31

Copyright (c) 2000, 2020, Oracle and/or its affiliates. All rights reserved.

Oracle is a registered trademark of Oracle Corporation and/or its
affiliates. Other names may be trademarks of their respective
owners.

Type 'help;' or 'h' for help. Type 'c' to clear the current input statement.

mysql>
mysql> set password = password('123456')
    -> ;
Query OK, 0 rows affected, 1 warning (0.00 sec)

mysql>
在T3上面安装PHP
PHP的依赖包需要epel源:https://developer.aliyun.com/mirror/epel?spm=a2c6h.13651102.0.0.3e221b11wagSZI
先搭建好epel源再安装依赖包
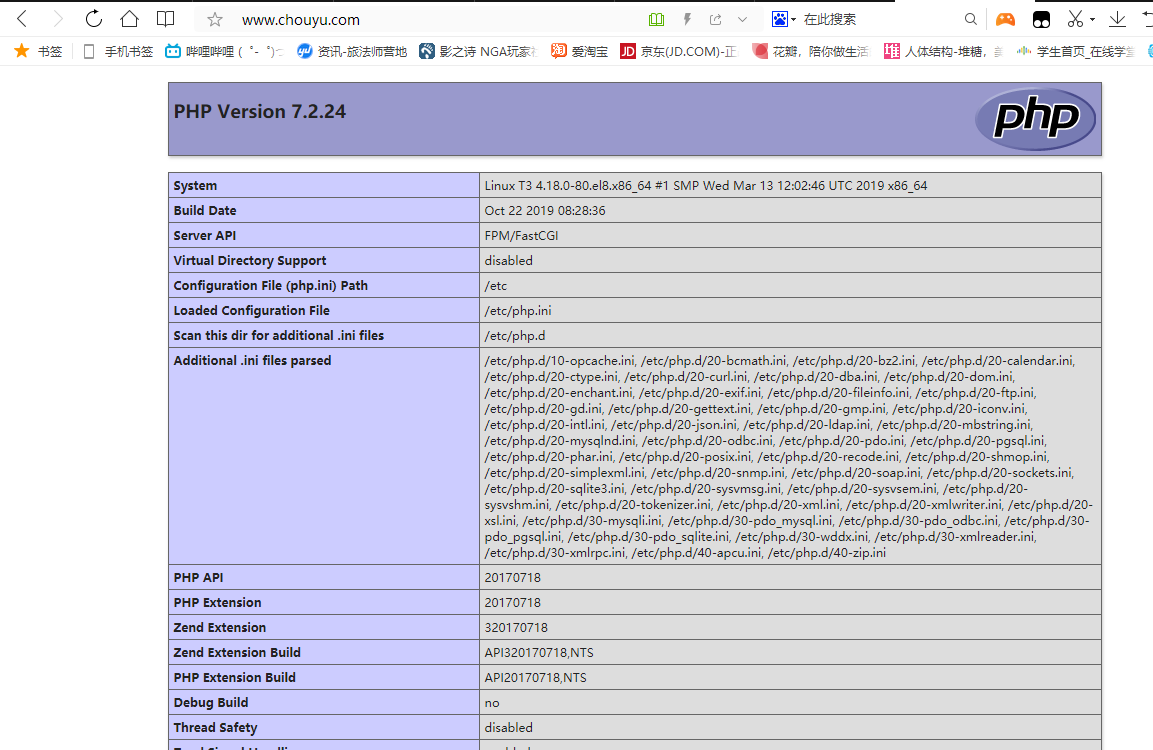
//搭建epel源
[root@T3 ~]# yum install -y https://mirrors.aliyun.com/epel/epel-release-latest-8.noarch.rpm

[root@T3 ~]# sed -i 's|^#baseurl=https://download.fedoraproject.org/pub|baseurl=https://mirrors.aliyun.com|' /etc/yum.repos.d/epel*

[root@T3 ~]# sed -i 's|^metalink|#metalink|' /etc/yum.repos.d/epel*

//安装依赖包
[root@T2 ~]#  yum -y install libxml2 libxml2-devel openssl openssl-devel bzip2 bzip2-devel libcurl libcurl-devel libicu-devel libjpeg libjpeg-devel libpng libpng-devel openldap-devel  pcre-devel freetype freetype-devel gmp gmp-devel libmcrypt libmcrypt-devel readline readline-devel libxslt libxslt-devel mhash mhash-devel php-mysqlnd

[root@T2 ~]#  yum -y install php-*
[root@T2 ~]# php -v
[root@T2 ~]# php -v
PHP 7.2.24 (cli) (built: Oct 22 2019 08:28:36) ( NTS )
Copyright (c) 1997-2018 The PHP Group
Zend Engine v3.2.0, Copyright (c) 1998-2018 Zend Technologies
    with Zend OPcache v7.2.24, Copyright (c) 1999-2018, by Zend Technologies

//
[root@T3 ~]# vim /etc/php-fpm.d/www.conf
;listen = /run/php-fpm/www.sock  //注释这行
liten = 0.0.0.0:9000   //添加这行 (0.0.0.0代表任何地址)
[root@T3 ~]# systemctl start php-fpm
[root@T3 ~]# ss -antl
State         Recv-Q          Send-Q                    Local Address:Port                   Peer Address:Port
LISTEN        0               128                             0.0.0.0:22                          0.0.0.0:*
LISTEN        0               128                             0.0.0.0:9000                        0.0.0.0:*
LISTEN        0               128                                [::]:22                             [::]:*

//创建测试页
[root@T3 ~]# cat /var/www/html/index.php
<?php
phpinfo();
?>
[root@T3 ~]#
//做完三个服务之后,有一些配置需要做
//在T1上面编辑这个文件添加下面的内容
[root@T1 httpd-2.4.46]# vim /etc/httpd24/httpd.conf
<VirtualHost *:80>
        DocumentRoot "/usr/local/apache/htdocs/"
        ServerName  www.chouyu.com
        ProxyRequests   Off
        ProxyPassMatch ^/(.*.php)$ fcgi://192.168.220.30:9000/var/www/html/$1
        <Directory "/usr/local/apache/htdocs">
                Options none
                AllowOverride none
                Require all granted
        </Directory>
</VirtualHost>
//取消这两个模块的注释
#LoadModule remoteip_module modules/mod_remoteip.so
LoadModule proxy_module modules/mod_proxy.so  //这个
#LoadModule proxy_connect_module modules/mod_proxy_connect.so
#LoadModule proxy_ftp_module modules/mod_proxy_ftp.so
#LoadModule proxy_http_module modules/mod_proxy_http.so
LoadModule proxy_fcgi_module modules/mod_proxy_fcgi.so  //这个


//在T3上修改配置
[root@T3 ~]# vim /etc/php-fpm.d/www.conf
; List of addresses (IPv4/IPv6) of FastCGI clients which are allowed to connect.
; Equivalent to the FCGI_WEB_SERVER_ADDRS environment variable in the original
; PHP FCGI (5.2.2+). Makes sense only with a tcp listening socket. Each address
; must be separated by a comma. If this value is left blank, connections will be
; accepted from any ip address.
; Default Value: any
listen.allowed_clients = 127.0.0.1
listen.allowed_clients = 192.168.220.10 //增加apache主机
做完这些操作之后记得重启一下服务,源码装的apache用apachectl restart重启,php用systemctl restart php-fpm重启
访问apache
想要用域名访问的话你需要在你的windows上面修改一下配置文件,它在C:WindowsSystem32driversetc这个路劲里面有一个hosts
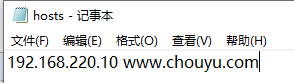
在里面写上你的apache地址和域名,就可以了