课程要点:
- 控件之间的继承关系、
- UILabel
- UIImageView
- 利用UIImageView实现帧动画
- 补充
试图之间的继承关系
昨天学习UIView的时候,了解到UIView里面有以下几个常用属性
* backGroundColor:背景颜色
* alpha:透明度
* subViews:子试图集合
* hidden:是否隐藏
* tag:标签值
* superview:父试图
我们从这些基本属性可以发现,UIView里面没有属性让在文字显示在试图上面,也就是说UIView这个试图,无法满足咱的需求。此时UILabel就应运而生。在深入学习UILabel之前,咱们需要先研究一下UIView与UILabel的关系。
 [self.window makeKeyAndVisible];

 //首先按照咱们创建控件的三步走创建一个UILbale,并把他在Window上。
 UILabel *testLabel = [[UILabel alloc]init];

 //按住command的同时鼠标点击frame,此时咱们能查看到关于frame属性的API
 testLabel.frame = CGRectMake(100, 100, 120, 30);

 [self.window addSubview:testLabel];
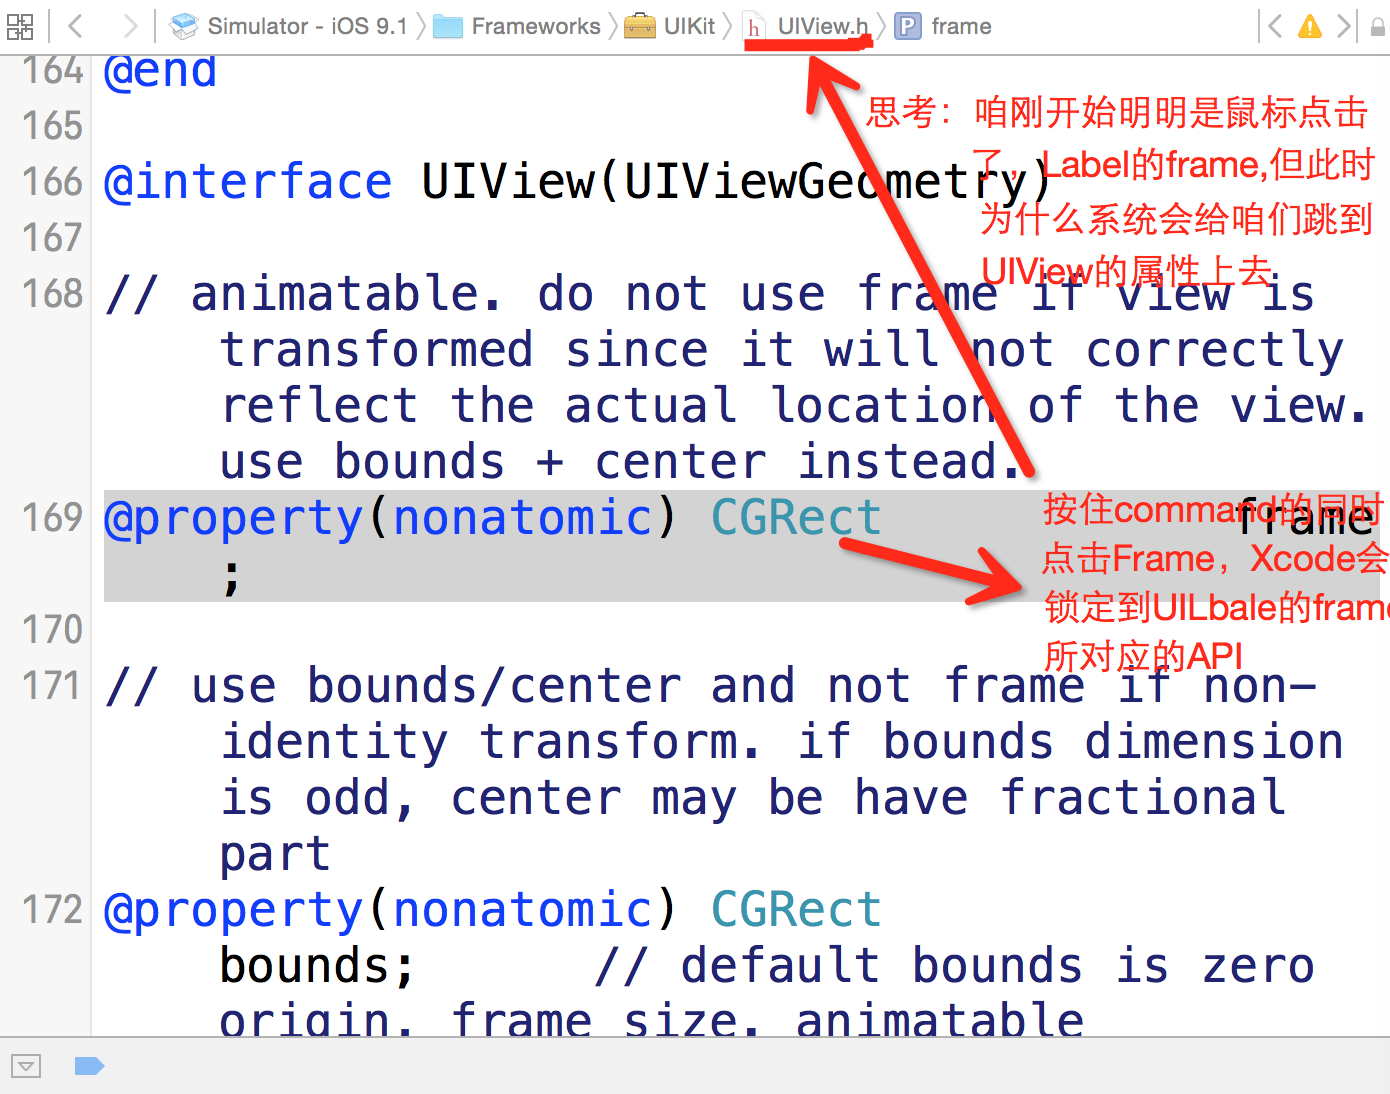
出现这种情况的主要原因是UILable继承于UIView,由于UILabel跟UIView有很多通用的属性,因此系统的UILabel类直接采用继承的方式,避免了在UILabel中写重复的属性。
PS:在工程里,我们怎么查看UILabel类是继承于谁的。按住Command的同时点击该类名。系统会自动定位到该类的.h文件中的interface部分,冒号部分是谁,就表示这个类继承于谁。在做项目的过程中学会怎么查看API以及习惯于查看API

UILabel:他是一个标签试图,继承UIView,不适合放太多的文本内容。
    //首先创建一个UILabel对象
    UILabel *testLabel = [[UILabel alloc]init];

    //设置testLabel的位置和大小
    testLabel.frame = CGRectMake(100, 100, 120, 100);

    //设置testLabel的背景颜色
    testLabel.backgroundColor = [UIColor grayColor];

    //给testLabel设置字符串
    testLabel.text = @"全球领先的移动设备操作系统";

    //给testLabel设置字体颜色
    testLabel.textColor = [UIColor greenColor];

    //给testLabel设置对其方式
    testLabel.textAlignment = NSTextAlignmentCenter;

    //给testLabel设置字体大小
    testLabel.font = [UIFont systemFontOfSize:17];

    //给testLabel设置阴影颜色
//    testLabel.shadowColor = [UIColor blackColor];

    //给testLabel设置阴影偏移量 此时你可以试试如果此时填的是(-5,-5)会是什么效果
//    testLabel.shadowOffset = CGSizeMake(10, 10);

    //给testLabel设置行数 1是一行显示 2是两行显示  0是根据内容自适应函数
    testLabel.numberOfLines = 2;

    //根据testLabel的宽高自动设置字体大小,从而让内容全部显示出来
    testLabel.adjustsFontSizeToFitWidth = YES;

    [self.window addSubview:testLabel];
UIImageView:图片试图,继承UIView,主要用来显示图片
怎么在工程里放图片
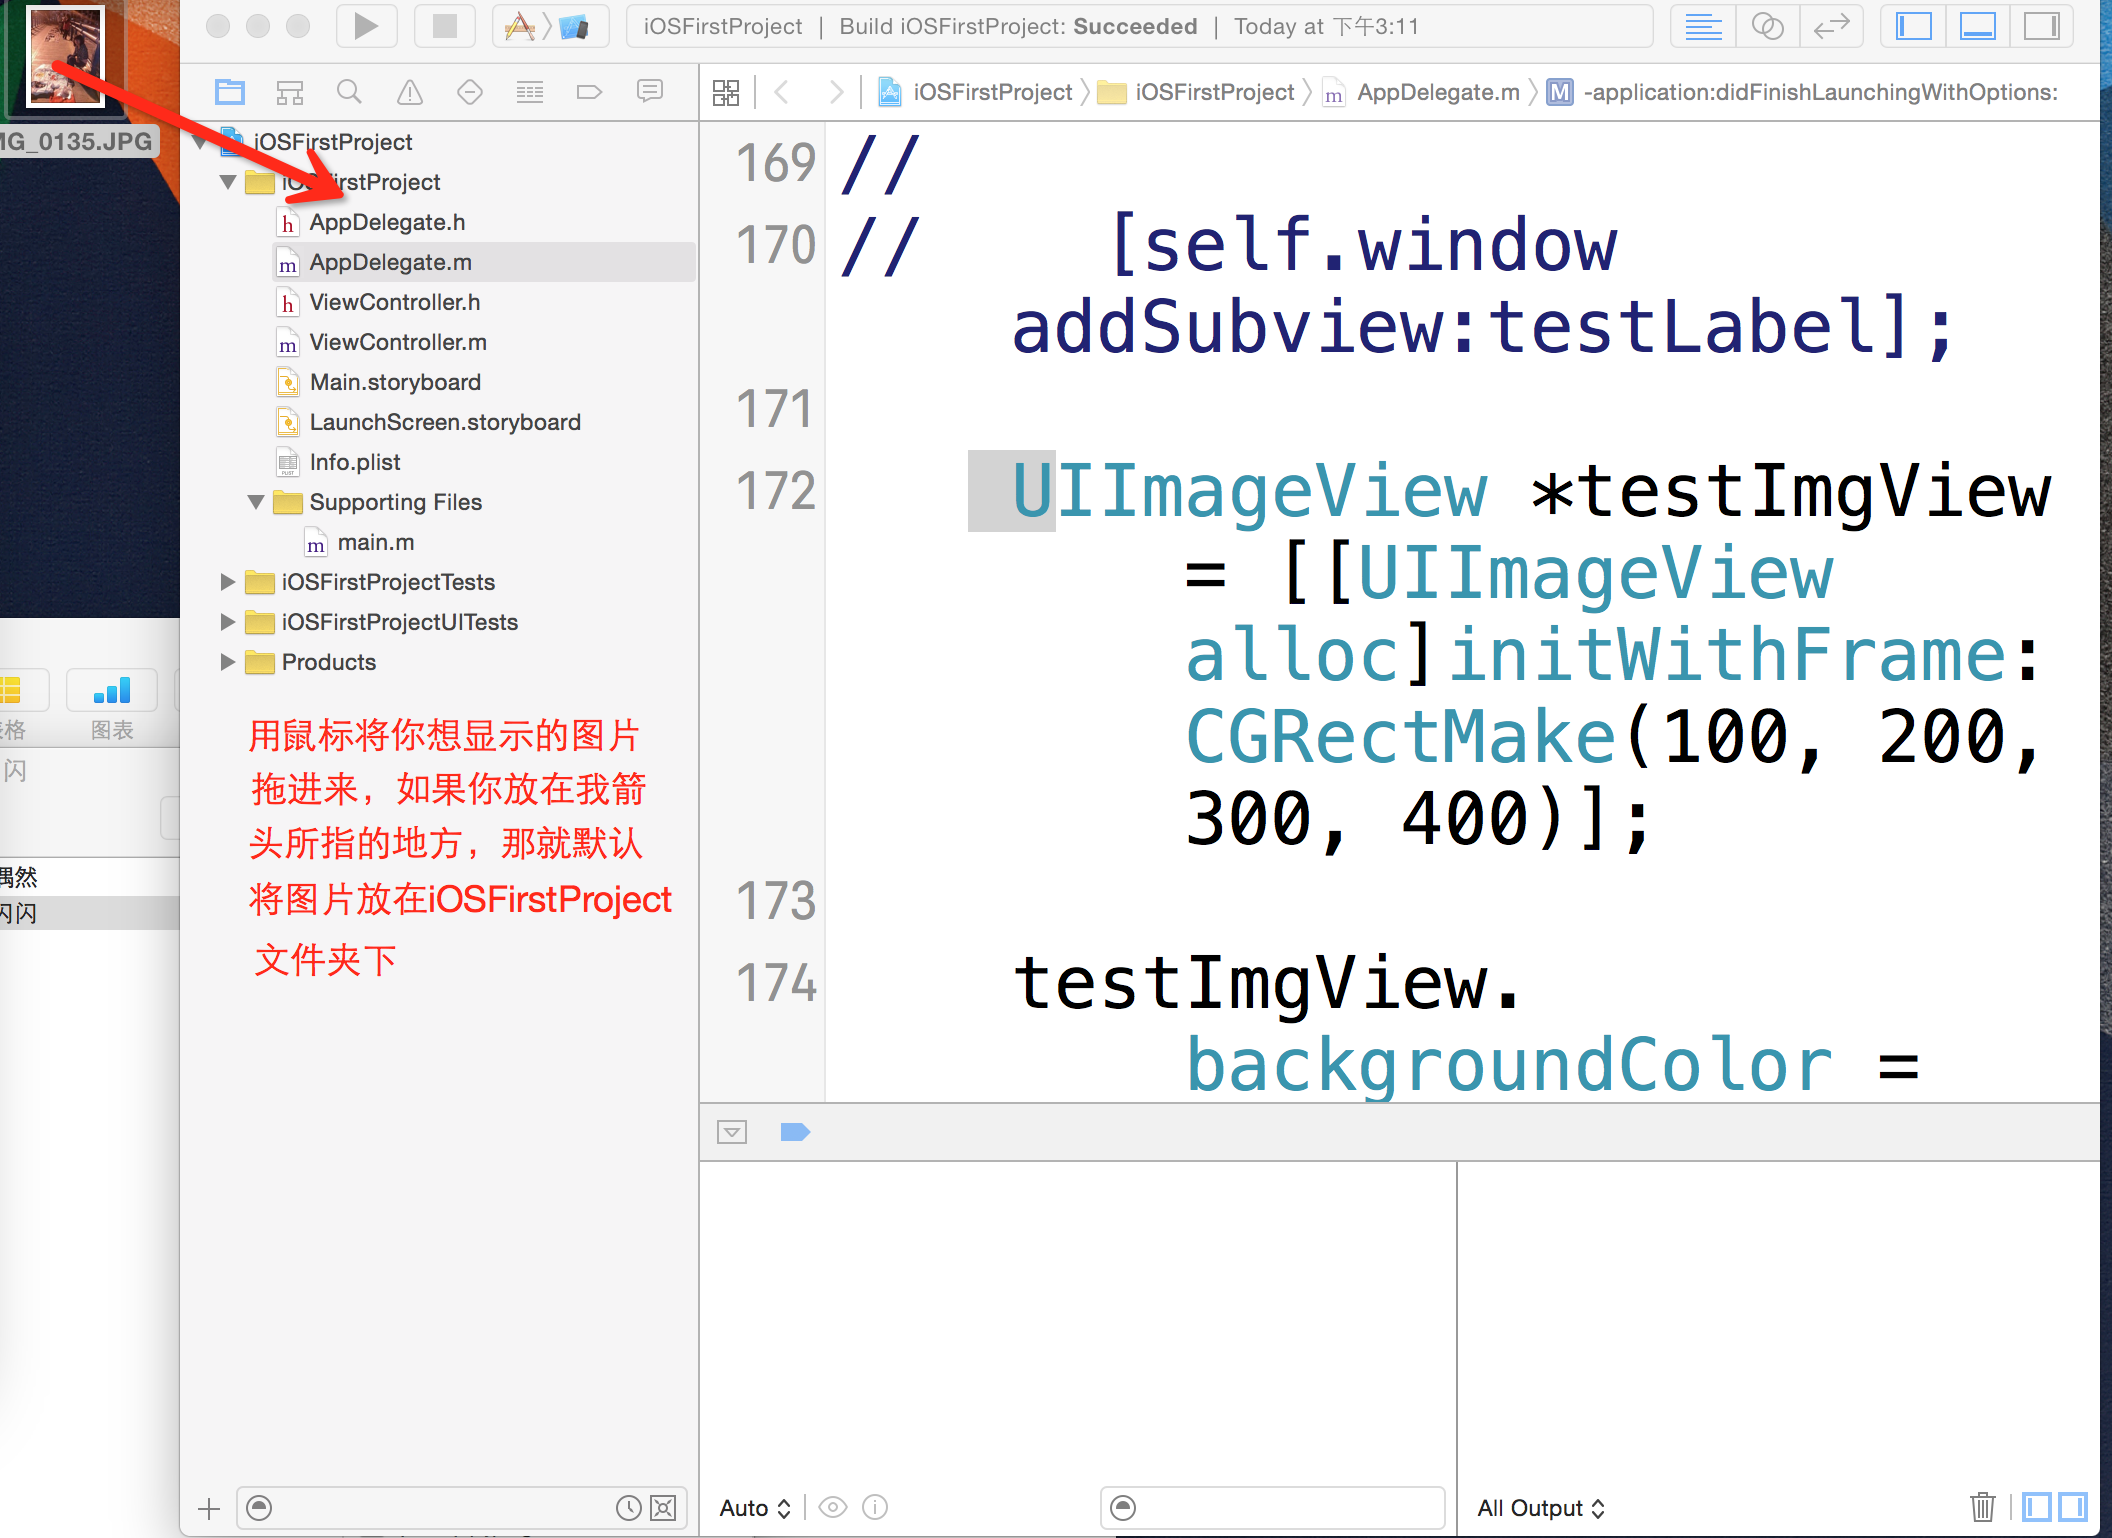
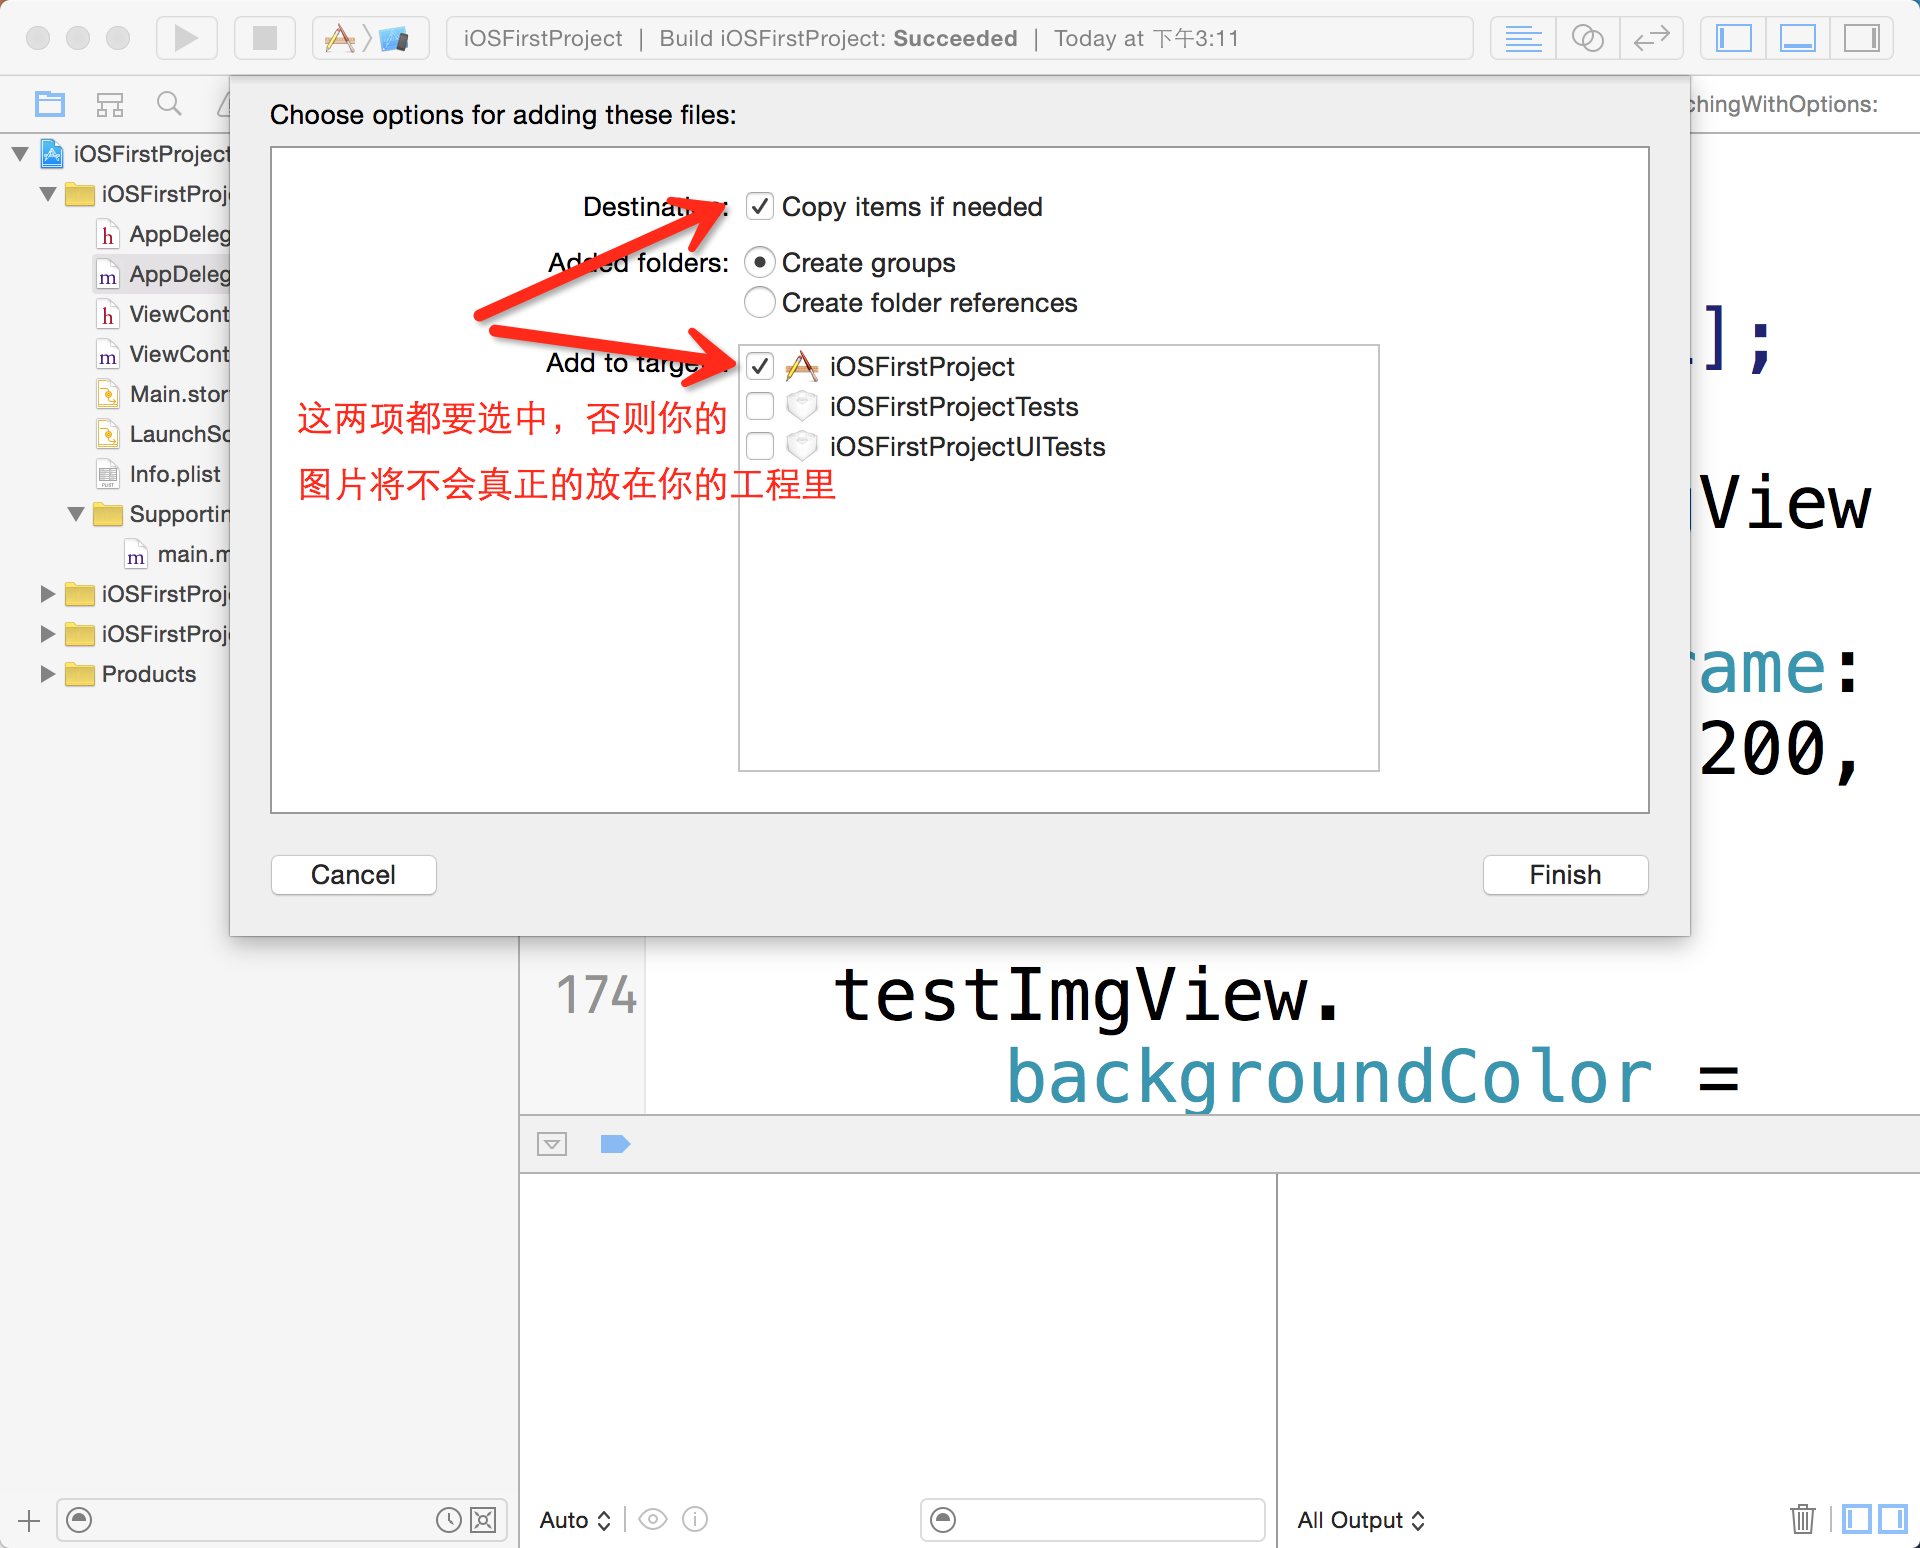
 //创建一个试图对象
    UIImageView *imgView = [[UIImageView alloc]init];


    //如果图片是PNG格式的,图片名不需要加后缀,否则都要加后缀
    imgView.image = [UIImage imageNamed:@“图片名字"];


    //在某个方向上让图片自适应,已达到最好看的效果。
    imgeView.contentMode = UIViewContentModeScaleAspectFit;

    //让图片充满整个frame
    imgeView.contentMode = UIViewContentModeScaleToFill;
    //取到图片的相应位置,并放到屏幕上,会超出设置的图片试图Frame
    imgeView.contentMode = UIViewContentModeRight;

    //裁剪掉超出试图frame的部分
    imgeView.clipsToBounds = YES;


   //给试图设置frame
    imgView.frame = CGRectMake(10, 10, 300, 400);

   //将试图放在window上
    [self.window addSubview:imgView];
用UIImageView设置一个帧动画
  /*
     * 创建帧动画四要素
        1、设置间隔时间
        2、准备图片素材
        3、设置重复次数
        4、开始动画
        5、结束动画
     */


    //animationDuration设置动画的时间间隔
    imgView.animationDuration = 1;


    UIImage *img1 = [UIImage imageNamed:@“图片名字”];

    UIImage *img2 = [UIImage imageNamed:@"图片名字"];

    NSArray *array = @[img1,img2];

    //给帧动画准备素材
    imgView.animationImages = array;

    //给动画设置重复次数
    imgView.animationRepeatCount = 0;

    //开始动画
    [imgView startAnimating];

    //结束动画
    [imgView stopAnimating];


  PS:UIImageView与UIImage的区别,UIImageView他就好比是一块专门放图片的位置,UIImage对象就是你要放置的图片。
补充
#import "AppDelegate.h"

/*
 * 宏定义格式:

     #define k常量名 @""

 * 作用:宏定义就是用内容替换变量名,不仅可以替换字符串还可以替换一句代码

 * 命名规则:k+驼峰命名法,例如:kCotent

 */
//
//
#define kContent @"我改过的内容"
#define kLabelX label.frame.origin.x
#define kScreenWidth [UIScreen mainScreen].bounds.size.height

@interface AppDelegate ()

@end

@implementation AppDelegate


- (BOOL)application:(UIApplication *)application didFinishLaunchingWithOptions:(NSDictionary *)launchOptions {

#pragma mark 补充
    /*

     * 延迟方法performselector

     * CGRectGetHeight(<#CGRect rect#>)

     * [UIScreen mainScreen].bounds.origin

     * 宏定义

     * 宏定义的使用技巧

    */

    [self.window makeKeyAndVisible];

    //延迟多少秒后执行相应的方法,用selector选择的方法一定要实现,否则会崩溃。
    [self performSelector:@selector(start) withObject:nil afterDelay:5];


    UILabel *label = [[UILabel alloc]init];

    label.frame = CGRectMake(10, 20, 120, 49);

    label.backgroundColor = [UIColor redColor];

    label.text = kContent;  //此时用到宏定义,试着按住command的同时点击kScreenWidth


    [self.window addSubview:label];
//    获取到label的x值方式
//    //第一种方式
//    NSLog(@"label的x=%f",kLabelX);
//    //第二种方式(这种方式还能获取到空间的最右边中间的x值,试着用看UILabel是继承哪个类的方式来查看怎么获取到label高,宽)
//    NSLog(@"label的x=%f",CGRectGetMinX(label.frame));

    //UIScreen指的就是屏幕,能帮组我们获取到各种屏幕的宽和高,再次我用宏定义来获取
    NSLog(@"屏幕的高=%f",kScreenWidth);

    return YES;
}

- (void)start{


}